

Page 1
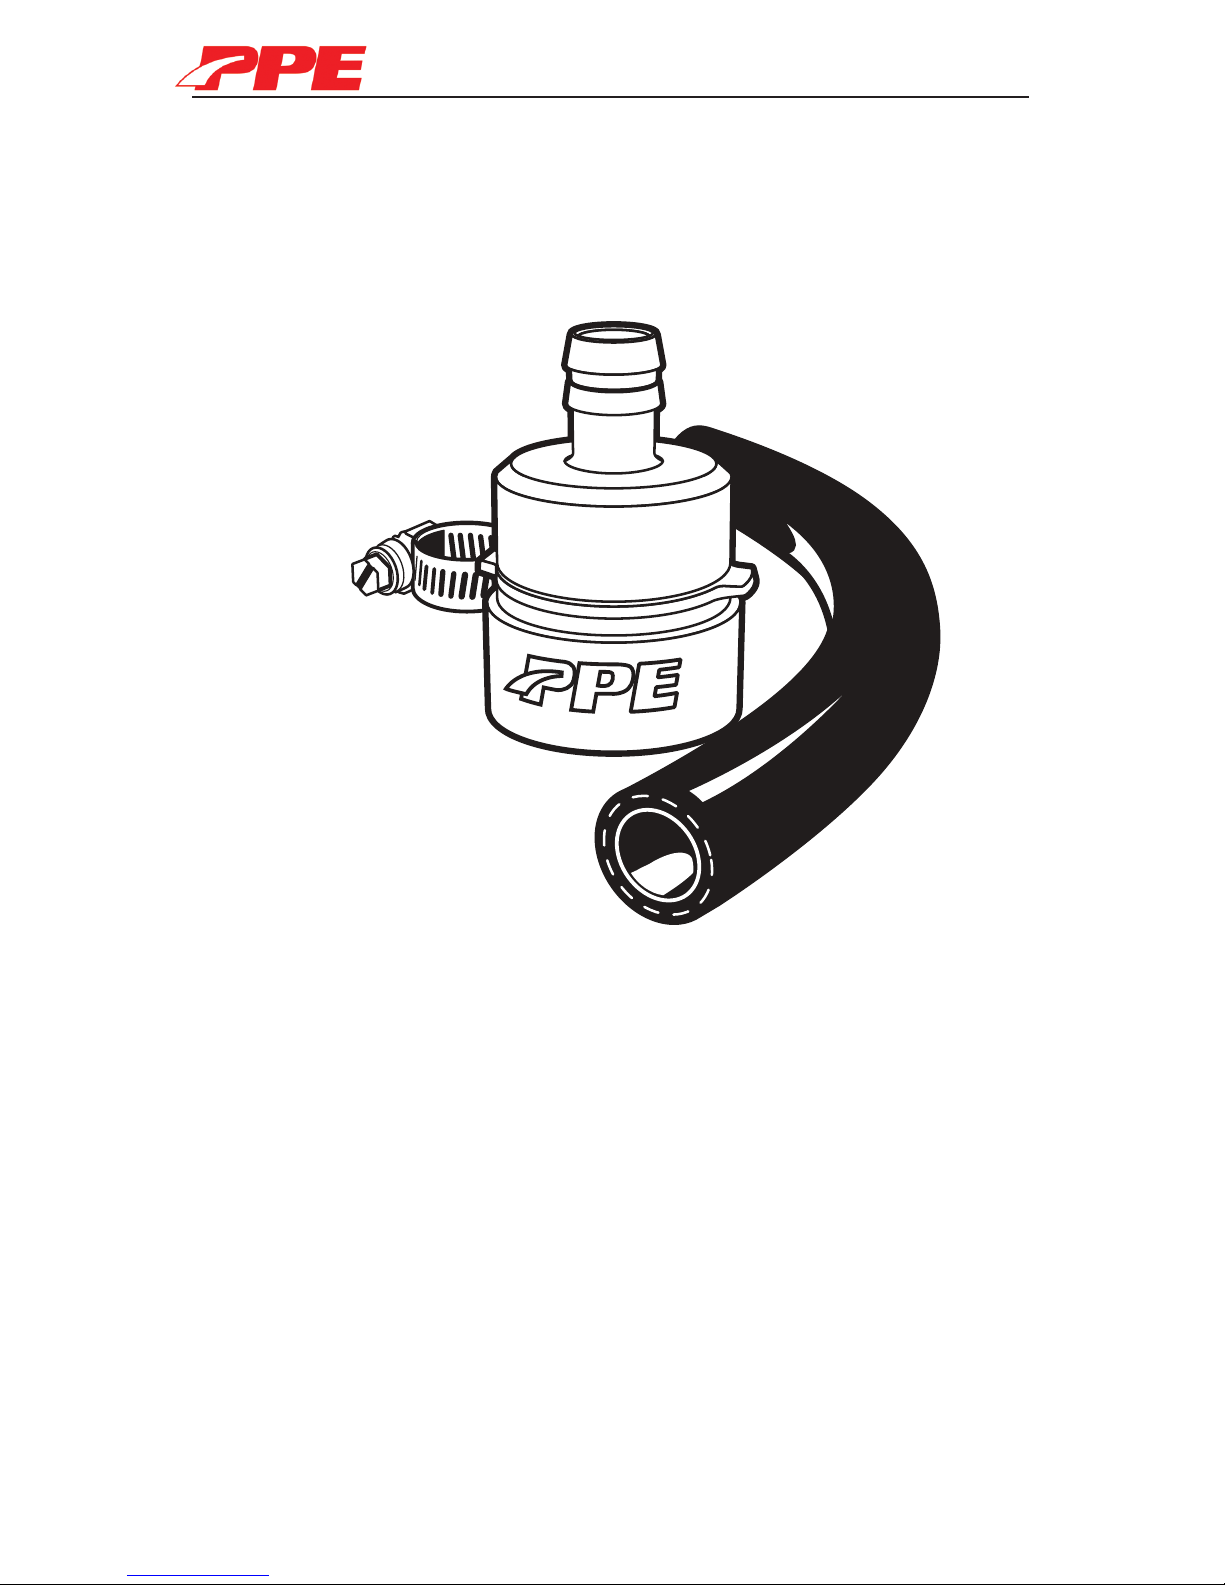
Fuel Pickup Kit
Rev: 06/08/18 | v7A
Technical Support (714) 985-4825
PPEdiesel.com
Fuel Pickup Kit
GM 6.6L Duramax 2006-2008
(113052000)
Installation Guide
Page 2
Fuel Pickup Kit
2
Note: LEGAL IN CALIFORNIA ONLY FOR RACING VEHICLES THAT MAY
NEVER BE USED, OR REGISTERED OR LICENSED FOR HIGHWAY OR OFFROAD USE.
CAUTION: Installation of this kit should only be performed by persons
knowledgeable in the repair and modication of high performance
automotive fuel systems.
WARNING: Fuel system may be under pressure!
Do not loosen fuel system connections until relieving pressure. Fuel
may leak when loosening fuel system connections. Eliminate potential
re hazards before loosening any fuel system connections. Always wear
appropriate personal safety equipment such as safety goggles and other
apparel as needed, for protection from debris and sprayed diesel fuel.
Work in a well-ventilated area and keep an approved re extinguisher
nearby. Extinguish any open ames and eliminate all sources of ignition in
the area of the vehicle before proceeding with the installation.
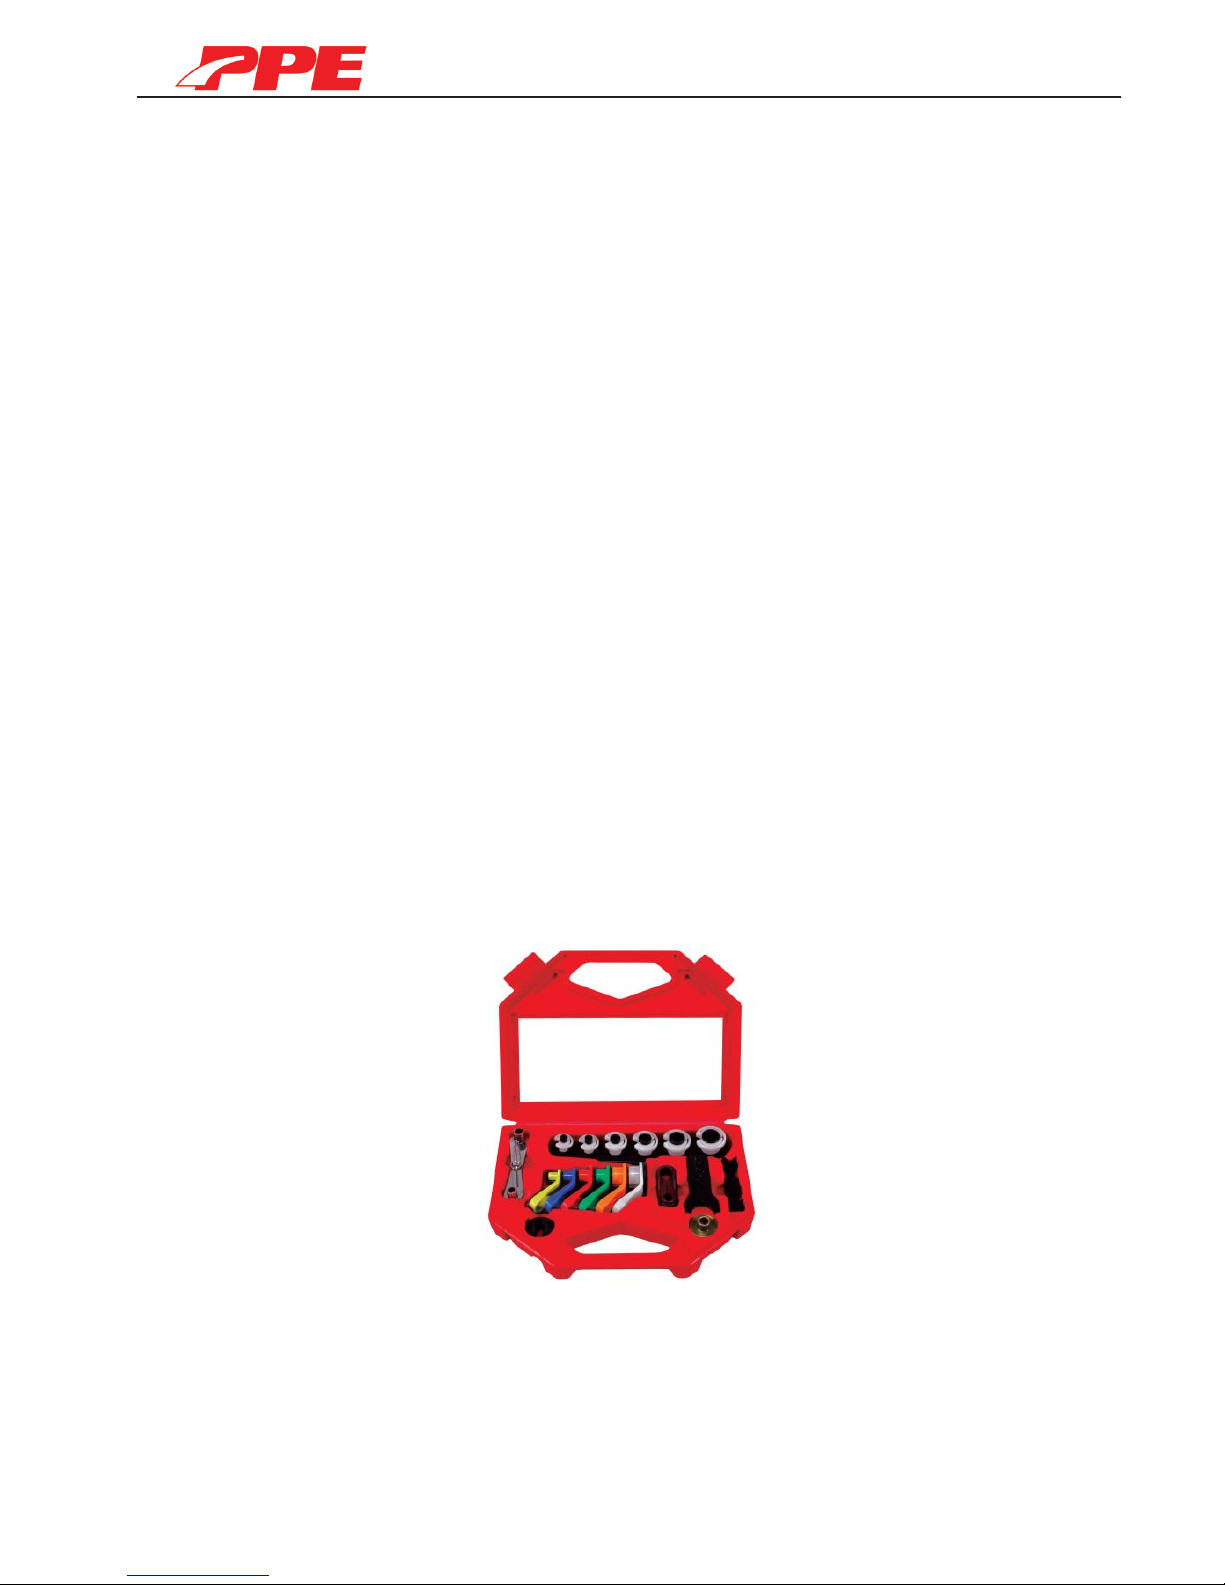
NOTE: Before beginning installation, you will need two disconnect tools for
fuel lines. The BLUE tool in the gure below corresponds to 3/8” diameter
and is used to remove the return line; the RED tool in the gure below
corresponds to 1/2” diameter and is used to remove the ll line. You can
purchase these tools at any auto parts store or Snap-on, Mac or Matco.
GM Fuel Line Disconnect Tool (Matco brand pictured)
Page 3
Fuel Pickup Kit
3
Installation for Fuel Pickup Kit
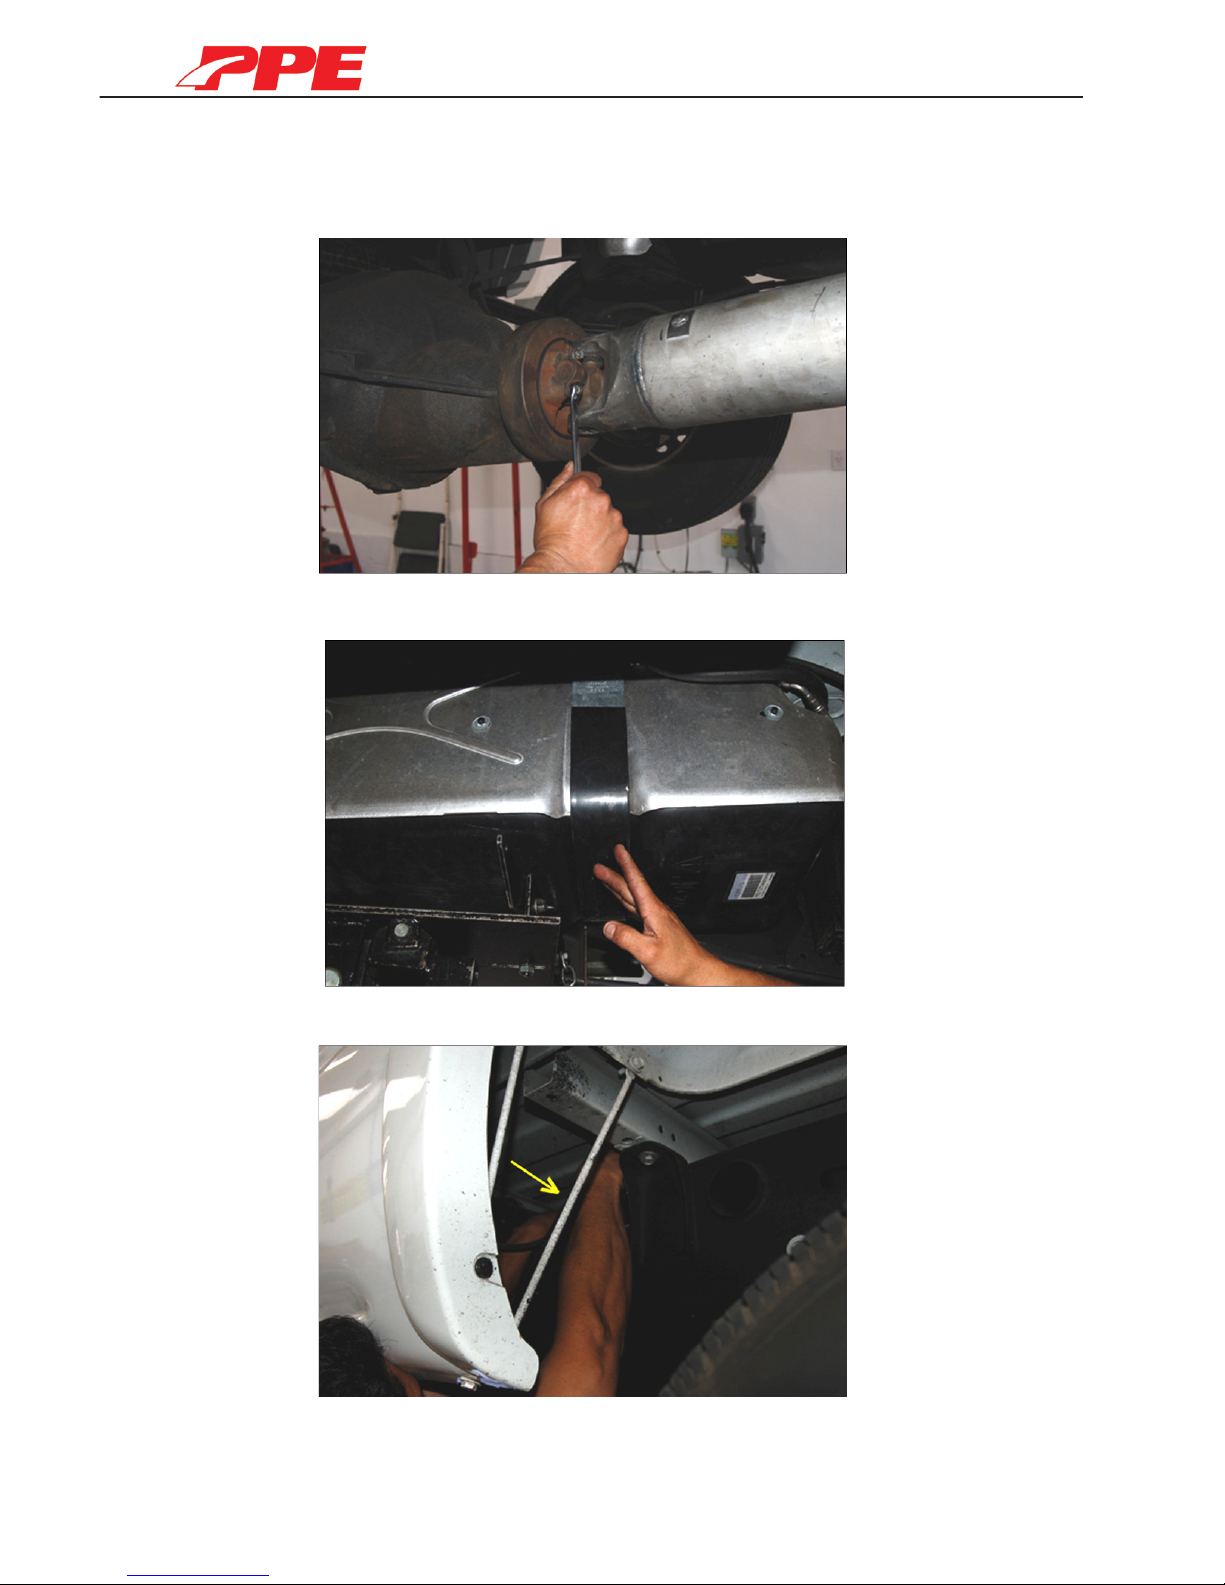
1. Remove drive shaft to allow for easy access to fuel tank
2. Remove tank straps (Use a jack to hold fuel tank in place)
3. Remove clamp from fuel hose
Page 4
Fuel Pickup Kit
4
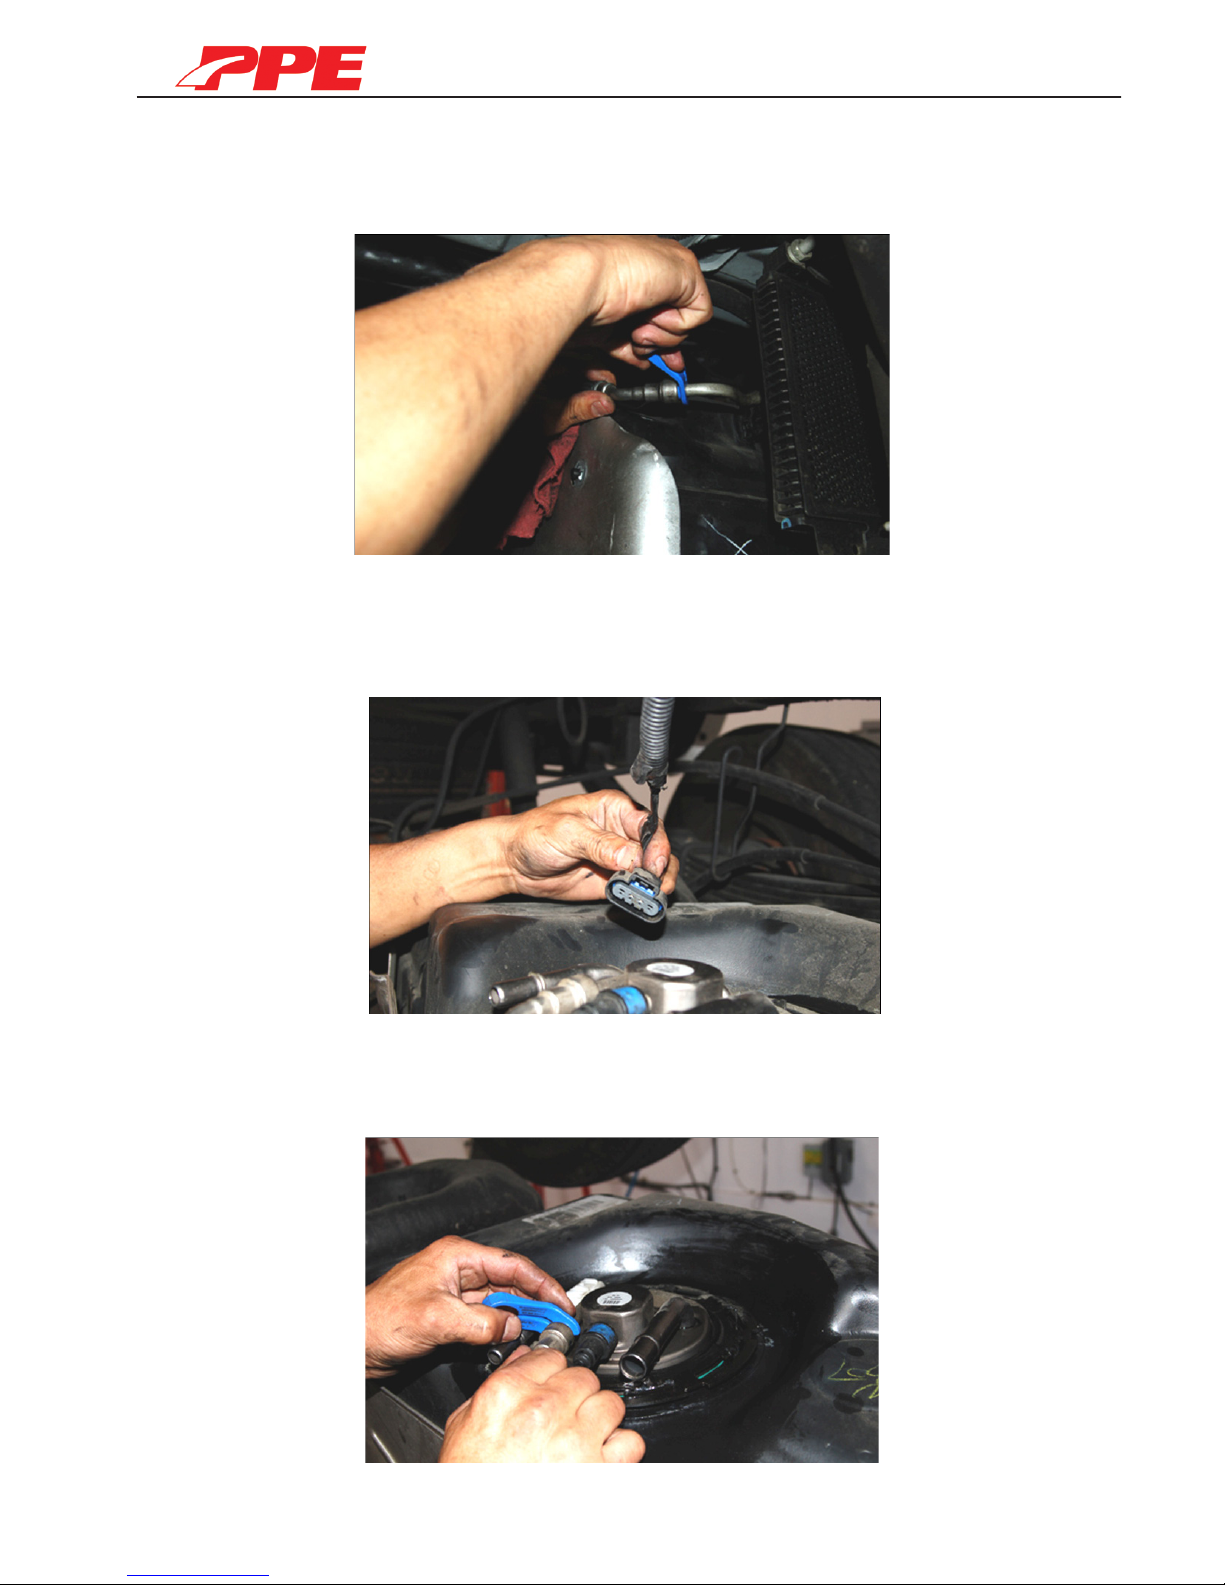
4. Disconnect return and ll lines with fuel line disconnect tool
(Caution: Fuel will leak from the lines!)
5. Lower fuel tank to allow for easy access to sending unit (No Image)
6. Disconnect sending unit sensor plug
7. Disconnect return and ll fuel lines from sending unit with fuel line
disconnect tool
Page 5
Fuel Pickup Kit
5
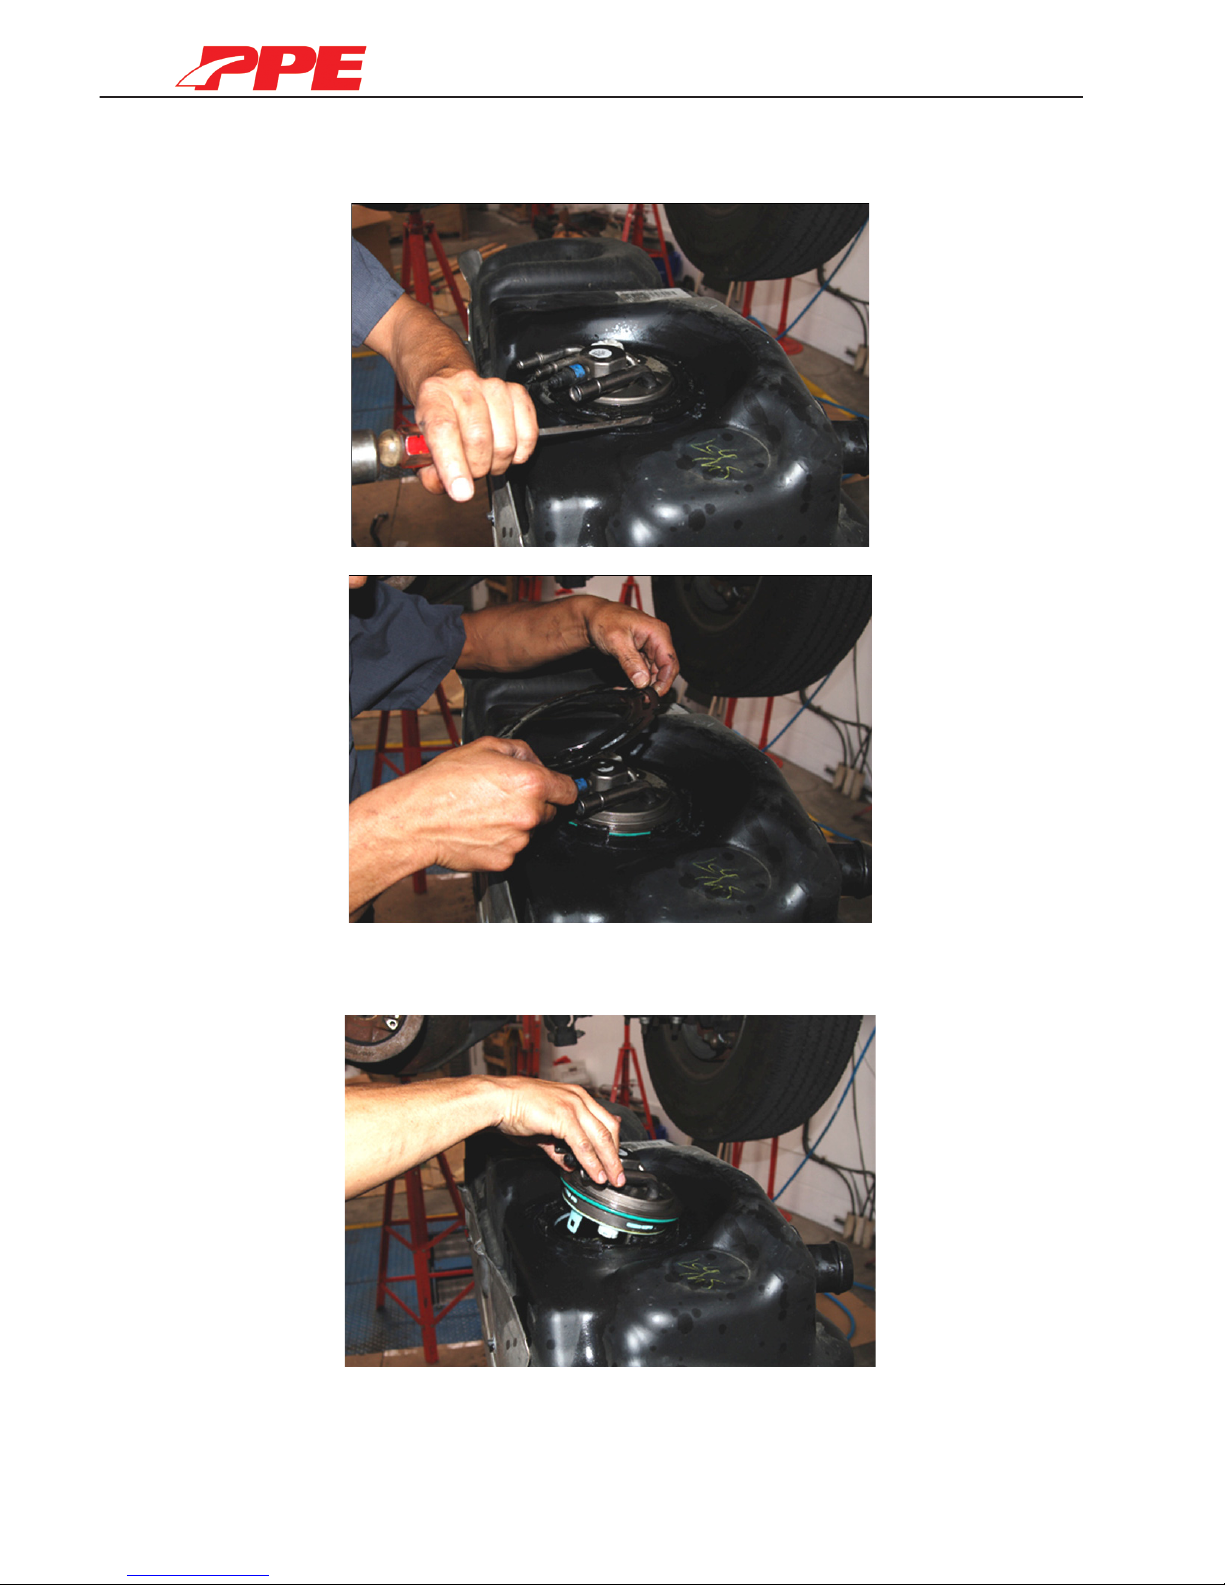
8. Remove sending unit base bracket
9. Remove sending unit from fuel tank (Be sure to drain all fuel)
Page 6
Fuel Pickup Kit
6
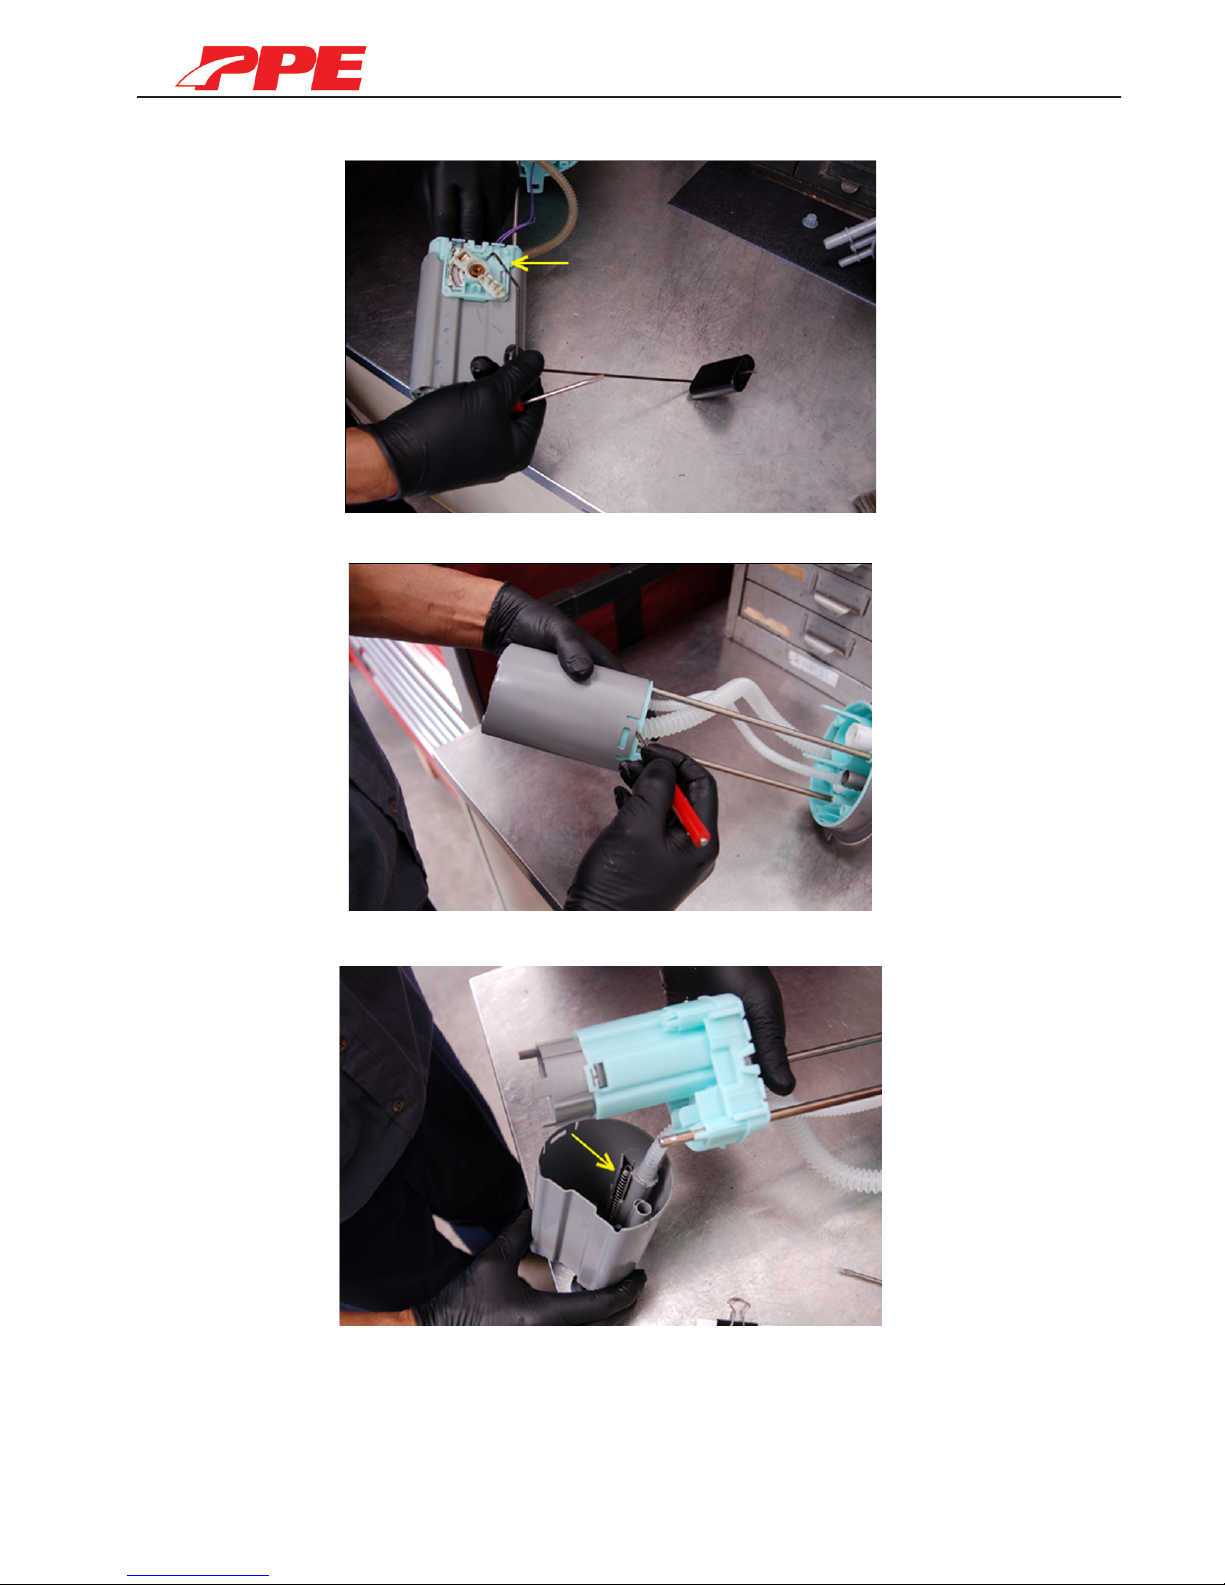
10. Remove sending unit level
11. Remove sending unit base cover
12. Remove spring from sending unit base
Page 7
Fuel Pickup Kit
7
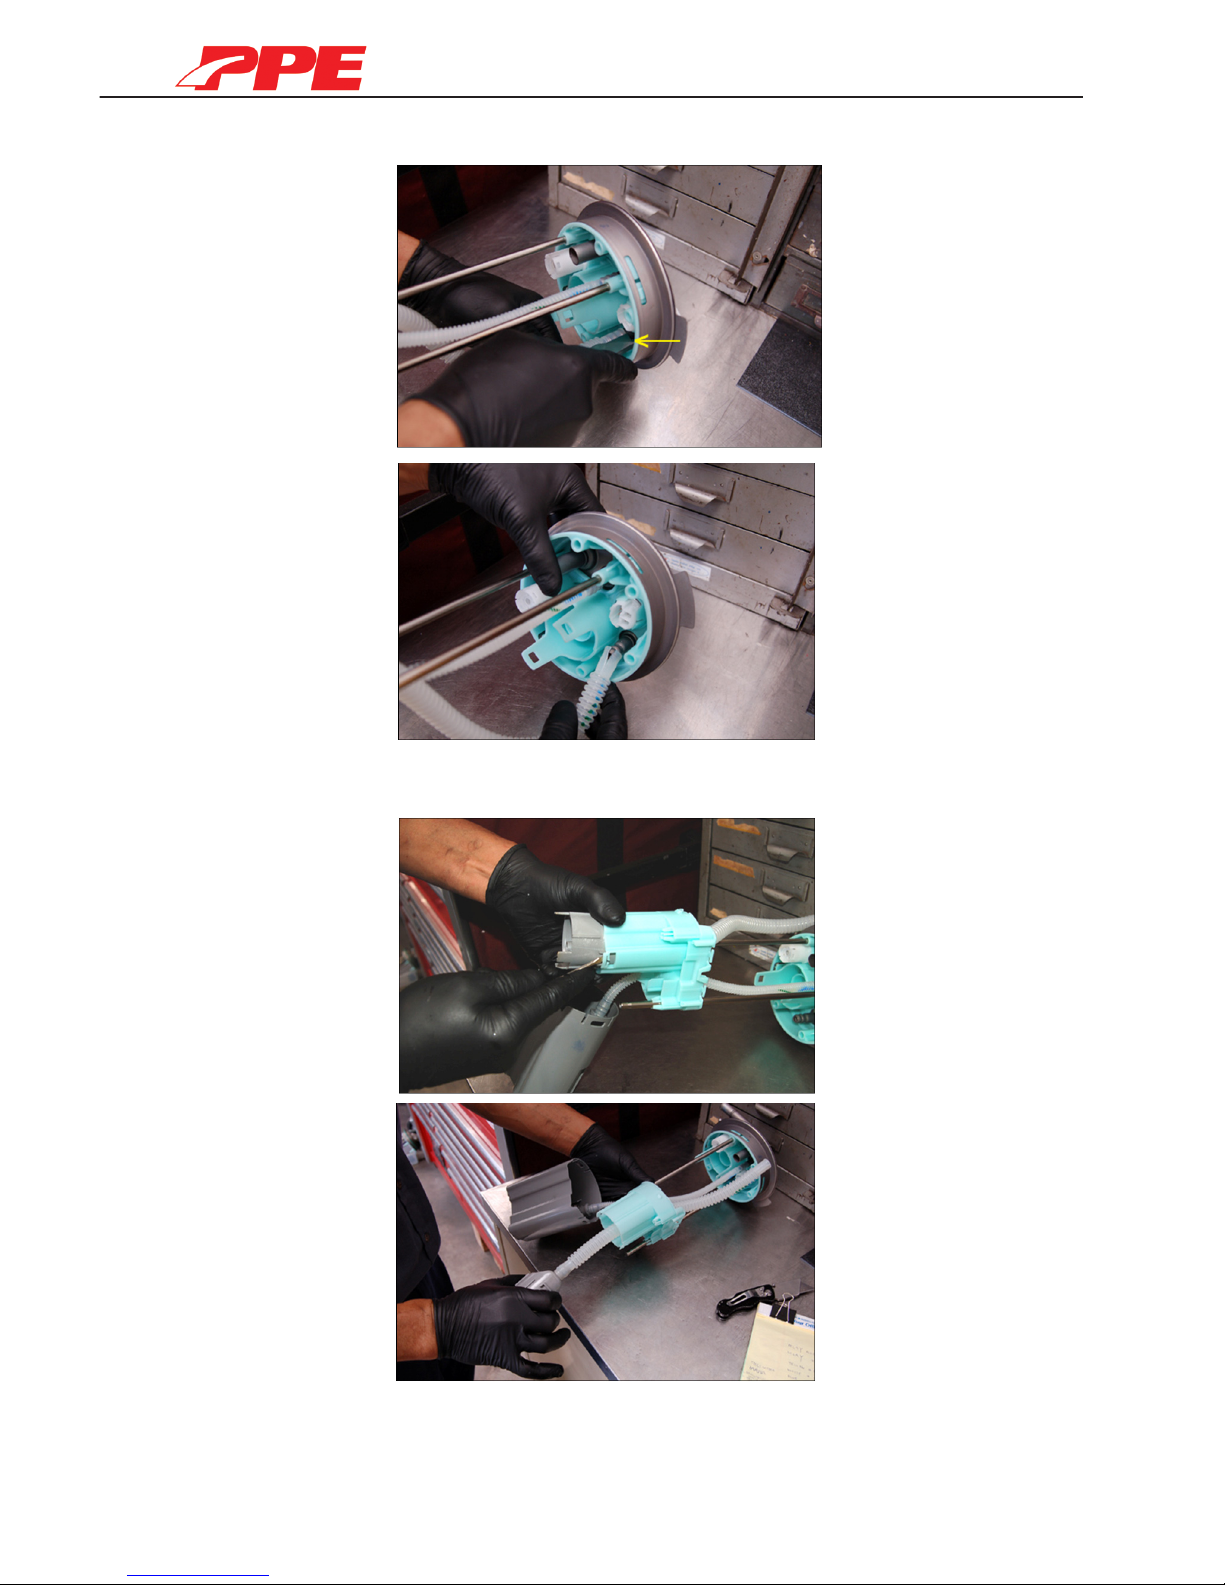
13. Cut the larger plastic corrugated hose
14. Unclip grey fuel pickup from sending unit and remove
Page 8
Fuel Pickup Kit
8
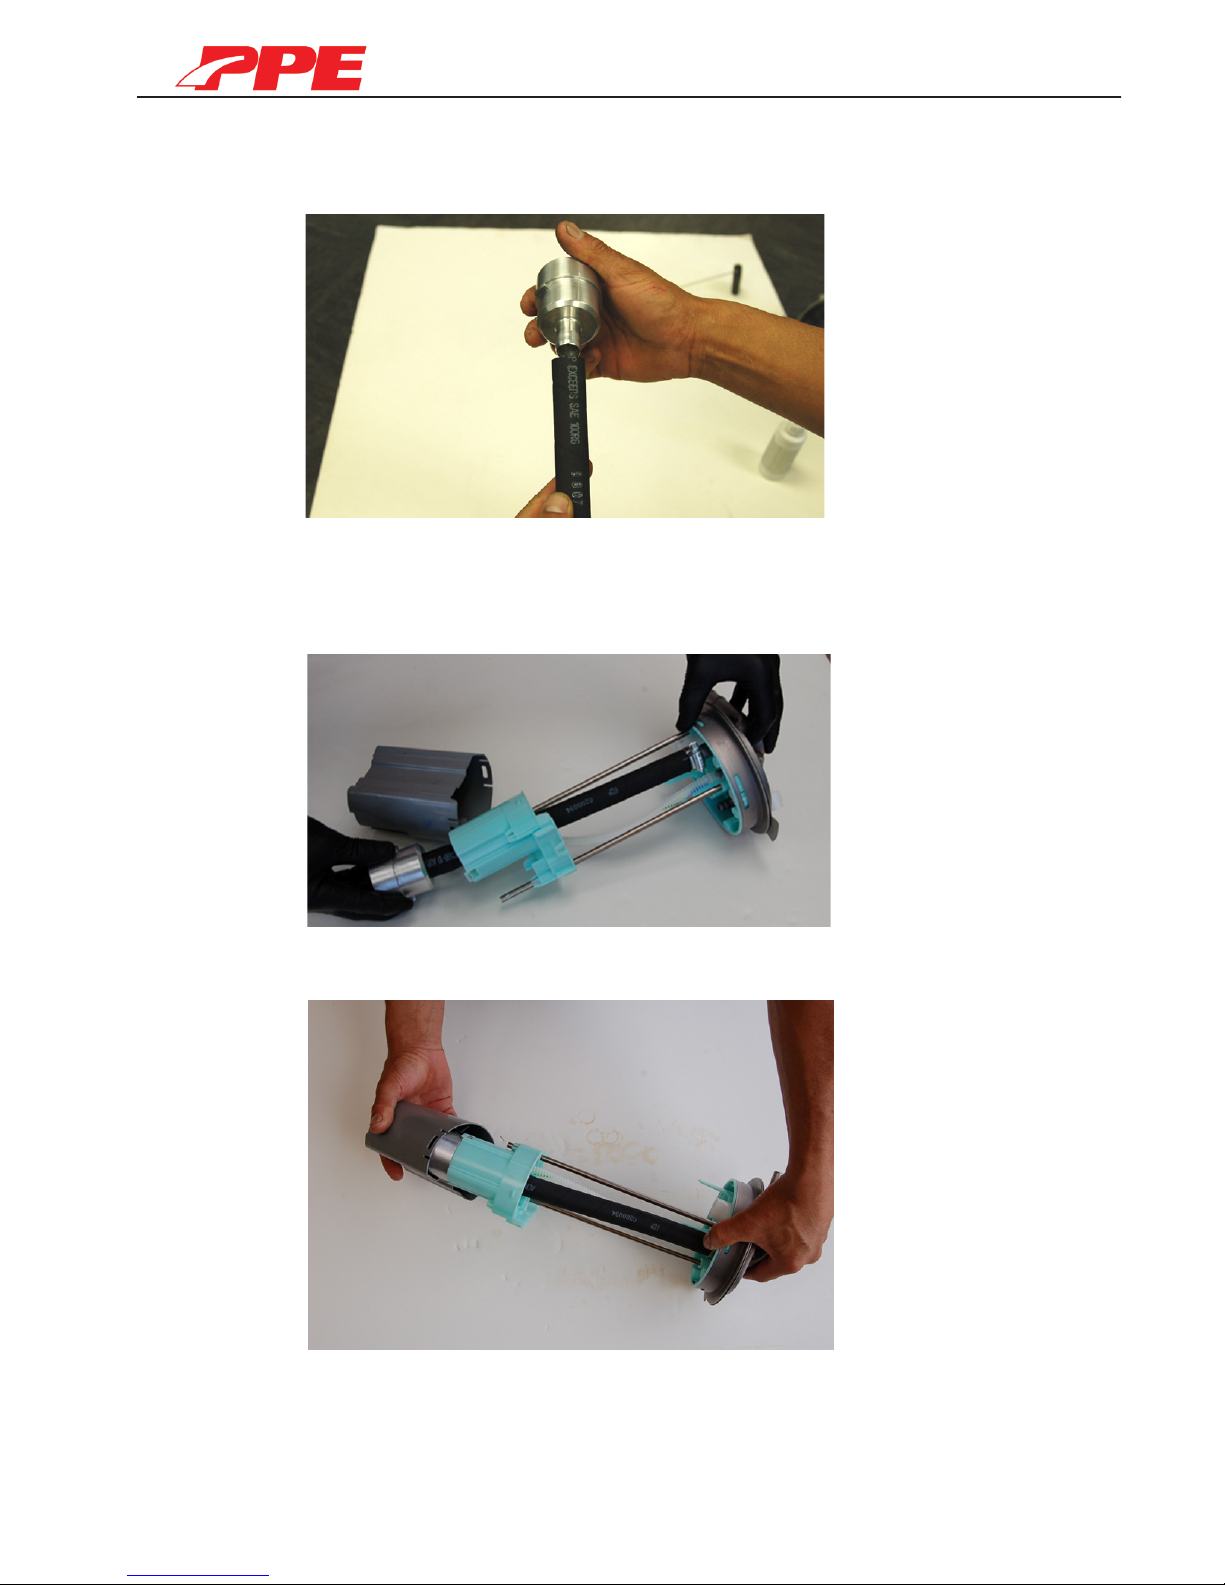
15. Lubricate 5/8” fuel line (11 5/8”) and insert billet aluminum fuel
pickup nozzle
16. Slide assembled 5/8” x 11 5/8” fuel line and billet aluminum
fuel pickup into sending unit and clip fuel pickup into place
(Note: Do not tighten clamp)
17. Reassemble cover and reattach sending unit level
Page 9
Fuel Pickup Kit
9
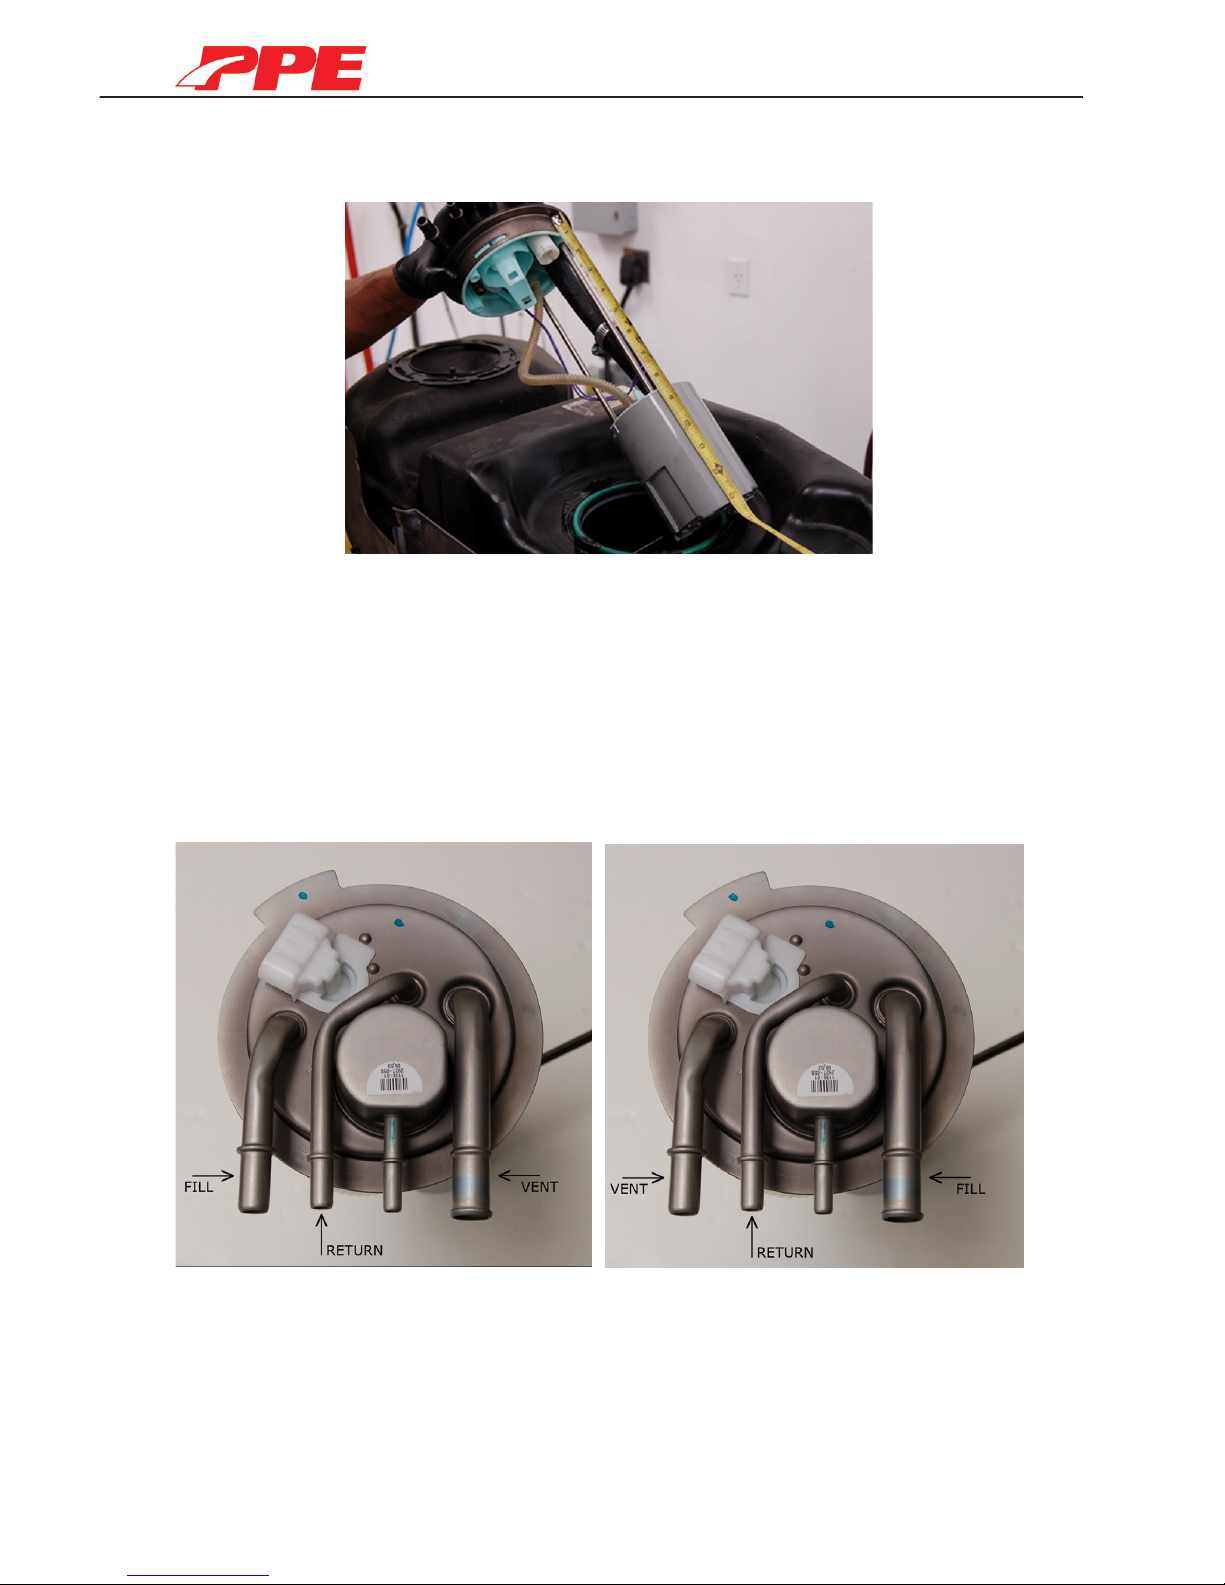
18. Extend adjustable sending unit to greater than 13” and lower unit
into fuel tank
19. Adjust sending unit length to appropriate fuel sensor level and
tighten fuel pickup line hose clamp
20. Reassemble sending unit into fuel tank
Note: The ll and vent lines must be swapped after
modication of the sending unit
(See gures below)
Stock sending unit conguration Modied sending unit
conguration
21. Reconnect all fuel lines, sending unit sensor plug, fuel tank
straps and fuel hose
Page 10
Fuel Pickup Kit
10
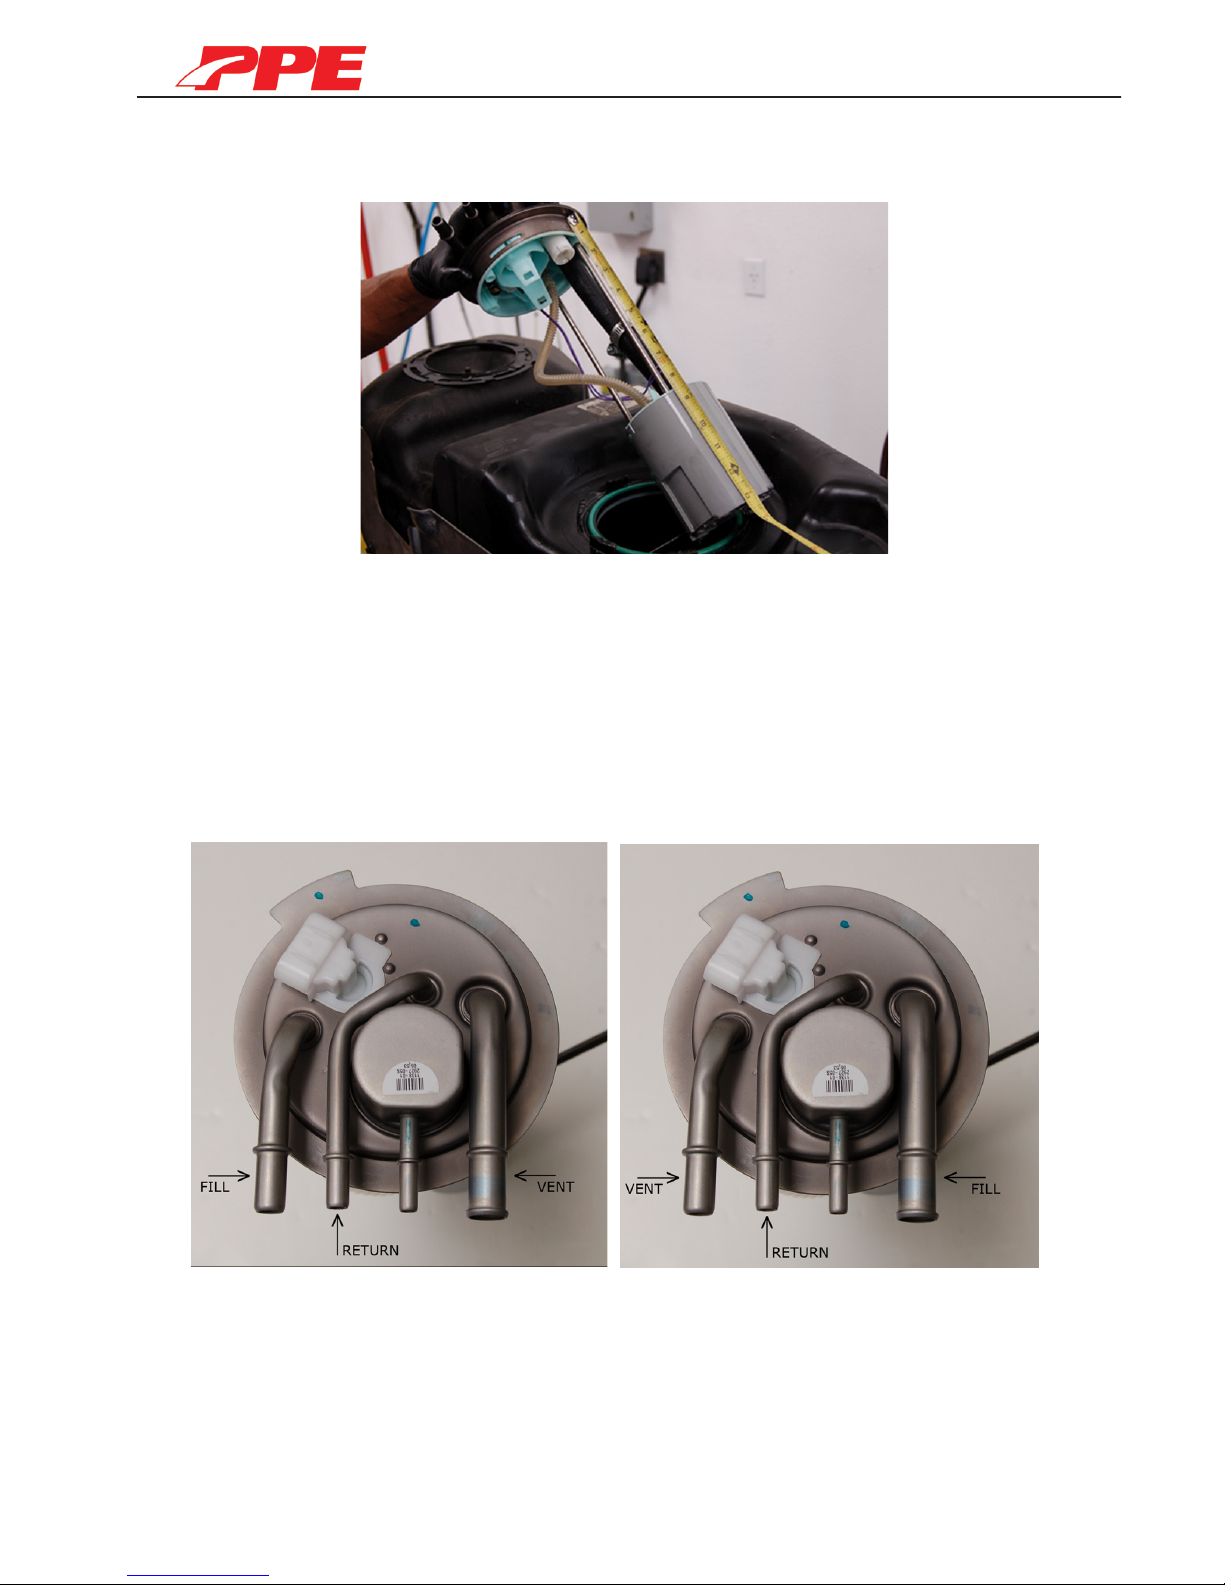
18. Extend adjustable sending unit to greater than 13” and lower unit
into fuel tank
19. Adjust sending unit length to appropriate fuel sensor level and
tighten fuel pickup line hose clamp
20. Reassemble sending unit into fuel tank
Note: The ll and vent lines must be swapped after
modication of the sending unit
(See gures below)
Stock sending unit conguration Modied sending unit
conguration
21. Reconnect all fuel lines, sending unit sensor plug, fuel tank
straps and fuel hose
Page 11
Fuel Pickup Kit
11
NOTES:
Page 12

5011 Brooks St. Montclair CA 91763
PPEdiesel.com
Phone: (714) 985-4825
Fax: (714) 985-9907
 Loading...