

PP3DP UP! mini User Manual

www.pp3dp.com
PP3DP-2013-V1

UP! mini 3D Printer User Manual
Legal Notice
The information in this document is subject to change without notice.
Beijing Tiertime Technology Co. Ltd. (Tiertime) MAKES NO WARRANTY OF
ANY KIND WITH REGARD TO THIS MATERIAL, INCLUDING, BUT NOT
LIMITED TO, THE IMPLIED WARRANTIES OF MERCHANTABILITY AND
FITNESS FOR A PARTICULAR PURPOSE. Beijing Tiertime Technology Co.
Ltd. shall not be liable for errors contained herein or for incidental or
consequential damages in connection with the furnishing, performance, or use
of this Material. Changes or modifications to the system not expressly
approved by Beijing Tiertime Technology Co. Ltd., the party responsible for
compliance, could void the user’s authority for use. This document is protected
by copyright. All rights reserved. Its use, disclosure, and possession are
restricted by an agreement with Beijing Tiertime Technology Co. Ltd. per
software copyright. No part of this document may be photocopied, reproduced
or translated into another language without the prior written consent of
Tiertime.
Delta Micro Corp. is wholly owned subsidiary of Beijing Tiertime Technology Co. Ltd.
PP3DP is a registered trademark of Tiertime.
© Copyright 2013 Beijing Tiertime Technology Co. Ltd. All rights reserved.

1. Introduction
UP! mini 3D Printer User Manual 2
1. INTRODUCTION ................................................................................................................... 3
1.1 HOW TO USE THIS MANUAL .................................................................................................. 3
1.2PRECAUTIONS ..................................................................................................................... 3
1.2.1 Safety ........................................................................................................................ 3
1.2.2 Protection .................................................................................................................. 4
2. OVERVIEW ........................................................................................................................... 5
2.1 APPEARANCE ..................................................................................................................... 5
2.2 SPECIFICATIONS ................................................................................................................. 8
2.2.1 Printer Physical Characteristics ................................................................................ 8
2.2.2 Specifications ............................................................................................................ 8
2.2.3 Environmental specifications .................................................................................... 9
3. OPERATION ........................................................................................................................ 10
3.1 PREPARATION .................................................................................................................. 10
3.1.1Installation the printer ............................................................................................... 10
3.1.2 Installing the software ............................................................................................. 13
3.1.3 Installing drivers ...................................................................................................... 14
3.2 USING THE BASIC FUNCTIONS ............................................................................................ 16
3.2.1 Start the program .................................................................................................... 16
3.2.2 Loading a 3D model ................................................................................................ 16
3.2.3View Options ............................................................................................................ 19
3.2.4 Model transformations ............................................................................................ 20
3.2.5 Placing models onto the build platform ................................................................... 22
3.3 GETTING READY TO PRINT ................................................................................................ 23
3.3.1 Initializing the Printer ............................................................................................... 23
3.3.2 Calibrating the Nozzle Height ................................................................................. 24
3.3.3
3.3.4 Other Maintenance Options .................................................................................... 28
3.3.5 Preparing the Platform .................................................................. 错误!
未定义书签。
4. PRINTING ............................................................................................................................ 39
5. MODEL REMOVAL ............................................................................................................. 43
6. MAINTENANCE .................................................................................................................. 47
6.1 CHANGING THE MATERIAL ................................................................................................. 47
6.2 VERTICAL CALIBRATION .................................................................................................... 48
6.3 CLEANING THE NOZZLE ..................................................................................................... 50
6.4 REMOVING /CHANGING THE NOZZLE .................................................................................. 51
6.5 LUBRICATION OF BEARINGS ..................................................................... 错误!未定义书签。
6.6 SPARE PARTS ................................................................................................................... 51
7. TIPS & TRICKS ................................................................................................................... 52
8. TROUBLESHOOTING ........................................................................................................ 53
SOLUTION FOR "WINUSB.DLL NOT FOUND" PROBLEM ................................................................ 53

1. Introduction
UP! mini 3D Printer User Manual 3
1. Introduction
1.1 How to use this manual
This User Manual is divided into four sections which cover Introduction,
Overview, Operation, and Troubleshooting, respectively. Please read this
manual carefully before install and operate this machine. Keep this manual
handy and refer to it when it is needed.
1.2 Precautions
Please read the following precautions carefully before operating the printer.
1.2.1 Safety
UP! printer can only be used with the power adapters supplied by Tiertime.
Other adapters could damage the printer with risk of fire.
During the period that printer is printing, and just after printer is done
printing, print platform, nozzle and printed model are still hot. In order to
avoid being burnt or cause deformation of model, do not touch model,
nozzle, or print platform by hand without any protection.
Protective glasses should always be worn when removing support
structure, especially when printing material is PLA.
The melting point of the brown sections of protection gloves supplied with
the printer is about 200°C . Please do not hold the nozzle with the gloves
when nozzle is heated.
Slight smell will be generated from printing material when printer is
extruding filament. A well ventilated room is highly recommended.
The following icons are used in this manual:
CAUTION: Indicating potential hazardous situation in which, if not
avoided, may cause minor or moderate injury.
WARNING: Indicating potential hazardous situation in which, if not
avoided, may cause serious injury.

1. Introduction
UP! mini 3D Printer User Manual 4
Gloves: When performing a certain maintenance work, machine
may be hot and protective gloves are required to avoid being burnt.
Safety Glasses: Wear safety glasses to avoid injury to the eyes.
1.2.2 Protection
UP! printer must not be exposed to water or rain, otherwise may cause
damage.
Do not shut down UP! Printer or pull the USB cable during the process of
loading a digital model to Printer, otherwise the model data may not be
transmitted successfully.
When using the “Extrude” function, keep at least 50mm gap between the
nozzle and the print platform. If the gap is too small, nozzle may not
extrude filament easily, which could cause nozzle clog.
UP! printer is designed to function properly at temperature between 15°C
and 30°C and humidity between 20% and 50%; Operating outside these
limits may cause low print quality.
2. Overview
UP! mini 3D Printer User Manual 5
2. Overview
UP! mini is designed with ultimate portability and simplicity in mind. The
machine and software allow you to print great models with only a few
keystrokes, even you are a first time user of 3D printer. UP! mini uses a nozzle
to deposit molten plastic, and the printed parts are strong and durable with high
accuracy.
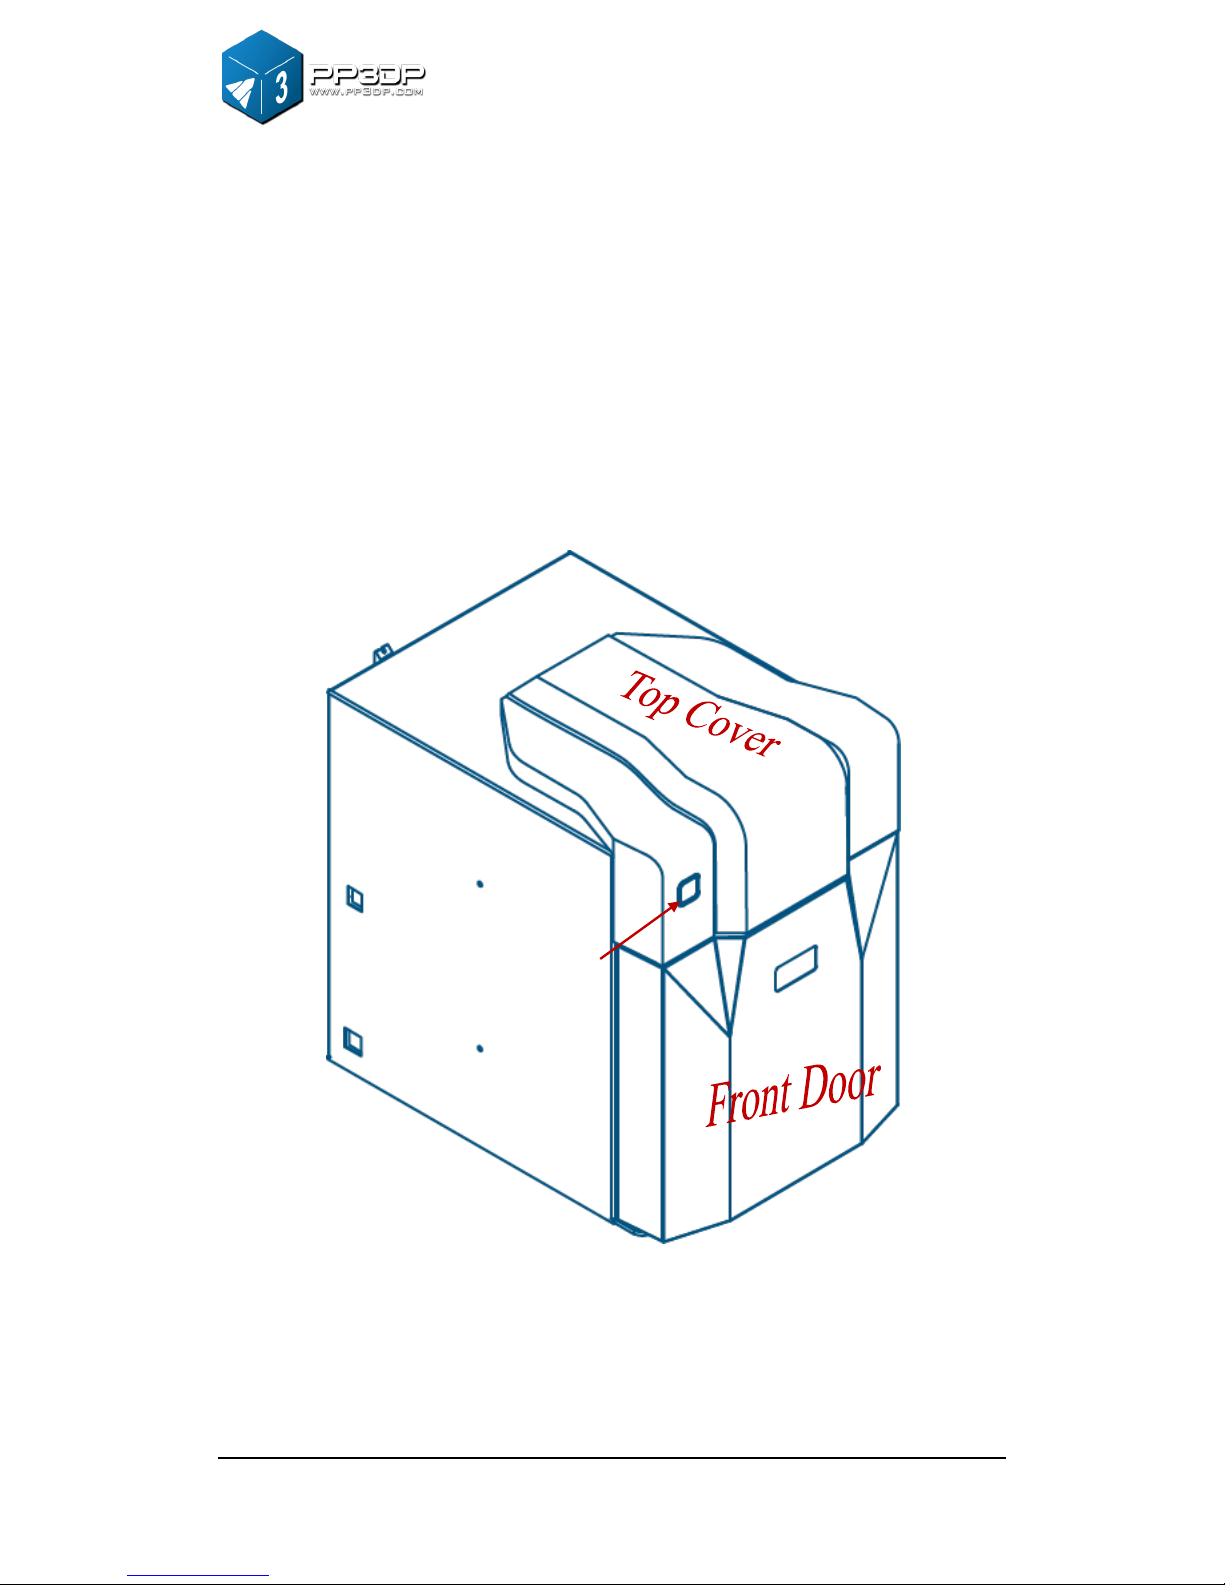
2.1 Appearance
Figure 2-1 Front view of UP! mini
Init. Button
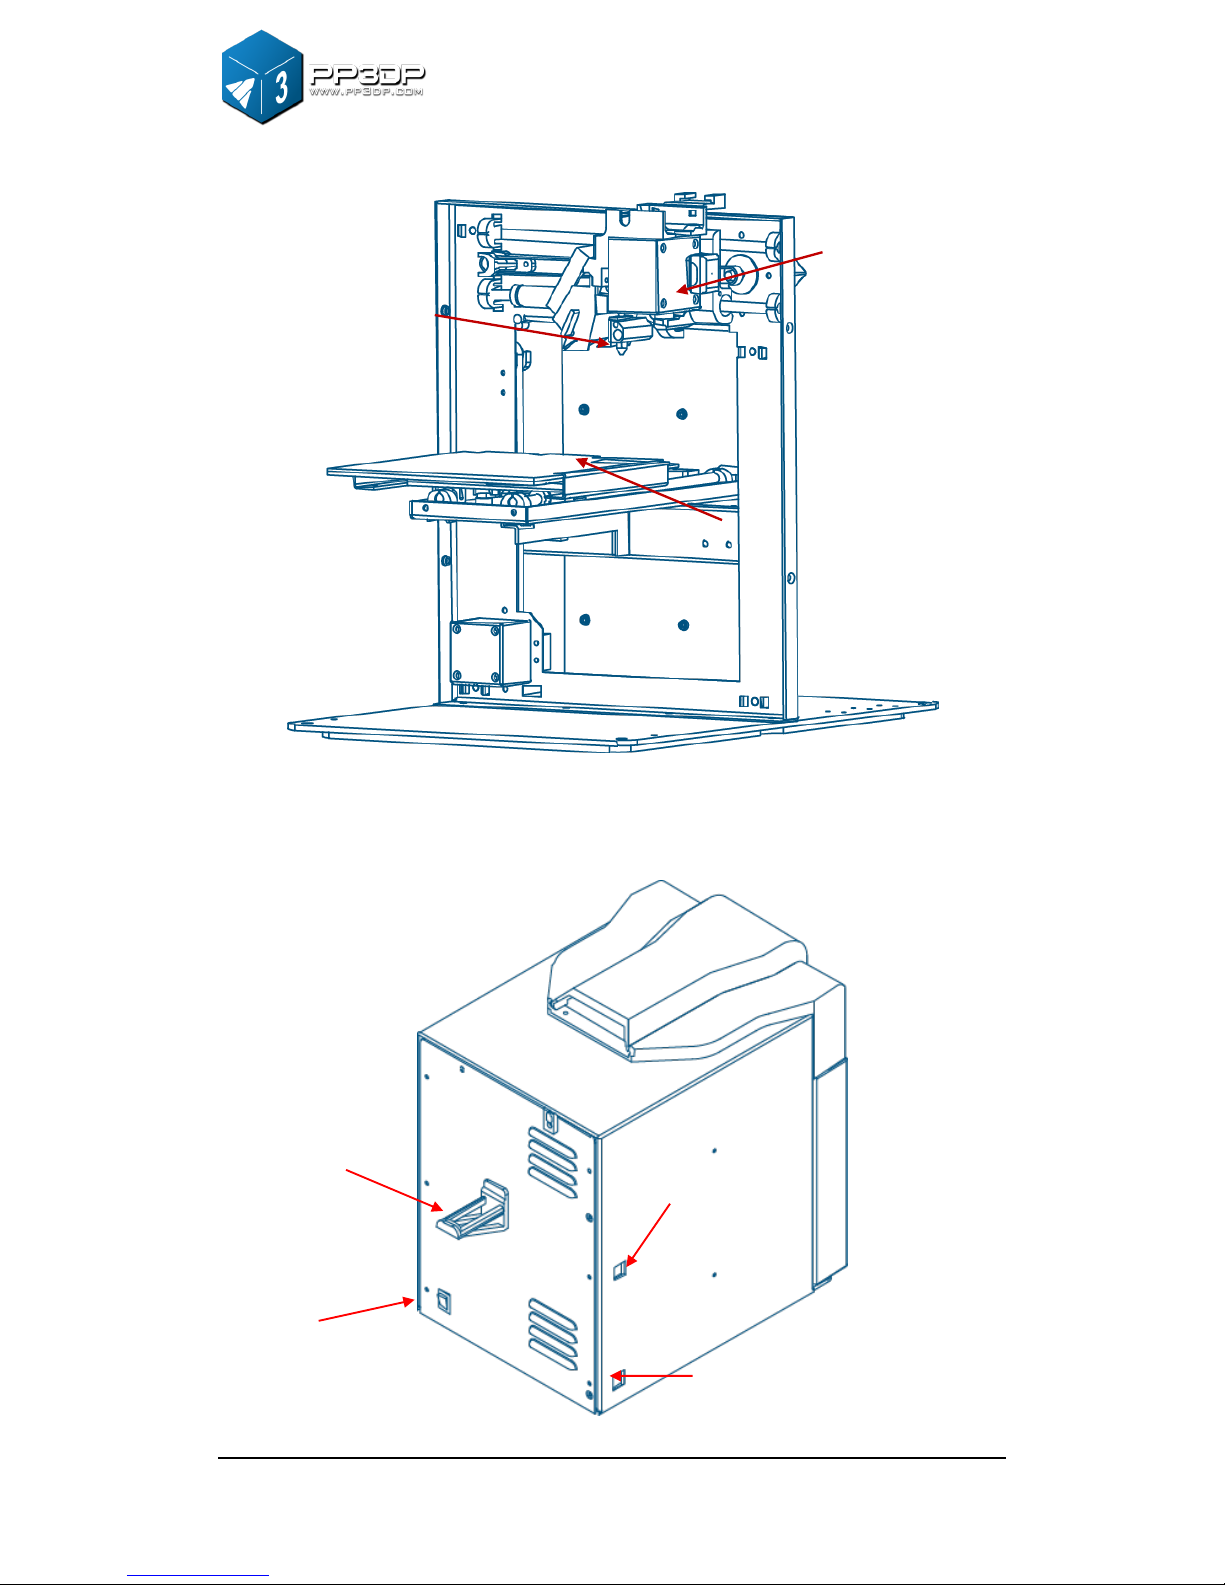
2. Overview
UP! mini 3D Printer User Manual 6
Figure 2-2 Inside View of UP! mini
Figure 2-3 Back view of UP! mini
Platform
Extrusion head
Nozzle
USB Interface
Power Interface
Roller Shaft
Power On/off
2. Overview
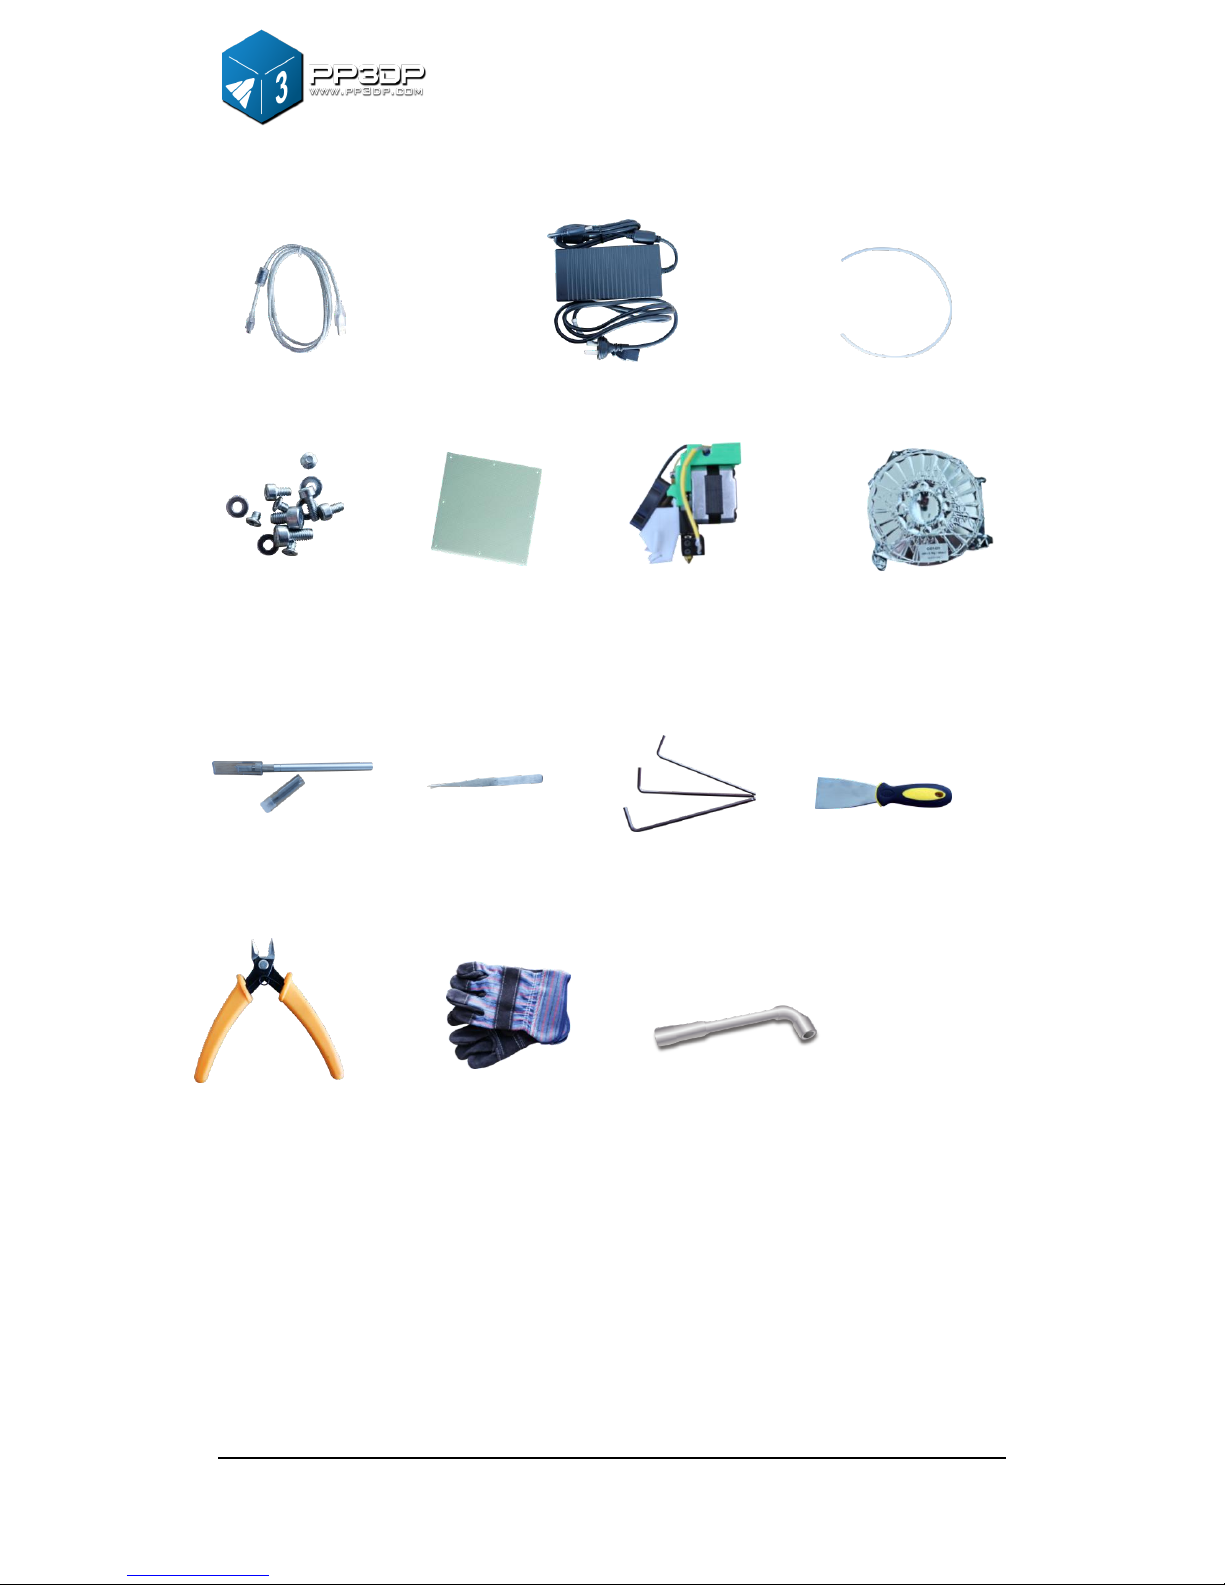
UP! mini 3D Printer User Manual 7
① USB cable ② Power adapter (20 V) ③ Filament tube
④ Screws ⑤ Cell board ⑥ Extrusion head ⑦ ABS spool
Figure 2-4 Accessories
① Pen Knives ②Tweezers ③ Hex wrench ④ Shovel
⑤ Pliers ⑥ Gloves ⑦ Nozzle wrench
Figure 2-5 Tool kit
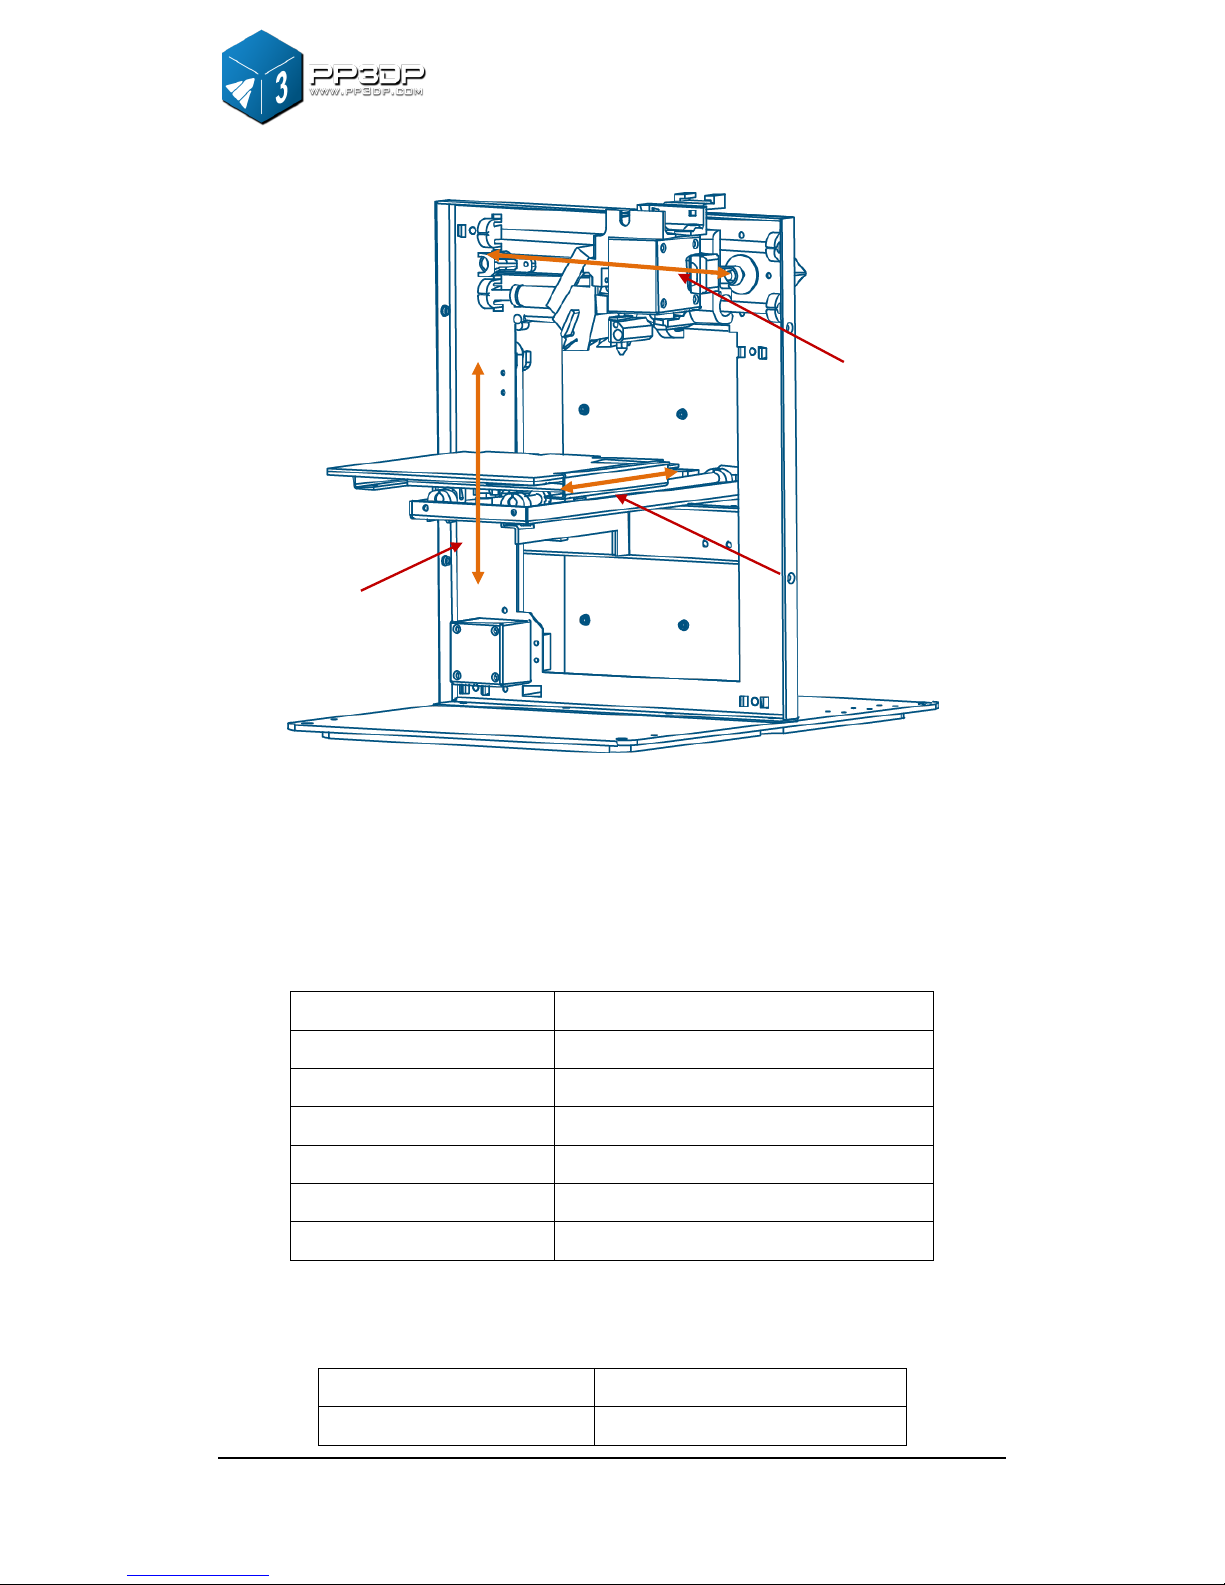
2. Overview
UP! mini 3D Printer User Manual 8
Figure 2-6 Axis
2.2 Specifications
2.2.1 Physical Specifications
Printing Material
ABS or PLA
Material Color
White/Black/Red/Yellow/Blue/Green
Layer Thickness
0.2-0.35 mm
Print Speed
10-100 cm3/h
Print Size
120×120×120 mm
Printer Weight
5 KG (11 lb)
Printer Size
240 × 350 × 350 mm
2.2.2 Other Specifications
Power Requirements
100-240VAC, 50-60Hz, 200W
Model Support
Auto-generated support
Y axis
Z axis
X axis

2. Overview
UP! mini 3D Printer User Manual 9
Input Format
STL
OS compatibility
Windows XP/Vista/7/8; Mac
2.2.3 Environmental specifications
Ambient Temperature
15°C ~30°C
Relative humidity
20%~50%
3. Operation
UP! mini 3D Printer User Manual 10
3. Operation
3.1 Preparation
3.1.1 Installation
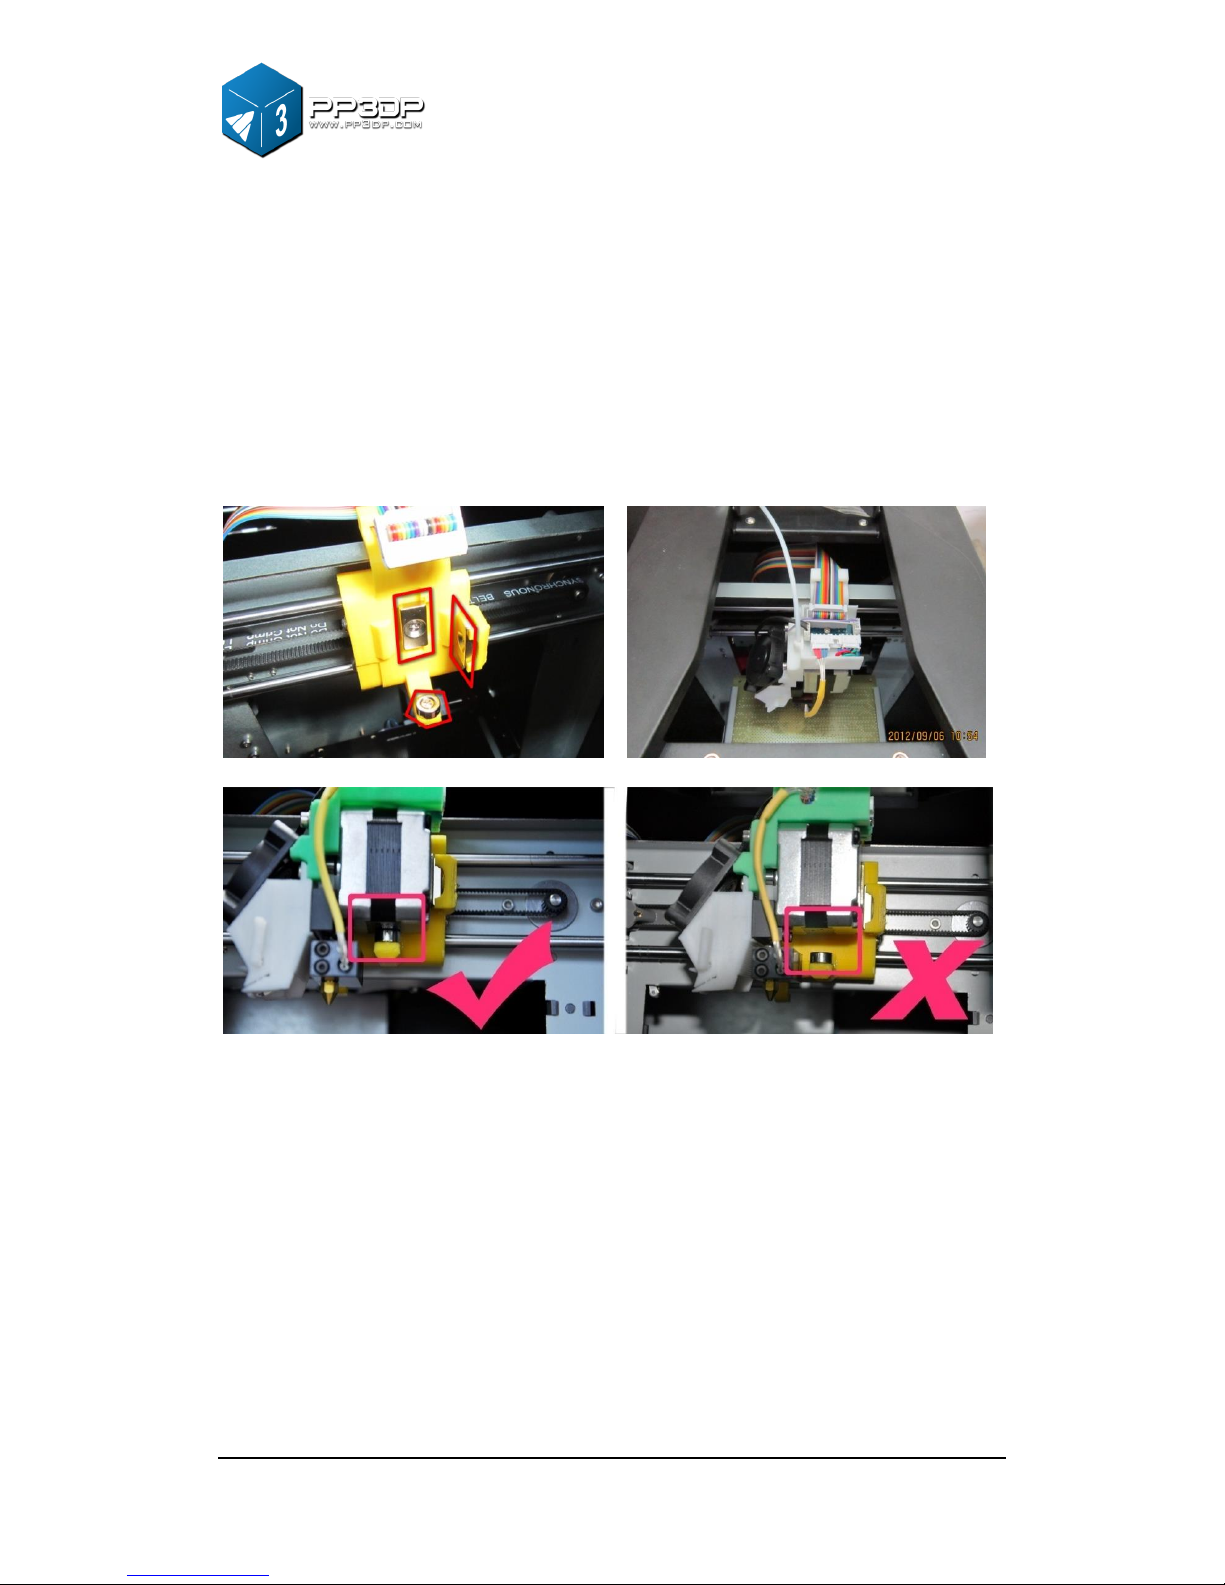
Figure 3-1 Print head installation
Extrusion Head
The extrusion head of an UP! mini is fastened by three magnetic buckles.
When assembling extrusion head, make sure the extrusion head is securely
contacted with all the three buckles at right position.
3. Operation
UP! mini 3D Printer User Manual 11
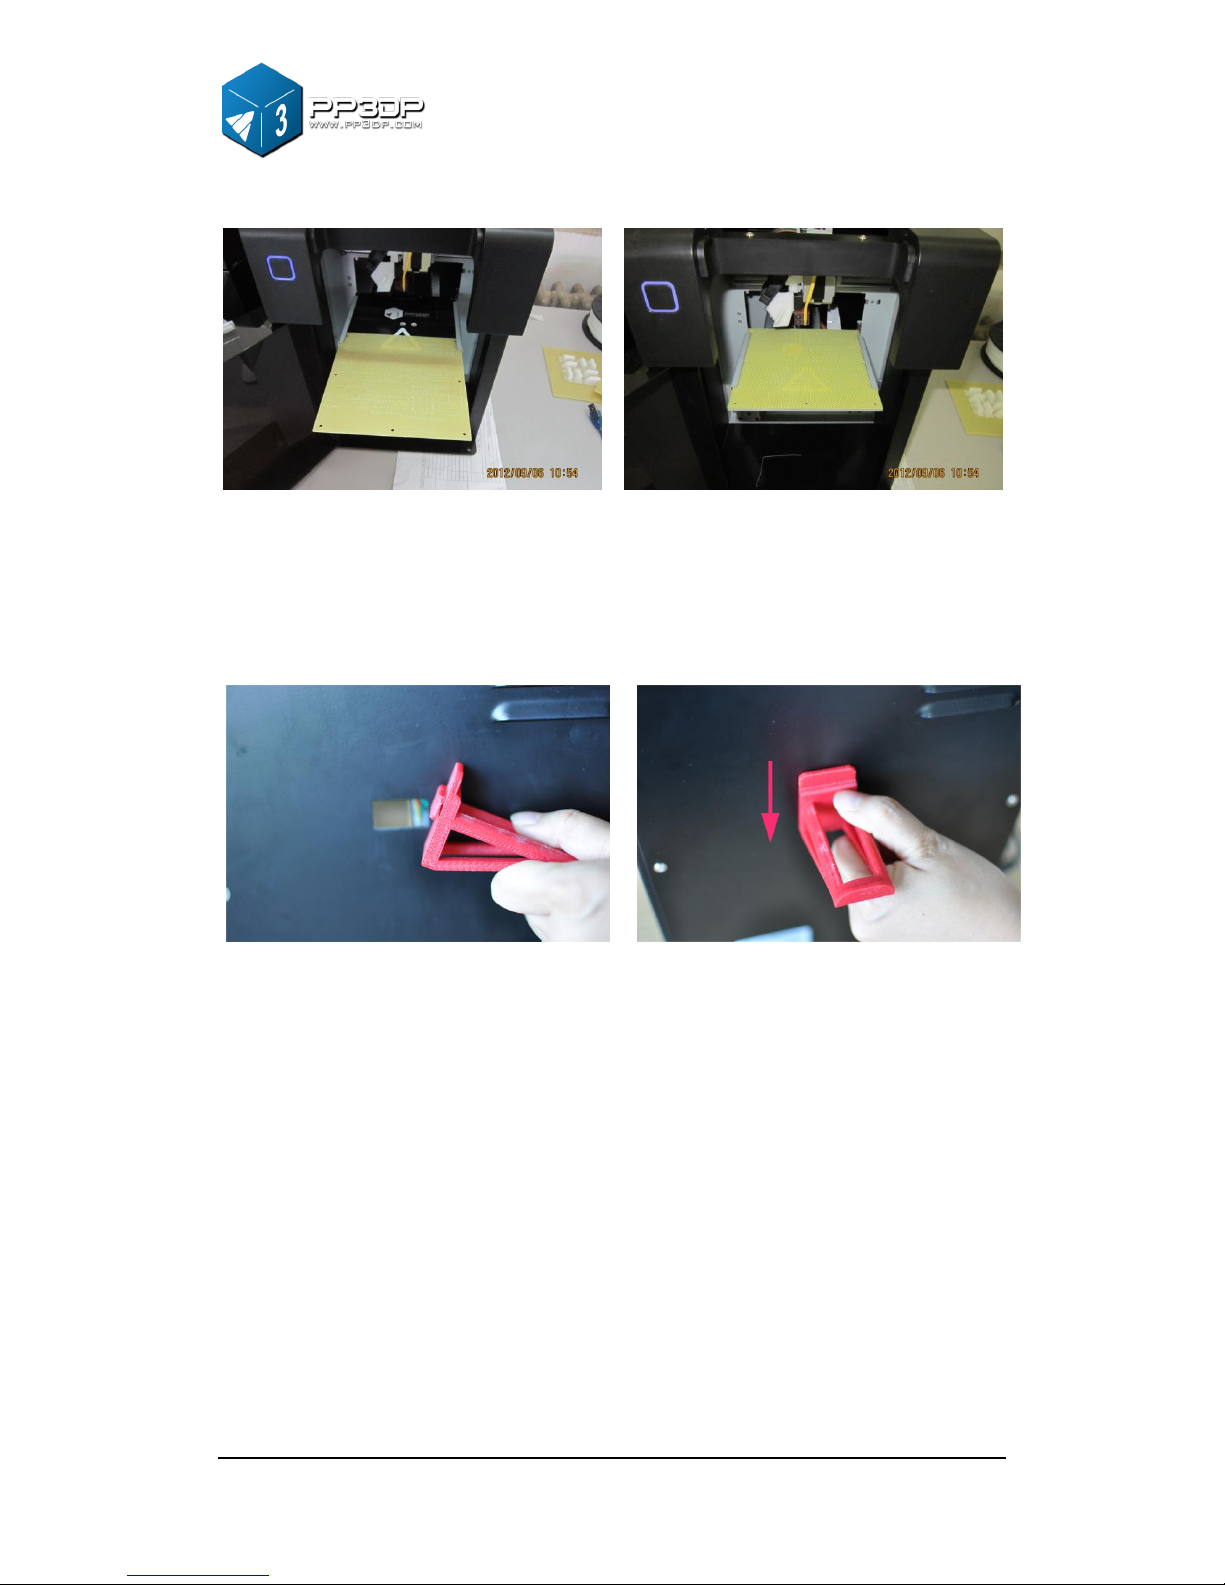
Figure 3-2 Print Platform
Platform
Insert the cell board into the platform slot. Moderate force is recommended
when inserting the cellboard.
Figure 3-3 Roller Shaft
Roller shaft
Insert the roller shaft into the hole at the back of printer, and press it downward.
The roller shaft should fit in the hole nicely.

3. Operation
UP! mini 3D Printer User Manual 12
Material Extrusion (top view)
Figure 3-4 Material Wiring
(1) Connect power adapter to power interface.
(2) Put a spool of material on the roller shaft, find the end of the material, insert
it into filament tube, pass the material through the tube, and pass the tube
through the top of the machine cover.
(3) Start UP! Software installed on a computer (If you have not already
installed the software, please refer to the software installation procedure in
section 3.1.2), connect the computer with printer through USB cable,
initialize the printer from the software, and, in the software menu, click “3D
Print -> Maintenance” to bring up the “Maintenance” dialogue, where you
will find “Extrude” button. Click the “Extrude” button, which triggers
extrusion process to start.
(4) Print nozzle starts warming up. When the temperature of the nozzle
reaches 260°C, printer will give off a beep. You can push the filament into
the hole at the top of the extrusion head. Hold the filament there with
pressure until the extrusion motor inside the print head grabs the filament

3. Operation
UP! mini 3D Printer User Manual 13
and starts pulling it through the extrusion head. From the nozzle side, a
string of melted filament will be extruded.
(Windows version)
(Mac version)
Figure 3-5 Maintenance Dialog
3.1.2 Software Installation
The UP! software is available on the website www.pp3dp.com. It is free for
everyone who owns UP! 3D printer. After downloading the software installer
from the website, start the "setup.exe", and install the program to a specified
directory (Default location is c:/Program files/UP). The installation process will
3. Operation
UP! mini 3D Printer User Manual 14
install UP! software, UP! printer drivers, and UP! sample files.
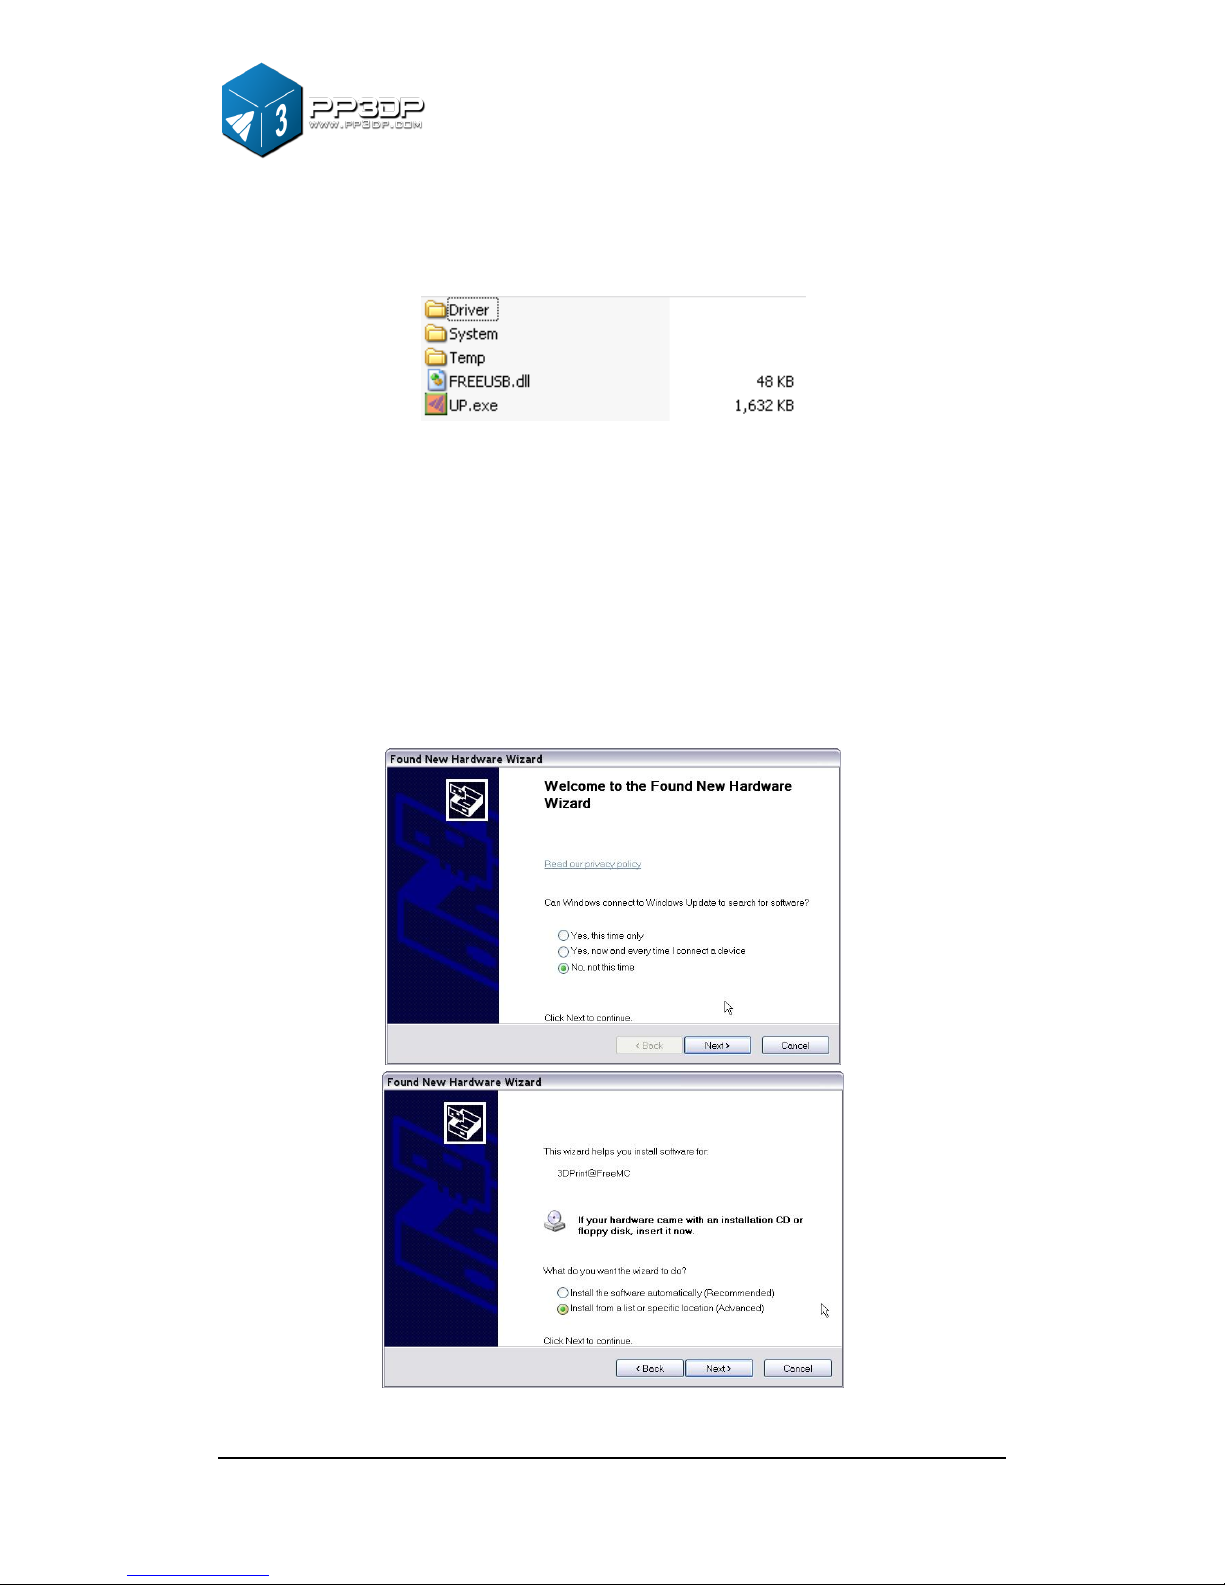
Figure 3-6 UP! Software Directory
3.1.3 Driver Installation
Connect the printer to a computer with a USB cable. The computer should pop
up the “Found New Hardware Wizard” window. Choose “No, not this time”
option, and then click “Next”. Choose “Install from a list or specific location
(Advanced)”, and click “Next”.
Figure 3-7 Snap shots of UP! Software installation

3. Operation
UP! mini 3D Printer User Manual 15
Click “Browse”, and choose C:\Program Files\UP\Driver, then “Next”.
Figure 3-8 Snap shots of UP! Software installation
The following dialogue box pops up. Choose “Continue Anyway”, and the
drivers will install automatically.
Figure 3-9 Snap shots of UP! Software installation
If you have any problems installing the driver, or get a "Winusb.dll not found" error,
please refer to the driver section in the troubleshooting section of this manual.
3. Operation
UP! mini 3D Printer User Manual 16
3.2 Using the basic functions
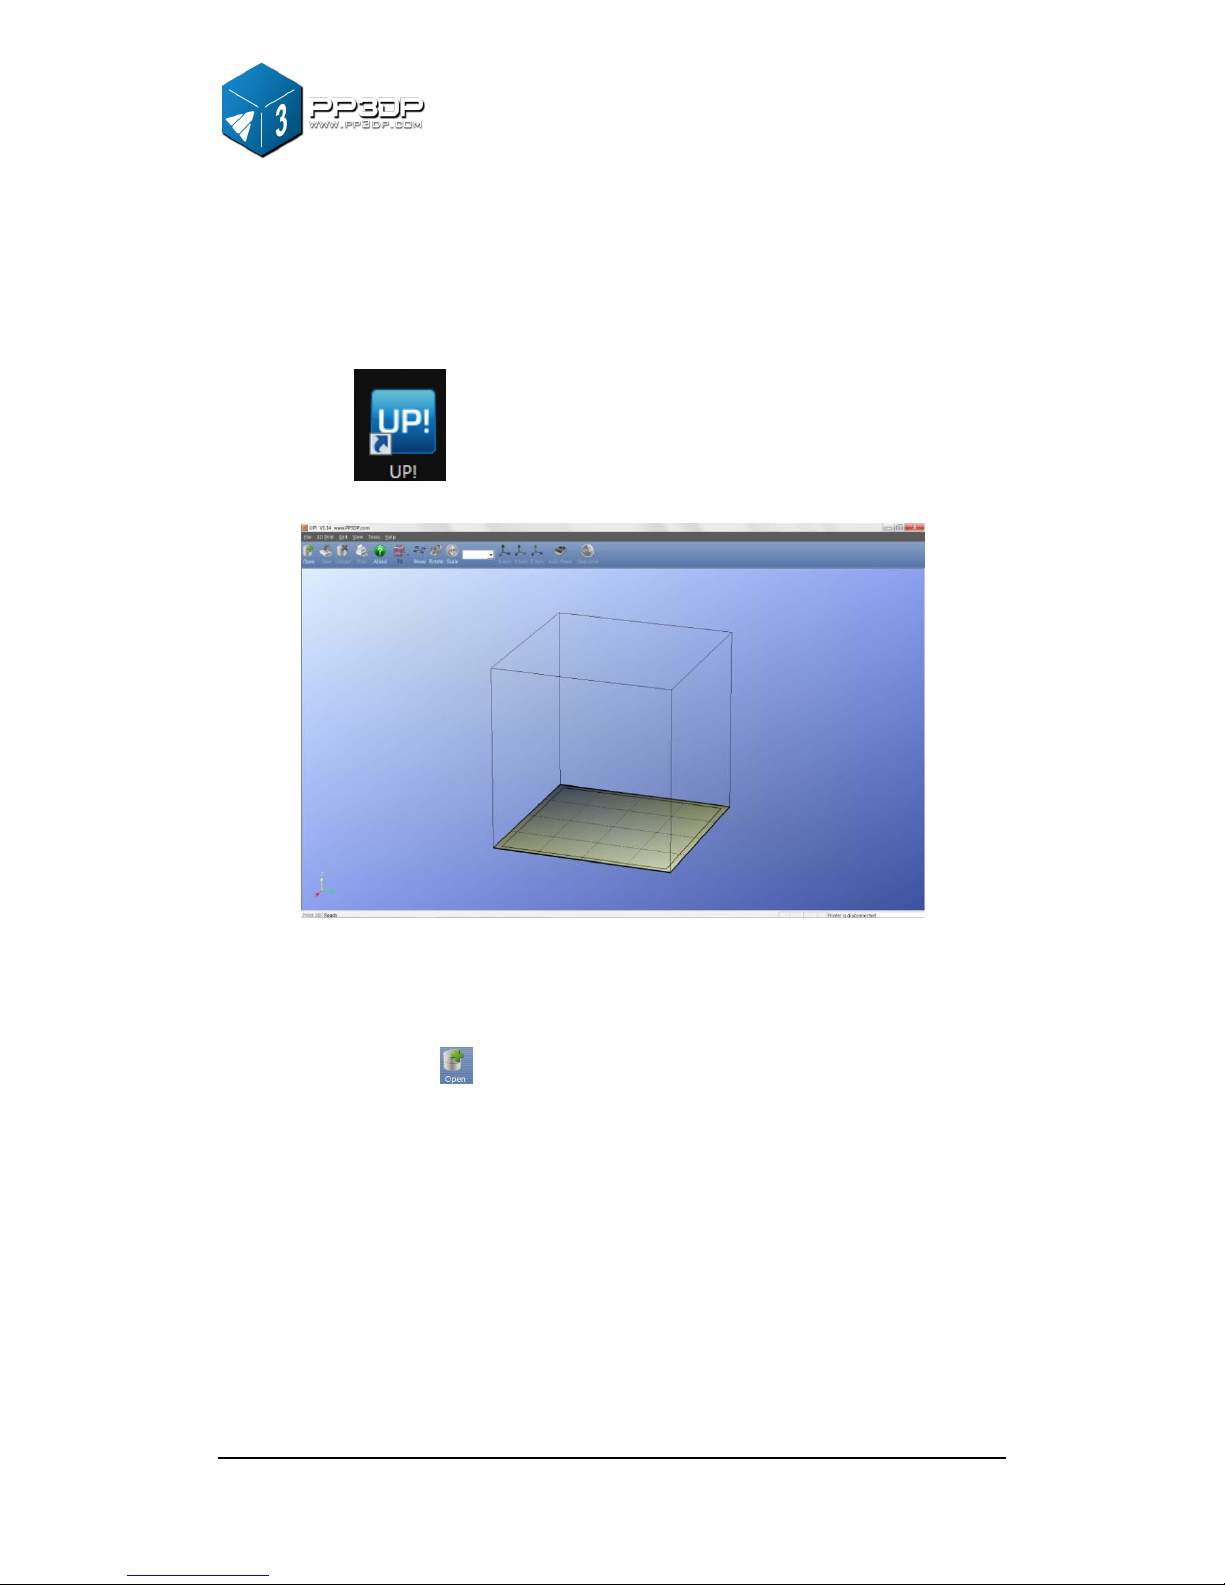
3.2.1 Start the program
Click on the icon in a computer desktop. The program should open
up as the following:
Figure 3-10 UP! Program Startup Screen
3.2.2 Loading a 3D model
Click “File / Open” or on the toolbar and select the model you want to load.
UP! software supports STL files (the standard input format for 3D printing), and
the UP3 format (UP’s proprietary compressed STL format).
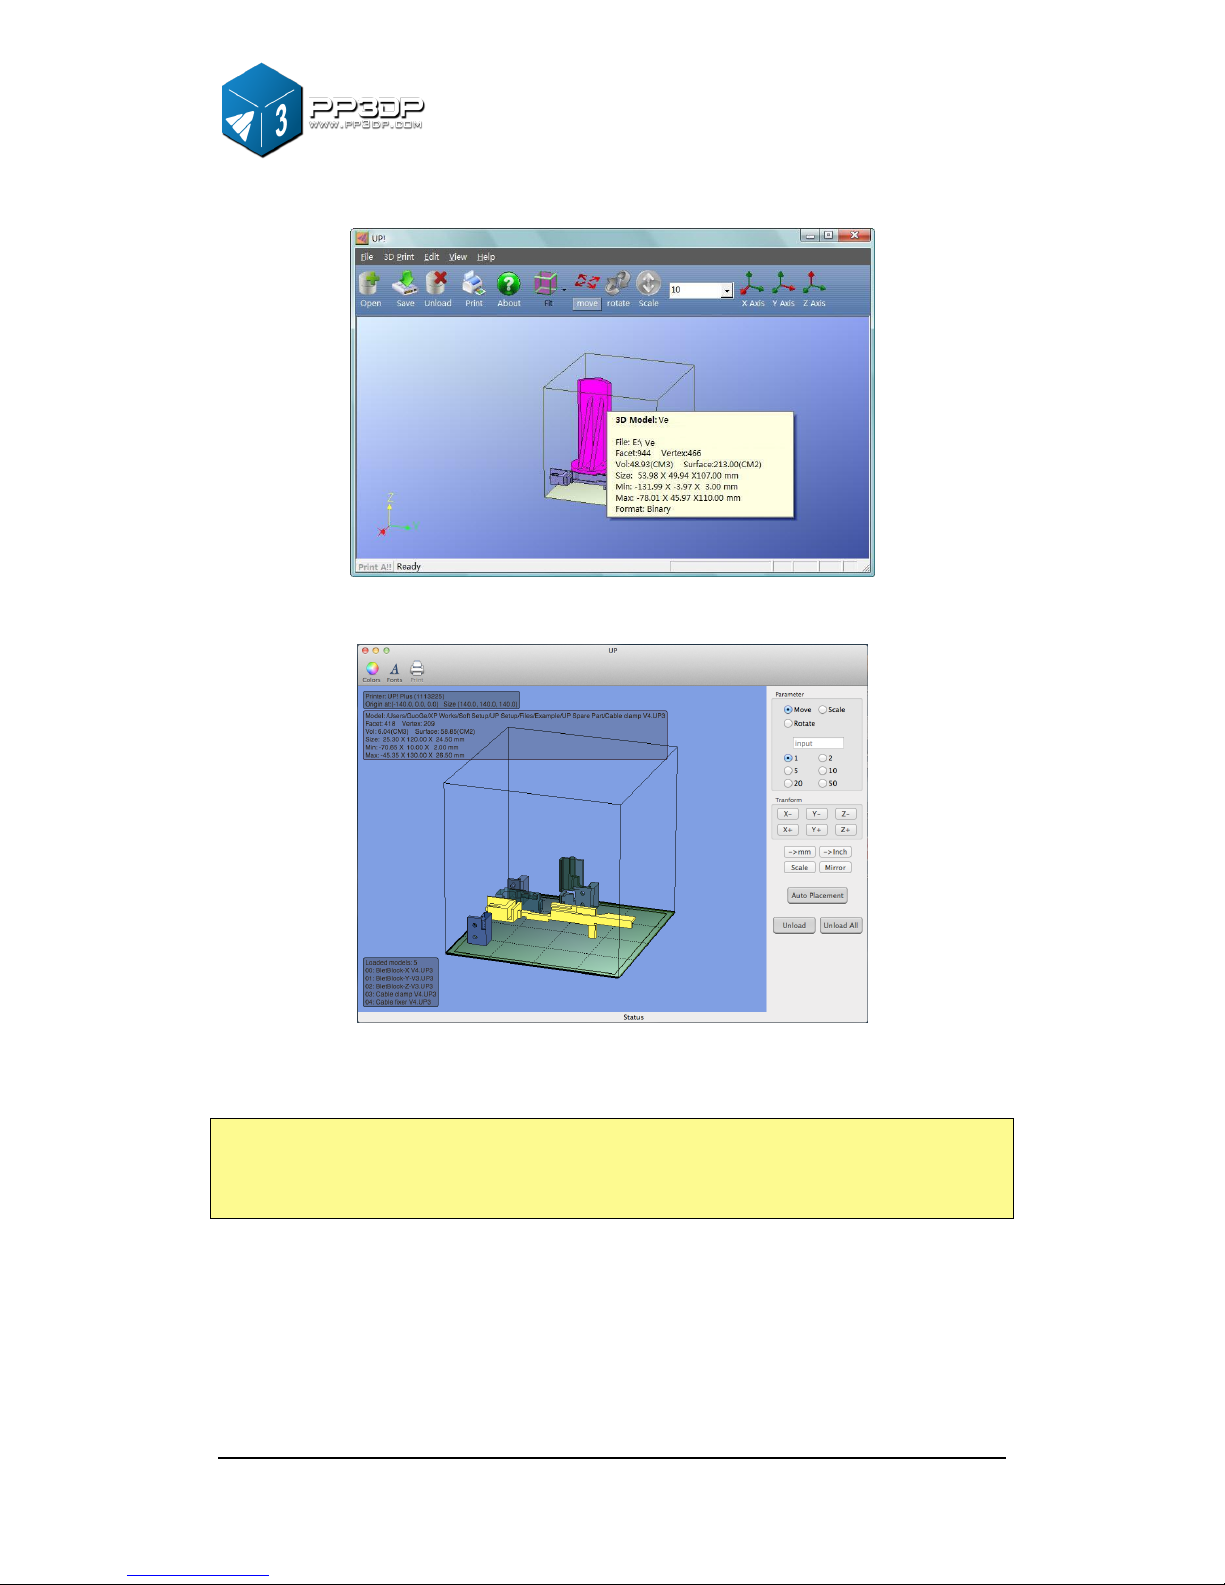
Move the mouse onto the model, and click the left mouse button. Model
information will be presented in a floating window, as shown below:
3. Operation
UP! mini 3D Printer User Manual 17
(Windows version)
(Mac version)
Figure 3-11 UP! Program Model Screen
TIP: You can open several models and print them all at the same time. Just
repeat the open model procedure for each model you want to add. See the
“Placing models on the build platform” section for more information.
Unloading a model: click the left mouse button on the model to select it, and
then click “Unload” on the toolbar, or click the right mouse button while over the
model and a context menu will appear. Choose unload the model or unload all
models, if you have more than one model loaded and want to remove all of
them.
 Loading...