

Page 1
Safety, Operation, and Maintenance Manual for
SELF-CONTAINED CARPET EXTRACTORS
Models PFX3S, PFX7S, PFX9S
Read and follow all instructions,
warnings and cautions before
using this self-contained extractor!
X
8470
A Tacony Company
3101 Wichita Court • Fort Worth,TX 76140
Page 2

SAVE THESE INSTRUCTIONS
READ ALL INSTRUCTIONS BEFORE USING!
CARE OF THIS SELF-CONTAINED EXTRACTOR
T
reat this unit as you would any other high grade preci-
sion made product. Dropping, unreasonable bumping
across thresholds and other misuses may result in a
damaged unit which will not be covered by warranty. When
not in use, power cord should be wrapped around handle for
storage.
R
ead this manual completely before operating this
extractor. It is important to follow instructions in this
manual to prevent the possibility of injury or damage to the
user and/or machine.
C
ongratulations on purchasing a Powr-Flite® self-
contained extractor. Given proper care, this product will
afford you many years of trouble-free operation. All parts
have passed rigid quality control standards before being
assembled to produce the finished product.
Prior to packaging, the extractor is again inspected for
assurance of flawless assembly. This unit is protectively
packed to prevent damage in shipment. We recommend
removal and inspection of unit upon delivery for possible
damage in transit. Only a visual examination will reveal
damage that may have occurred.
If damage is discovered, immediately notify the transportation company that delivered your extractor. As a shipper, we
are unable to report claims for concealed damage.
You must originate any claim within 5 days of delivery.
This manual is for your protection and information.
PLEASE READ CAREFULLY since failure to follow precautions could result in discomfort or injury. When using
electrical equipment, basic safety precautions should always
be followed.
THANK
YOU FOR CHOOSING POWR-FLITE®!
TABLE OF CONTENTS
INTRODUCTION . . . . . . . . . . . . . . . . . . . . . . . . . . 2
SAFETY PRECAUTIONS (English) . . . . . . . . . . . . . . 3
SAFETY PRECAUTIONS (Spanish) (French) . . . . . . . 4
GROUNDING INSTRUCTIONS. . . . . . . . . . . . . . . . . . 5
GENERAL INSTRUCTIONS . . . . . . . . . . . . . . . . . . 6,7
Machine Components . . . . . . . . . . . . . . . . . 6
Machine Operation . . . . . . . . . . . . . . . . . . . 6
Pre-operation Checks . . . . . . . . . . . . . . . . . 6
Cleaning Procedure (accessories) . . . . . . . . . 7
Storage . . . . . . . . . . . . . . . . . . . . . . . . . . . 7
Routine Care & Maintenance . . . . . . . . . . . . 7
ILLUSTRATED PARTS LIST . . . . . . . . . . . . . . . . 8-11
MAINTENANCE GUIDE . . . . . . . . . . . . . . . . . . . . . 12
2
Page 3
SAVE THESE INSTRUCTIONS
3
IMPORTANT SAFETY PRECAUTIONSIMPORTANT SAFETY PRECAUTIONS
WWAARRNNIINNGG!!:: To reduce the risk of fire, electric shock, or injury
When using this self contained extractor, basic precautions
should always be followed, including the following:
1) DO NOT leave unit when plugged in. Unplug from
outlet when not in use and before servicing.
2) DO NOT allow unit to be used as a toy. Close
attention is necessary when used around or near
children.
3) Use only as described in this manual. Use only
manufacturer’s recommended attachments.
4) DO NOT use with damaged cord or plug. If unit is
not working properly because it has been dropped,
dropped into water, left outdoors, or damaged in any
way, contact a service center of Powr-Flite®.
5) DO NOT pull or carry by cord, use cord as a handle,
close door on cord, or pull cord around sharp edges
or corners. DO NOT run unit over cord. Keep cord
away from heated surfaces.
6) DO NOT unplug by pulling on cord. To unplug, grasp
the plug, not the cord.
7) DO NOT handle plug or appliance with wet hands.
8) DO NOT put any objects into openings. DO NOT use
with any opening blocked: keep free of dust, lint,
hair, or anything that may reduce air flow.
9) Keep hair, loose clothing, fingers, and all parts of
body away from openings and moving parts.
10) DO NOT pick up anything that is smoking or
burning such as cigarettes, matches, or hot ashes.
11) DO NOT use to pick up hazardous chemicals.
12) Turn off all controls before unplugging.
13) Turn unit off immediately if foam or liquid comes from
machine exhaust. Empy & clean out recovery (dirty)
tank and use defoamer to correct the problem.
14) DO NOT use to pick up flammable or combustible
liquids such as gasoline or use in areas where they
may be present.
15) DO NOT use where oxygen or anesthetics are used.
16) DO NOT use an extension cord unless absolutely
necessary. If an extension cord is used, then wire
size must be #14 or larger and should not exceed
25 ft. in length. Extension cord must be a three-wire
type to insure grounding protection.
17) Replace damaged or worn parts immediately with
genuine original equipment parts to maintain safety.
18) This unit must be connected to a properly grounded
outlet only. See grounding instruction.
WARNING
To avoid fire, DO NOT use
with a flammable or com-
bustible liquid to clean
floor.
WARNING
To avoid electric
shock, DO NOT expose
to rain.
Store Indoors.
Page 4
4
NE PAS utiliser
l’appareil avec des
d’éviter du feu.
en aspirant afin
liquides inflammables
NE PAS utiliser l’appareil lorsqu’une ouverture est
bloquée. S’assurer que de la poussière, de la
peluche, des cheveux ou d’autres matières ne
réduisent pas le débit d’air.
doigts et toutes les parties du corps à l’écar t des
ouvertures et des pièces mobiles.
dégagent de la fumée, comme des cigarettes, des
allumettes oiu des cendres chaudes.
produits chimiques dangereux.
avant dé debrancher l’appareil.
nettoyage sort de l’appareil. Videz et nettoyez le
réservoir interim et admettez le liquide de nulle
10) N’INSÉRER aucen objet dans les ouver tures.
à l’intérieur.
Ne pas exposer
NE PAS aspire de
IMPORTANTES MESURES DE SÉCURITÉIMPORTANTES MESURES DE SÉCURITÉ
electrique ou de blessure:
AAVVEERRTTIISSSSMMEENNTT!!:: Pour reduire les risques d’incendie,de choc
maitiéres humides.
est branché. Débrancher lorsque l’appareil n’est pas
POUR VO TRE SÉCURITÉ
1) NE PAS laisser l’appareil sans surveillance lorsqu’il
11) Maintenir les cheveux, les vêtements amples, le
utilisse ét avant l’entretien.
l’appareil. Une attention particulière est nécessaire
lorsque l’appareil est utilisé par des enfants ou à
proximité de ces derniers.
2) NE PAS per mettre aux enfants de jouer avec
12) NE PAS aspirer de matières en combusion ou qui
13) NE PAS utiliser l’aspirateur pour soulever les
14) Mettre toutes les commandes à la position ARRÊT
15) Couper le courant immèdiatement si le liquide de
accessoires recommandés par le fabricant.
magé. Retourner l’appareil à un atelier de réparation
s’il ne fonctionne pas bien, s’il est tombé ou s’il a été
endommagé, oublié à l’extérieur ou immergé.
cordon. NE PAS utiliser le cordon comme une
poignée, le coincer dans l’embrasure d’une porte ou
l’appuyer contre des arêtes vives ou des coins.
NE PAS faire rouler l’appareil sur le cordon. Garder
3) N’utiliser que conformément à cette notice avec les
4) NE PAS utiliser si le cordon ou la fiche est endom-
5) NE PAS tirer, soulever ou traîner l’appareil par le
le cordon à l’écarte des surfaces chaudes.
écume.
6) NE PAS débrancher en tirant sur le cordon. Tirer
bustibles, comme de l’essence, et ne pas faire
fonctionner dans des endroits où peuvent se trouver
de tels liquides.
16) NE PAS aspirer des liquides inflammables ou com-
plutôt la fiche.
mains sont humides.
7) NE PAS toucher la fiche ou l’appareil lorsque vos
la terre. Voir les instructions visant la mise à la terre.
17) Replacez taré parties vite à maintenir sécurité.
18) Ne brancher qu’à une prise de courant avec mise à
pas de capacité sufisante pour transporter le courant.
8) NE PAS utiliser des rallonges ou des prises qui n’ont
9) NE PAS utiliser où l’oxygène ou les gazes sont utilisès.
AAVVEERRTTIISSSSMMEENNTT!!
Un conducteur de terre mal raccordé peut entraîner un
INSTRUCTIONS VISANT LA MISE À LA TERRE
risque de choc électrique. Consulter un électricien ou
un technicien d’entretien qualifié si vous n’êtes pas
certain que la prise soit correctement mise à lat terre.
Ne pas modifier la fiche fournie avec l’appareil-se elle
ne peur être inséreé dans la prise, faire installer une
prise adéquate par un electricien qualifié.
NO utilize la unidad
MEDIDAS DE SEGURIDADMEDIDAS DE SEGURIDAD
NO SE exponga a la lluvia
PPEELLIIGGRROO!!:: Para reducar el riesgo de incendio, descarga electrica o daño:
como gasolina.
para levantar liquidos
flamables o combustibles
11) No use unidad a recoje materiales peligrosas.
a guarde bajo techo.
superficies humedas.
Una sacudida electrica
puede suceder sí se usa en
1) NO DEJE la aspiradora enchufada. Desconectela
PARA SU SEGURIDAD
cuando no la use y antes de darle servicio.
liquidos saliendo da bajo de la unidad. Sí esto para
limpia el tanqué y también usa un chemico de
espuma.
flamables o combustibles como gasolina;o use
en areas dande se encuentren estos liquidos.
immediamente para mentener la seguridad.
12) Apajue todos los controles antes de desconectar.
13) Paga las unidad immediamente si hay espuma o
attencion cuando se use cerca de niños.
2) NO PERMITE que se use como juguete. Ponga
14) NO UTILIZE la unidad para levantar liquidos
15) Replacen los partes gastadas o dañadas
y con accesorios recomendados por el fabricante.
ha sido golpeada, mojada, o dañada enalgun modo
llame al centro de servicio o Powr-Flite®.
o lo estire sobre objetos filosos. NO USE la unidad
sobre el cable.
3) USE SE SOLAMENTE de acuerdo a las instrucciones
4) NO USE con el cable o clavija dañados. Si la unidad
5) NO JALE o carque del cable, no machuque el cable
correctamente aterrezado solamente. Vea los
instrcciones de tierra. Sí su aspiradora/soplador
tiene un enchufe para una boquilla de potencia,
apaguela siempre antes de conector o
desconector la goquilla.
empleados.
16) Esta unidad debe ser conectada a un enchufe
jale de la clavija no del cable.
6) NO DESENCHUFE jalando el cable. Para hacerlo
17) NO USE donde oxigeno o anestesicos sean
18) NO USE extensión electrica mas que cuando sea
mojadas.
está tapada. Mantenga limpia de polvo, peluza o
cualquier obstrucción.
7) NO TOME la clavija o el aparato con las manos
8) NO TAPE objetos en las ventilas. NO USE si alguna
absolutamente necesario. Si usa extensión, el cable
debe de ser calibre #14 o mayor y no debe exceder
50 pies de longitud. El cable extensión debe ser de
3 polos para asegurar protection de tierra.
cuerpo lejos de las aberturas y partes móviles.
como cigarros, cerillos o cenizas calientes.
¡¡PPEELLIIGGRROO!!
9) Mantenga el pelo, ropa suelta manos y partes del
10) NUNCA aspire objetos que mandose o humeando
Una coneccion incorrecta de tierra puede resultar en
INSTRUCCÍONES DE TIERRA
una descarga electrica. Consulte con un electricista
calificado o persona de servicio si tiene duda acerca
del enchufe y su tierra. No modifique el enchufe de
las unidad. Si no encaja en el enchufe, haga instalar
un enchufe apropiado por un electricista calificado.
Page 5

SAVE THESE INSTRUCTIONS
5
GROUNDING INSTRUCTIONSGROUNDING INSTRUCTIONS
DANGER: Improper use of the grounding plug can result in a risk of electric shock.
GROUNDING INSTRUCTIONS
GROUNDING METHODS
T
his self-contained extractor must be properly grounded. If
it should malfunction or breakdown, grounding provides a
path of least resistance for electrical current to reduce the risk
of electric shock. This machine is equipped with a cord having an equipment-grounding conductor and grounding plug.
The plug must be insertedinto an appropriate outlet that is
properly installed and grounded in accordance with all local
codes and ordinances. If repair or replacement of the cord or
plug is necessary, DO NOT connect the grounding wire to
either flat blade terminal. The wire with insulation having an
outer surface that is green with or without stripes is the
grounding wire.
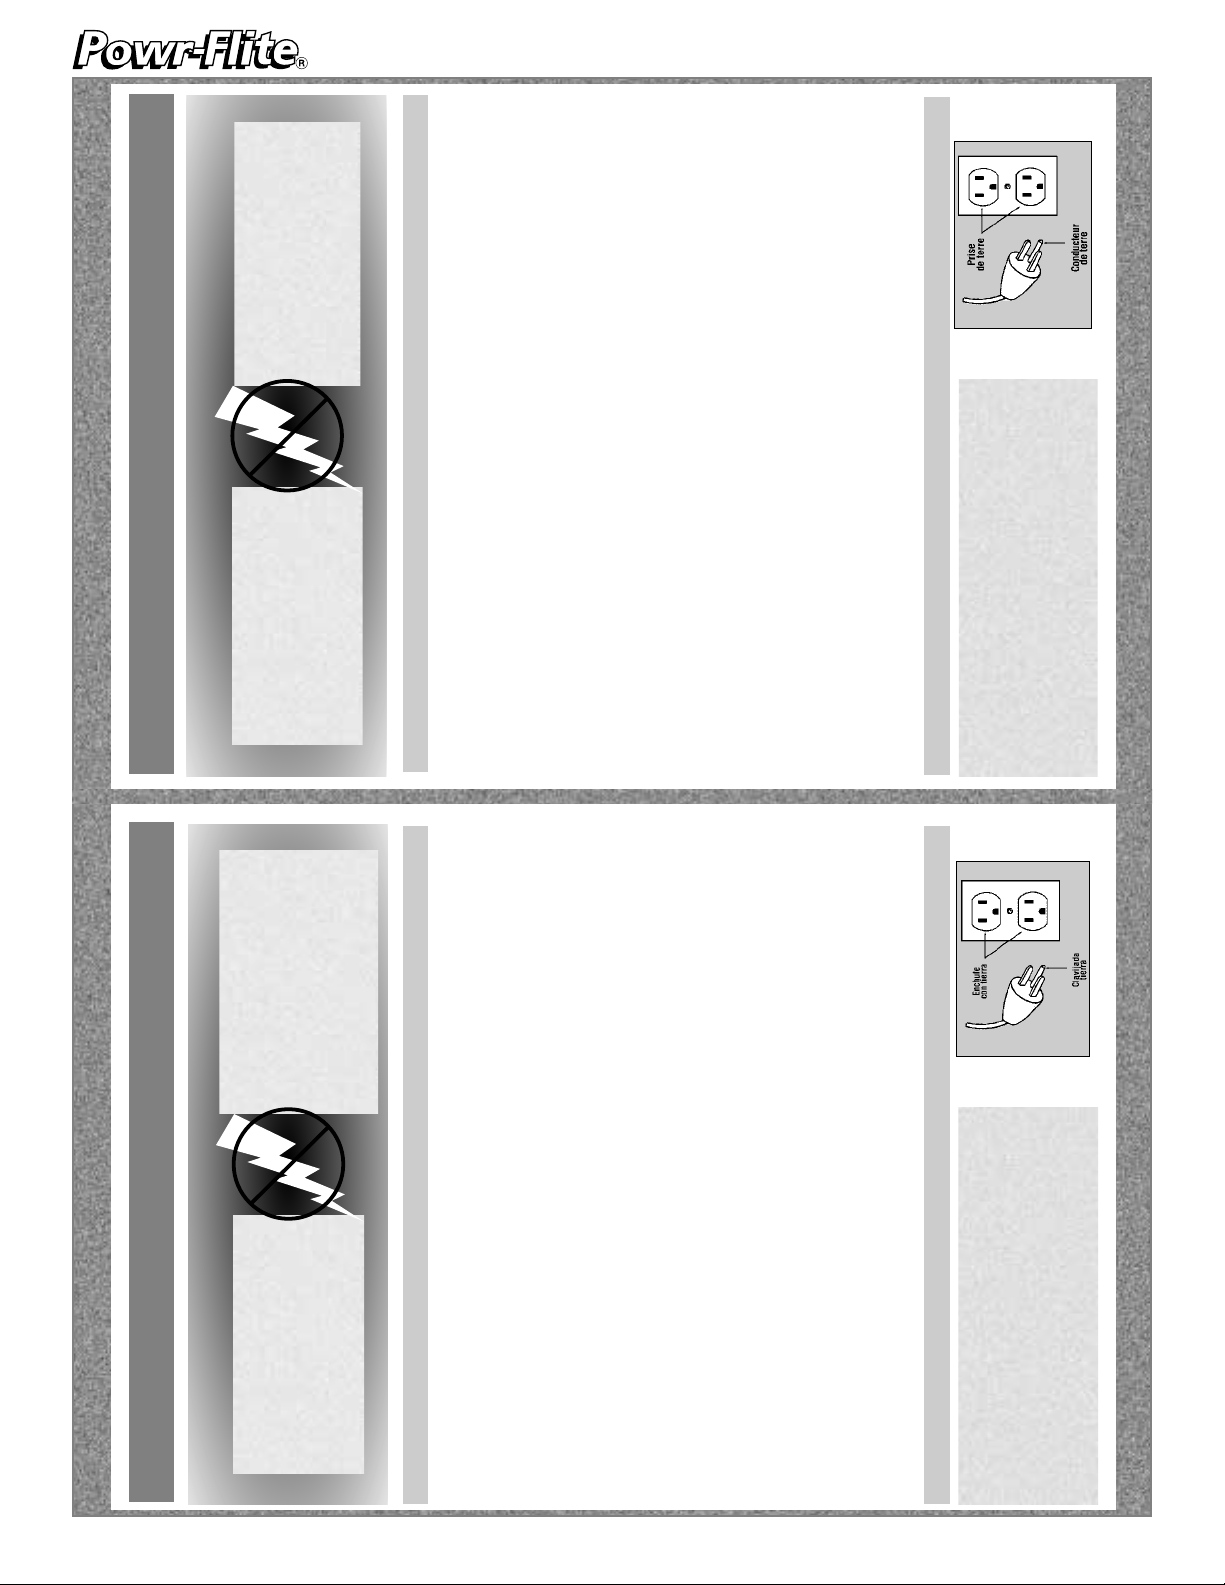
T
his unit is for use on a nominal 120 volt circuit, and has
a grounded plug that looks like the plug illustrated in
(Fig. A). A temporary adapter that looks like the adapter
illustrated in (Fig. B&C) may be used to connect the plug to
a 2-pole receptacle as shown in (Fig. B) if a properly
grounded outlet is not available.
T
he temporary adapter should be used only until a prop-
erly grounded outlet (Fig. A) can be installed by a qualified electrician. The green color rigid ear, lug, or the like
extending from the adapter must be connected to a permanent ground such as a properly grounded outlet box cover.
Whenever the adapter is used, it must be held in place by a
metal screw.
NOTE: In Canada, the use of a temporary adapter is not permitted
by the Canadian Electrical Code.
WWAARRNNIINNGG!!
Improper connection of the equipment-grounding conductor can result in
a risk of electric shock. Check with a qualified electrician or service
person if you are in doubt as to whether the outlet is properly grounded.
DO NOT modify the plug provided with the appliance. If it will not fit the
outlet, have a proper outlet installed by a qualified electrician.
Page 6

SAVE THESE INSTRUCTIONS
6
GENERAL INSTRUCTIONSGENERAL INSTRUCTIONS
1) Move the furniture around to give a clear working
area. Cover bottoms of furniture legs where possible.
(aluminum foil or foam blocks are ideal)
Pin up curtains and drapes.
2) Have a suitable size clean bucket available for filling
the solution tank with warm water. CAUTION: - Do
not add the cleaning agent at this stage
3) Adjust the machine brush operating depth with the
knob on the back of models PFX 7S & 9S (FIG. 1A)
and the front of PFX4S (FIG. 1B) to suit the carpet
height. NOTE: The raised counter clockwise position
of the knob should be used when the machine is being
stored. NOTE: Excess brush contact may overload
motor circuit breaker or reduce wet extraction quality.
4) Remove the transparent cover and remove the recovery tank below cover. .(FIG. 1A)
5) Measure carpet cleaning solution such as Powr-Flite’s
Kold-Powr® per manufacturers recommended ratio
into the clean water tank and fill with hot water from a
very clean bucket. DO NOT use the waste tank to fill
the solution tank as debris could damage the pump or
block the jet. WARNING: DO NOT exceed 150° (65°
C)
6) Replace recovery (dirty water) tank above solution
tank. (FIG. 1A) Add defoamer solution per
manufacturer’s instructions as needed. 2 oz.
Powr-Flite Powr-Defoamer
®
7) Replace the transparent cover. Pull back handle to
lock cover into place. (FIG. 1A) Treat heavily soiled
areas by using traffic lane cleaner such as Powr-Flite’s
Fast Lane®.
PRE-OPERATION INSTRUCTIONS
OPERATION OF SELF-CONTAINED CARPET CLEANER
NNOOTTEE:: (color fastness) Before using carpet cleaning
chemicals, test on an inconspicuous part of the carpet for color
fastness. Place the solution on a small piece of clean white
material or tissue, then rub the carpet vigorously. Excessive
amounts of dye showing on the material would indicate that the
1) Plug main power cable (FIG. 1A) into outlet. WARNING: This machine must be properly grounded.
See grounding instructions.
2) Press the master switch to the on position. Then press the vacuum switch on and the accessory/brush switch to the
right. (FIG 1C)
3) Press and hold the solution switch (FIG 1C) to apply the cleaning solution. Pull the machine backwards at the same
time to clean the carpet. Stop the solution spray about 12” (30cm) before the end so all of the solution is vacuumed
up. Slightly overlap the next cleaning pass to prevent streaking. Atwo (2) wet pass maximum is recommended to
avoid overwetting and one dry pass without solution spray will aid in drying time. After a few passes, check the
waste tank to see that no foam is present. Add extra defoamer if necessary.
4) Make sure to empty the recovery (top) tank (FIG. 1A) when it is approximately 3/4 full. Do not refill the solution tank
without emptying all the contents of the recovery tank first.
BRUSH HEIGHT
ADJUSTMENT
KNOB - PFX7S & 9S
BRUSH HEIGHT
ADJUSTMENT
KNOB - PFX4S
RECOVERY
(WASTE)
TANK
SOLUTION
(CLEAN WATER)
TANK
CARRYING
HANDLE
TANK COVER
& HANDLE
SOLUTION
SWITCH
CIRCUIT
BREAKER
MASTER
SWITCH
VACUUM
SWITCH
ACCESSORY / BRUSH
SWITCH
MAIN
POWER
CABLE
POWER
CORD
FIG. 1A
PFX7S shown
FIG. 1C
FIG. 1B
Page 7

SAVE THESE INSTRUCTIONS
7
DAILY / INTERVAL
1) The filter in the solution tank (FIG 3) should be kept clean. It can be removed if
necessary. A damaged filter should be replaced otherwise blockages and/or
damage to the pump head and spray jet can occur.
2) Check the spray jet (FIG 4) for blockage and a uniform spray pattern .
Remove jet and blow through to clean. Do not use a pin as this may cause
damage to the jet.
3) Check and remove any debris or lint build-up from the vacuum head, brush,
and brush housing.
4) Always wash out the tanks with clean water after use. To do this, pour clean
water into the solution tank and spray through spray tip to clear chemical
residue from the pump, lines, and spray tip. Allow the vacuum to run for a few
minutes after use to aid the machine in drying out and to help prevent bacteria
and odors.
WEEKLY
1) Inspect hoses (unseen blockages sometimes occur), hose cuffs, and the rubber seal on the recovery tank lid. The
main cable, plug, and switches should also be examined for damage.
NOTE: It is advisable to store the unit with the recovery tank lid removed.
CAUTION: THIS UNIT MUST BE PROTECTED FROM FREEZING. Damage from freezing could cause machine to malfunction.
GENERAL INSTRUCTIONSGENERAL INSTRUCTIONS
ROUTINE MAINTENANCE INSTRUCTIONSROUTINE MAINTENANCE INSTRUCTIONS
STORAGE
WHEN CLEANING IS FINISHED:
1) Connect the drain hose (clipped to the handle) to the solution fitting at the
back of the machine and place the other end into the waste tank, turn on
the accessory switch. (FIG 1C) This will pump the remaining solution into
the waste tank for easy drainage.
2) To disconnect the solution hose, push in on the ring of the solution fitting.
(FIG 2) Switch off the machine, remove power plug from the socket, and
empty the waste tank. Leave waste tank open when storing.
3) Raise the brush to storage position.
ACCESSORIES / TOOLS (OPTIONAL)
For upholstery cleaning and inaccessible areas. Remove the white cuff from the transparent cover (FIG 1A) and connect the accessory vacuum hose in its place. Connect the accessory solution hose to the solution fitting at the back of
the machine by pushing back the locking ring to fit. (FIG 2) Then press vacuum switch & press the accessory/brush
switch to the left (FIG 1C)and the wand or upholstery tool can now be used.
FIG. 2
FIG. 3
FIG. 4
SOLUTION
SPRAY
JET
Page 8

8
ILLUSTRATED PARTS LISTILLUSTRATED PARTS LIST
PFX7S BRUSH, TANK & CHASSIS
ref # order # description qty.
1 07409 Lid, clear 1
2 07340 Waste tank 1
3 07334 Solution tank 1
3A PX10 Dump valve 1
4 SC30 Pump head 1
5 SC29 Motor for brush and pump 1
6 07091 Pulley, driver 1
7 07911 Stub axle assembly 1
8 07081 Pulley, brush drive 1
9 08378 Brush 1
10 SC1 Bearing and cover assembly 1
11 SC22 Pulley guard 1
12 07076 Bracket 2
13 07173 Front lift handle 1
14 07750 Chassis assembly 1
15 08459 Vacuum shoe 1
16 08404 Link, chassis to shoe 1
17 07656 Cover, bearing assembly 1
ref # order # description qty.
18 07223 Front link assembly 1
19 07456 Wheel cap 2
20 SC26 Wheel, PFX9S only 2
21 07105 Axle 1
22 07224 Bar adjuster assembly 1
23 Bush 1
24 07469 Knob 1
25 Bush 1
26 Bracket 1
27 Washer 1
28 7450 Lower handle 1
29 7507 Spacer, PFX7S only 2
30 07032 Solenoid 1
31A 1928 Vac motor, PFX7S & 9S 1
TANK ASSEMBLY • PFX4S shown
ref # order # description qty.
1 SC15 Lid, clear, PFX4S, 7S & 9S 1
2 07028 Screw, M6, hex head., x20 - plated 4
3 31913 Washer, M6, flat - plated 4
4 07305 Handle for waste tank 1
5 07434 Hose, vacuum - grey 1
6 07433 Hose, recovery - white 1
7 SC16 Gasket for lid, 1
8 X8437 Instruction labels 1
9 07601 Waste tank, PFX4S 1
10 07437 Solution tank, PFX4S 1
11 SC20 Nylon tube, 8mm, I.D. - red 1
12 Back nut for bulkhead fitting 1
13 07017 Elbow, plastic, 2
14 SC14 Filter, solution tank, 1
15 07019 Bulkhead fitting 1
16 10018 Sealing washer, bulkhead 1
17 X8438 SHP label 1
18 X8436 Warning label 1
19 X8400 Powr-Flite®barricade label 1
*NOTE - All tank
parts except for
solution tank and
waste tank are
interchangeable
on all models.
Page 9

VAC MOTOR & SILENCER PFX9S
ref # order # description qty.
1PX6Coupling, quick connect, female 1
2 63703 Washer, brass 2
5 07031 Adapter stem, quick fit 1
6 65022 Spacer, plastic 4
7 8408 Silencer 1
8 Silencer foam 1
9 08410 Tube transfer, vac motor 1
11 08409 External baffle 1
12 Silencer foam 1
13 1928 Vacuum Motor 1
14 32910 Nut, full M6 2
15 31960 Washer spring, M6 2
16 31913 Washer, plain M6 2
17 07514 Gasket 1
18 31913 Washer, plain M6 2
19 30939 Bolt, hex HD, M6 x 90 2
20 33063 Hose clip 1
CHASSIS ASSEMBLY PFX9S
ref # order # description qty.
1 08000 Chassis body 1
2 08488 Cover, drive belt assembly 4
3 07076 Bracket, tank mount 1
5 07003 Screw, M6 hex HD x 10 1
6 31960 Washer, M6 spring 1
7 08005 Screw, M6 x 10 C/SK slot HD 1
9 07096 Grommet, chassis 1
10 08105 Axle assembly, less wheel 2
11 30911 Screw, M6 x 16 1
12 31960 Washer, M6 spring 1
13 32910 Nut, M6 hexagon x 5mm 1
14 SC26 Wheel 1
15 07007 Washer, flat 23 x 13 x 1.5 1
16 07036 Circlip 1
17 FD17 Wheel embellisher 1
18 Screw, self tap 1
19 08409 External baffle for silencer 1
20 Foam silencer 1
23 65004 Screw, special shoulder 6mm 1
24 08403 Link, vac shoe to brush casting 1
25 07044 Washer, M6 plain 1
27 08459 Casting, vacuum head 1
28 91092 Warning label, wand head 1
29 07037 Nut, M8 full 1
31 08405 Bracket, tension vac shoe 1
32 07230 Screw, M5 1
33 07447 Nut, M5 1
34 07046 Washer, M5 Shakeproof 1
35 08406 Spring, vac shoe tension 1
36 01052 Washer, M8 1
39 08069 Knob 1
40 08472 Stud, threaded vac shoe 1
41 07523 Hose to solenoid 1
BRUSH DRIVE ASSEMBLY PFX9S
ref # order # description qty.
1 SC4 Brush belt 1
2 Grub screw for pulley 1
3 SC5 Pulley brush roller 1
4 SC1 Brush bearing 2
5 07047 Washer, M5 flat 8
6 07049 Screw, M5 pan head 6
7 SC3 Brush for PFX7S & 9S 1
8 08086 Housing for brush 1
9 SC6 Motor pulley 1
10 SC7 Clutch 1
11 SC22 Pulley guard 2
9
Page 10

10
HANDLE & MOTOR ASSEMBLY
PFX4S, PFX7S & PFX9S
ref # order # description qty.
1 SC24 Handle, upper 1
2 SC20 Handle cover, lower 1
3 50027 Insulation 2
4 SC10 Spray switch 1
6 07447 Nut, M5 1
7 07047 Washer, plain, M5 2
8 23046 Terminal block, L.E.N. 1
9 22027 Back nut for strain relief cable
11 22026 Strain relief assembly 1
14 M1400C Cable, 50’, fits PFX7S, 9S 1
M1400E Cable, 30’, fits PFX4S 1
15 07047 Washer, plain, M5 1
16 07447 Nut, M5 1
17 07447 Nut, M5 1
18 07047 Washer, M5 1
19 07202 Wiring harness 1
21 Nut, M8, (nyloc) 1
22 Washer, M8 1
23 30934 Bolt, M6 x 90 2
24 31913 washer, plain, M6 1
25 07450 Tube, lower 1
27 07054 Washer spring, M6 2
28 31913 Washer, plain, M6 2
29 31960 Nut, M6 1
30 07207 Wiring harness 1
31 031960 Nut, M6 1
32 07202 Wiring harness 1
33 22027 Backnut for strain relief 1
ref # order # description qty.
34 22026 strain relief assembly 1
36 07451 Disc handle adjust mechanism 1
37 07550 Brass spacer for handle 2
38 Washer, M8 1
39 Bolt, M8 1
40 07402 Cover handle, top 1
41 SC11 Breaker, 120V, 15A, circuit 1
42 Nut for breaker 1
43 Screw, M5 x 40 2
44 07047 Washer, plain, M5 1
45 SC9 Switch, two position 1
46 Cable tie clamp 1
47 30916 Self-tap screw 2
48 Screw, M5 x 70 1
49 X8034 Rectifier bridge, 35A 1
50 SC8 ON/OFF switch 2
52 22026 Cable assembly & strain relief 1
58 07094 Motor 120V, pump/brush
58A 07078 Replacement carbon brushes (not shown) 1
59 Self-tap screw 1
60 Diaphragm 2
61 25229 Replacement kit
63 25216 Poppet & spring 1
64 25213 Check valve for bypass head 1
66 25215 Plug for bypass HD 1
67 25230 Housing bypass pump 1
68 30952 Screw, M4 2
69 25239 Screw 4
70 25228 Cover assembly 1
71 25240 ‘O’ cam assembly 1
CHASSIS & BASE ASSEM
PFX4S & PFX7S
ref # order # description
1 07096 Grommet, chassis to vacu
2 33063 Clip for hose 2”
3 07433 Hose for vacuum - grey
4 30934 Bolt, hex head, 80mm
5 07517 Spacer, ABS vac motor
6 31913 Washer, plain, M6
7 31960 Washer, M6, spring, plate
8 32910 Nut, M6, full, plated
9 1928 Motor, vacuum, 120V, PFX
1937 Motor, vacuum, 120V, PFX
10 07003 Screw, M6, hex head, x10
11 30911 Screw, M6, hex head, x16
12 07076 Bracket, tank mounting
13 31913 Washer, plain, M6
14 07100 Chassis, machine, PFX4S
7750 Chassis, machine, PFX7S
15 Rating label
16 07490 Spacer, axle, PFX4S &7S
17 SC25 Wheel for PFX4S
18 31913 Washer, plain, M6
19 07036 Circlip for wheel retention
20 Wheel embellisher (comes
21 07105 Axle for PFX4S & 7S
22 07966 Label, brush height
23 30911 Screw, M6, hex head, x16
24 31960 Washer, M6, spring
25 07096 Grommet, chassis to vac
26 07173 Handle, front lift, PFX4S &
Page 11

qty.
um 1
4
2
2
2
s4
2
7S & 9S 1
4S 1
plated 4
4
4
8
1
1
1
2
2
2
2
w/ wheel) 2
1
1
plated 6
2
ose 1
7S 1
ILLUSTRATED PARTS LISTILLUSTRATED PARTS LIST
CHASSIS & BRUSH ASSEMBLY
PFX4S & PFX7S
ref # order # description qty.
1 07096 Grommet, chassis to vac 1
2 07433 Hose, vacuum shoe 1
3 07058 Shoulder bolt, M6 2
5 07459 Vac shoe 1
7 31913 Washer, plain, M6 2
8 32910 Hex nut, M6 x 5mm 1
9 07169 Height adjustment knob 1
10 07036 Circlip 1
11 SC6 Pulley, motor drive 1
12 07049 Screw, MB pan head, pozi x 101g 4
13 07047 Washer, M5, plain 4
14 30950 Screw, M4, pan head x 10 1
15 PX6 Quick connect, female 1
16 SC17 Tee assembly 1
SC18 Tee piece adapter 1
17 SC19 Solenoid, 120V 1
18 Solenoid wiring connector 1
19 Coil for solenoid 1
20 31912 Washer, M4, plain 1
ref # order # description qty.
21 30902 Nut, M4, (nyloc style) 1
22 07017 Elbow, plastic 2
23 07209 Screw, M6 3
24 31960 Washer, M6, spring 3
25 65064 Hose, solution tank, black 1
26 65063 O Clip 1
27 Nut for jet assembly 1
28 30916 Screw pan head, self tap, no.6 2
29 07487 Retainer jet assembly 1
30 07422 Jet assembly 1
31 07084 Screw, M5, pan head, pozi x 8 6
32 07047 Washer, M5, flat 6
33 SC2 Brush & axle assembly, PFX4S 1
SC3 Brush & axle assembly, PFX7S & 9S 1
34 07066 Grubscrew, M4, socket 1
35 SC5 Pulley, brush 1
36 07486 Brush housing 1
37 SC1 Bearing housing assembly 2
38 SC29 Brush motor 1
39 SC7 Bearing clutch roller 1
40 SC8 Belt for brush drive 1
41 SC21 Guard for pulley, PFX4S 1
42 7458 Bolt shoulder 2
SC27 Zematic varistor (not shown) 1
SC30 Pump head (not shown) 1
11
Page 12

SAVE THESE INSTRUCTIONS
12
MAINTENANCE GUIDEMAINTENANCE GUIDE
WARRANTY
The manufacturer warrants to the original purchaser that products manufactured are free
from defects of workmanship and material, provided such goods are installed, operated and
maintained in accordance with written manuals or other instructions for a period of 1 year
from date of purchase on parts and workmanship. In case you as our customer, meet any
trouble with your machine, contact your Powr-Flite® representative who will be happy to be
of service to you and will take care of the warranty settlement.
NOTE: Alterations and changes made to the machine without written approval of the
manufacturer and use of unapproved spare parts will not be covered by warranty.
Motors not running
CAUSE: SOLUTION:
1) Power not reaching main switch. 1) Check power supply. Check fuses/circuit
breaker. Contact service center.
2) Defective power cord. 2) Contact manufacturer or service center.
3) Faulty switches or wiring. 3) Contact manufacturer or service center.
4) Blown fuse or tripped circuit breaker 4) Reset circuit breaker according to operating
instructions or replace fuse if qualified..
5) Problem with brushes, field windings,
or armatures. (vacuum or brush motor) 5) Repair or replace defective part.
Loss of vacuum suction
CAUSE: SOLUTION:
1) Vacuum head blocked. 1) Visually inspect and clear blockage.
2) Hoses blocked. 2) Visually inspect and clear blockage.
3) Recovery tank not sealed properly. 3) Check tank for damage or adjust
for proper fit.
Brush not functioning properly
CAUSE: SOLUTION:
1) Belt broken. 1) Replace belt.
2) Brush jammed. 2) Visually inspect and clear blockage.
3) Clutch bearing seized. 3) Contact manufacturer or service center.
Spray jet not functioning properly
CAUSE: SOLUTION:
1) Jet blocked 1) Visually inspect and clean according to
operating instructions.
2) Solution filter blocked. 2) Visually inspect and clean according to
operating instructions.
3) Pump head, valves or diaphram blocked 3) Contact manufacturer or service center.
or damaged.
4) Solenoid valve inoperative 4) Contact manufacturer or service center.
5
YEARS on
One Piece
Housing
2
YEARS on
Brush Motor
1
YEAR on
Parts & Our
Workmanship
 Loading...