


MODEL 8x
DOCUMENT BINDER
Service Manual

COPYRIGHT INFORMATION
Copyright Information
This document contains proprietary and confidential information of Powis Parker Incorporated (“Powis Parker”).
Copyright Powis Parker Incorporated 2004
All Rights Reserved.
No part of this document may be photocopied, reproduced in any form, or translated into another language without prior written
consent of Powis Parker, except as allowed under the copyright laws.
Warranty
The information contained in this document is subject to change without notice.
Powis Parker makes no warranty of any kind with respect to this information. Powis Parker specifically disclaims the implied warranty of
merchantability and fitness for a particular purpose.
PPI shall not be liable for any direct, indirect, incidental, consequential, or other damage alleged in connection with the furnishing or use
of this information.
Notice
Changes are periodically made to this document. Revisions, changes, any technical inaccuracies, and typographical errors will be
corrected in any subsequent editions.
ii FB8X Service Manual Rev. C, 9/28/10

CONTENTS
1 SUMMARY
2 OVERVIEW
2.1 Main Components of the FB8x
2.2 Diagram of the User Menu
2.3 System Block Diagram
2.4 Specifications
2.5 Bind Media
2.6 Getting the Best Bind Quality
2.7 Contacting Technical Support
3 REQUIRED SERVICE TOOLS
3.1 Hand Tools
3.2 Tools to Service the Heaters
3.3 Tools for Flash Upgrade of the Microcontroller
3.4 Tools needed to inspect the Controller Assembly
3.5 Cleaning Supplies
4 TROUBLESHOOTING
4.1 Power Problems
4.2 Error Messages
4.3 Machine Errors
4.4 Display Problems
4.5 Poor Bind Quality
5 SERVICE MENU
5.1 Accessing the Service Menu
5.2 Diagram of the Service Menu
5.3 Service Menu Descriptions
5.4 Testing and Calibration
5.4.1 Measuring the Heater Temperature
5.4.2 Checking the Sensors
5.4.3 Calibrating the Sensors, the Switches, and the Carriage Assembly
5.4.4 Entering the A_HI/A_LO values
5.4.5 Checking Motor Functions
5.4.6 Checking the Resistance of the Heater Sensors
5.4.7 Checking the Resistance of the Heater Power Connectors
FB8X Service Manual Rev. C, 9/28/10 iii

CONTENTS
6 SERVICE AND CALIBRATION PROCEDURES
(This section contains detailed procedures for removing and installing the specified component on the FB8x)
6.1 Covers
6.1.1 Left Cover
6.1.2 Right Cover
6.1.3 Front Cover
6.2 Cooling Rack
6.3 Controller Assembly
6.3.1 Inspecting the Controller Assembly
6.3.2 Removing and Installing the Controller Assembly
6.3.3 Changing the Fuses
6.4 Carriage Drive
6.5 Bender Drive
6.6 Sensors
6.6.1 Strip Present PCA
6.6.2 Book Emitter PCA
6.6.3 Book Detector PCA
6.7 Switches
6.7.1 Carriage Home Switch
6.7.2 Carriage Clamp Switch
6.8 Display
6.9 Heater Assemblies
6.9.1 Bender Assembly
6.9.2 Carriage Assembly (Back Heater)
6.9.3 Spine Assembly
6.10 Fan
6.11 Jaw Assembly
6.12 Replacing Grip Tape
7 UPGRADING FIRMWARE
7.1 Tools Required
7.2 Upgrading Firmware Procedure
8 SERVICE KIT PART NUMBERS
9 SERVICE KIT PICTURES
10 PICTURES OF FB8x PARTIALLY EXPLODED
iv FB8X Service Manual Rev. C, 9/28/10

SUMMARY
1
The newly redesigned Fastback Model 8x makes service and repair
easier than ever. While in outward appearance it looks very similar
to its predecessor, the Model 8 binder, you will find that beneath the
covers the binder has been dramatically simplified and improved. This
manual will guide you through the various routines needed to service
this machine. It will provide you with diagrams of the User Menu,
Service Menu, and Electrical Connectivity, as well as a complete list
of Service Parts and pictures of the machine partially exploded. This
manual will introduce you to the Service Menu and various functions
to test Heaters, Sensors, and Mechanisms. It will guide you through
the process of upgrading the Firmware using your computer. The
manual will provide you with a troubleshooting chart to quickly and
accurately diagnose and solve common problems, and it will tell you
how to perform routine service procedures, and how to disassemble
and reassemble the machine correctly and efficiently. In all, this
manual will tell you everything you need to know to keep the machine
binding and the customer happy.
The process by which the Model 8x binds documents has not
changed. The Model 8x has three heaters located in the binding
recess that heat the adhesive coating on the Lx-Strip or the spine on
the Halfback Cover, and adhere it to the spine, front, and back of the
document. These three heaters are called the Bender Heater, the
Spine Heater, and the Back Heater. They have been upgraded from
the previous versions with additional temperature sensing elements
that will allow the heaters to better regulate temperature.
The Model 8x binder has two sensors, the Book Sensor and the
Strip Sensor, designed to detect the presence of the document and
the strip when they are inserted in the binding recess. While the
Book Sensor determines only the presence of the book, the Strip
Sensor will sense the presence of a strip and determine whether you
are using the correct width strip for the document you are binding.
The binder is also equipped with encoders and switches that
determine the thickness of the document you are binding and the
pressure the Carriage Assembly must clamp the document to achieve
the best possible bind without overexerting the motors or any of the
other mechanical parts.
After giving the new Model 8x a few test binds you will find that the
improvements made to the binder will provide the customer and the
service technician with a machine that is both easy to use and easy to
service.
FB8X Service Manual Rev. C, 9/28/10 Page 1

2
OVERVIEW- Main Components
2.1 MAIN COMPONENTS OF THE FB8x
Left Side Cover
Tamping Platform
Front Cover
Cooling Rack
Right Side Cover
(Binder with Book Fences removed.)
LCD Display
Bender Link
Assembly
Right Bender Pivot
Bender Gear
Book Sense Detector PCA
(located inside the Carriage Assembly)
Jaw Guide
Jaw Spring
Carriage Spring
Carriage Home Switch
Carriage Drive Assembly
Jaw Spring
Spine Spring
Left Carriage Guide
Jaw Guide
Carriage Alignment Plate
Page 2 FB8X Service Manual Rev. C, 9/28/10
Left Bender Pivot

OVERVIEW- Main Components
2
2.1 MAIN COMPONENTS OF THE FB8x
Book Sense Emitter PCA
Bender Motor
Assembly
Bender Heater
Strip Detector PCA
(Picture shows Tamping Platform partially removed.)
FB8X Service Manual Rev. C, 9/28/10 Page 3

OVERVIEW- Main Components
2
2.1 MAIN COMPONENTS OF THE FB8x
Carriage Assembly
(Back Heater)
Cooling Platen
Spine Heater
Carriage Spring
Carriage Clamp Switch
(Picture shows Cooling Rack and Left Cover removed.)
Page 4 FB8X Service Manual Rev. C, 9/28/10

OVERVIEW- Main Components
2
2.1 MAIN COMPONENTS OF THE FB8x
CONTROLLER ASSEMBLY
Strip Present Emitter
Microcontroller
J10
J8
J11 J2
J3 J1
J4
J5
J6
J7
Serial Port
Fuses
J1 Spine Heater Temp Sensor Connector
Transformer
Power Entry Module
FB8X Service Manual Rev. C, 9/28/10 Page 5
J2 Bender Heater Temp Sensor Connector
J3 Back Heater Temp Sensor Connector
J4 Motors Connector
J5 Spine Heater Power Connector
J6 Bender Heater Power Connector
J7 Back Heater Power Connector
J8 Motors and Carriage Sensors Connector
J10 LCD Connector

OVERVIEW- User Menu
USER MENU
L-STRIP
SPINE BIND TIME
LANGUAGE
STRIP MODE
COVER BIND TIME
HALFBACK
PERFECTBACK LF
PERFECTBACK PS
EDIT MODE
SETTINGS
L-STRIP ON
L-STRIP OFF
-1 SECONDS
+0 SECONDS
+1 SECONDS
+2 SECONDS
+3 SECONDS
+4 SECONDS
-5 SECONDS
+0 SECONDS
+5 SECONDS
+10 SECONDS
+15 SECONDS
+20 SECONDS
-2 SECONDS
+5 SECONDS
DUTCH
DEUTSCH
FRANCAIS
ITALIANO
ESPAÑOL
NORSK
ENGLISH
SVENSKA
DANSK
SETTING LANGUAGE:
WRAPAROUND, NO "EXIT"
OPTION
SETTING SPINE BIND TIME:
NO WRAPAROUND, NO "EXIT"
OPTION
SETTING COVER BIND TIME:
NO WRAPAROUND, NO "EXIT"
OPTION
This item is present only
if the STRIP MODE is
"L-STRIP ON"
Lx-STRIP
Lx-COMP STRIP
EXIT
EXIT
EXIT
2
2.2 User Menu
Page 6 FB8X Service Manual Rev. C, 9/28/10

OVERVIEW- System Block Diagram
2
2.3 System Block Diagram
FB8X Service Manual Rev. C, 9/28/10 Page 7

OVERVIEW- Specifications
2
2.4 Specifications
Power Requirements:
Power Consumption:
Recommended Operating
Temperature and
Humidity:
Weight:
Dimensions:
Bind Capacity:
Duty Cycle:
FB8x: 115V (110-125VAC) 50-60 Hz, 8.4 Amps
FB8xE & FB8xA: 230V (220-240VAC) 50-60 Hz, 4.2 Amps
FB8xJ: 100V (90-110VAC) 50-60 Hz, 9.5 Amps
FB8x: 950 Watts while binding, 55 Watts standby
FB8xE & FB8xA: 950 Watts while binding, 55 Watts standby
FB8xJ: 950 Watts while binding, 55 Watts standby
15 to 35 degrees (C), 59 to 95 degrees (F)
Humidity Range: 5 to 80% RH non condensing
17 lbs
With book fences attached: 19.3” W x 11.1” H x 12.5” D
Without book fences attached: 19.3” W x 6.0” H x 10.6” D
Lx-Strip
.04” to 1.0” (1 mm to 25 mm), about 10-250 sheets.
10-125 sheets = Narrow Lx-Strip
126-250 sheets = Medium Lx-Strip
L-Strip .04” to 0.7” (1 mm to 18 mm), about 10-175 sheets.
10-80 sheets = Narrow L-Strip
81-175 sheets = Medium L-Strip
Not compatible with Wide L-Strip.
Halfback covers .04” to 0.8” (1 mm to 20 mm), about 10-200 sheets.
10-100 sheets = Narrow Halfback
101-200 sheets = Medium Halfback
Does not work with Wide Halfback Covers.
Perfectback Strips .04” to 1.0” (1 mm to 25 mm), about 10-250 sheets.
10-125 sheets = Narrow Perfectback Lx-Strip
126-250 sheets = Medium Perfectback Lx-Strip
500 binds per month average
Bind Speed:
Safety Certications:
Page 8 FB8X Service Manual Rev. C, 9/28/10
35-55 seconds
UL60950
IEC60950/EN60950

OVERVIEW- Bind Media
2
2.5 Bind Media
The newly redesigned Model 8x Binder is capable of binding the following strips:
Lx-Strip
Lx-Comp Strip
L-Strip
Halfback Covers (Narrow and Medium only)
Perfectback® PS Strips
Perfectback
Selecting the Binding Mode
To bind with any of these various binding strips, enter the User Menu and select the
binding strip you wish to bind with.
Bind Memory
When the machine is turned off and on, the last bind setting will be retained.
(Narrow and Medium only)
® LF Strips
Binding Widths
The Model 8x binder is not compatible with wide L Strips or wide Halfback Covers.
(See 2.5 Specifications).
Binding Hard Cover Books
Use Lx-Strip or L-Strip to bind book blocks to be made into Hard Cover Books.
FB8X Service Manual Rev. C, 9/28/10 Page 9

OVERVIEW- Getting the Best Bind Quality
2
2.6 Getting the Best Bind Quality
• Before binding, make sure the binder is set in the correct binding mode.
• Before placing the strip into the binding recess, fold the strip in 90° angle making
sure the adhesive side faces inward
• Place the strip into the binding recess with the adhesive side facing up. The short
side of the bent “L” should be resting against the back wall. Slide the strip all the
way to the right of the machine.
• Before binding, tap the pages several times to ensure that they are even when the
document is in the binding recess. The right edge of the strip and right edge of the
document should line up and be justified against the right side of the binding recess.
• The grain of the paper should run parallel to the binding edge of the document. All
paper has a grain — it is a result of the fibers that make up the paper. If the grain
runs parallel to the long side of the sheet, the paper is “grain long”. When the grain
runs parallel to the short side of the paper, it is “grain short”.
.
A sheet of paper will naturally flex more easily along the direction of its grain. Try
it and see. (Hold a piece of paper the long way lightly in your fingertips and gently
bow the paper, allowing it to flex. Now try it the other way. See the difference?
Most copy papers are grain long, so you should not have any problems with the
bind. Grain long paper will give you the best bind. Occasionally you may find papers
that are grain short, so we recommend you test unfamiliar papers before binding
large numbers of documents.
• Coated papers, and papers with heavy ink or toner coverage may also experience
problems with binding. If you have documents with heavy ink or toner coverage,
always do a test bind first to ensure that your documents will bind properly.
• After the binding cycle, be sure to place your document entirely upright, with the
bound side down, against one of the two rear book support fences for five minutes.
Improper cooling of your document may result in a crooked spine. Bind strength
reaches the maximum strength after 24 hours.
• NOTE: When placing multiple documents on the Cooling Rack, make sure it
doesn’t get overloaded to where the front document hangs off the metal step.
MAINTENANCE TIP : Minor glue buildup on the heaters is expected. When
cleaning the heaters, turn the machine off and unplug it. Wait for the heaters to
cool, and then wipe off any glue using a clean dry lint free cloth. Cleaning solution is
not necessary.
(Caution: The heaters are very delicate. Do not use anything sharp to remove glue
from the clamps, platen, or interior surfaces of the binder. )
Page 10 FB8X Service Manual Rev. C, 9/28/10

OVERVIEW- Technical Assistance
2
2.7 Contacting Technical Support
If there are any questions not answered in this manual, please contact the
Powis Parker Technical Support Dept: 510-848-2463.
FB8X Service Manual Rev. C, 9/28/10 Page 11

OVERVIEW
2
THIS PAGE IS INTENTIONALLY LEFT BLANK
Page 12 FB8X Service Manual Rev. C, 9/28/10

REQUIRED SERVICE TOOLS
3
When servicing a Model 8x binder the following tools are required:
3.1 HAND TOOLS
Phillips Screwdrivers #1 and #2
Needle Nosed Pliers
Diagonal Cutters
Fuse Puller
2.5mm Hex Key
Pen
Exacto Knife
3.2 TOOLS TO SERVICE THE HEATERS
Temperature Meter (
K-820-011)
Straight Temperature Probe (K-820-012)
Right Angle Temperature Probe (K-820-3436)
Ohmmeter
3.3 TOOLS FOR FLASH UPGRADE OF FIRMWARE
P31 Printer Cable (K-551-1685)
PC with either Windows 98, 2000, XP, or ME, and a 9-pin com port
Internet Access
3.4 TOOLS NEEDED TO INSPECT THE CONTROLLER ASSEMBLY
Ground Strap
3.5 CLEANING SUPPLIES
Citrus Cleaning Solution (K-212-001)
Lint Free Cloth
FB8X Service Manual Rev. C, 9/28/10 Page 13

TROUBLESHOOTING GUIDE
4
4.1 Power Problems
• NO POWER
Possible Cause Solution
Power Cord is not securely plugged in. Check that the Power Cord is securely plugged into the
Electrical outlet is not functioning. Plug the machine into another electrical outlet.
Machine is plugged into the wrong voltage outlet. Use the correct voltage outlet to power the machine.
Wire Harness connections are loose. Check that all wire connectors are securely
Blown Fuse. Check fuses on the Controller Assembly and
Failed Controller Assembly. Replace the Controller Assembly.
• POWER FLICKERS ON AND OFF
machine and into the outlet in the wall.
plugged into the Controller Assembly.
replace if any are blown.
Possible Cause Solution
A 230v machine in plugged into a 115v outlet. Plug the machine into a 230v outlet.
Failed Controller Assembly. Replace the Controller Assembly.
• BACKLIGHT COMES ON, NOTHING ELSE HAPPENS
Possible Cause Solution
A 230v machine in plugged into a 115v outlet. Plug the machine into a 230v outlet.
See the “NO POWER” troubleshooting table above.
• WHEN TURNED ON, THE MOTORS MOVE BUT NOTHING IS ON THE DISPLAY
Possible Cause Solution
A problem with the display. See troubleshooting section 4.4 “Display Problems”.
• FUSES BLOW REPEATEDLY
Possible Cause Solution
Short circuit in heaters. Check the resistance of the Heaters. See Section
5.4.7 “Checking the Resistance of the Heater Power
Connectors”.
Short in the Controller Assembly. If none of the heaters have shorted out, the
problem lies in the Controller Assembly. Replace
the Controller Assembly.
Page 14 FB8X Service Manual Rev. C, 9/28/10

• Error Message: “INSERT BOOK”
Possible Cause Solution
TROUBLESHOOTING GUIDE
4
4.2 Error Messages
The operator pressed the Bind button without inserting a
book into the binding recess.
The sheets are not fully justified against the right side of the
binding recess.
The Book Sensor is damaged. Replace the Book Sensor.
Failed Controller. Replace the Controller
• Error Message: “USE SMALLER SIZE”
Possible Cause Solution
The strip is too wide for the amount of sheets placed in the
binding recess.
The strip is not folded. Make sure to fully fold the strip into a 90 degree angle.
The strip is not lined up properly. Make sure the strip and the sheets are justified against
The machine is configured to bind the new Lx-Strip and
you tried to bind using the original type L-Strip.
Place a book into the machine and then press the Bind
button.
Tap the edges of the sheets until the book is flush
against the right side of the binding recess prior to
pressing the BIND button.
Add more sheets or use a narrower width strip.
the back of the binding recess.
In settings, select the L-STRIP ON menu option in the
STRIP MODE Settings menu.
• Error Message: “BOOK TOO THICK”
Possible Cause Solution
You are trying to bind too many sheets with the medium strip. Remove some sheets.
• Error Message: “USE MEDIUM SIZE”
Possible Cause Solution
You are trying to bind too many sheets with a narrow strip. Remove some sheets or use a medium width strip.
There is no strip in the binding recess. Insert a medium strip.
• Error Message: “USE NARROW SIZE”
Possible Cause Solution
You are trying to bind too few sheets with a medium strip. Add some sheets or use a narrow width strip.
There is no strip in the binding recess. Insert a narrow strip.
• Error Message: “REVERSE STRIP”
Possible Cause Solution
The strip is inserted into the machine backwards. Make sure the short end of the strip is vertical and the
long end of the strip is flat.
Make sure the strip is flat. An over folded or curled strip
can cause a “Reverse Strip” error.
FB8X Service Manual Rev. C, 9/28/10 Page 15

TROUBLESHOOTING GUIDE
4
4 . 3 M a c h i n e E r r o r s
• Error Message: MACHINE ERROR 11, 21, or 31
This error indicates an under-temp error in one of the heaters.
Possible Cause Solution
Heater sensor leads are not plugged in correctly. Check that the connectors J1, J2, and J3 are plugged in
Heater sensor malfunction. Check the resistance of the Heaters. See Section 5.4.6
Machine is extremely cold. The FB8x is not designed to function below 0°C/32°F.
Failed Controller Assembly. Replace the Controller Assembly.
• Error Message: MACHINE ERROR 12, 15, 22, 25, 32, or 35
This error indicates an over-temp error in one of the heaters.
correctly.
“Checking the Resistance of the Heater Sensors”.
Possible Cause Solution
Heater sensor leads are not plugged in correctly. Check that the connectors J1, J2, and J3 are plugged in
correctly.
Heater sensor malfunction. Check the resistance of the Heaters. See Section 5.4.6
“Checking the Resistance of the Heater Sensors”.
Heater calibration is inaccurate. Recalibrate the heaters. See Section 5.3.2 “Cal Heaters”.
Heater A_HI/A_LO INPUT values are incorrect. Verify the A_HI/A_LO values on the heater tags match
the values in the A_HI/A_LO INPUT menu. See section
5.4.4.
Failed Controller Assembly. Replace the Controller Assembly.
• Error Message: MACHINE ERROR 13, 14, 23, 24, 33, or 34
This error indicates a problem with the heater temperature settings.
Possible Cause Solution
Heater calibration is inaccurate. Recalibrate the heaters. See Section 5.3.2 “Cal Heaters”.
Heater A_HI/A_LO INPUT values are incorrect. Verify the A_HI/A_LO values on the heater tags match
the values in the A_HI/A_LO INPUT menu. See section
5.4.4.
Failed Controller Assembly. Replace the Controller Assembly.
Page 16 FB8X Service Manual Rev. C, 9/28/10

TROUBLESHOOTING GUIDE
4
4 . 3 M a c h i n e E r r o r s
• Error Message: MACHINE ERROR 50
This error occurs when a user tries to bind a book and the carriage does not move.
Possible Cause Solution
Carriage Motor/Carriage Assembly is jammed or obstructed. Remove any obstructions that may cause the Carriage
Assembly to jam.
Carriage Motor is burnt out. Replace the Carriage Motor if it is burnt out.
Carriage Home Switch or Carriage Clamp Switch problem. Check the functionality of the Carriage Home Switch
and the Carriage Clamp Switch. See Section 5.4.2
“Checking the Sensors”. Replace the Switches if
necessary.
Failed Controller Assembly. Replace the Controller Assembly.
• Error Message: MACHINE ERROR 51
This error indicates a carriage jam.
Possible Cause Solution
Carriage Clamp Switch or Carriage Home Switch failure. Check the function of both switches in the CHECK
SENSORS menu. Replace any damaged switches.
Obstructions in the binding recess. Check for obstructions in the binding recess. If
necessary remove the Carriage Assembly to check for
any obstructions.
• Error Message: MACHINE ERROR 52
This error indicates a problem with the Carriage Home Switch.
Possible Cause Solution
An obstruction prevents the Carriage Assembly from
returning to its home position.
Carriage Home Switch failure. Check the functionality of the Carriage Home Switch.
Failed Controller Assembly. Replace the Controller Assembly.
Remove any obstructions.
See Section 5.4.2 “Checking the Sensors”. Replace the
Switch if necessary.
• Error Message: MACHINE ERROR 60 or 61
This error indicates a problem with the line voltage.
Possible Cause Solution
Electrical supply is not 50 Hz or 60 Hz. Switch to a regulated power supply.
Failed Controller Assembly. Replace the Controller Assembly.
FB8X Service Manual Rev. C, 9/28/10 Page 17

TROUBLESHOOTING GUIDE
4
4 . 3 M a c h i n e E r r o r s
• Error Message: MACHINE ERROR 70-75
This error indicates a problem with the A_HI/A_LO values entered into the machine.
Possible Cause Solution
Heater A_HI/A_LO values are incorrect. Verify the A_HI/A_LO values on the heater tags match
Failed Controller Assembly. If the error reoccurs after the A_HI/A_LO values have
• Error Message: MACHINE ERROR 80-82
This error indicates a problem with the EEPROM.
Possible Cause Solution
the values in the A_HI/A_LO INPUT menu. See section
5.4.4.
been reentered, the Controller Assembly has failed.
Replace the Controller Assembly.
Firmware/EEPROM mismatch. Upgrade the firmware as shown in Section 7.
• Error Message: FIRMWARE ERROR
Possible Cause Solution
Firmware is corrupted or the firmware transfer was
interrupted.
Failed Controller Assembly. Replace the Controller Assembly.
Perform the Flash Upgrade again with the current
firmware.
Page 18 FB8X Service Manual Rev. C, 9/28/10

TROUBLESHOOTING GUIDE
4
4.4 Display Problems
• NO CHARACTER DISPLAYED
Possible Cause Solution
Display is not connected. Reconnect the Display.
Failed Display Replace the Display.
Failed Controller Assembly. Replace the Controller Assembly.
• INCORRECT DISPLAY
Possible Cause Solution
Failed Display. Replace the Display.
Failed Controller Assembly. Replace the Controller Assembly.
• NO BACKLIGHT
Possible Cause Solution
Failed Display. Replace the Display.
Failed Controller Assembly. Replace the Controller Assembly.
FB8X Service Manual Rev. C, 9/28/10 Page 19

TROUBLESHOOTING GUIDE
4
4.5 Poor Bind Quality
• SPINE IS NOT SQUARE
Possible Cause Solution
The Strip is not folded in a 90 degree angle. Fold the Lx-Strip into a 90 degree angle. The
The book was not placed in the Cooling Rack after being
bound.
• PAGES PROTRUDE PAST THE STRIP
Possible Cause Solution
The edges of the pages are not even. Tap on the top and left sides of the pages until
better you fold the strip the more square the
spine will be.
After binding, make sure the book is placed in the
Cooling Rack to properly cool down.
the edges are even.
The Strip is not flush against the right side of the binding
recess.
• BIND QUALITY IS UNSATISFACTORY
Part of the pages separate from the strip
There are gaps in the pages where the strip can be seen
There is Thermo-plastic adhesive leakage.
Possible Cause Solution
The machine is not set to the correct binding style. Verify the machine is set to the correct binding style.
• PAGES DO NOT ADHERE TO THE STRIP VERY WELL
Possible Cause Solution
Some paper stocks and some heavy cover material can be
difficult to bind.
Make sure the strip is flush against the right side of the
binding recess.
The bind may be improved by increasing the Spine Bind
time in the Setting Menu.
Page 20 FB8X Service Manual Rev. C, 9/28/10

TROUBLESHOOTING GUIDE
4
THIS PAGE IS INTENTIONALLY LEFT BLANK
FB8X Service Manual Rev. C, 9/28/10 Page 21

THIS PAGE IS INTENTIONALLY LEFT BLANK
Page 22 FB8X Service Manual Rev. C, 9/28/10

SERVICE MENU
5
5.1 Accessing the Service Menu
To access the Service Menu press the OPEN and MENU buttons at the same time while
turning the machine on. Keep the buttons pressed until SYSTEM CHECK appears on the display. After
SYSTEM CHECK appears on the screen, an OK message should appear, followed by the date of the
currently installed firmware. After a couple seconds, AUTO-CYCLES will appear.
5.1.1 Navigating through the Service Menu.
Use the orange OPEN and MENU buttons to toggle through the menu options.
Use the green BIND button to select the menu option currently displayed.
5.1.2 Warnings!
Be very careful when navigating through the Service Menu. Altering any of the settings
can greatly affect the performance of the machine.
FB8X Service Manual Rev. C, 9/28/10 Page 23

SERVICE MENU
5
5.2 Service Menu Diagram
Page 24 FB8X Service Manual Rev. C, 9/28/10

SERVICE MENU
5
5.2 Service Menu Diagram
FB8X Service Manual Rev. C, 9/28/10 Page 25

SERVICE MENU
5
5.3 Service Menu Descriptions
5.3.1 AUTOCYCLES
This option offer two choices for continuous cycling of the machine. It is recommended the while running
in either Autocycle mode, that a book or pages be inserted into the binding cavity, secured to the Book Fence with tape.
Note: Do not use a strip! If you are running continuous cycles, glue will leak out of the ends of the strip, dirtying up the
heaters.
STANDARD
To stop the binder, press the OPEN button when the Carriage returns to the home position and the display says
AUTOCYCLES, otherwise the binder will automatically stop the Autocycling after 500 cycles.
FAST
Selecting this menu option causes the machine to go through full length binding cycles at normal speed.
the OPEN button when the Carriage returns to the home position and the display says AUTOCYCLES,
otherwise the binder will automatically stop the Autocycling after 500 cycles.
Selecting this menu option causes the binder to go through continuous, fast-speed cycles. To stop the cycling, press
NOTE: To stop Autocycling at any point of the cycle, turn the machine off.
5.3.2 CALIBRATION
This option allows you to calibrate the Book Sensor, the Strip Sensor, the Carriage Assembly, and the Heaters.
CAL BOOK SENSOR
Selecting this menu option will allow you to calibrate the Book Sensor only. When calibrating the Book Sensor
make sure there is nothing in the binding recess. If the calibration is successful, a result number will appear followed
by the message “SUCCESS”. If the calibration is unsuccessful, a failure massage will appear. For more details, see
section 5.4.3, Calibrating the Book Sensor.
CAL STRIP SENSOR
sure there is nothing obstructing the small crescent shaped hole in the Spine Heater. If the calibration is successful,
a result number will appear followed by the message “SUCCESS”. If the calibration is unsuccessful, a failure message
will appear. For more details, see section 5.4.3, Calibrating the Strip Sensor.
Selecting this menu option will allow you to calibrate the Strip Sensor only. When calibrating the Strip Sensor make
CAL CARRIAGE
Selecting this menu option will allow you to calibrate the Carriage Assembly only. When calibrating the Carriage
Assembly make sure there is nothing in the binding recess. If the calibration is successful, a result number will
appear followed by the message CAL SAVED!. If the calibration is unsuccessful, a failure message will appear. For
more details, see section 5.4.3, Calibrating the Carriage Assembly.
Page 26 FB8X Service Manual Rev. C, 9/28/10

SERVICE MENU
5
5.3 Service Menu Descriptions
CAL HEATERS
Heaters it is very important that the Heaters are at room temperature. If the calibration is successful, the
display will read SUCCESS. If the calibration is unsuccessful, a failure message will appear on the display.
SHOW CALIBRATION
toggle through the list of values.
BOOK: XX OK/NG
This menu option displays the book calibration value. There will be an OK if the value is in the
acceptable range or an NG message if the out of range.
Selecting this menu option will allow you to calibrate all three Heaters. When calibrating the
This menu displays the calibration values for the machine. Use the OPEN and MENU button to
STRIP: XX OK/NG
This menu option displays the strip calibration value. There will be an OK if the value is in the
acceptable range or an NG message if the out of range.
CARR: XX OK/NG
This menu option displays the carriage calibration value. There will be an OK if the value is in the
acceptable range or an NG message if the out of range.
TEMP: XX OK/NG
This menu option displays the room temperature reading taken during the heater calibration.
There will be an OK if the value is in the acceptable range or an NG message if the out of range.
SPINE: XX OK/NG
This menu option displays the Spine Heater calibration reading during heater calibration.
There will be an OK if the value is in the acceptable range or an NG message if the out of range.
BEND: XX OK/NG
This menu option displays the Bender Heater calibration reading during heater calibration.
There will be an OK if the value is in the acceptable range or an NG message if the out of range.
BACK: XX OK/NG
This menu option displays the Back Heater calibration reading during heater calibration.
There will be an OK if the value is in the acceptable range or an NG message if the out of range.
FB8X Service Manual Rev. C, 9/28/10 Page 27

SERVICE MENU
5
5.3 Service Menu Descriptions
5.3.3 SENSORS
AC LINE INFO
50/51 for a 50 Hz supply or 59/60/61 for a 60 Hz supply. The second value is proportional to the line voltage and
should be 3000 +/- 300 for 115/230V machines, and 2600 +/- 300 for 100V machines.
CHECK SENSORS
Selecting this menu will display six numbers, each one either zero or non-zero depending on the state of a binary
sensor.
Selecting this menu will display two values: The first value represents the line frequency. This value should be 49/
Sensors: 1 2 3 4 1 2
1 if at home position, 0 if not in home position.
Carriage Home Switch.
Carriage Clamp Switch
2 if not clamped, 0 if clamped.
Encoder on Bender Motor Assembly
Encoder on Carriage Motor
Assembly
Book Sensor
3 if blocked, 0 if clear
Strip Sensor
4 if blocked, 0 if clear
CHECK BOOK BEAM
binding recess) the first value should be 2750 +/- 150. The second value should be between 100 and 2400. The
` numbers will change from moment to moment, but should not vary by no more than 100.
This menu displays two numeric readings from the Book Sensor. With the beam open (no book present in the
CHECK STRIP BEAM
crescent shaped hole in the Spine Heater) the first value should be 2750 +/- 150. The second value should be
between 100 and 2400. The numbers will change from moment to moment, but should not vary by no more
than 100.
This menu displays two numeric readings from the Strip Sensor. With the beam open (no strip blocking the
CHECK HEATER SN
This menu displays three numeric readings from the heater temperature sensors. If the heaters are at room
temperature, each value should be 1000 +/- 200.
AMBIENT TEMP
alternate between the “raw” values, the temperature in Celsius, and the temperature in Fahrenheit.
The first value corresponds to the temperature sensor on the Spine extrusion. This value can fall between the room
temperature and the target temperature of the Spine Heater (330°F/166°C).
The second value corresponds to the temperature sensor on the Controller Assembly. This value should be
between room temperature and 20°C/36°F.
Page 28 FB8X Service Manual Rev. C, 9/28/10
This menu displays the temperature readings of the two temperature sensors inside the machine. These values

5.3.4 INFO
SHOW COUNTS
SERVICE MENU
5
5.3 Service Menu Descriptions
cycles. Binding a book counts for 1 bind + 1 cycle. Running an autocycle in either Standard or Fast mode, counts
for only 1 cycle.
This menu displays two alternating values for the number of binds the machine has performed and the number of
SHOW VERSION
This menu displays the version of firmware installed in the binder.
5.3.5 HEATERS
HEATER TEST
TEST ALL
button to turn the heaters on and off. During the heater test, internal diagnostic values will appear on the
display. The diagnostic values are for use by Powis Parker technicians only.
Selecting this menu will allow you to turn on and test all three heaters at the same time. Press the BIND
TEST SPINE
heater on and off. During the heater test, internal diagnostic values will appear on the display.
The diagnostic values are for use by Powis Parker technicians only.
Selecting this menu will allow you to turn on the Spine Heater only. Press the BIND button to turn the
TEST BENDER
heater on and off. During the heater test, internal diagnostic values will appear on the display.
The diagnostic values are for use by Powis Parker technicians only.
Selecting this menu will allow you to turn on the Bender Heater only. Press the BIND button to turn the
TEST BACK
heater on and off. During the heater test, internal diagnostic values will appear on the display.
The diagnostic values are for use by Powis Parker technicians only.
This menu sets the fan function during heater tests. This menu is for Powis Parker Technicians only.
Selecting this menu will allow you to turn on the Back Heater only. Press the BIND button to turn the
SET FAN
SHOW HEATER SETS
This menu displays the thermostat values for the three heaters. The first value is for the Spine Heater. This
value should be between 1550 and 2150 . The second value represents the Bender Heater. This value should be
between 1200 and 1700. The third value represents the Back Heater. This value should be between
1200 and 1700.
FB8X Service Manual Rev. C, 9/28/10 Page 29

SERVICE MENU
5
5.3 Service Menu Descriptions
CHECK HEATER SN
This menu displays three numeric readings from the heater temperature sensors. If the heaters are at room
temperature, each value should be 1000 +/- 200.
A_HI/A_LO INPUT
In this menu, the A_HI and A_LO values for each of the heaters can be entered. The A_HI and A_LO values are
located on the heater tags. See section 5.4.4 “Entering A_HI/A_LO Values” for more details.
SPINE HIGH
This menu allows for viewing and editing of the A_HI value of the Spine Heater.
SPINE LOW
This menu allows for viewing and editing of the A_LO value of the Spine Heater.
BENDER HIGH
This menu allows for viewing and editing of the A_HI value of the Bender Heater.
BENDER LOW
This menu allows for viewing and editing of the A_LO value of the Bender Heater.
BACK HIGH
This menu allows for viewing and editing of the A HI value of the Back Heater.
BACK LOW
This menu allows for viewing and editing of the A_LO value of the Back Heater.
Page 30 FB8X Service Manual Rev. C, 9/28/10

5.3.6 MOTORS
CARRIAGE
SERVICE MENU
5
5.3 Service Menu Descriptions
Assembly forward, and press the BIND button to move the Carriage Assembly backward and into the home
position. When the Carriage Assembly is all the way back in its home position, a home offset value (+/- 25) will
appear on the display. When the Carriage Assembly is moved all the way forward (with the binding cavity empty),
three values will appear on the display. The first value must be 2000 +/-64.
In this menu, you can test the function of the Carriage Assembly. Press the MENU button to move the Carriage
BENDER1
In this menu, you can test the function of the Bender mechanism. Press the BIND button to move the Bender
Heater up, and the MENU button to move the Bender Heater down. After moving the Bender Heater up, the
display will read UP and a value will appear. This value should be 50 +/- 5. After moving the Bender Heater down,
the display will read DOWN and a value will appear. This value should be 0 +/- 5.
BENDER2
move the Bender Heater in either the up position, the down position, or the middle position.
In this menu, you can test the function of the Bender mechanism. Pressing either the BIND or MENU buttons will
TOGGLE HEATERS
heaters on, toggle back through the menu by pressing the MENU or OPEN button and select the Motor test you
want to perform. After testing the motor, go back to the TOGGLE HEATERS menu and turn the heaters off.
The heaters do not turn off on their own. Leaving the heaters on for extended periods of time is not
recommended for safety reasons.
In this menu, you can turn on all three heaters while performing one of the other motor tests. After turning the
5.3.7 FACTORY USE
FB8X Service Manual Rev. C, 9/28/10 Page 31
This menu is for use at the factory when the machine is manufactured.

SERVICE MENU
5
5.4 TESTING AND CALIBRATION
5.4.1 MEASURING HEATER TEMPERATURE
Temperature Probe (K-820-012), and a Right Angled Temperature Probe (K-820-3436).
When measuring the heater temperature, it is necessary to keep the Temperature Probe on the heater for at least
90 seconds.
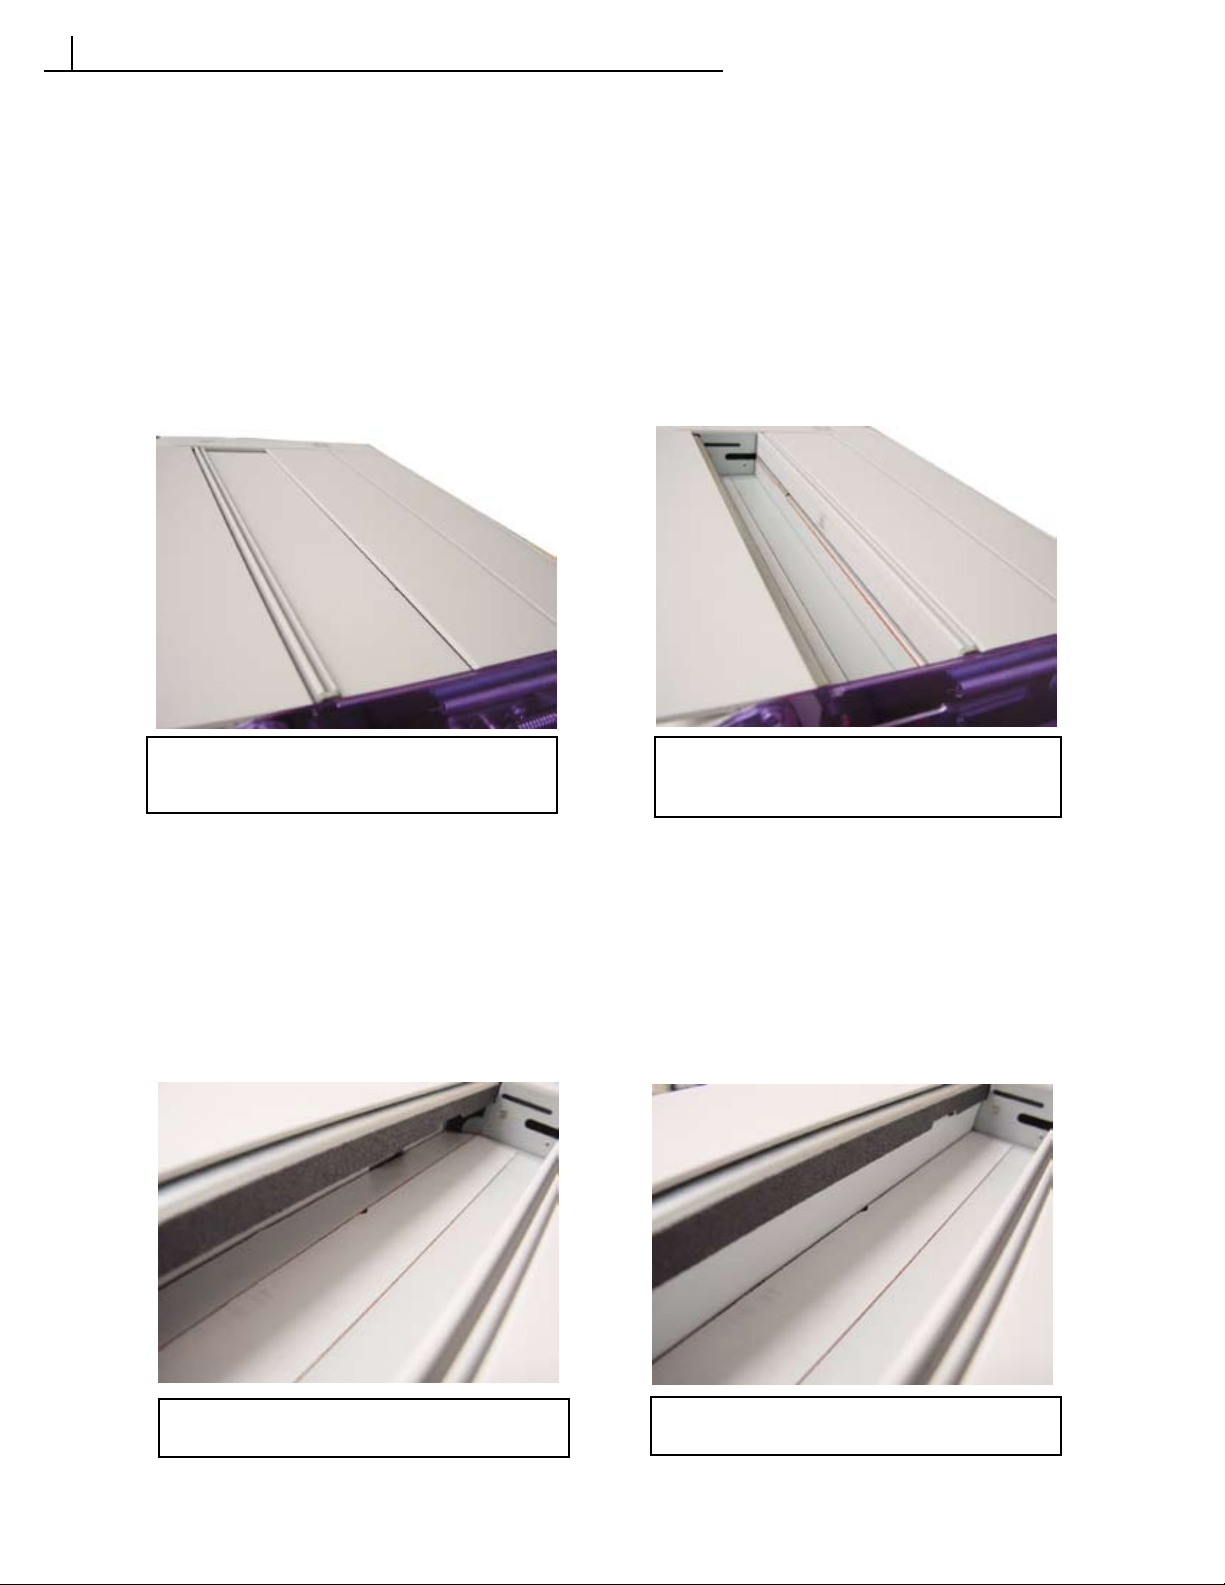
Take the temperature in the middle of the heater, as shown in each of the pictures. Use the crescent shaped hole
in the Spine Heater and the Hot Symbol Label as reference points.
To measure the temperature of the heaters you will need a Thermocouple Meter (K-820-011), a straight
CHECKING THE SPINE HEATER TEMPERATURE
1. Enter HEATERS menu.
2. Select HEATER TEST.
3. Select TEST SPINE by pressing the green BIND button.
The fan will turn on and the heater will begin to heat up.
4. Place the straight Temperature Probe right below the
crescent shaped hole in the Spine Heater. Keep the probe
on the heater for at least 90 seconds, until the
temperature stabilizes.
To turn off the Spine Heater, press the orange OPEN button.
Spine Heater Temperature Range
Turn off the machine if the temperature
exceeds 350°F (177°C). Then contact Powis Parker
Technical Service.
Page 32 FB8X Service Manual Rev. C, 9/28/10
300°F- 330°F
149°C-166°C

SERVICE MENU
5
5.4 TESTING AND CALIBRATION
5.4.1 MEASURING HEATER TEMPERATURE
CHECKING THE BENDER HEATER TEMPERATURE
1. Enter HEATERS menu.
2. Select HEATER TEST.
3. Select TEST BENDER by pressing the green BIN
button. The Bender Heater will then rotate up into the
upright position.
4. Press the BIND button again and the fan will turn on and
the heater will start to heat up.
5. Place the Right Angled Probe in the middle of the heater,
in line with the crescent shaped hole in the Spine Heater.
Keep the probe on the heater for at least 90 seconds
until the temperature stabilizes.
Bender Heater Temperature Range
225°F- 245°F
107°C-118°C
To turn off the Bender Heater, press the orange OPEN
button.
Turn off the machine if the temperature
exceeds 260° F (127°C). Then contact Powis Parker
Technical Service.
CHECKING THE BACK HEATER TEMPERATURE
1. Enter HEATERS menu.
2. Select HEATER TEST.
3. Select TEST BACK by pressing the green BIND button.
The fan will turn on and the heater will begin to heat up.
4. Place the Right Angled Probe in the middle of the heater
in line with the Hot Symbol Label. Keep the probe on
the heater for at least 90 seconds until the temperature
stabilizes.
To turn off the Back Heater, press the orange OPEN button.
Back Heater Temperature Range
205°F- 225°F
Turn off the machine if the temperature
exceeds 260° F (127°C). Then contact Powis
Parker Technical Service.
96°C-107°C
FB8X Service Manual Rev. C, 9/28/10 Page 33

SERVICE MENU
5
5.4 TESTING AND CALIBRATION
5.4.2 CHECKING THE SENSORS
To check the sensors, select CHECK SENSORS in the SENSORS menu. A series of numbers will appear
representing each of the sensors and switches.
Sensors: 1 2 0 0 0 0
Checking the Book Sensor
To activate the Book Sensor, insert a piece
of paper into the binding recess as shown. The
third number will turn to 3 when the Book Sensor is
blocked.
Sensors: 1 2 3 0 0 0
Carriage Home Switch
Carriage Clamp Switch
Book Sensor
Bender Motor
Carriage Motor
Strip Sensor
Checking the Strip Sensor
To activate the Strip Sensor, block the cres-
cent shaped hole in the Spine Heater. The fourth
number will change to 4 when the Strip Sensor is
blocked.
Sensors: 1 2 0 4 0 0
Page 34 FB8X Service Manual Rev. C, 9/28/10

SERVICE MENU
5
5.4 TESTING AND CALIBRATION
Checking the Carriage Motor
and the Carriage Home Switch
Remove the screws attaching the Right Cover but keep
the cover plugged into the Wire Harness, taking care
the cover does not interfere with the mechanism or
encoder.
To check if the Carriage Motor sensor and the Carriage
Home Switch function properly, rotate the Carriage
Drive Belt and move the Carriage Assembly from its
home position.
When the Carriage Assembly moves forward from it’s
home position, the first number will change to 0.
As you rotate the Drive Belt, the fifth number will
alternate between 0 and 1.
Sensors: 0 2 0 0 1 0
Checking the Carriage Clamp Switch
To check the Carriage Clamp Switch, the Carriage
Assembly must be moved forward out of it’s home
position.
Remove the Right Cover making sure to keep the cover
plugged into the Wire Harness. Rotate the Carriage
Drive Belt and move the Carriage a little bit forward.
To check the Carriage Clamp Switch, squeeze the
Carriage Assembly so that it goes back as shown. If
the Carriage Clamp Switch is functioning properly, the
second number will change to 0.
Sensors: 0 0 0 0 1 0
Checking the Bender Motor
To check the Bender Motor, remove the Right Cover
making sure to keep it plugged into the Wire Harness.
Rotate the Bender Motor Gear as shown. If the Bender
Motor sensor is working properly, the sixth number will
alternate between 0 and 2 when the gear is rotated.
Sensors: 1 2 0 0 0 2
FB8X Service Manual Rev. C, 9/28/10 Page 35

SERVICE MENU
5
5.4 TESTING AND CALIBRATION
5.4.3 Calibrating the Sensors, Switches, and Carriage
Calibrating the Book Sensor
To calibrate the Book Sensor enter the service menu and select CALIBRATION.
1.
2. Select CAL BOOK SENSOR.
3. Make sure there is nothin
sensor.
If the calibration is successful, a result number will appear followed by the message “SUCCESS”.
If the calibration is unsuccessful, a failure message will appear. If a failure message appears double check and make sure there
is nothing blocking the Book Sensor and calibrate again. If you continue to get a failure message, contact Powis Parker
technical support.
Calibrating the Strip Sensor
To calibrate the Strip Sensor enter the service menu and select CALIBRATION.
1.
2. Select CAL STRIP SENSOR.
3. Make sure there is nothing in the binding recess that can block the crescent shaped hole in the Spine heater. Press the
BIND button to calibrate the sensor.
If the calibration is successful, a result number will appear followed by the message “SUCCESS”.
g in the binding recess that can block the Book Sensor. Press the BIND button to calibrate the
If the calibration is unsuccessful, a failure message will appear. If a failure message appears double check and make sure there
is nothing blocking the crescent shaped hole and calibrate again. If you continue to get a failure message, contact Powis
Parker technical support.
Calibrating the Carriage
To calibrate the Carriage Assembly enter the service menu and select CALIBRATION.
1.
2. Select CAL CARRIAGE.
3. Make sure there is nothing in the binding recess. Press the BIND button.
4. A confirmation message “CAL NOW?” will appear on the display. Press the BIND button to calibrate. The Carriage Assembly will move forward twice. A value will briefly appear on the display each time. If the calibration is successful, the
display will say CAL SAVED! followed by a value. This value must be between -64 and +64.
If the calibration is unsuccessful, a failure message will appear. If a failure message appears double check and make sure there
is nothing binding recess and calibrate again. If you continue to get a failure message, contact Powis Parker technical support.
Calibrating the Heaters
NOTE: The heaters must be at room temperature to be calibrated. The binder must be turned off for 1/2 hour- 1
hour for the heaters to return to room temperature. Directing a fan onto the heaters can speed up the cool down
process.
1. To calibrate the Heaters enter the service menu and select CALIBRATION.
2. Select CAL HEATERS.
3. The fan will turn on for 30 seconds and then the machine will take heater temperature readings for 16 seconds. If the
calibration is successful, the display will say SUCCESS. Press the MENU button to turn off the heaters and stop the
calibration.
If the calibration is unsuccessful, a failure message will appear. If a failure message appears, check that each of the heaters are
plugged in and that the heaters are at room temperature. Calibrate the heaters again. If the failure message appears again,
call Powis Parker technical support.
Page 36 FB8X Service Manual Rev. C, 9/28/10

SERVICE MENU
5
5.4 TESTING AND CALIBRATION
5.4.4 Entering A_HI/A_LO values
CAUTION: Entering the wrong values
can damage the unit and lead to bind
problems.
1. Enter the Service Menu and select the HEATERS
menu.
2. Select the A_HI/A_LO INPUT menu.
The A_HI/A_LO INPUT menu consists of
these six submenus:
SPINE HIGH
Fig 1
The A HI and A LO values are located on the heater tags.
Disregard any negative (-) symbol in front of the A LOW and A
HIGH value if present.
SPINE LOW
BENDER HIGH
BENDER LOW
BACK HIGH
BACK LOW
3. Select the appropriate menu for the heater you are
inputting the value. For example, if you are entering the A_HI value for the Spine Heater, select the
SPINE HIGH menu.
4. A_HI/LO: XXX.X will appear on the display. Press
the Bind button.
5. “EDIT? bind = yes” will appear on the display.
Press the Bind button to confirm that you want to
edit the value.
6. A_HI: XXX.X will appear on the display with the
last value blinking. Enter the A_HI or A_LO value
starting with the last value first. The A_HI and A_LO
values are located on the heater tags (fig 1).
Use the orange Menu and Open buttons to toggle
through numbers and press the green Bind button save
the number. When you press the Bind button you will
be forwarded to the next number.
When you enter the final value, the display will say
“SAVING...” and then you will be taken out of this submenu and returned to the A_HI/A_LO INPUT menu.
7. After entering the A_HI or A_LO values for the
heater, it is recommended you go back into those
menus and verify the correct values have been
inputted.
FB8X Service Manual Rev. C, 9/28/10 Page 37
SERVICE MENU
5
5.4 TESTING AND CALIBRATION
5.4.5 Checking motor functions
Checking the Carriage Motor
1. Enter the MOTORS menu.
2. Select CARRIAGE.
3. Press the orange MENU button to move the Carriage Assembly forward and the green BIND button to move
the Carriage Assembly backward.
When the Carriage Assembly closes three numbers
will be displayed. If the binding recess was empty,
the first number should be 2000 +/- 64.
When the Carriage Assembly is all the way back
and in the home position a home offset value
(+/- 25) appears on the display.
Checking the Bender Motor
1. Enter the MOTORS menu.
2. Select BENDER1.
3. Press the orange MENU button to rotate the Bender Heater down and the green BIND button to rotate the
Bender Heater up.
When the Bender Heater is in the down position, a
value (0 +/- 5) will appear on the display.
Page 38 FB8X Service Manual Rev. C, 9/28/10
When the Bender Heater is in the up position, a
value (50 +/- 5) will appear on the display.

SERVICE MENU
5
5.4 TESTING AND CALIBRATION
Checking the Bender Motor in the BENDER2 menu.
1. Enter the MOTORS menu.
2. Select BENDER2.
3. Press the orange MENU button or the green BIND button to rotate the Bender Heater in the down position,
the halfway position, or the up position.
FB8X Service Manual Rev. C, 9/28/10 Page 39

SERVICE MENU
5
5.4 TESTING AND CALIBRATION
TOOLS REQUIRED: #1 Phillips Screwdriver, Ohmmeter
5.4.6 Checking the Resistance of the Heater Sensors
1. Turn off the machine. Make sure the machine is
unplugged.
2. Remove the Front Cover.
3. Disconnect the Heater Sensor connections
(J1/J2/J3).
4. Touch the red and black probes to each connector
as shown.
5. Verify all Heater sensor connectors have a reading
of 120 ohm +/- 15% at 20°C/68°F.
J1
J3
J2
(J1) Spine Heater Connector
(J3) Back Heater Connector
6. Attach a ground connector to the chassis of the machine as shown.
Touch the red probe to each sensor connector. Each heater should
have a reading greater than 100,000 ohm. Reconnect the heaters.
Ground Connector
(J2) Bender Heater Connector
Page 40 FB8X Service Manual Rev. C, 9/28/10

SERVICE MENU
5
5.4 TESTING AND CALIBRATION
TOOLS REQUIRED: #1 Phillips Screwdriver, Ohmmeter
5.4.7 Checking the Resistance of the Heater Power
Connectors
1. Turn off the machine. Make sure the machine is
unplugged.
2. Drop the Controller Assembly down.
2. Disconnect the Heater Power Connectors
(J5/J6/J7).
3. Touch the two probes to the Heater Power
connector.
4. Verify the readings on the Ohmmeter are as
follows:
HEATER RESISTANCE
(J5) Spine Heater
(J5) SPINE HEATER 115v/100v 27 ohm +/- 15%
(J5) SPINE HEATER 230v 108 ohm +/- 15%
(J6) BENDER HEATER 115v/100v 46 ohm +/- 15%
(J6) BENDER HEATER 230v 186 ohm +/- 15%
(J7) BACK HEATER 115v/100v 68 ohm +/- 15%
(J7) BACK HEATER 230v 273 ohm +/- 15%
(J6) Bender Heater
(J7) Back Heater
5. Attach a ground connector to the chassis of the
machine as shown. Touch the red probe to
the heater connector. Each heater should have a
reading greater than 100,000 ohm. Reconnect the
heaters.
Ground Connector
FB8X Service Manual Rev. C, 9/28/10 Page 41

SERVICE AND CALIBRATION PROCEDURES
6
The focus of these service procedures is to explain how to safely and efficiently remove and replace components
of the binder. Each part of this section deals with a specific component.
Following each of the procedures, may be a list of tasks that must be performed for the procedure to be
completed. The tasks must be completed in the order in which they appear.
6.1 Covers
TOOLS REQUIRED: #1 Phillips Screwdriver
6.1.1 Left Cover
The Left Cover is attached
by one M3x6 LG Flat Head Screw
in the Binding Recess (fig 1) and two
M3x10 PAN Head Plastite Screws on
the underside of the machine (fig 2).
To remove the two screws
on the underside of the machine, flip
the binder on its back end (fig 2) to
prevent scratching the top surface of
the binder.
Fig 1
TOOLS REQUIRED: #1 Phillips Screwdriver
6.1.2 Right Cover
The Right Cover is attached
by one M3x6 LG Flat Head Screw
in the Binding Recess (fig 1) and
two M3x10 SEM PAN Head Plastite
Screws on the underside of the machine.
To remove the two screws
on the underside of the machine, flip
the binder on its back end to
prevent scratching the top surface of
the binder.
To fully remove the Right
Cover, remove the three screws
and then unplug the wire harness
connector (fig 2).
After reinstalling the Right Cover, perform the following task:
Fig 1
Fig 2
Fig 2
TASK 1
Page 42 FB8X Service Manual Rev. C, 9/28/10
Turn the binder on and make sure the buttons on the Right Cover function properly.

SERVICE AND CALIBRATION PROCEDURES
6
TOOLS REQUIRED: #1 Phillips Screwdriver
6.1.3 Front Cover
Removing the Front Cover
1. Remove the Skirt The Skirt is attached by two M3x6 SEM PH PHIL
Screws (fig 1).
2. Use your hands and pry off the bottom of the Front Cover as shown.
Rotate the Cover upwards until it
can be removed from the Tamping
Platform (fig 2).
Attaching the Front Cover
1. Insert the lip of the Front Cover into
the crevice on the Tamping Platform
(fig 3) and then snap the bottom of
the Front Cover into each of the locking places in the base (fig 4).
2. Reattach the Skirt.
Fig 1
Fig 3
Fig 2
Fig 4
Fig 5
Fig 7
6.2 Cooling Rack
TOOLS REQUIRED: #1 & #2 Phillips Screwdrivers
Fig 6
Removing the Cooling Rack
1. Remove the Right and Left
Covers.
2. Remove the Cooling Rack. The
Cooling Rack is attached by
four M4x10 PH PHIL Screws
(fig 5 & 6).
Attaching the Cooling Rack
Fig 8
1. Insert the slot on the underside of
the Cooling Rack into the edge of
the Backside Plate (fig 7).
2. Use the four M4x10 Screws to
reattach the Cooling Rack, making
sure the edge of the Cooling Rack
is even with the top edge of the
side plates (fig 8).
FB8X Service Manual Rev. C, 9/28/10 Page 43

SERVICE AND CALIBRATION PROCEDURES
6
6.3 Controller Assembly
TOOLS REQUIRED: #2 Phillips Screwdriver, Ground Strap
6.3.1 Inspecting the Controller Assembly
The Controller Assembly can be accessed by either removing the
Front Cover (fig 1) or by propping the machine up and then dropping it
down by removing the two screws attaching it the back of the Base Plate
(fig 2 & 3). The Controller Assembly is attached with two M4x6 PH PHIL
Screws.
SAFETY NOTE: When working with the Controller Assembly, always
disconnect the Power Cord and always wear a Ground Strap to protect
NOTE: Removing the Front Cover provides the
best access to all the Wire Harness connections.
the board from ESD.
Fig 1
NOTE: Dropping the
Controller Assembly
down provides the best
access to the Heater
Connections.
Fig 3
Fig 2
CONTROLLER NOTE: Please be aware that there is two types of FB8X Controllers.
One is a NON-RoHS and the other RoHS. They can be identified by their part numbers and colors. Please
refer to pages 71 & 72.
* Please note that the controllers are not interchangable.
6.3.2 Removing the Controller Assembly
1. Disconnect the power cord from the
machine.
2. Remove the Front Cover.
3. Disconnect all the Wire Harness
connections from the Controller
Assembly (fig 4).
4. Prop the back of the machine up and
Fig 4
remove the two M4x6 Screws attaching
the Controller Assembly to the back of
the Base Plate.
5. Gently lower the Controller Assembly
down and disconnect the three heater
connectors.
6. Remove the Controller Assembly (fig 5).
Page 44 FB8X Service Manual Rev. C, 9/28/10
Fig 5

SERVICE AND CALIBRATION PROCEDURES
6
6.3 Controller Assembly
Fig 2
Fig 1
Fig 3
If the same Controller Assembly is removed and then reinstalled, perform the following tasks:
6.3.2 Installing the Controller Assembly
1. Prop the back end of the machine up
and place the Controller Assembly
underneath.
2. Connect the three Heater connections.
3. Connect the Wire Harness connections
in the front of the of the Controller
Assembly
4. Insert the Controller Assembly bracket
into the Base Plate (fig 1). Verify the
bracket is not placed outside the base
plate as shown (fig 2).
5. Lift up on the Controller Assembly and
attach to the back of the Base Plate using
the two M4x6 Screws (fig 3).
TASK 1
Check the Sensors.
TASK 2 Verify heaters are plugged in by selecting the CHECK HEATER SN menu.
TASK 3 Test the heaters.
If a new Controller Assembly is installed, perform the following tasks:
TASK 1
Calibrate the Book Sensor, the Strip Sensor, the Carriage, and the Heaters in CALIBRATION menu.
TASK 2 Input new A_HI/A_LO INPUT values for each of the heaters. The A HI/ A LO values are located on
each of the heater tags.
6.3.3 Changing the Fuses
1. Disconnect the Power Cord.
2. Prop the machine up and drop the
Controller Assembly down.
3. Use a fuse puller to remove the Fuses.
4. Insert the new fuse(s) by snapping them
in place by hand.
Left photo: NON-RoHS / Right Photo: RoHS
ESD PROTECTION: Wear a Ground Strap
while working with the Controller Assembly.
If any fuses are replaced, perform the following task:
TASK 1
FB8X Service Manual Rev. C, 9/28/10 Page 45
Test the heaters.

SERVICE AND CALIBRATION PROCEDURES
6
6.4 Carriage Drive
TOOLS REQUIRED: #2 Phillips Screwdriver, Needle Nosed Pliers, Diagonal Cutters
Removing the Carriage Drive
1. Remove the Right and Left Covers.
2. Remove the Cooling Rack.
3. Cut the cable tie attaching the Wire
Harness to the Carriage Motor sensor board using Diagonal Cutters.
4. Disconnect the Wire Harness
connector from the Carriage Motor.
5. Remove the two Carriage Springs
using Needle Nosed Pliers (fig 1 & 2).
6. Move the Carriage Assembly forward
so that the two screws attaching the
Drive Nut Bracket are accessible (fig
3). This will ensure that no damage
is done to the sensor board on the
Carriage Drive Motor.
6. Remove the two M4x20 PH PHIL
Screws attaching the Drive Nut
Bracket, the Right Carriage Guide,
and the Carriage Guide Back together
(fig 3).
7. Remove the Carriage Guide Back.
8. Flip the Drive Nut Bracket down and
remove (fig 4).
9. Remove the three M4x8 PH PHIL
Screws attaching the Carriage Drive
Plate to the Right Side Plate (fig 5).
10. Remove the Carriage Drive
Assembly.
Fig 2
Fig 1
Fig 4
Fig 3
Fig 5
Page 46 FB8X Service Manual Rev. C, 9/28/10

SERVICE AND CALIBRATION PROCEDURES
6
6.4 Carriage Drive
TOOLS REQUIRED: #2 Phillips Screwdriver, Needle Nosed Pliers, Diagonal Cutters
Fig 2
Fig 1
Fig 3
Installing the Carriage Drive
1. Insert the half shears on the Carriage Drive Plate into the hole and
slot in the Right Side Plate (fig 1).
2. Attach the Carriage Drive to the
Right Side Plate using the three
M4x8 PH PHIL Screws. Ensure the
Carriage Drive Plate is flush against
the Right Side Plate (fig 2). Ensure
the Carriage Drive does not pinch
the Carriage Home Switch (fig 3).
2. Place the Carriage Back Guide
against the Right Carriage Guide in
the orientation shown (fig 4).
3. Attach the Drive Nut Bracket to
the Drive Nut as shown (fig 5).
4. Flip the Drive Nut Bracket up
and use the two M4x20 Screws
to attach the Drive Nut Bracket,
the Right Carriage Guide, and the
Carriage Guide Back together.
5. Attach the two Carriage Springs
using Needle Nosed Pliers.
6. Connect the Wire Harness connector to the Carriage Motor.
7. Cable Tie the wire to the Carriage
Motor sensor board (fig 6). The
wires must be routed to the motor
side of the circuit board.
8. Reinstall the Cooling Rack.
9. Reinstall the Right and Left Covers.
Fig 4
Fig 6
Fig 5
After replacing the Carriage Drive, perform the following tasks:
TASK 1
Test the Carriage Motor
TASK 2 Recalibrate the Carriage Assembly in the CAL CARRIAGE menu.
FB8X Service Manual Rev. C, 9/28/10 Page 47

SERVICE AND CALIBRATION PROCEDURES
6
6.5 Bender Drive
TOOLS REQUIRED: #1 & #2 Phillips Screwdrivers
Removing the Bender Drive
1. Remove the Right Cover.
2. Remove the Front Cover.
3. Remove the two M3x6 SEM PH PHIL
Screws attaching the Bender Drive to the
Right Side Plate (fig 1).
4. Disconnect the Wire Harness connector
from the Bender Drive.
Fig 1
Installing the Bender Drive
1. Connect the Wire Harness connector
to the Bender Drive.
2. Insert the Bender Drive through the hole
in the Right Side Plate, making sure the
sensor board is pointing towards the
inside of the machine and that the teeth
of the Bender Drive gear and the Bender
Gear engage each other (fig 2).
3. Attach the Bender Drive to the Right
Side Plate using two M3x6 SEM PH PHIL
Screws.
Fig 2
After replacing the Bender Motor, perform the following tasks:
TASK 1
Test the Bender Motor in the BENDER1 menu.
Page 48 FB8X Service Manual Rev. C, 9/28/10

SERVICE AND CALIBRATION PROCEDURES
6
6.6 Sensors
TOOLS REQUIRED: #1 & #2 Phillips Screwdrivers
Fig 3
Fig 1 Fig 2
6.6.1 Removing the Strip Present PCA
1. Remove the Right and Left Covers.
2. Remove the Front Cover.
3. Remove the four M4x10 PH PHIL Screws
attaching the Tamping Platform to the
Right and Left Side Plates (fig 1 & 2).
4. Disconnect the Wire Harness connector
from the Strip Sensor.
5. Remove the M3x6 PH PHIL Screw attaching the Strip Sensor bracket to the
Tamping Platform.
6. Remove the M3x6 LG PH PHIL Screw
attaching the Strip Sensor to the Bracket.
Installing the Strip Present PCA
1. Attach the Strip Sensor to the Strip
Sensor Bracket using one M3x6 LG PH
PHIL Screw.
2. Attach the Strip Sensor bracket to the
Tamping Platform using the M3x6 Screw.
3. Insert the Wire Harness connector
through the hole on the other side and
connect to the Strip Sensor (fig 3).
4. Reattach the Tamping Platform using the
four M4x10 Screws.
5. Reattach the Right and Left Covers.
6. Reattach the Front Cover.
After replacing the Strip Present PCA, perform the following tasks:
TASK 1
Recalibrate Strip Sensor in the CAL STRIP SENSOR menu.
TASK 2 Check Strip Sensor in the CHECK SENSORS menu.
FB8X Service Manual Rev. C, 9/28/10 Page 49

SERVICE AND CALIBRATION PROCEDURES
6
6.6 Sensors
TOOLS REQUIRED: #1 & #2 Phillips Screwdrivers
6.6.2 Removing the Book Sense Emitter PCA
1. Remove the Front Cover.
2. Remove the M4x8 PH PHIL Screw attaching
the Book Emitter PCA to the Tamping Platform.
3. Disconnect the Wire Harness connector from
the Book Emitter PCA.
Fig 4
Installing the Book Sense Emitter PCA
1. Attach the Book Emitter PCA to the Tamping
Platform using one M4x8 PH PHIL Screw.
2. Connect the Wire Harness connector (fig 4).
3. Reinstall the Front Cover.
After replacing the Book Sense Emitter PCA, perform the following tasks:
TASK 1
Recalibrate Book Sensor in the CAL BOOK SENSOR menu.
TASK 2 Check Book Sensor in the CHECK SENSORS menu.
Page 50 FB8X Service Manual Rev. C, 9/28/10

SERVICE AND CALIBRATION PROCEDURES
6
6.6 Sensors
Replacing the Book Detector requires you to partially disassemble the Carriage Assembly. It is recommend that
before you replace the Book Detector, you first replace the Book Emitter only, and then check the sensors in the CHECK
SENSORS menu. If the sensor test fails, follow the instructions to replace the Book Detector.
TOOLS REQUIRED: #1 & #2 Phillips Screwdrivers
Fig 1
Fig 3
Fig 2
6.6.3 Removing the Book Sense
Detector PCA
1. Remove the Right and Left Covers.
2. Remove the Cooling Rack.
3. Remove the Carriage Assembly but do
not disconnect it from the Controller
Assembly.
4. Remove the four M3x12 FH PHIL
Screws attaching the Carriage Top
(fig 1 & 2).
5. Disconnect the Wire Harness connector from the Book Detector PCA.
6. Pull the Book Sense Detector PCA
from the pinched slot.
Installing the Book Sense Detector
PCA
1. Insert the Book Sense Detector PCA
into the pinched slot making sure that it
is firmly seated inside the slot.
2. Connect the Wire Harness connector
(fig 3).
3. Reattach the Carriage Top using the
four M3x12 FH PHIL Screws and making sure the top edge of the PCA fits
into the slot on the underside of the
plate.
4. Reinstall the Carriage Assembly.
5. Reinstall the Cooling Rack.
6. Reinstall the Right and Left Covers.
7. Reinstall the Front Cover.
After replacing the Book Detector, perform the following tasks:
TASK 1
Recalibrate Book Sensor in the CAL BOOK SENSOR menu.
TASK 2 Check Book Sensor in the CHECK SENSORS menu.
TASK 3 Recalibrate the Carriage Assembly in the CAL CARRIAGE menu.
FB8X Service Manual Rev. C, 9/28/10 Page 51

SERVICE AND CALIBRATION PROCEDURES
6
6.7 Switches
TOOLS REQUIRED: #1 & #2 Phillips Screwdrivers, 2.5 Hex Key
6.7.1 Removing the Carriage Home Switch
1. Remove the Right and Left Covers.
2. Remove the Cooling Rack.
3. Remove the M3x10 SH CAP Screw using a
2.5mm Hex Key (fig 1).
4. Unplug the Carriage Home Switch from the
Wire Harness from inside the machine.
Fig 1
Installing the Carriage Home Switch
1. Insert the Carriage Home Switch wire
through the hole in the Right Side Plate and
connect it to the Wire Harness (fig 2).
2. Attach the Switch to the Right Side Plate
using a M3x10 SH CAP Screw and a 2.5mm
Hex Key.
3. Reinstall the Cooling Rack.
4. Reinstall the Right and Left Covers.
Fig 2
After replacing the Carriage Home Switch, perform the following tasks:
TASK 1
Check the switch in the CHECK SENSORS menu.
TASK 2 Recalibrate the Carriage.
Page 52 FB8X Service Manual Rev. C, 9/28/10

SERVICE AND CALIBRATION PROCEDURES
6
Fig 1
The little black cable tie on the Switches wire must be next
to the 1/8” wide cable tie.
6.7 Switches
TOOLS REQUIRED: #1 & #2 Phillips Screwdrivers, Diagonal Cutters
6.7.2 Removing the Carriage Clamp Switch
1. Remove the Right and Left Covers.
2. Remove the Cooling Rack.
3. Remove the M3x10 SH CAP Screw using a 2.5mm Hex Key.
4. Cut the head of the cable tie attaching the Switch’s wire to
the Wire Harness bundle.
5. Unplug the Carriage Clamp Switch connector from the Wire
Harness (fig 1).
Installing the Carriage Clamp Switch
1. Connect the Carriage Clamp Switch connector to the Wire
Harness.
2. Attach the Carriage Clamp Switch to the bracket on the
Carriage Assembly using the M3x10 SH CAP Screw. The
Switch is positioned by a round tab that engages a hole in the
bracket. Make sure the wire is routed as shown in the picture.
3. Cable tie the Switch’s wire and the Wire Harness bundle to
the Base Plate using a 1/8” wide cable tie.
4. Verify the little black cable tie on the Switch’s wire is next to
the 1/8” Cable tie. Trim excess on 1/8” cable tie.
After replacing the Carriage Clamp Switch, perform the following tasks:
TASK 1
Check the switch in the CHECK SENSORS menu.
TASK 2 Recalibrate the Carriage.
Fig 3
6.8 Display
TOOLS REQUIRED: #1 Phillips Screwdriver
Removing the Display
1. Remove the Right Cover.
2. Remove the Front Cover.
3. Pull the Display up out of the slot in
the Right Side Plate.
4. Disconnect the Wire Harness
connector.
Fig 4
Installing the Display
1. Connect the Wire Harness to the
Display (fig 3).
2. Insert the Display into the slot in the
Right Side Plate (fig 4).
3. Reinstall the Right Cover.
4. Reinstall the Front Cover.
After replacing the Carriage Home Switch, perform the following tasks:
TASK 1
FB8X Service Manual Rev. C, 9/28/10 Page 53
Turn the binder on and make sure characters appear on the display.

SERVICE AND CALIBRATION PROCEDURES
6
6 . 9 H e a t e r A s s e m b l i e s
TOOLS REQUIRED: #1 & #2 Phillips Screwdrivers, Diagonal Cutters
6.9. 1 Removing the Bender Assembly
1. Remove the Right and Left Covers.
2. Remove the Front Cover.
3. Cut the cable tie attaching the Bender
Heater wires to the Tamping Platform.
4. Remove the four M4x10 PH PHIL
Screws attaching the Tamping Platform
to the Right and Left Side Plates.
5. Do not remove the Tamping Platform
completely. Keep the Strip Present PCA
attached to the Wire Harness and just
flip the Tamping Platform out of the way
so as to gain better access to the Bender
Heater (fig 1).
5. Remove the two M4x16 PH PHIL
Screws attaching the Bender Heater to
the Right and Left Bender Pivots
(fig 2 & 3).
6, Disconnect the Bender Heater connec-
tions from the Controller Assembly.
Fig 1
Fig 2
Fig 3
Installing the Bender Assembly
1. Insert the tabs on the Bender Pivots into
the holes on the ends of the Bender
Heater (fig 4).
2. Attach the heater to the Bender Pivots
using the two M4x16 PH PHIL Screws.
3. Reattach the Tamping Platform using the
four M4x10 Screws.
4. Connect the two Bender Heater connections to the Controller Assembly.
5. Cable tie the wires to the Tamping
Platform (fig 5). Ensure there is proper
slack in the wires for the Bender Heater
to rotate up and down.
After replacing the Bender Heater, perform the following tasks:
TASK 1
Input A_HI/A_LO INPUT values. A_HI/ A_LO values are located on the heater tags.
NOTE: This is only necessary if a new Bender Heater has been installed.
Fig 4
Fig 5
TASK 2 Calibrate the Bender Heater in CAL HEATERS menu.
TASK 3 Test the heater and measure the temperature.
Page 54 FB8X Service Manual Rev. C, 9/28/10

Fig 3
SERVICE AND CALIBRATION PROCEDURES
6
6.9 Heater Assemblies
TOOLS REQUIRED: #1 & #2 Phillips Screwdrivers, Needle Nosed Pliers, 2.5mm Hex Key
6.9.2 Removing the Carriage Assembly
(Back Heater)
1. Remove the Right and Left Covers.
2. Remove the Front Cover.
3. Remove the Cooling Rack.
4. Remove the M3x10 SH CAP Screw
attaching the Carriage Clamp Switch using a 2.5mm Hex Key (fig 1).
Fig 1
Fig 4
5. Remove the Carriage Springs.
Fig 2
6. Remove the Left Carriage Guide by
unscrewing the two M3x10 PH PHIL
Screws (fig 2).
7. Remove the two M4x20 PH PHIL Screws
attaching the Drive Nut Plate, the Right
Carriage Guide, and the Carriage Back
Guide (fig 3).
8. Remove the Right Carriage Guide by
moving the Carriage Assembly towards
the front of the machine and sliding the
guide all the way forward and out of the
slot (fig 4).
9. Disconnect the Wire Harness from the
Book Detector PCA.
10. Disconnect the Back Heater wires from
the Controller Assembly.
11. Remove the Carriage Assembly.
FB8X Service Manual Rev. C, 9/28/10 Page 55

SERVICE AND CALIBRATION PROCEDURES
6
6.9 Heater Assemblies
TOOLS REQUIRED: #1 & #2 Phillips Screwdrivers, Needle Nosed Pliers
6.9.2 Installing the Carriage Assembly
(Back Heater)
1. Connect the Heater connections to the
Controller Assembly.
2. Install the Carriage Assembly by feeding the
tab on the right side of the Carriage Assembly into the long slot in the Right Side
Plate (fig 1). When installed, the Carriage
will be sitting on the Carriage Alignment
Gears.
3. Move the Carriage Assembly forward and
check the alignment to the Spine Heater.
The left side of the Carriage should be
ever so slightly more forward than the
right side (fig 2 & 3). If it is not, lift one
side of the Carriage off the gears and realign.
4. Connect the Wire Harness connector to
the Book Detector PCA (fig 4).
5. Attach the Left Carriage Guide using two
M3x10 PH PHIL Screws. Ensure the tabs
in the Left Carriage Guide fit into the hole
and slot in the Left Carriage Plate.
6. Move the Carriage Assembly all the way
Fig 4
forward until the slot aligns with the slot in
the Right Side Plate. Insert the Right Carriage Guide into the slot making sure the
tabs are facing outward. Push the Carriage
Guide all the way back (fig 5).
7. Move the Carriage Assembly back. Flip
the Drive Nut Bracket up so that the holes
engage the two tabs in the Right Carriage
Guide.
8. Place the Carriage Guide Back against the
Right Carriage Guide in the orientation
shown (fig 6).
9. Use the two M4x20 Screws to attach
the Drive Nut Bracket, the Right Carriage Guide, and the Carriage Guide Back
together (fig 7). Verify these screws are
very tight.
10. Reattach the Carriage Clamp Switch.
11. Reattach the Carriage Springs
12. Reattach the Covers and the
Cooling Rack.
After replacing the Carriage Assembly, perform the following tasks:
Fig 1
Fig 2
Fig 6
Fig 3
Fig 5
Fig 7
TASK 1
Input A_HI/A_LO INPUT values. A_HI/A_LO values are located on the heater tags.
NOTE: This is only necessary if a new Carriage Assembly has been installed.
TASK 2 Calibrate the Back Heater in CAL HEATERS menu.
TASK 3 Test the heater and measure the temperature.
TASK 4 Recalibrate Carriage Assembly in the CAL CARRIAGE menu.
Page 56 FB8X Service Manual Rev. C, 9/28/10

SERVICE AND CALIBRATION PROCEDURES
6
6.9 Heater Assemblies
TOOLS REQUIRED: #1 & #2 Phillips Screwdrivers, Needle Nosed Pliers, 2.5mm Hex Key
Fig 2
Fig 1
Fig 3
Fig 5
Fig 8
Fig 7
After replacing the Spine Heater, perform the following tasks:
6.9.3 Removing the Spine Assembly
1. Remove the Right and Left Covers.
2. Remove the Cooling Rack.
3. Remove the Carriage Assembly.
4. Remove the M4x6 PH PHIL Screw attaching
the Carriage Alignment Plate to the Left Side
Plate (fig 1). Remove the Plate.
5. Remove the Carriage Alignment Shaft by
swinging it in an arc so that the other end
detaches from the pivot pin in the side plate
(fig 2).
6. Remove the Spine Spring (fig 3).
7. Remove the two 7mm Retaining Rings from
the Spine Pivot Pins using Needle Nosed
Pliers (fig 4).
8. Remove the Spine Pivot Pins.
9. Disconnect the heater connections from the
Controller Assembly.
Fig 4
10. Remove the Spine Heater.
Installing the Spine Assembly
Fig 6
1. Connect the two heater connectors to the
Controller Assembly (fig 5).
2. Insert the tab on the Spine Heater through
the slot in the Left Side Plate (fig 6).
3. Attach the two Spine Pivot Pins making sure
the groove is near the side plates.
4. Attach the two 7mm Retaining Rings into the
Spine Pivot Pins (fig 7 & 8).
5. Install the Carriage Alignment Shaft Assy by
inserting the right side into the pivot pin on
the Right Side plate.
6. Attach the left side of the shaft by inserting
the Carriage Alignment Plate through the
Left Side Plate and into the Carriage Alignment Gear.
7. Attach the Carriage Alignment Plate using
the M4x6 PH PHIL Screw.
8. Attach the Spine Spring.
9. Reinstall the Carriage Assembly.
10. Reinstall the Cooling Rack and the Covers.
TASK 1
Input A_HI/A_LO INPUT values. A_HI/A_LO values are located on the heater tags.
NOTE: This is only necessary if a new Spine Heater has been installed.
TASK 2 Calibrate the Spine Heater in CAL HEATERS menu.
TASK 3 Test all heaters.
TASK 4 Measure the Spine Heater temperature
TASK 5 Recalibrate the Carriage Assembly in the CAL CARRIAGE menu.
FB8X Service Manual Rev. C, 9/28/10 Page 57

SERVICE AND CALIBRATION PROCEDURES
6
6.10 Fan
TOOLS REQUIRED: #1 & #2 Phillips Screwdrivers, Needle Nosed Pliers, 2.5mm Hex Key, Diagonal Cutters
Removing the Fan
1. Remove the Right and Left Covers.
2. Remove the Cooling Rack.
3. Remove the Carriage Assembly.
4. Remove the Carriage Alignment Shaft.
5. Remove the Spine Heater.
6. Remove the two M4x20 PH PHIL
Screws attaching the Fan Shroud and the
Fan to the Base Plate (fig 1).
7. Cut the cable tie that secures the Fan
wire to the Wire Harness wire bundle.
8. Disconnect the Fan connector from the
Wire Harness connector.
Installing the Fan
1. Place the Fan on Base Plate so that label
is facing up and the fan wires come out
towards the front of the machine.
2. Place the Fan Shroud over the Fan and
attach using M4x20 Pan Head Screws
making sure that no wires are being
pinched under the Fan or Shroud. Ensure the Fan Shroud is oriented so that
the open end is facing the Controller
Assembly (fig 1)
3. Connect the Fan connector to the Wire
Harness connector.
4. Use a cable tie and secure the Fan wire
and the Wire harness bundle to the
Base Plate (fig 2). Trim off excess cable
tie.
5. Reinstall the Spine Heater.
6. Reinstall the Carriage Alignment Shaft.
7. Reinstall the Carriage Assembly.
8. Reinstall the Cooling Rack.
9. Reinstall the Right and Left Covers.
Fig 1
Fig 2
After replacing the Fan, perform the following tasks:
TASK 1
Test the heaters. Make sure the fan turns on during this test.
TASK 2 Calibrate the Carriage Assembly in the CAL CARRIAGE menu.
Page 58 FB8X Service Manual Rev. C, 9/28/10

Fig 1
SERVICE AND CALIBRATION PROCEDURES
6
6.11 Jaw
TOOLS REQUIRED: #1 & #2 Phillips Screwdrivers
Removing the Jaw Assembly
Fig 2
1. Remove the Right and Left Covers.
2. Remove the Front Cover.
3. Remove the four M4x10 PH PHIL Screws
attaching the Tamping Platform to the
Right and Left Side Plates.
4. Do not remove the Tamping Platform
completely. Just flip the Tamping Platform
out of the way so as to gain better access
to the Jaw Assembly.
5. Remove the two Jaw Springs.
6. Remove the Jaw Assembly.
Fig 3
7. Remove the two Jaw Guides from the Jaw
Assembly.
Fig 4
Fig 5
Installing the Jaw Assembly
1. Attach the Jaw Guide to the right side of
the Jaw Assembly (fig 1). After you hear
the jaw guide click into place pull back on
the guide as shown until it can’t go any
further.
2. Place the right Jaw Guide on the Jaw
Assy. into the slot in the Right Side Plate
as shown (fig 2). Attach a Jaw Guide to
the other side of the jaw and into the
slot of the Left Side Plate making sure to
pull back on the guide after you hear an
audible click. (fig 3).
3. Attach the Jaw Springs where shown. The
open end of the spring goes into the Jaw
Guide (fig 4 & 5).
4. Reattach the Tamping Platform using the
four M4x10 PH PHIL Screws.
5. Reattach the Covers.
FB8X Service Manual Rev. C, 9/28/10 Page 59
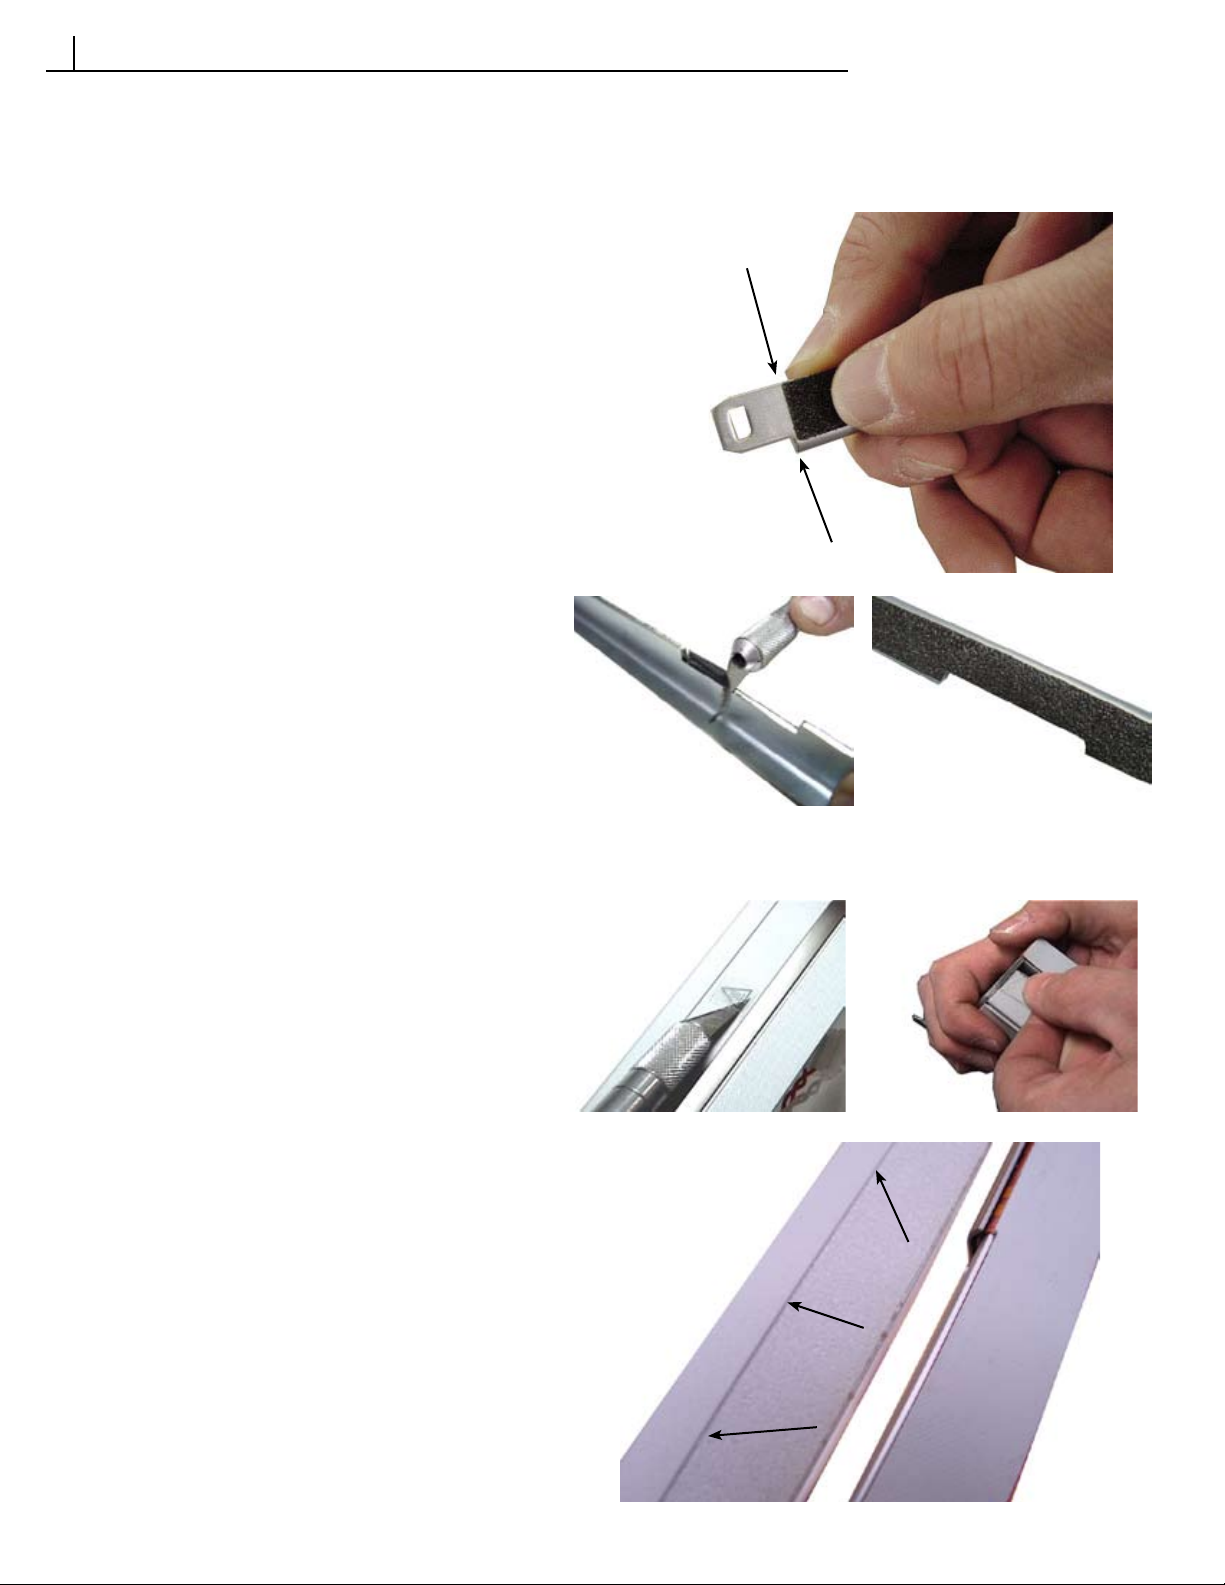
SERVICE AND CALIBRATION PROCEDURES
6
6.12 Grip Tape
TOOLS REQUIRED: #1 & #2 Phillips Screwdrivers, Exacto Knife
Replacing the Grip Tape on the Jaw Assembly
1. Follow the instructions to remove the Jaw Assembly
as outlined in Section 6.11.
2. Carefully peal off the existing Grip Tape.
3. After removing the Grip Tape, clean the Jaw with
Denatured Alcohol.
4. Line up the edge of the Grip Tape with the edge of
the Jaw as shown (fig 1)
5. Carefully apply the Grip Tape to the Jaw making
sure the bottom edge is flush with the bottom edge
of the Jaw.
6. Cut out the excess Grip Tape from the recess using
an Exacto Knife (fig 2 & 3).
7 Reattach the Jaw Assembly as outlined in Section
6.11.
Fig 1
Fig 2 Fig 3
Replacing the Grip Tape on the Carriage Assembly
1. Remove the Carriage Assembly as outlined in
Section 6.9.2.
2. Carefully peal off the existing Grip Tape.
3. Remove the Hot Symbol Label.
4. Clean the Carriage Assembly with Denatured
Alcohol.
5. Apply the Hot Symbol Label to the middle of the
Carriage Top using an exacto knife as shown (fig 4).
6. Apply the Carriage Grip Tape to the Carriage Top
making sure to line up the edge of the grip tape with
the right edge of the Carriage Top (fig 5). Slowly
separate the grip tape from the release liner as you
apply it across the Carriage Top making sure to
press out any air bubbles.
7. Verify the top edge of the Grip Tape is flush with
the edge of the Carriage Assembly (fig 6).
8. Reinstall the Carriage Assemby as outlined in
Section 6.9.2.
Fig 4 Fig 5
Fig 6
Page 60 FB8X Service Manual Rev. C, 9/28/10

SERVICE AND CALIBRATION PROCEDURES
6
THIS PAGE IS INTENTIONALLY LEFT BLANK
FB8X Service Manual Rev. C, 9/28/10 Page 61

UPGRADING FIRMWARE
7
7.1 Tools Required
FB8x
P31 Printer Cable (K-551-1685)
PC with either Windows 98, 2000, XP, ME, or Vista
and a 9-pin com port.
FB8x Flash Updater V 1.0 (see step 1)
Hex file for new firmware (see step 1)
P31 Printer Cable (K-551-1685)
Page 62 FB8X Service Manual Rev. C, 9/28/10

UPGRADING FIRMWARE
7
7.2 Upgrading Firmware Procedure
This procedure applies to Version 1.0 of the FB8x Flash Updater. Future versions of the FB8x Flash Updater
may require a different procedure. If necessary, future versions of the software will be supplied with its own updated
procedure instructions.
Ensure you have the FB8x Flash Updater V1.0 loaded onto your computer. This software is available for download from the Powis Parker website. The software in located on the Dealer Side, in Technical Support, under
Manuals and Software. No installation procedure is required for this software. Just save the .exe file in an easy
to find location.
1. Download the latest FB8x firmware from the Powis Parker website. The hex file that will contain the new
firmware is located on the Dealer Side, in Technical Support, under Manuals and Software.
Firmware Notes: There is a NON-RoHs and a RoHS version on the website. Make sure
you download the correct version according to your controller version. (See pages 71 &
72.)
2. Verify the FB8x is turned OFF. Connect the PC to the FB8x using the P31 Printer Cable.
3. Start the Flash Upgrade program by double clicking the icon.
FB8X Service Manual Rev. C, 9/28/10 Page 63

UPGRADING FIRMWARE
7
7.2 Upgrading Firmware Procedure
4. When you open the Flash Upgrade software, an introductory screen will pop up
containing the title and some introductory information. Click the NEXT button.
5. The Communications Setup window will appear. Select the com port to which the FB8x is connected.
NOTE: If the port to which the FB8x is connected is not available, it might be in use by another program. If you are sure
that there aren’t any other programs using the com port, use the Windows Control Panel to check if the port is working.
6. After selecting the com port, turn the FB8x ON. After 0-10 seconds the FB8x LCD should say
LOADER RUNNING and the NEXT button in the Flash Upgrade window should darken and become available.
Click the NEXT button.
NOTE: If LOADER RUNNING does not appear on the FB8x LCD and the NEXT button does not become available, the
incorrect com port has been selected. If this happens, turn the FB8x off, select the correct com port, and turn the FB8x
back on.
Page 64 FB8X Service Manual Rev. C, 9/28/10

UPGRADING FIRMWARE
7
7.2 Upgrading Firmware Procedure
7. The Firmware File Selection window will appear. Click the OPEN button in the
top right corner of the window.
8. A file selection dialog window will appear. Find and select the hex file that contains the new firmware.
Click NEXT.
NOTE: If you choose an incorrect or corrupt file, you will get an error message. The NEXT button will be unavailable
until an appropriate hex file is chosen.
FB8X Service Manual Rev. C, 9/28/10 Page 65

UPGRADING FIRMWARE
7
7.2 Upgrading Firmware Procedure
9. A Review and Conformation window will appear. This window contains summary information about the
firmware that is currently on the FB8x and the firmware you are about to install. The Flash-Upgrade program will
use the firmware dates and hardware compatibility information to make a recommendation about installing the
firmware.
To install the new firmware, click the NEXT button.
NOTE: This is the last chance to keep the old firmware; once you start the transfer process, the old firmware will be gone.
10. The Firmware Transfer window will appear showing the progress of the firmware transfer. When the
transfer is over the Flash Upgrade program will go automatically to the final screen.
Page 66 FB8X Service Manual Rev. C, 9/28/10

UPGRADING FIRMWARE
7
7.2 Upgrading Firmware Procedure
11. The Results and Final Setup window appears. This window contains an information message about the
success of the firmware transfer and a space for additional information about the setup process. Any additional
steps needed for this upgrade will appear in this window.
Click the FINISH button to exit the Flash Upgrade program.
The Flash upgrade is now complete.
FB8X Service Manual Rev. C, 9/28/10 Page 67

UPGRADING FIRMWARE
7
THIS PAGE IS INTENTIONALLY LEFT BLANK
Page 68 FB8X Service Manual Rev. C, 9/28/10

Service Kit Part Numbers
8
Service Kit Listing of FB8x Parts
K-311-4069 Service Kit, Rubber Feet
K-410-3996 Service Kit, Cooling Rack
K-425-4100 Service Kit, Book Support Fence
K-A3926-02 Service Kit, Right Cover Assembly
K-A3931 Service Kit, Display Assembly
K-A3933 Service Kit, Carriage Drive Assembly
K-A3976 Service Kit, Jaw Assembly
K-A4006 Service Kit, Bender Motor Assembly
K-A4008 Service Kit, Carriage Alignment Shaft Assembly
K-A4013D Service Kit, Spine Assembly (D & J)
K-A4013E Service Kit, Spine Assembly (E)
K-A4089 Service Kit, Fan Assembly
K-A4092D Service Kit, Controller Assembly (D)
K-A4092E Service Kit, Controller Assembly (E)
K-A4092J Service Kit, Controller Assembly (J)
K-A4102D Service Kit, Bender Assembly (D & J)
K-A4102E Service Kit, Bender Assembly (E)
K-A4104D Service Kit, Carriage Assembly (D & J)
K-A4104E Service Kit, Carriage Assembly (E)
K-A4641 Service Kit, Fuse Kit
K-A4687 Service Kit, Spring Kit
K-A4708 Service Kit, Grip Tape Kit
K-A4709 Service Kit, Fastener Kit
K-A4710 Service Kit, Plastic Part Kit
K-A4711 Service Kit, Small Metal Parts Kit
K-A4730 Service Kit, Sensor Kit
K-A4731-02 Service Kit, Switch Kit
K-A4732-02 Service Kit, Plastic Cover Kit
K-L3997 Service Kit, User Manual (D,E, & A)
K-L4703 Service Kit, User Manual (J)
Service Kit Listing of Tools Needed
K-820-011 Service Kit, Temperature Meter
K-820-012 Service Kit, Straight Temperature Probe
K-820-3436 Service Kit, Right Angle Temperature Probe
K-551-1685 Service Kit, P31 Printer Cable
K-212-001 Service Kit, Citrus Cleaning Solution
D= Domestic, 115v
J= Japan, 100v
E= European, 230v
A= Australian, 230v
FB8X Service Manual Rev. C, 9/28/10 Page 69
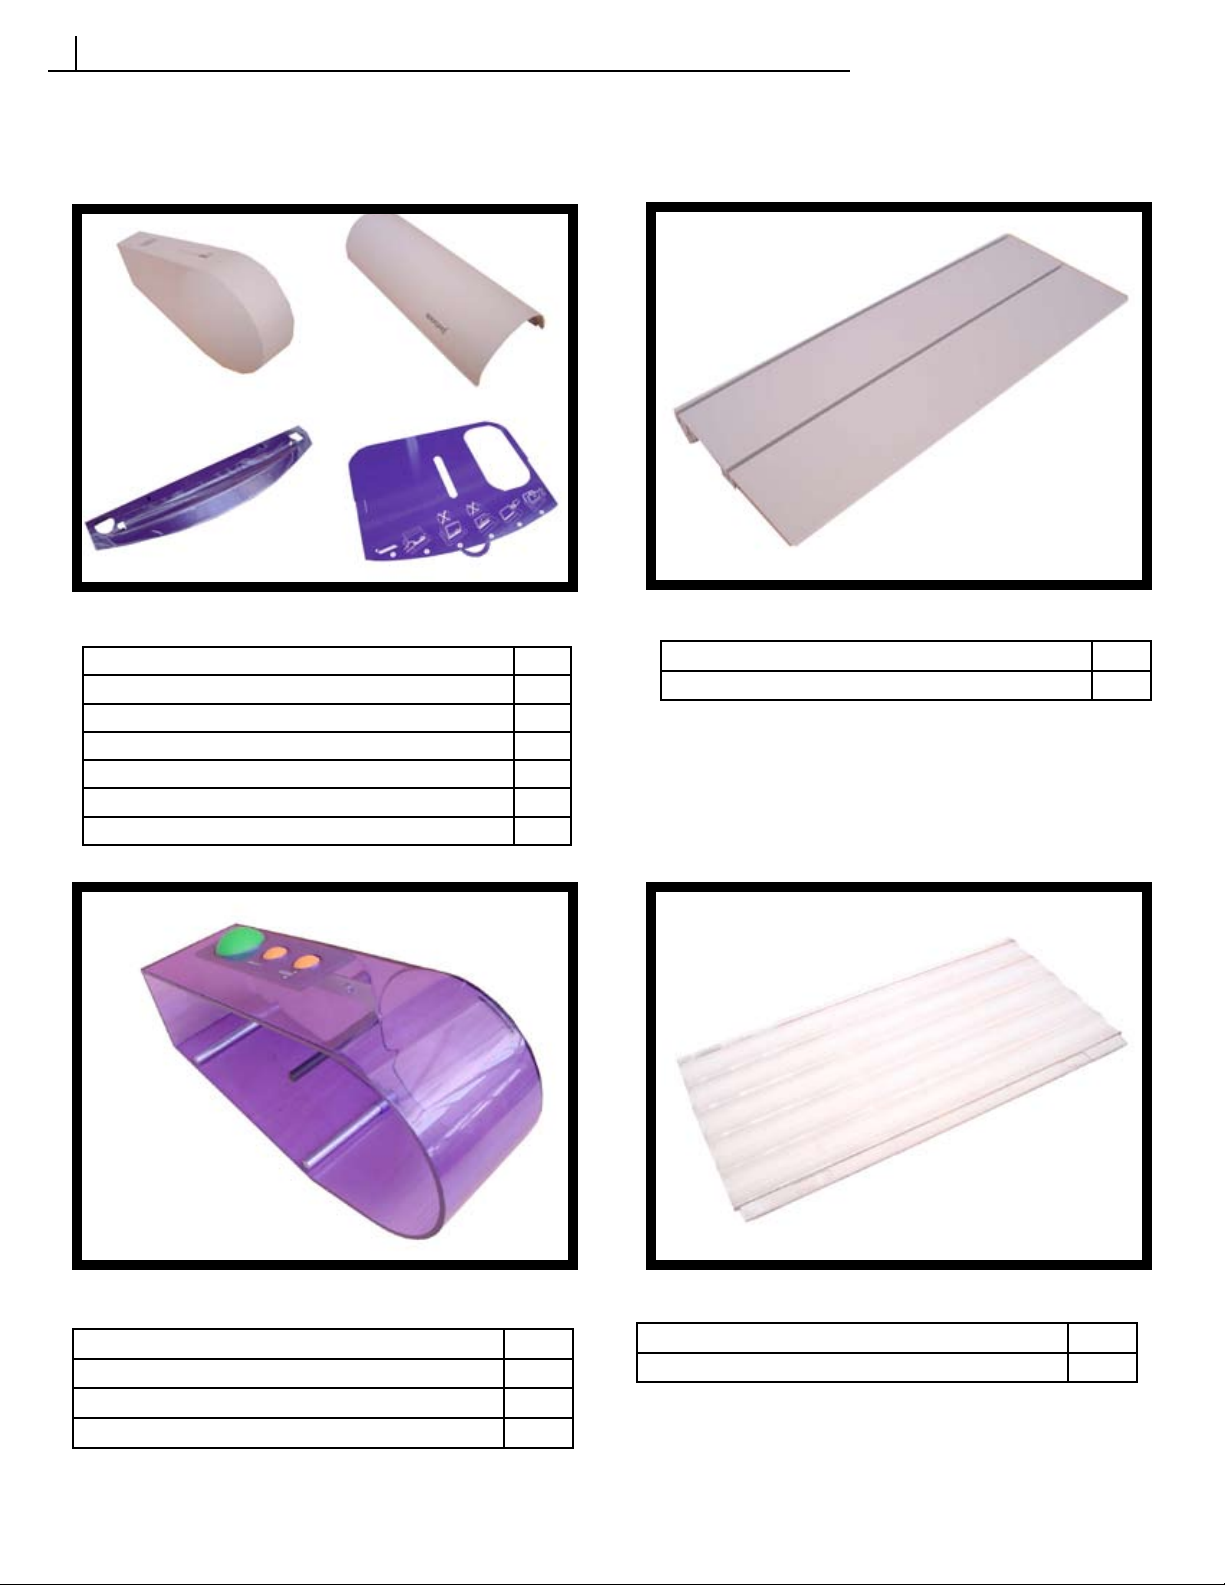
S E R V I C E K I T P I C T U R E S
9
Covers
K-A4732-02 Service Kit, Plastic Cover Kit
Item Qty.
Left Cover 1
Front Cover 1
Skirt 1
Pull Out Instruction Card 1
Screw,FH Phl, M3x.5x6mm Zi 1
Screw, PH, Phil, M3x10 Lg Plastite 2
K-410-3996 Service Kit, Cooling Rack
Item Qty.
Cooling Rack 1
K-A3926-02 Service Kit, Right Cover Assembly
Item Qty.
Right Cover Assembly 1
Screw,Fh Phl, M3x.5x6mm Zi 1
Screw, PH, Phil, M3x10 Lg Plastite 2
Page 70 FB8X Service Manual Rev. C, 9/28/10
K-425-4100 Service Kit, Book Support Fence
Item Qty.
Book Support Fence 3

SERVICE KIT PICTURES
9
Electronics
K-A4730 Service Kit, Sensor Kit
Item Qty.
Strip Detector PCA 1
Book Sense Emitter PCA 1
Book Sense Detector PCA 1
K-A3931 Service Kit, Display Assembly
Item Qty.
Display Assembly 1
K-A4731-02 Service Kit, Switch Kit
Item Qty.
Carriage Clamp Switch 1
Carriage Home Switch 1
FB8X Service Manual Rev. C, 9/28/10 Page 71
K-A4092D Controller Assembly (D) - NON-RoHS
K-A4092E Controller Assembly (E) - NON-RoHS
K-A4092J Controller Assembly (J) - NON-RoHS
Item Qty.
Controller Assembly 1

S E R V I C E K I T P I C T U R E S
9
Heater Assemblies
K-A4013D Service Kit, Spine Assembly (D & J)
K-A4013E Service Kit, Spine Assembly (E)
Item Qty.
Spine Assembly 1
K-A4102D Service Kit, Bender Assembly (D & J)
K-A4102E Service Kit, Bender Assembly (E)
Item Qty.
Bender Assembly 1
K-A4104D Service Kit, Carriage Assembly (D & J)
K-A4104E Service Kit, Carriage Assembly (E)
K-A4092D-RoHS Controller Assembly (D) - RoHS
K-A4092E-RoHS Controller Assembly (E) - RoHS
K-A4092J-RoHS Controller Assembly (J) - RoHS
Item Qty.
Carriage Assembly 1
Page 72 FB8X Service Manual Rev. C, 9/28/10
Item Qty.
Controller Assembly 1

S E R V I C E K I T P I C T U R E S
9
Motors
K-A4006 Service Kit, Bender Motor Assembly
Item Qty.
Bender Motor Assembly 1
K-A4008 Carriage Shaft Alignment Assembly
Item Qty.
Carriage Shaft Alignment Assembly 1
K-A3976 Jaw Assembly
Item Qty.
Jaw Assembly 1
K-A3933 Service Kit, Carriage Drive Assembly
Item Qty.
Carriage Drive Assembly 1
Misc.
K-A4089 Fan Assembly
Item Qty.
Fan Assembly 1
FB8X Service Manual Rev. C, 9/28/10 Page 73

S E R V I C E K I T P I C T U R E S
9
Kits
K-311-4069 Service Kit, Rubber Feet
Item Qty.
Rubber Feet 4
K-A4687 Service Kit, Spring Kit
Item Qty.
Spine Spring 1
Jaw Spring 2
Carriage Spring 2
K-A4710 Service Kit, Plastic Part Kit
Item Qty.
Bender Gear 1
Jaw Guides 2
Right Bender Pivot 1
Left Bender Pivot 1
Spine Pivot Pin 2
Left Carriage Guide 1
Right Carriage Guide 1
Page 74 FB8X Service Manual Rev. C, 9/28/10
K-A4711 Service Kit, Small Metal Parts Kit
Item Qty.
Drive Nut Bracket 1
Bender Link Assembly 1
Carriage Alignment Plate 1
Strip Present Sensor Bracket 1
Carriage Guide Back 1
Bender Gear Stop w/ O-Ring 1
Bender Gear Pivot 1

S E R V I C E K I T P I C T U R E S
9
Kits
K-A4708 Service Kit, Grip Tape Kit
Item Qty.
Jaw Grip Tape 1
Carriage Grip Tape 1
Hot Symbol Label 1
K-A4641 Service Kit, Fuse Kit
Item Qty.
10A 5x20mm Fast Blow Fuse 6
K-A4709 Service Kit, Fastener Kit
Item Qty.
SCREW 3mm X .5 X 6mm PPH 12
Washer,Fender,#6x1” OD 2
Washer, Flat, 2.5 x 8mm OD 2
Screw, Ph Phil, M2.5X6 LG 2
Screw, Ph Phil, M3.5x5x6 LG 8
Screw, Bh Soc, M3x.5x6 LG 4
Screw, Fh Phil, M3x.5x12 LG 16
Screw, Sem, Ph Phl, M3x.5x6 LG 28
Screw,Sem,Ph Phl, M3x.5x12 LG 16
Screw,Ph Phl, M3x.5x10mm Zi 4
Screw,Ph Phl, M3x.5x6mm Zi 4
Screw,SH Cap, M3x.5 Lg Blk 4
Screw,Sem,IntSt,PhPhl, M3x12Zi 2
Screw, Sem, Ph Phl, M3x.5x6 LG 18
Screw, Ph Phl, M4x.7x6 LG 22
Screw, Ph Phl, M4x.7x20 LG 8
Screw, Ph Phl, M4x.7x16 LG 4
Screw,Sem,Ph Phl, M4x.7x8 LG 6
Screw.PH,Phil,M4x.7x8 Lg 6
Washer,Flat,5.3mmx11mm OD 2
Cable Tie 3/32 wide 10
CABLE TIE 1/8 WIDE 6
Cable Tie Wrap 4
FB8X Service Manual Rev. C, 9/28/10 Page 75

PICTURES OF THE FB8x PARTIALLY EXPLODED
10
Exploded View 1
1
2
3
4
5
ITEM # DESCRIPTION
1 Cooling Rack
2 Left Cover
3 Right Cover Assembly
4 Front Cover
5 Skirt
Note: The Pull Out Instructions Card and the Book Support Fences
are not shown in this picture.
Page 76 FB8X Service Manual Rev. C, 9/28/10

10
PICTURES OF THE MACHINE PARTIALLY EXPLODED
Exploded View 2
4
10
11
1
3
2
6
5
8
9
3
7
ITEM # DESCRIPTION
1 Carriage Assembly (Back Heater)
2 Left Carriage Guide
3 Carriage Spring
4 Carriage Guide Back
5 Right Carriage Guide
6 Drive Nut Bracket
7 Carriage Drive Assembly
8 Controller Assembly
9 Carriage Clamp Switch
10 Carriage Alignment Shaft Assembly
11 Spine Assembly
FB8X Service Manual Rev. C, 9/28/10 Page 77

PICTURES OF THE MACHINE PARTIALLY EXPLODED
10
Exploded View 3
1
2
4
3
2
8
5
6
7
12
9
10
11
ITEM # DESCRIPTION
1 Jaw Assembly
2 Jaw Guide
3 Carriage Home Switch
4 Tamping Platform
5 Bender Motor Assembly
6 Bender Gear
7 Bender Link
8 Left Bender Pivot
9 Bender Assembly
10 Right Bender Pivot
11 Display Assembly
12 Book Sense Emitter PCA
Page 78 FB8X Service Manual Rev. C, 9/28/10

PICTURES OF THE MACHINE PARTIALLY EXPLODED
10
THIS PAGE IS INTENTIONALLY LEFT BLANK
FB8X Service Manual Rev. C, 9/28/10 Page 79
 Loading...