

Page 1
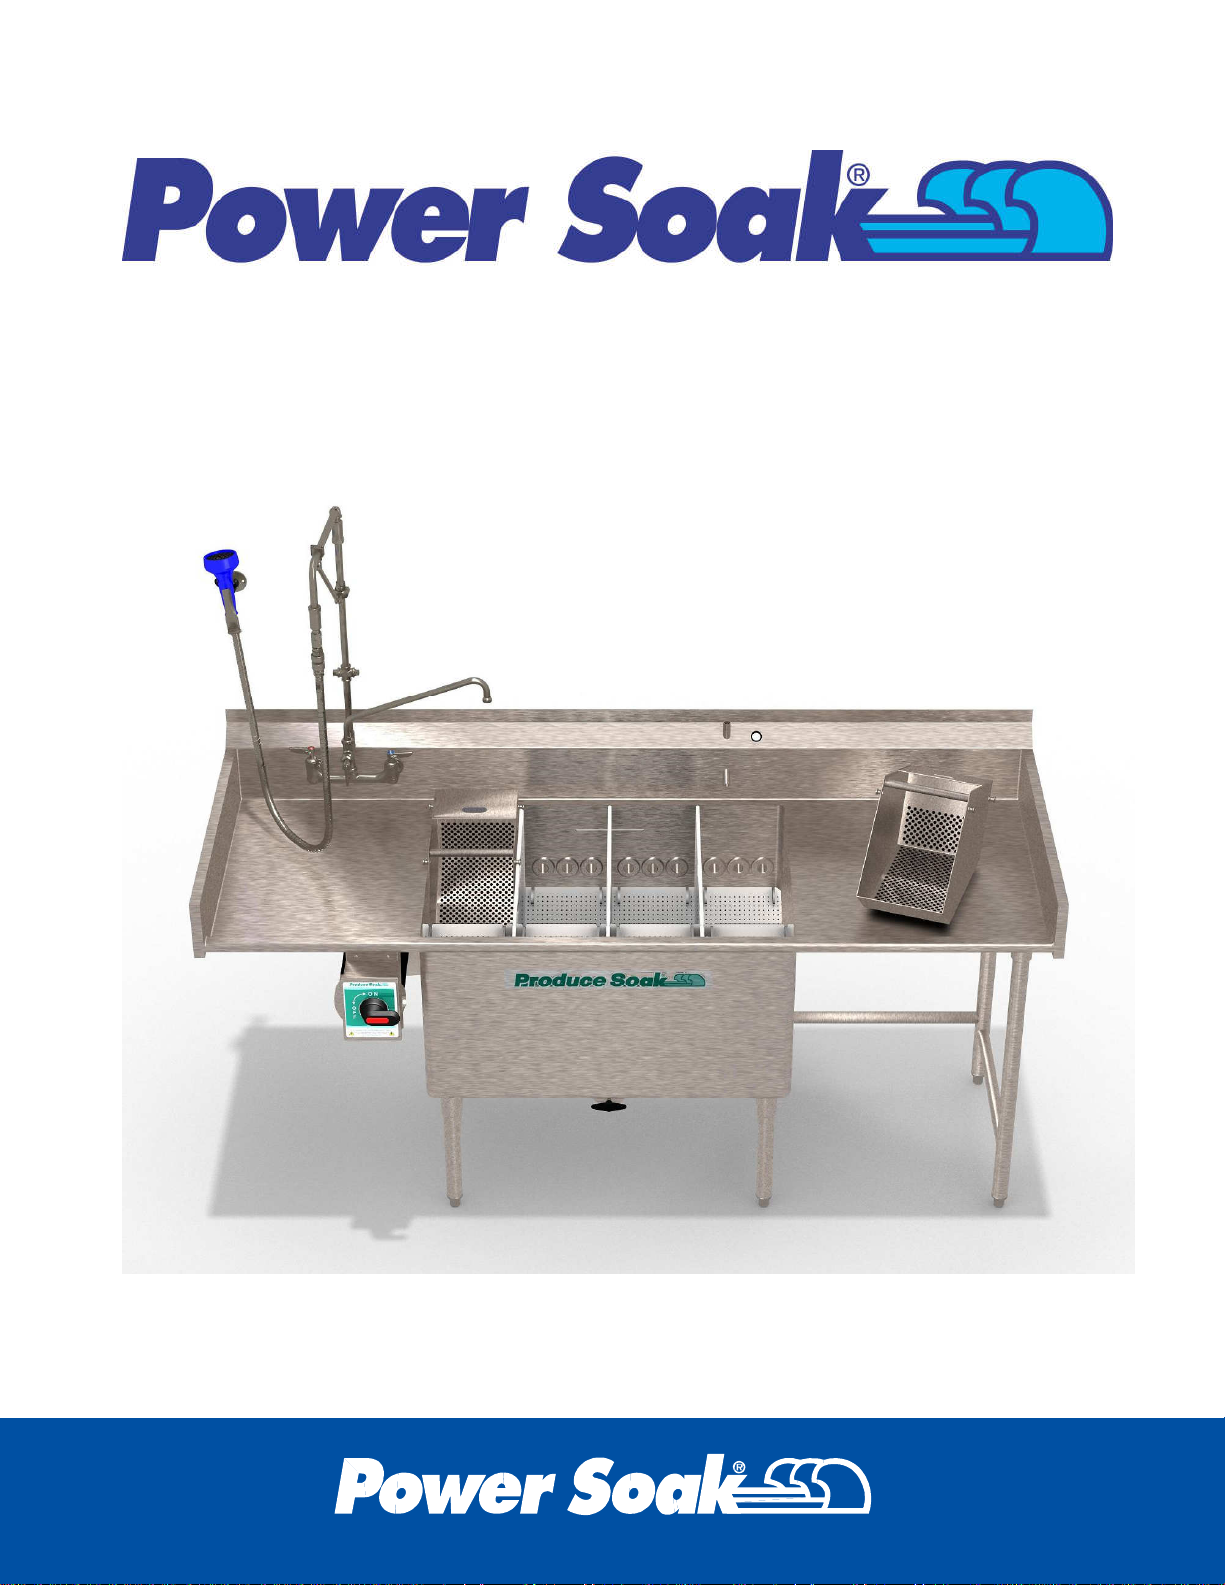
Owner's Manual
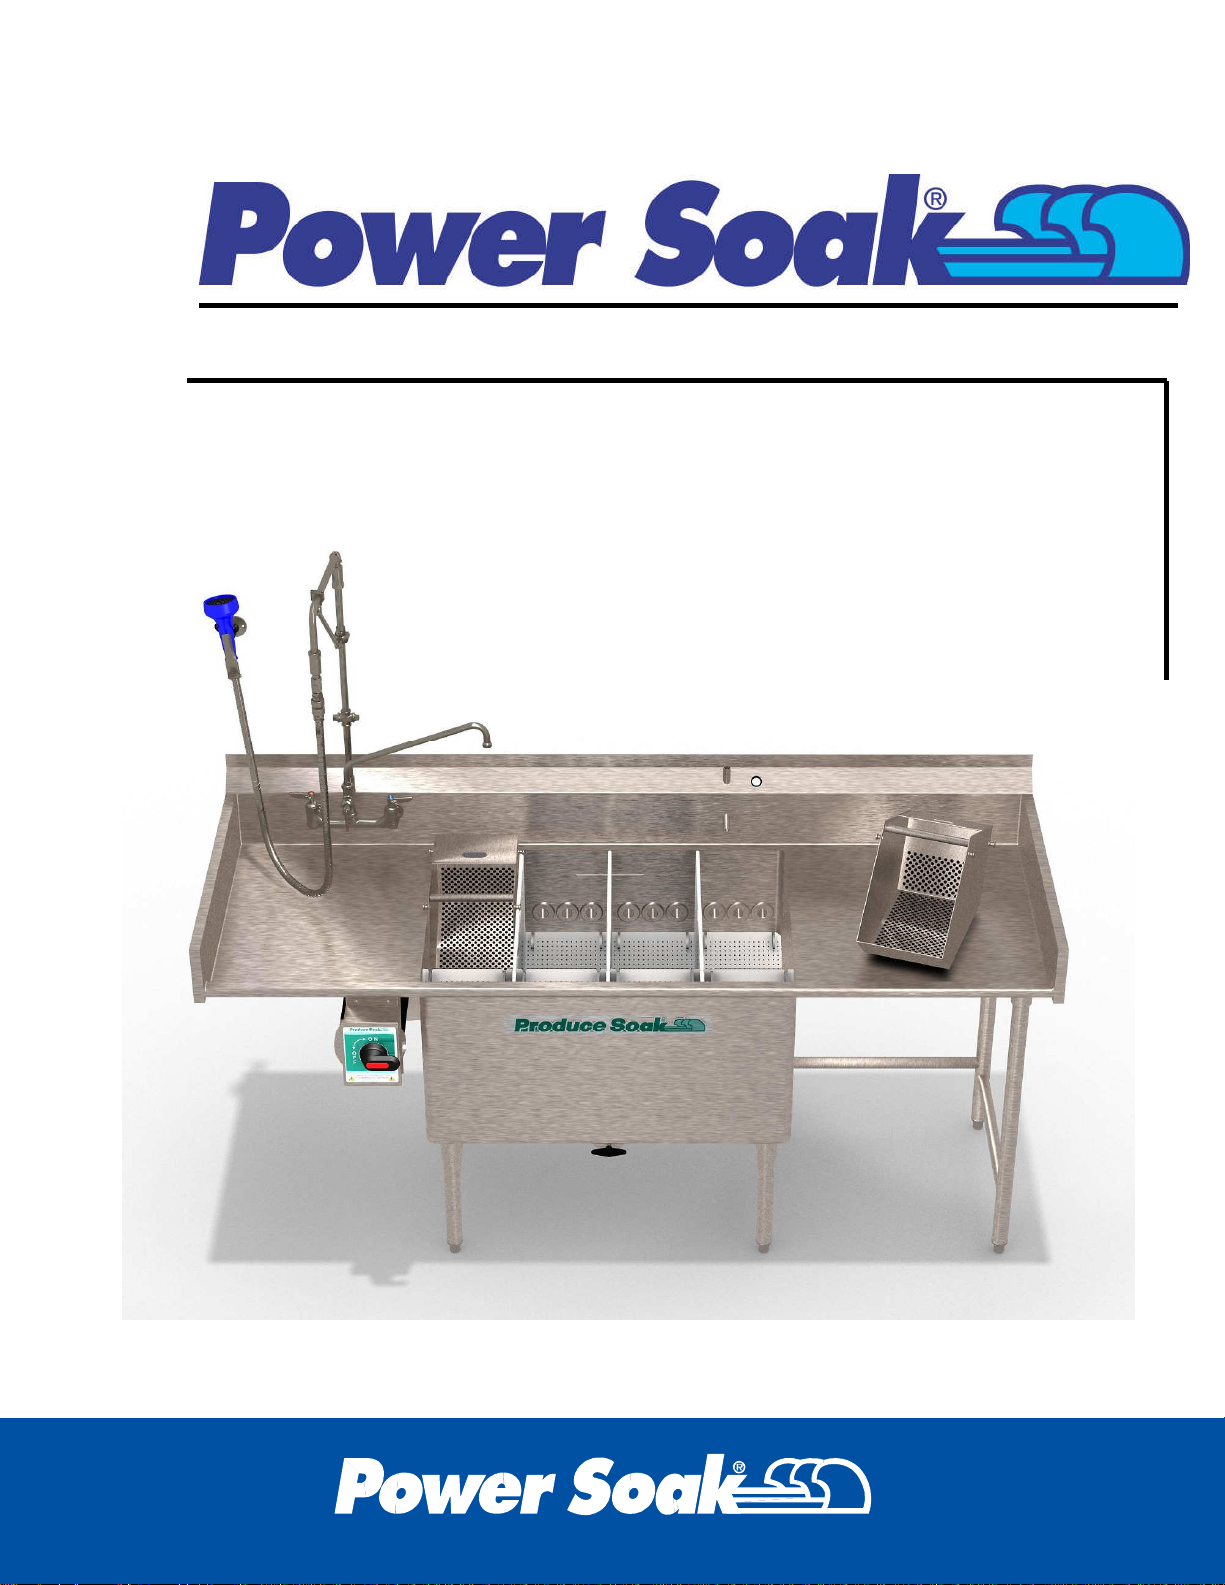
PRODUCE SOAK
Page 2

Table of Contents
Introduction and Conventions .................................. 1
Product Introduction ..................................................................................2
Produce Washing Chemicals and Antimicrobials ......................................2
Explanation of Warning Messages ...........................................................3
Danger ......................................................................................................3
Warning ....................................................................................................3
Chemical Hazard ......................................................................................3
Operating Instructions .............................................. 5
Preparing the Produce Soak .....................................................................6
Placing the Wash Components .............................................................6
Rib sets .................................................................................................7
Partitions ...............................................................................................9
Flow Guides ........................................................................................ 12
Filling the Produce Soak ......................................................................... 16
Washing Tips ...................................................................................... 22
Emptying the Produce Soak .................................................................... 23
Preventive Maintenance .......................................... 29
Troubleshooting ...................................................... 31
Installation ................................................................ 34
Electrical Requirements .......................................................................... 36
Plumbing Requirements .......................................................................... 37
Page 3
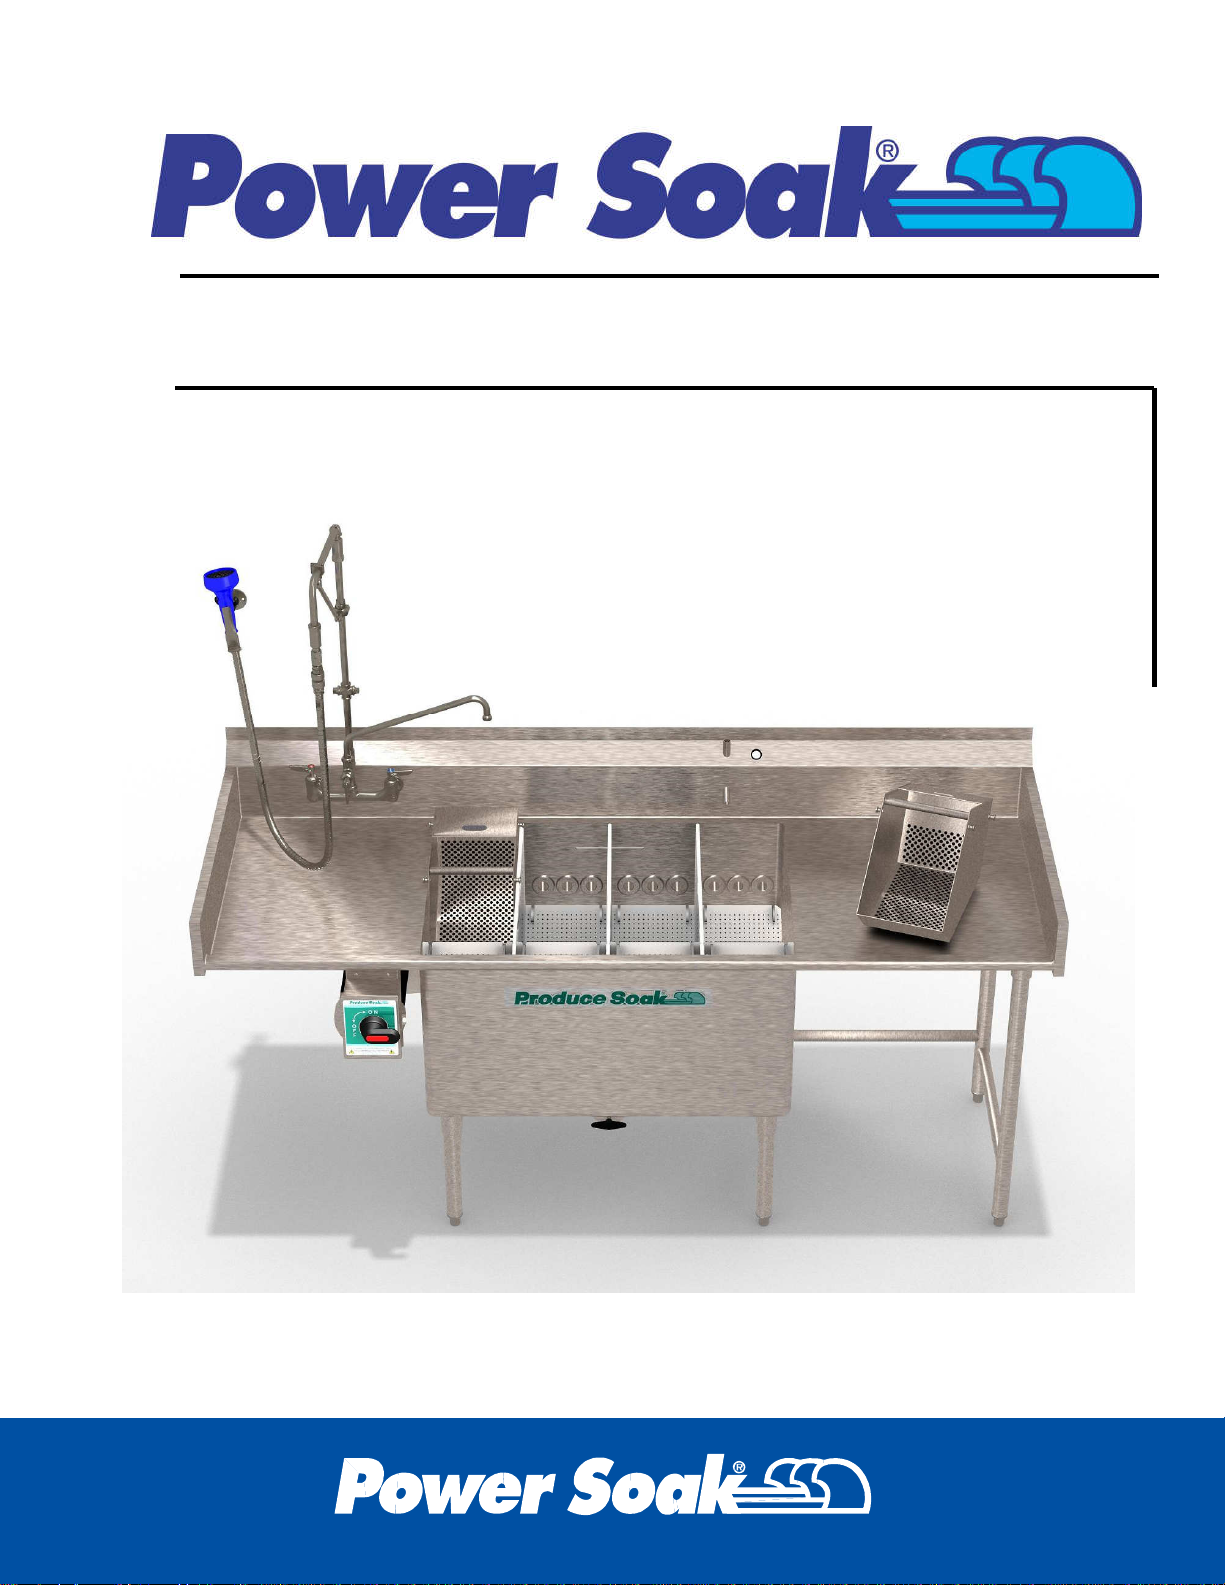
Introduction and Conventions
Produce Soak
1
Page 4

Product Introduction
Thank you for purchasing a Produce Soak fruit and vegetable washing
system. Your new Produce Soak washing system will provide years of
dependable, efficient and trouble-free service.
As a Produce Soak owner, you will benefit in numerous ways:
• Your produce washing operation will be more efficient.
• Your produce will more free of soil.
• Your produce will harbor fewer microbes.
• Your water usage will decrease.
• Your produce washing hours will decrease and your employee
morale will increase.
Every system is manufactured to last, with only high-quality, heavy-duty, 14
gauge stainless steel used in its construction. All electrical components
used in a Produce Soak system are of the highest quality. The faucet and
drain are designed for quick filling and emptying of the system's sink.
At Power Soak Systems, we take pride in manufacturing the Produce Soak
and are committed to standing behind our customers and products 100%.
Should you ever need assistance, please contact us directly at the factory
by dialing 800-444-9624 or fax 816-761-0544.
Produce Washing Chemicals and Antimicrobials
The produce wash product you select is best if it:
• Requires a minimal wash time, ideally, two minutes or less
• Requires no rinsing
• Is non-corrosive when properly diluted
• Is dispensed through fixed dilution rate equipment
• Is FDA and/or EPA approved for both whole and cut fruit and
vegetables.
Consult your chemical provider for a suitable product.
2
Page 5
Explanation of Warning Messages
Be sure to read, understand and follow all DANGER and WARNING
messages located in this guide and on the equipment.
Danger
Personal Injury and Property Damage hazard.
May result in serious injury or death.
May cause extensive equipment damage
Warning
Property Damage Hazard.
May result in property or equipment damage.
Chemical Hazard
May result in serious injury or death. Instructions, labels and
Material Safety Data Sheets (MSDSs) should be supplied
with all produce treating chemicals. The manufacturers,
importers and distributors of your treating chemicals are
responsible for providing this information.
Power Soak Systems is not a manufacturer, importer, or distributor of
antimicrobials. Power Soak Systems, Inc. will not make specific brand
recommendations these chemicals.
3
Page 6

- -This page left intentionally blank - -
4
Page 7
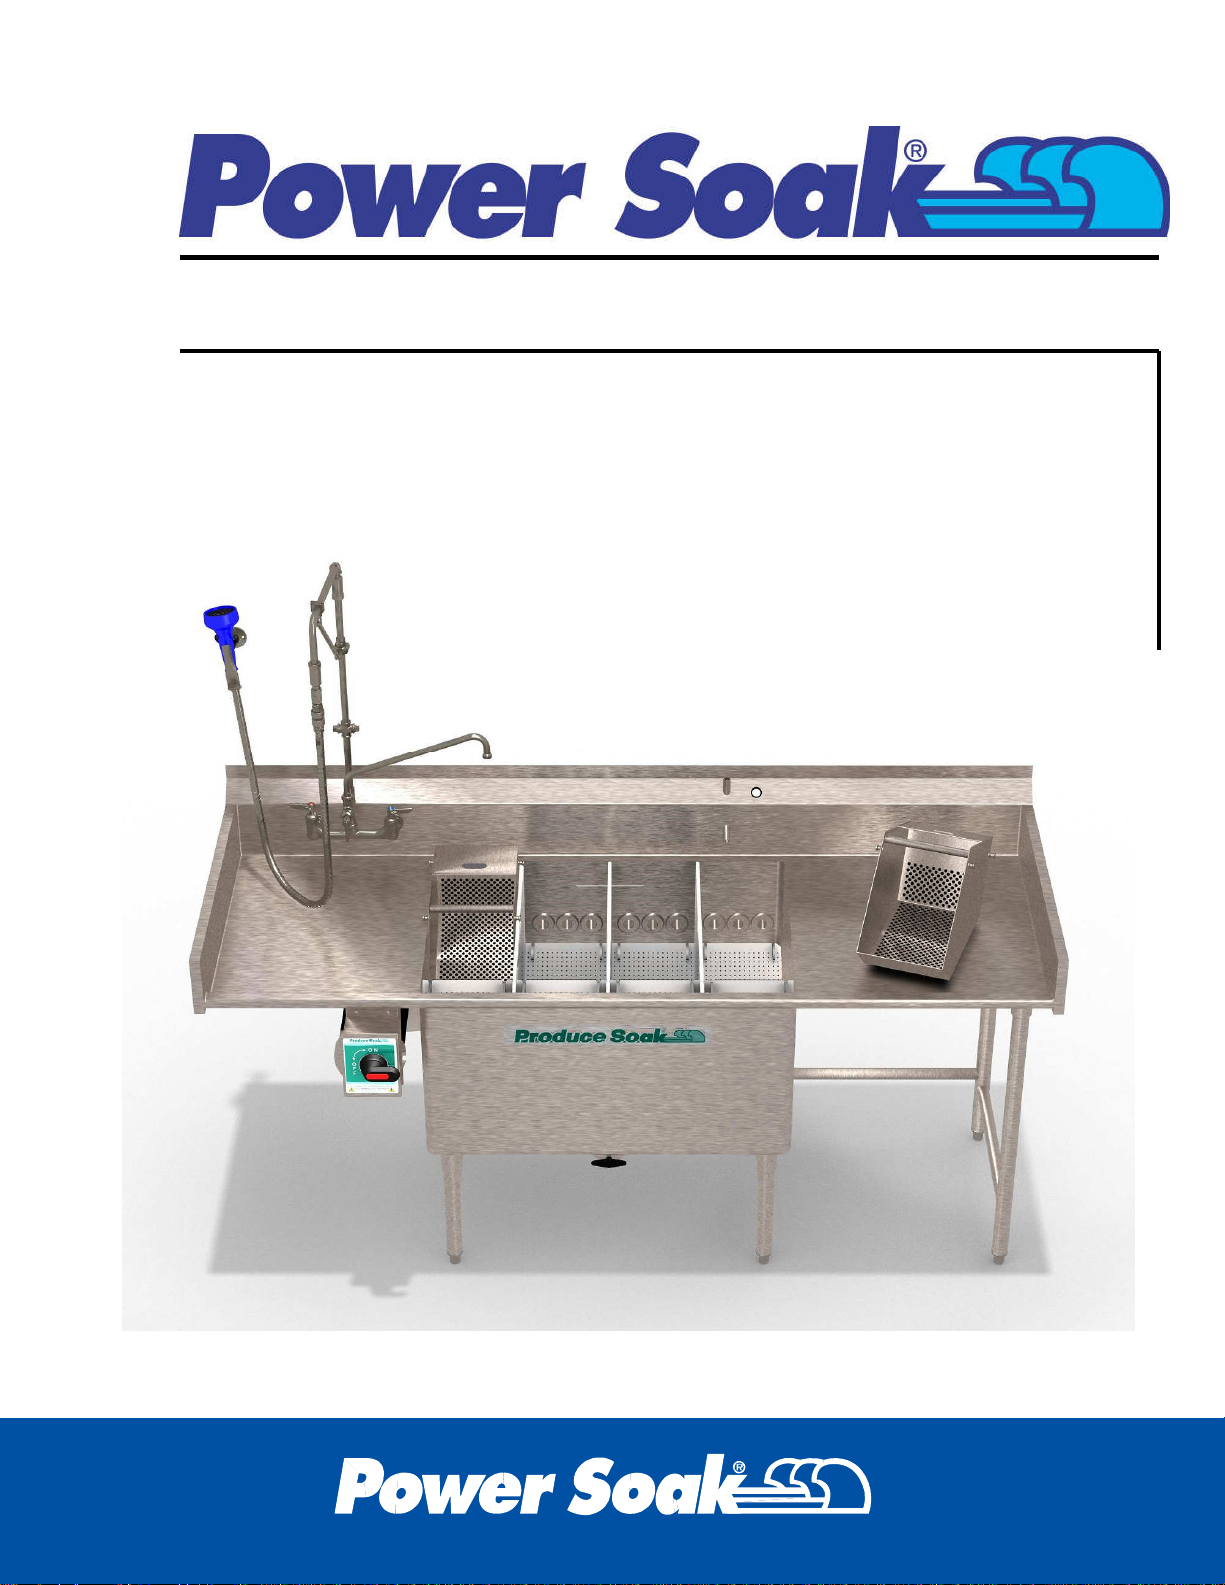
Operating Instructions
Produce Soak
5
Page 8
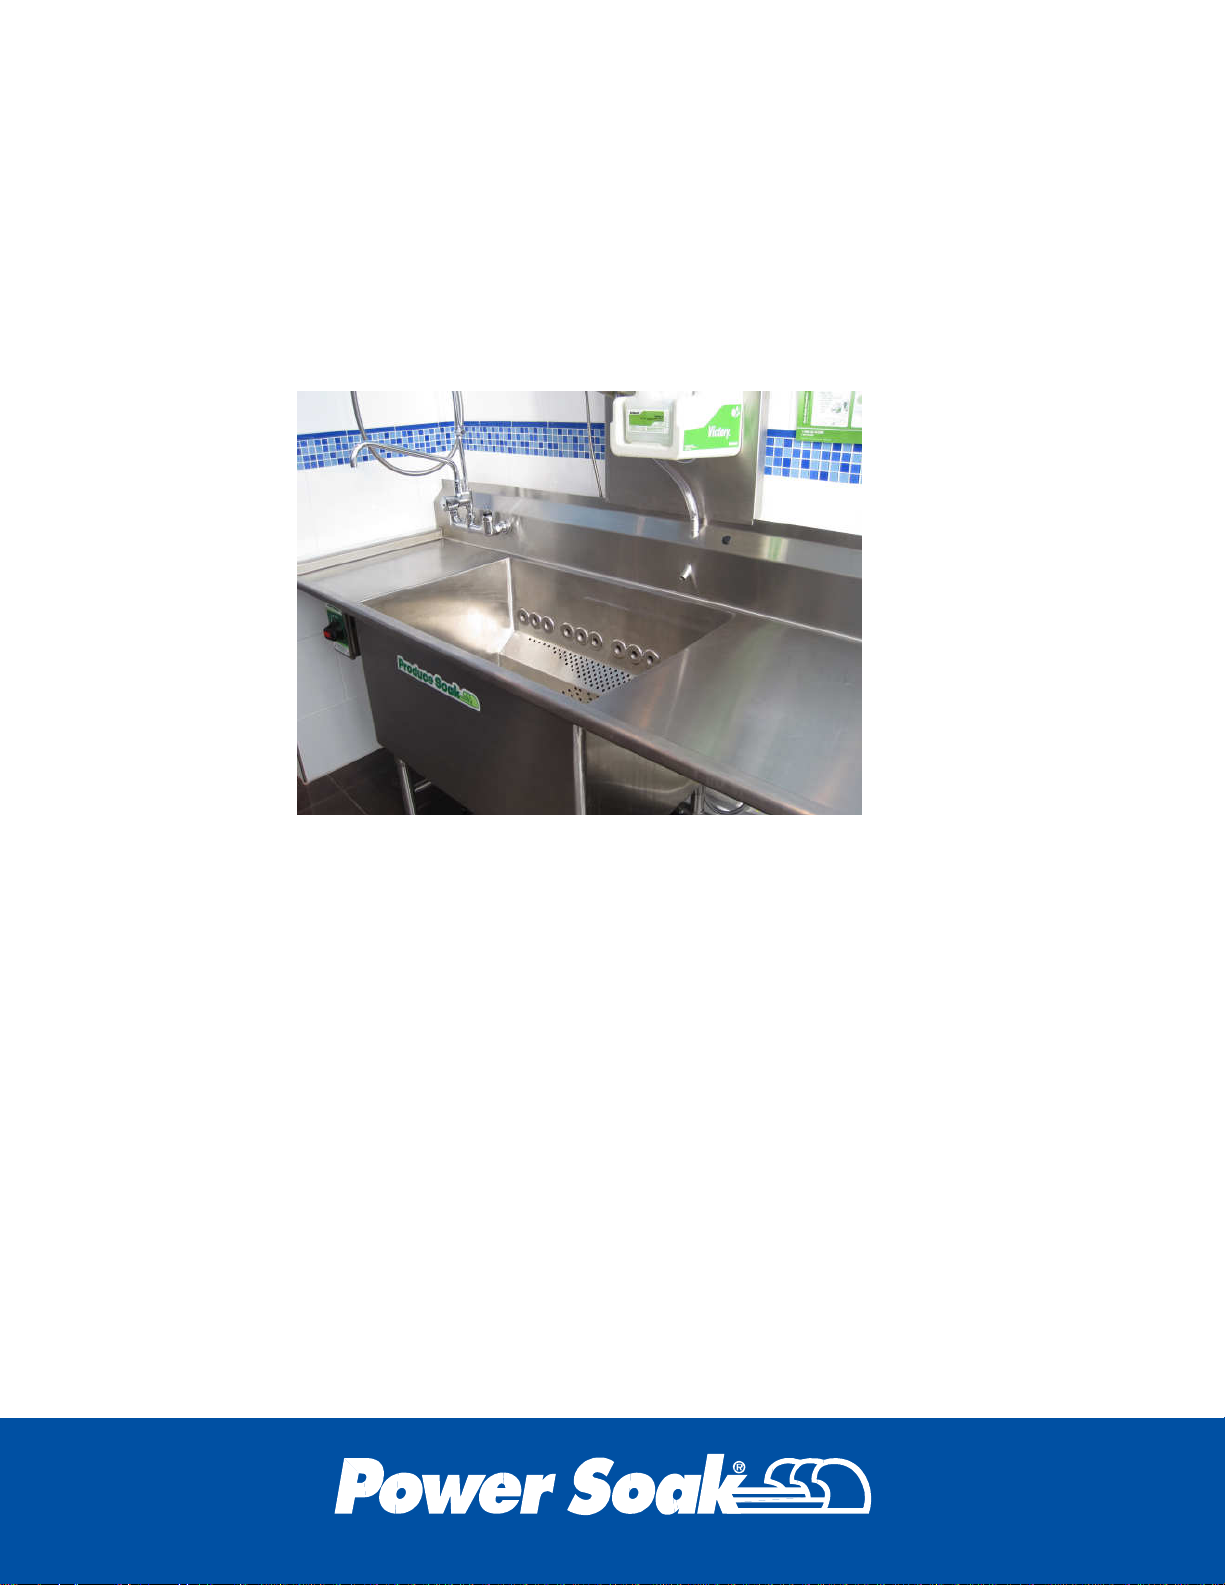
Preparing the Produce Soak
Placing the Wash Components
Begin by removing any debris left from previous batches of produce.
Disinfect all work surfaces according to the standard practices of your
institution.
6
Page 9
Rib sets
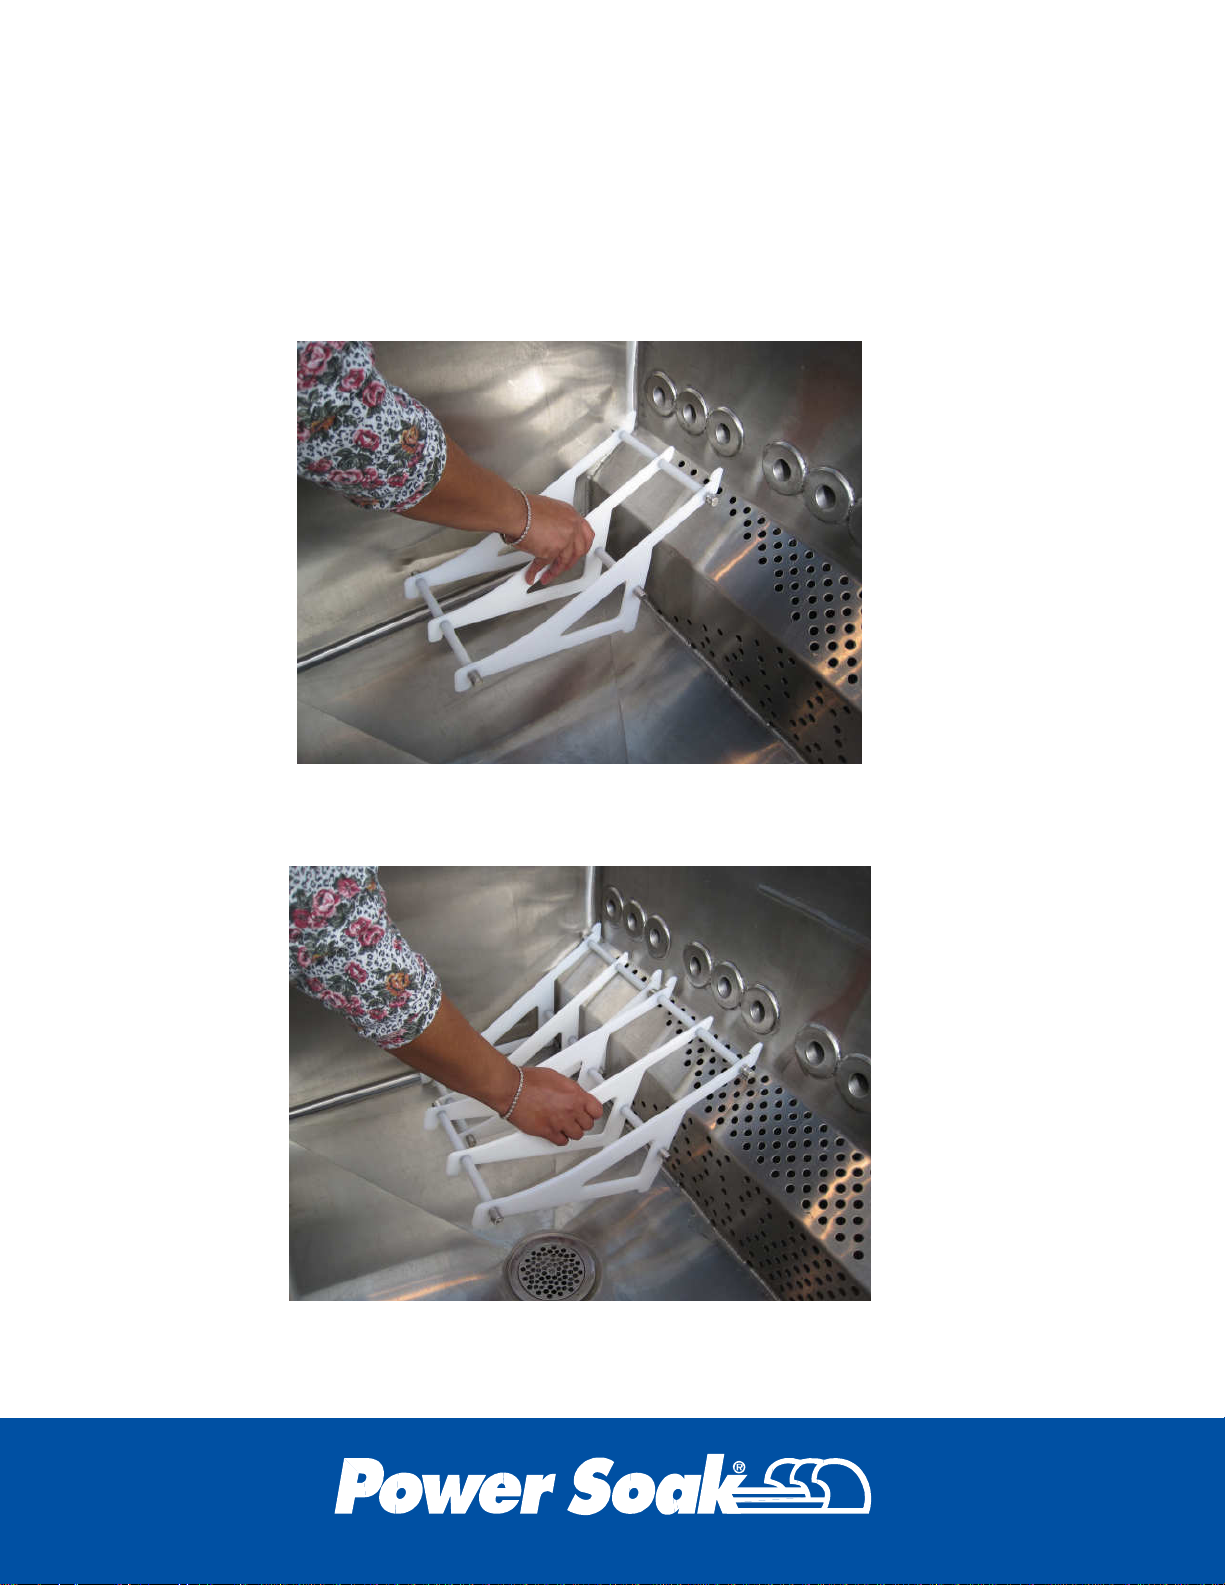
Once the system is clean, the wash components can be installed. Begin
by placing a rear rib set against one of the rear corners of the sink.
Place the other rear rib sets against the back wall of the sink leaving a
finger-size gap between them.
7
Page 10
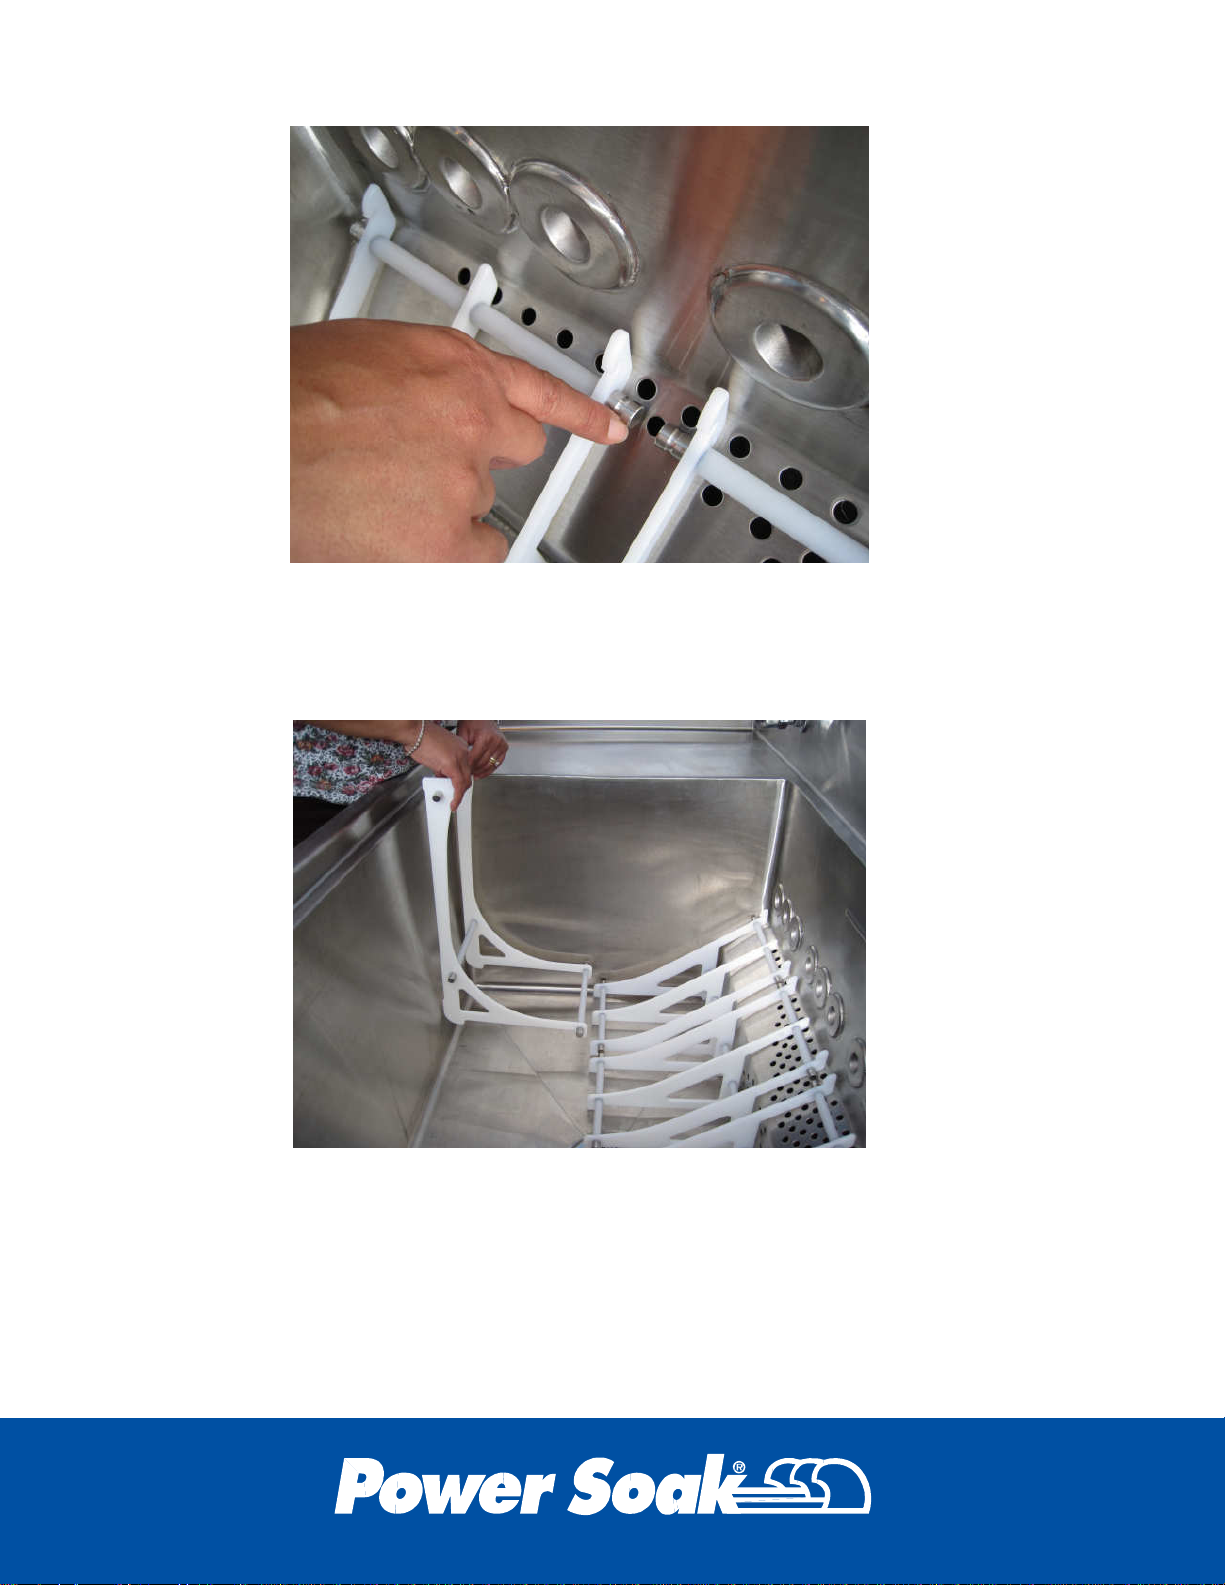
When you have placed all of the rear rib sets, begin placing front rib sets
against the front wall of the sink. As with the rear rib sets, place the first
front rib set against a corner, and leave a finger-size gap between it and
the next front rib set.
8
Page 11
Partitions
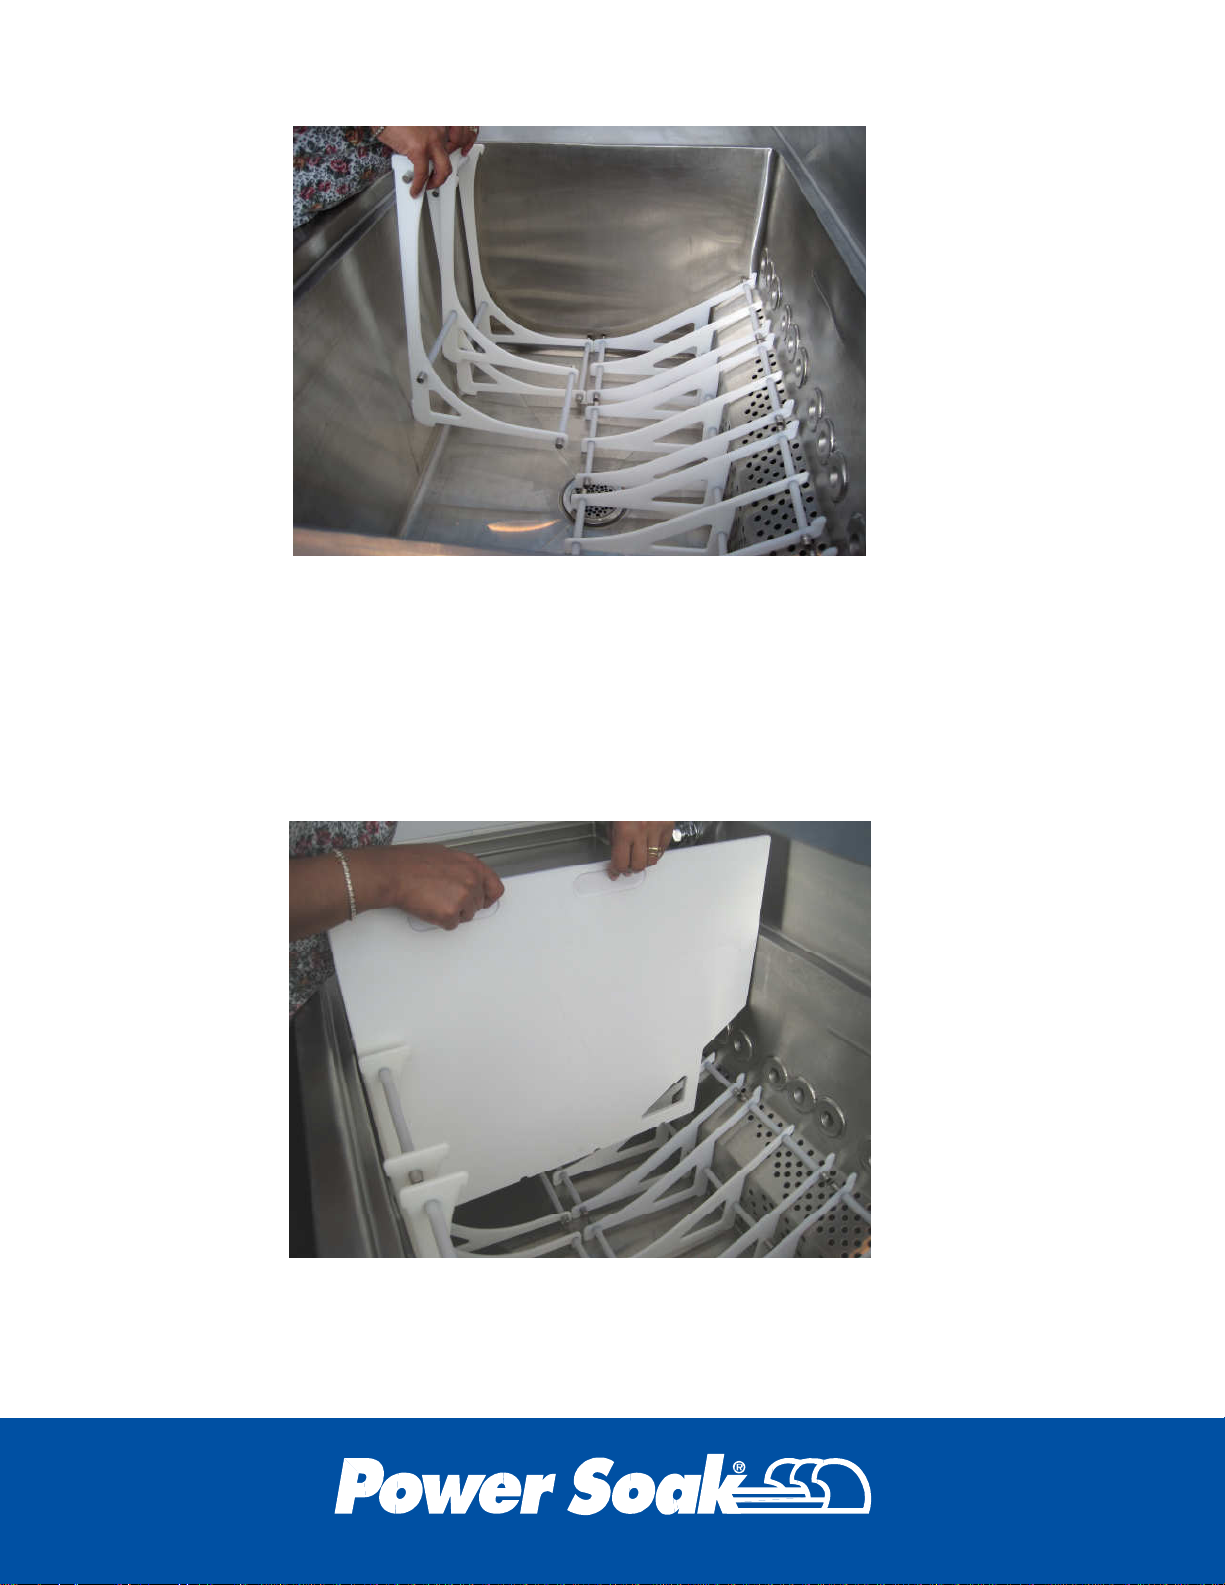
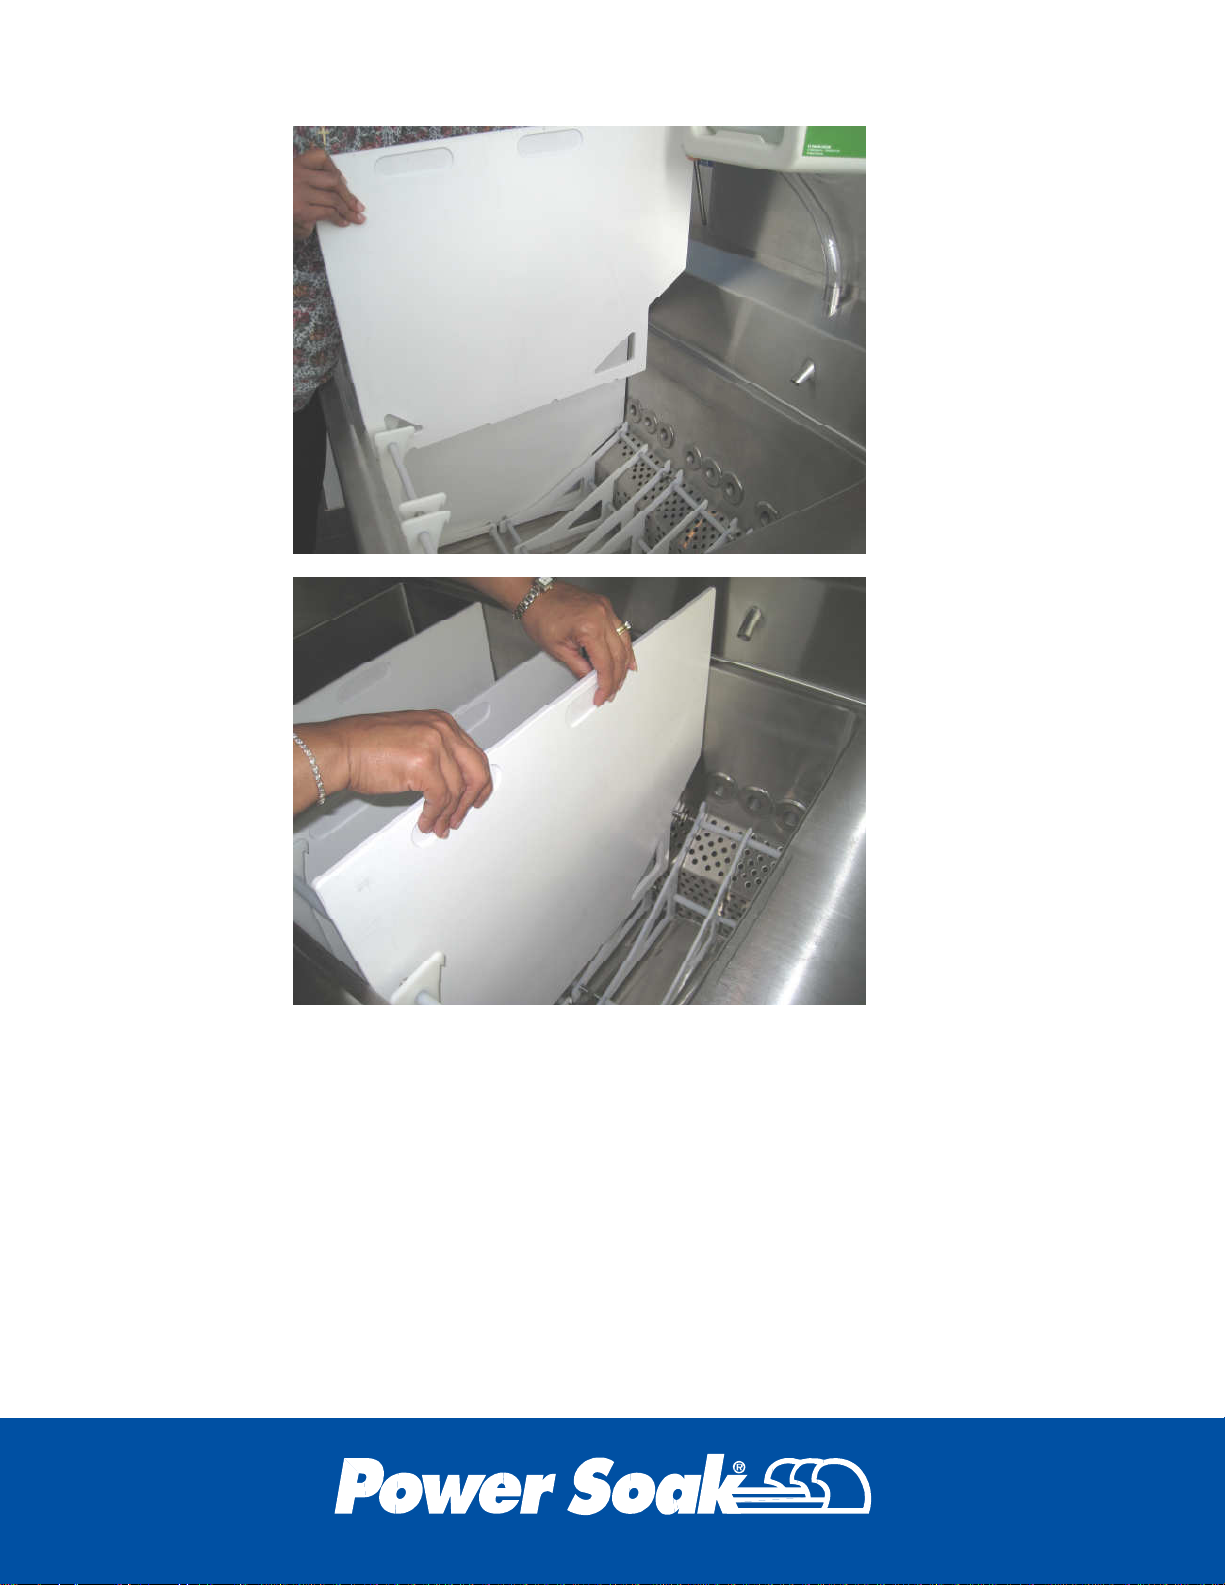
Next, place partitions in the gaps between the front and rear pairs of rib
sets. Make sure the partitions go all the way down and are not snagged on
the ends of the rib sets.
9
Page 12
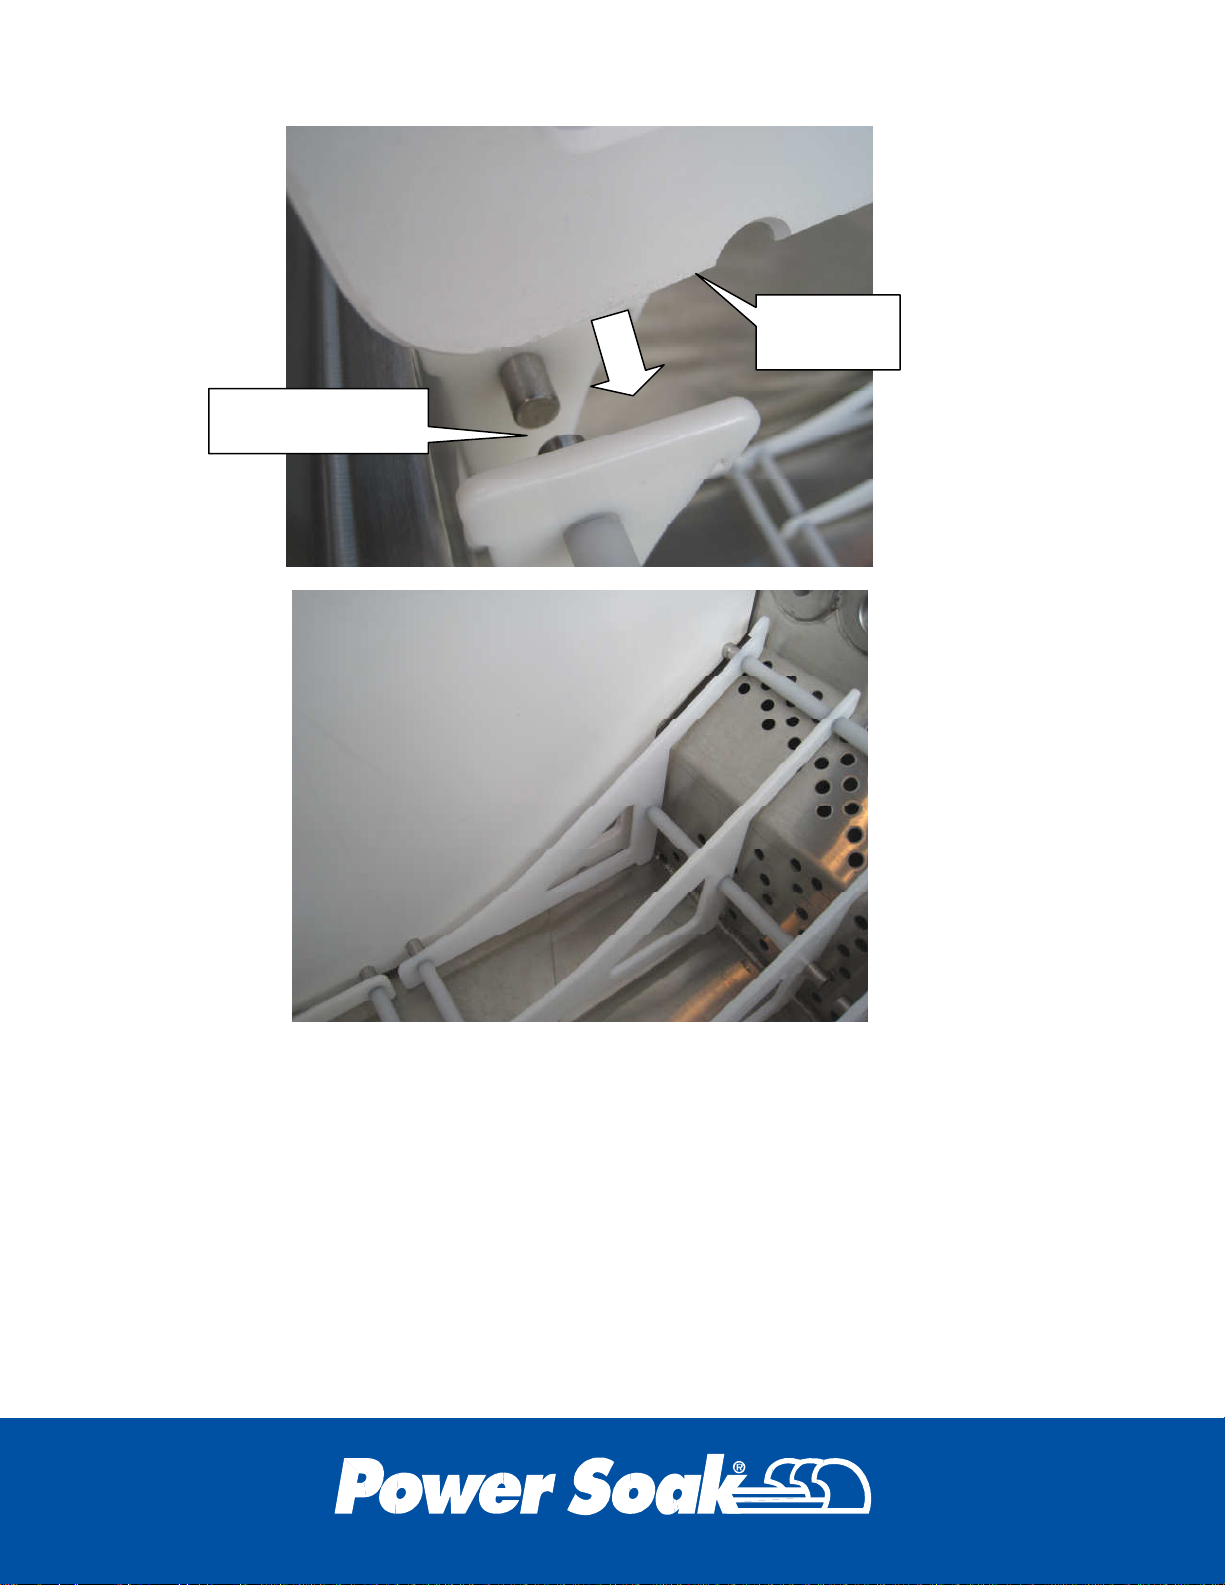
Gap between
Bottom of
partition
Continue until all three partitions are in place. It will be necessary to push
all previously placed components together to make room for the final
partition.
10
Page 13
11
Page 14
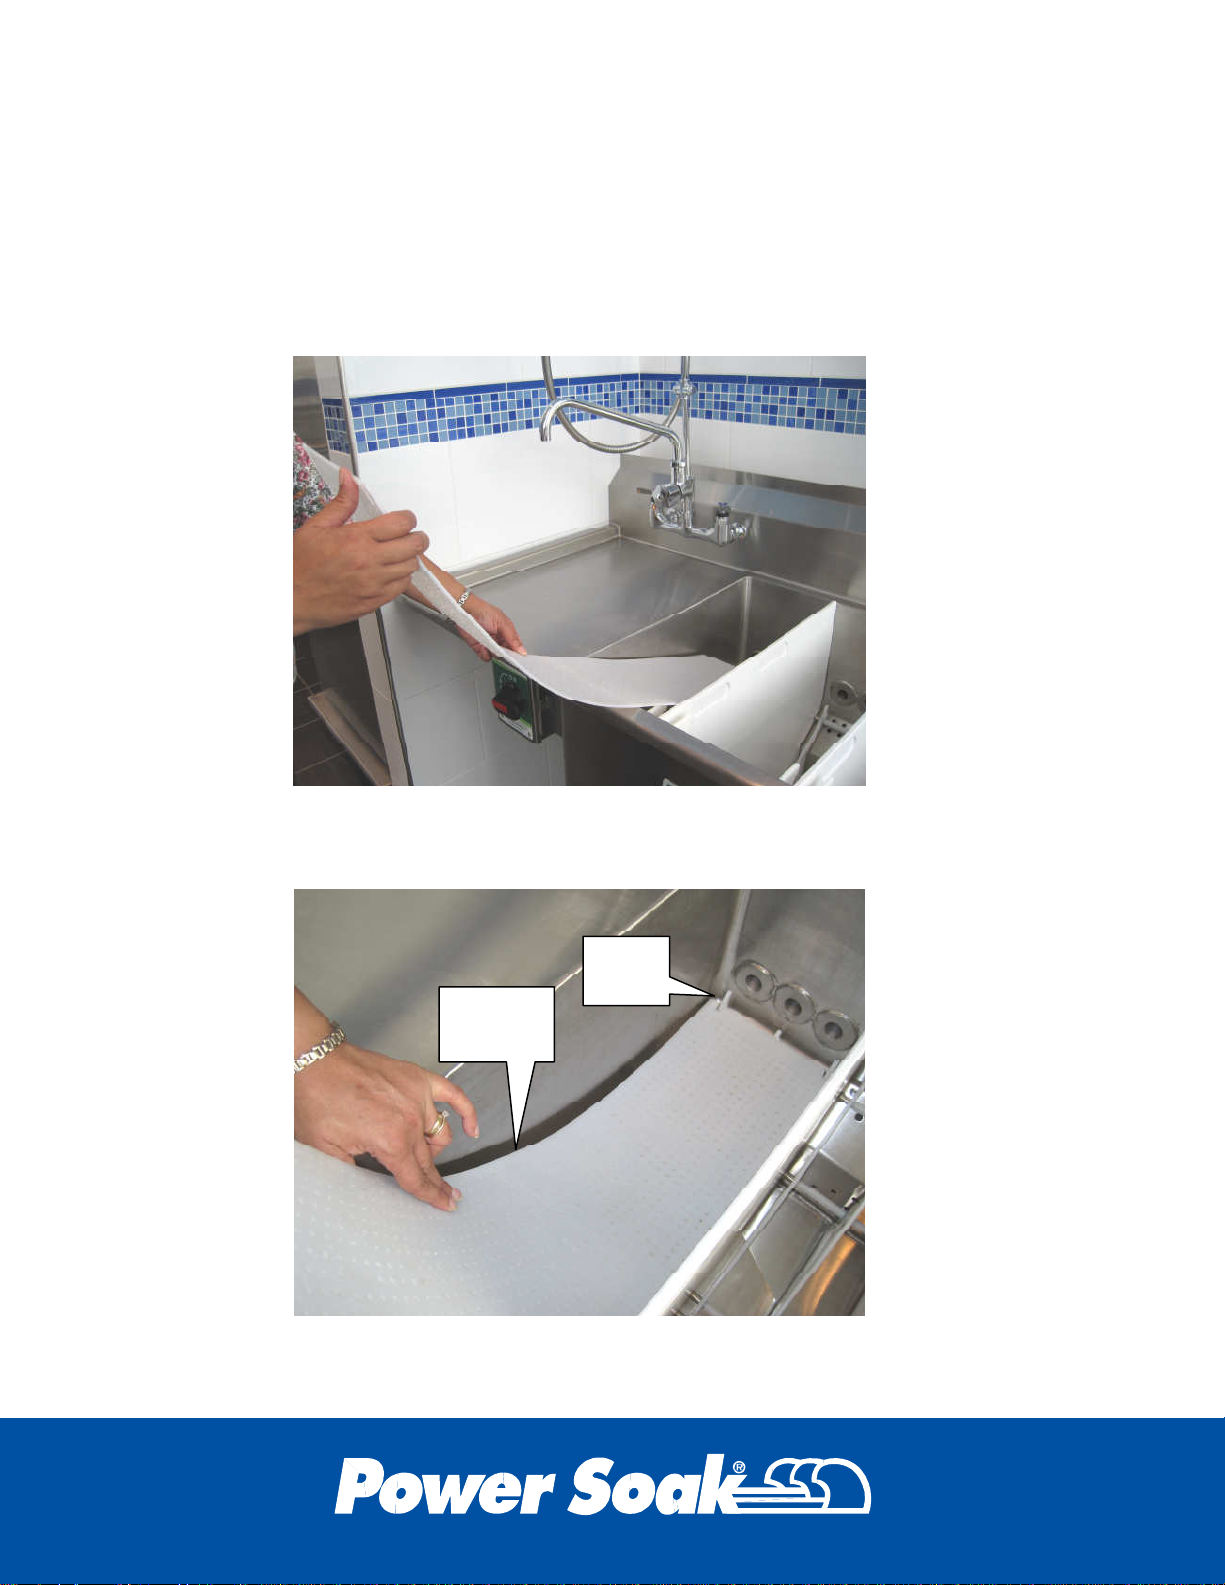
h
ook
Flow Guides
Once all the partitions are in place, the flow guides can be installed. Start
by positioning a notched end of the flow guide adjacent to the hooks of the
rear rib set.
Begin bending the flow guide to the shape of the front rib set, and allow the
notches of the flow guide to engage the hooks of the rear rib set.
Rear
Flow
guide
12
Page 15
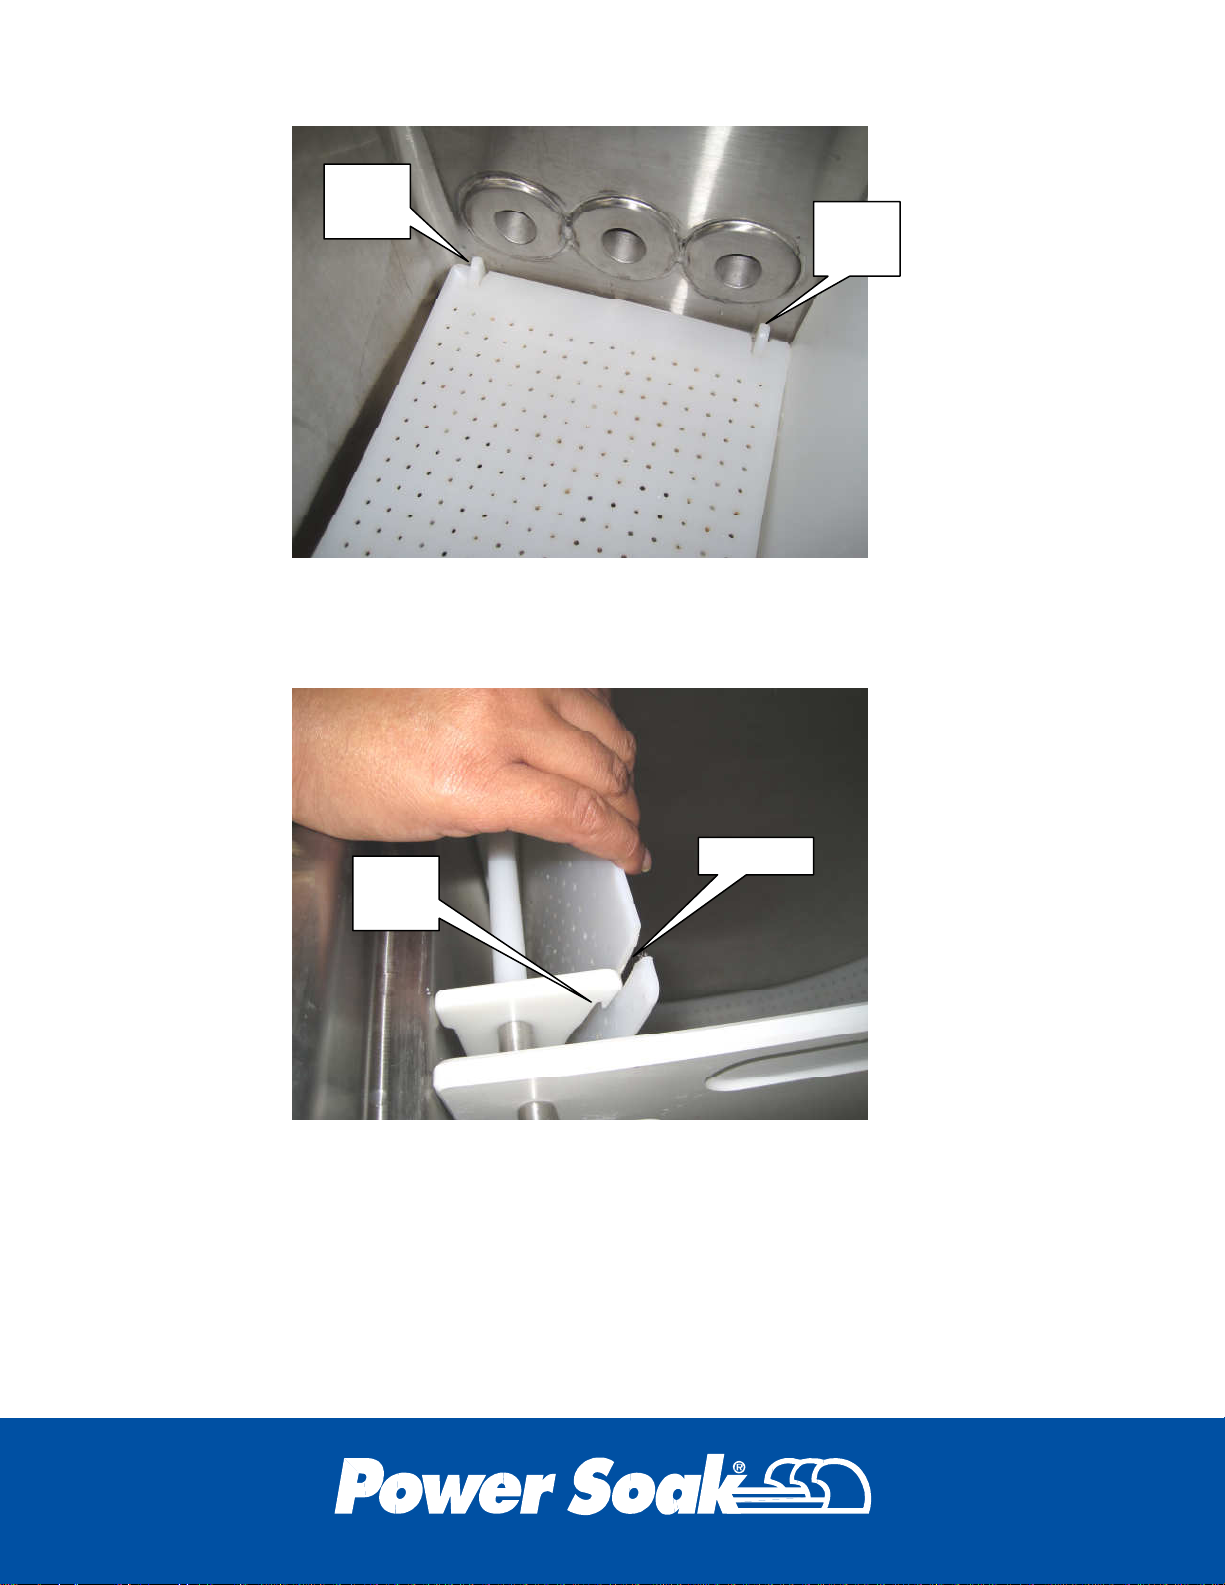
Rear
hook
Rear
hook
Continue to push the flow guide down against the rib sets until the notched
end of the flow guide nearest you is adjacent to the hooks of the front rib
set.
Front
hook
13
Page 16
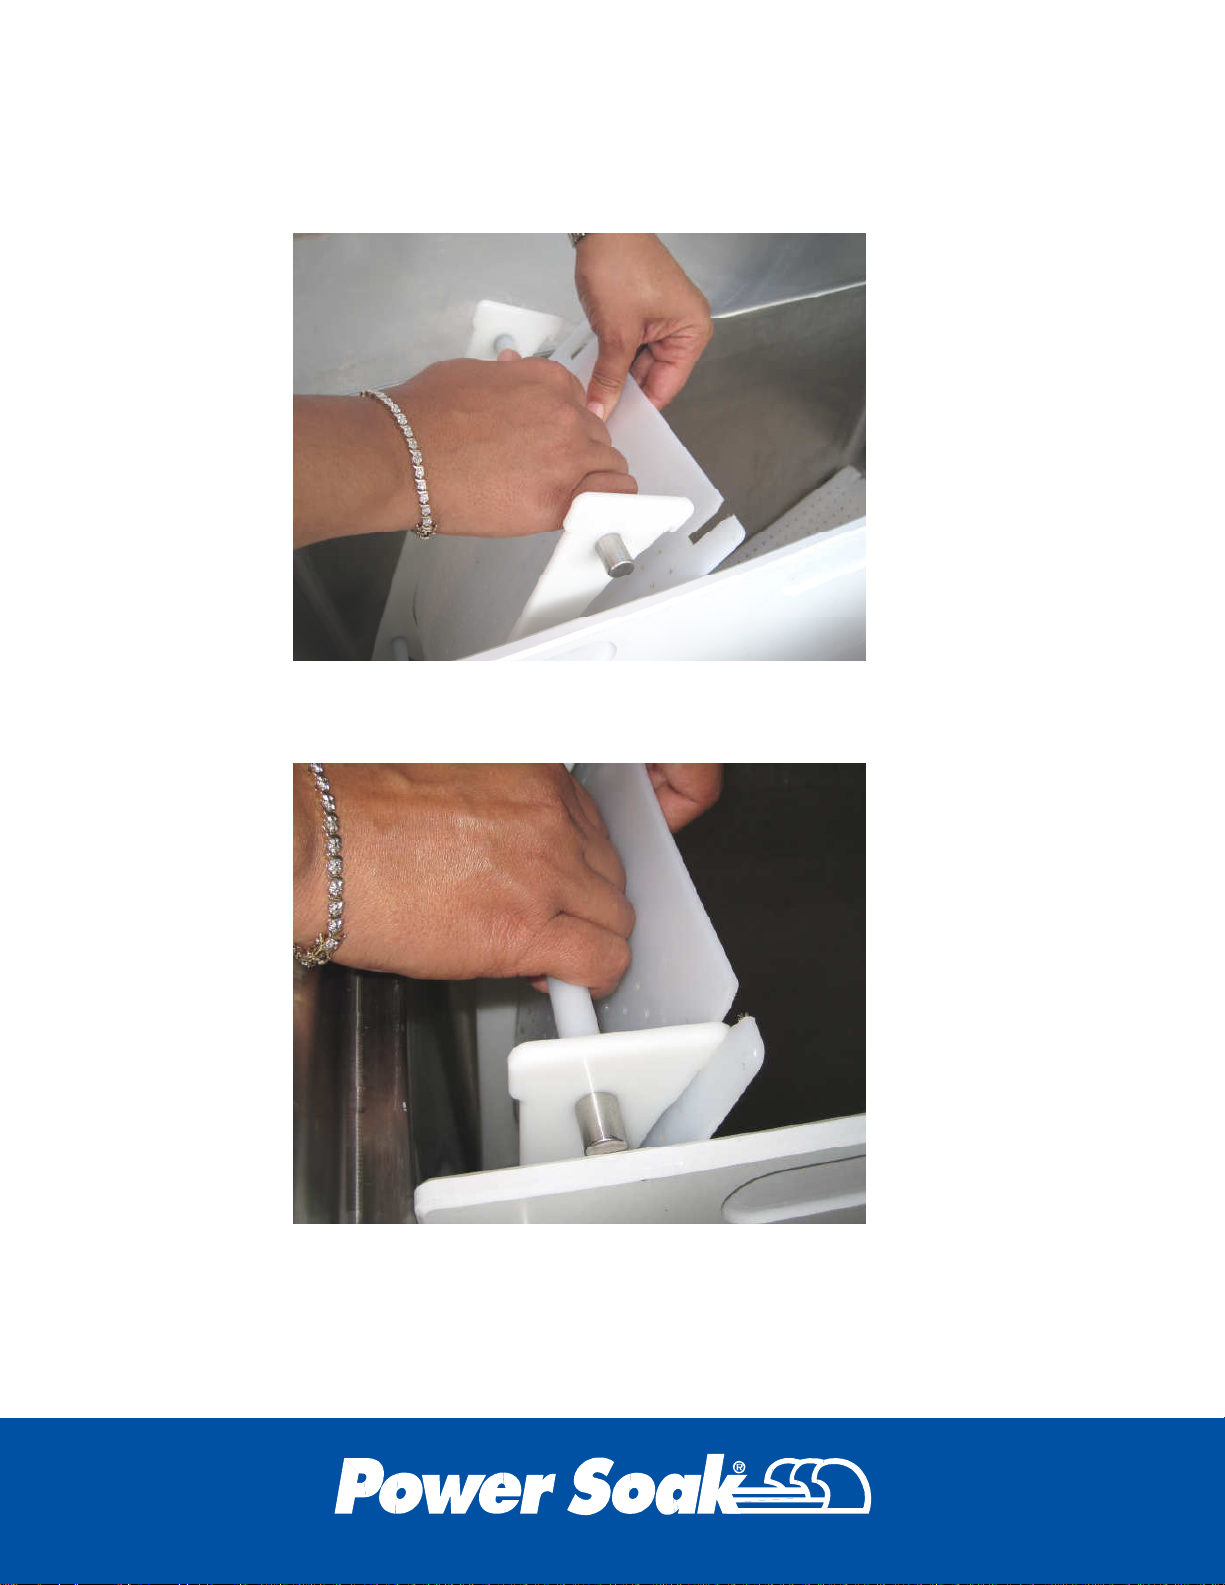
While holding the flow guide against the front rib set, rock the front rib set
and the end of the flow guide away from you until the notches in the flow
guide engage the hooks of the front rib set.
Gently release the components until the front rib set is once again touching
the front wall of the sink.
14
Page 17
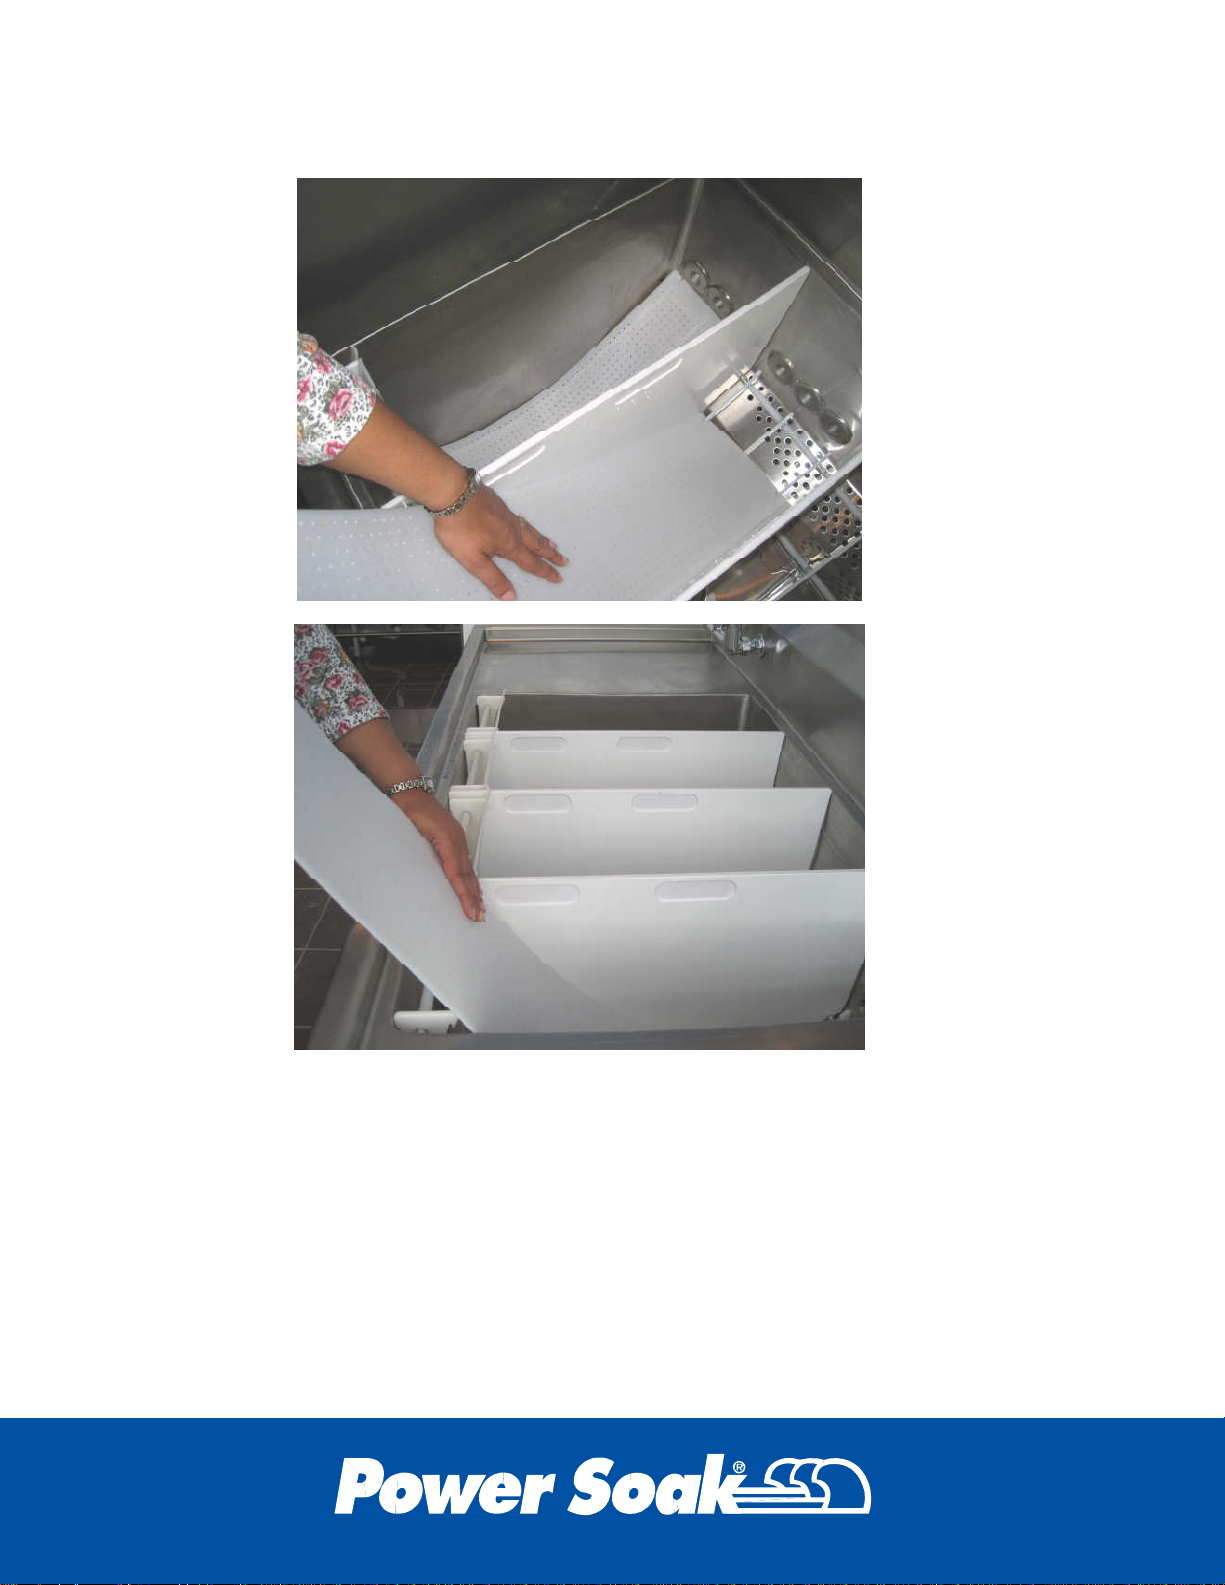
Repeat the process until all four flow guides are in place.
The wash components are now in place, and the Produce Soak is ready for
use.
15
Page 18
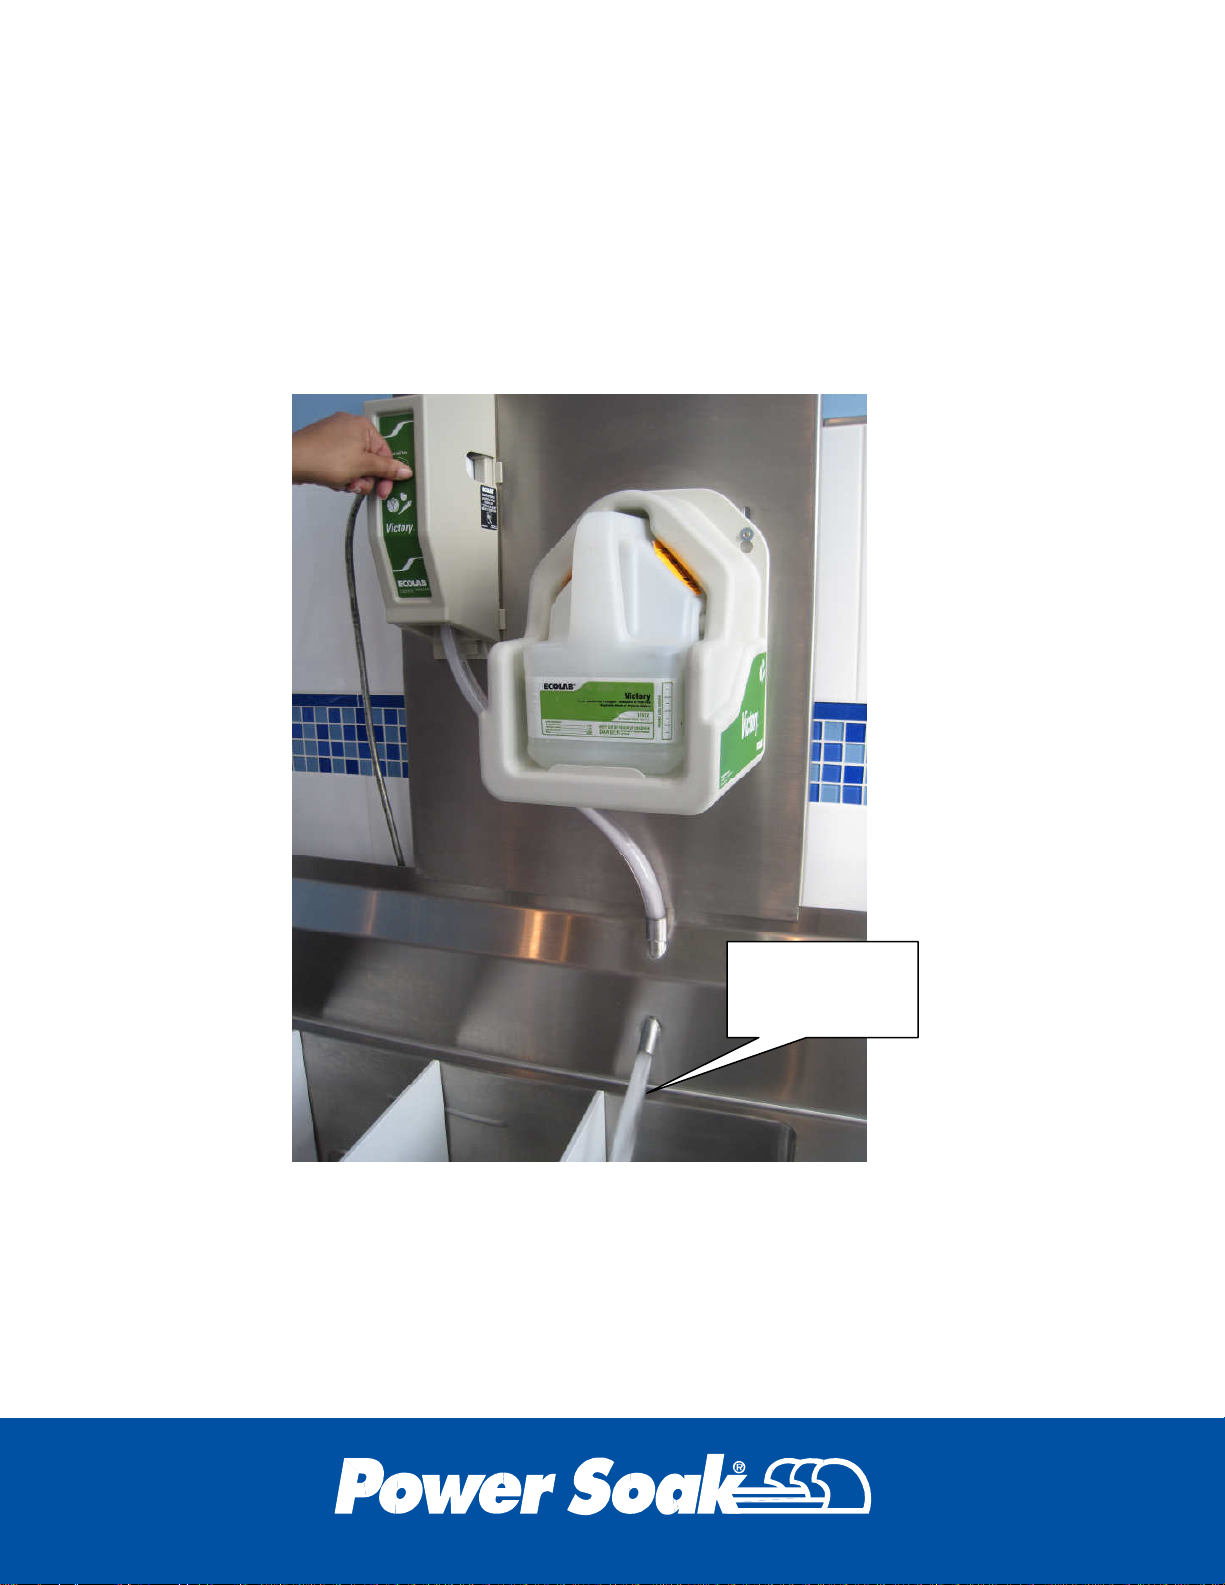
Filling the Produce Soak
wash sink
Produce treating chemicals are dispensed into the wash water as the
Produce Soak is filled. Consult your chemical provider for details about the
equipment they can offer. A typical dispensing system is shown:
Treated water
entering the
16
Page 19
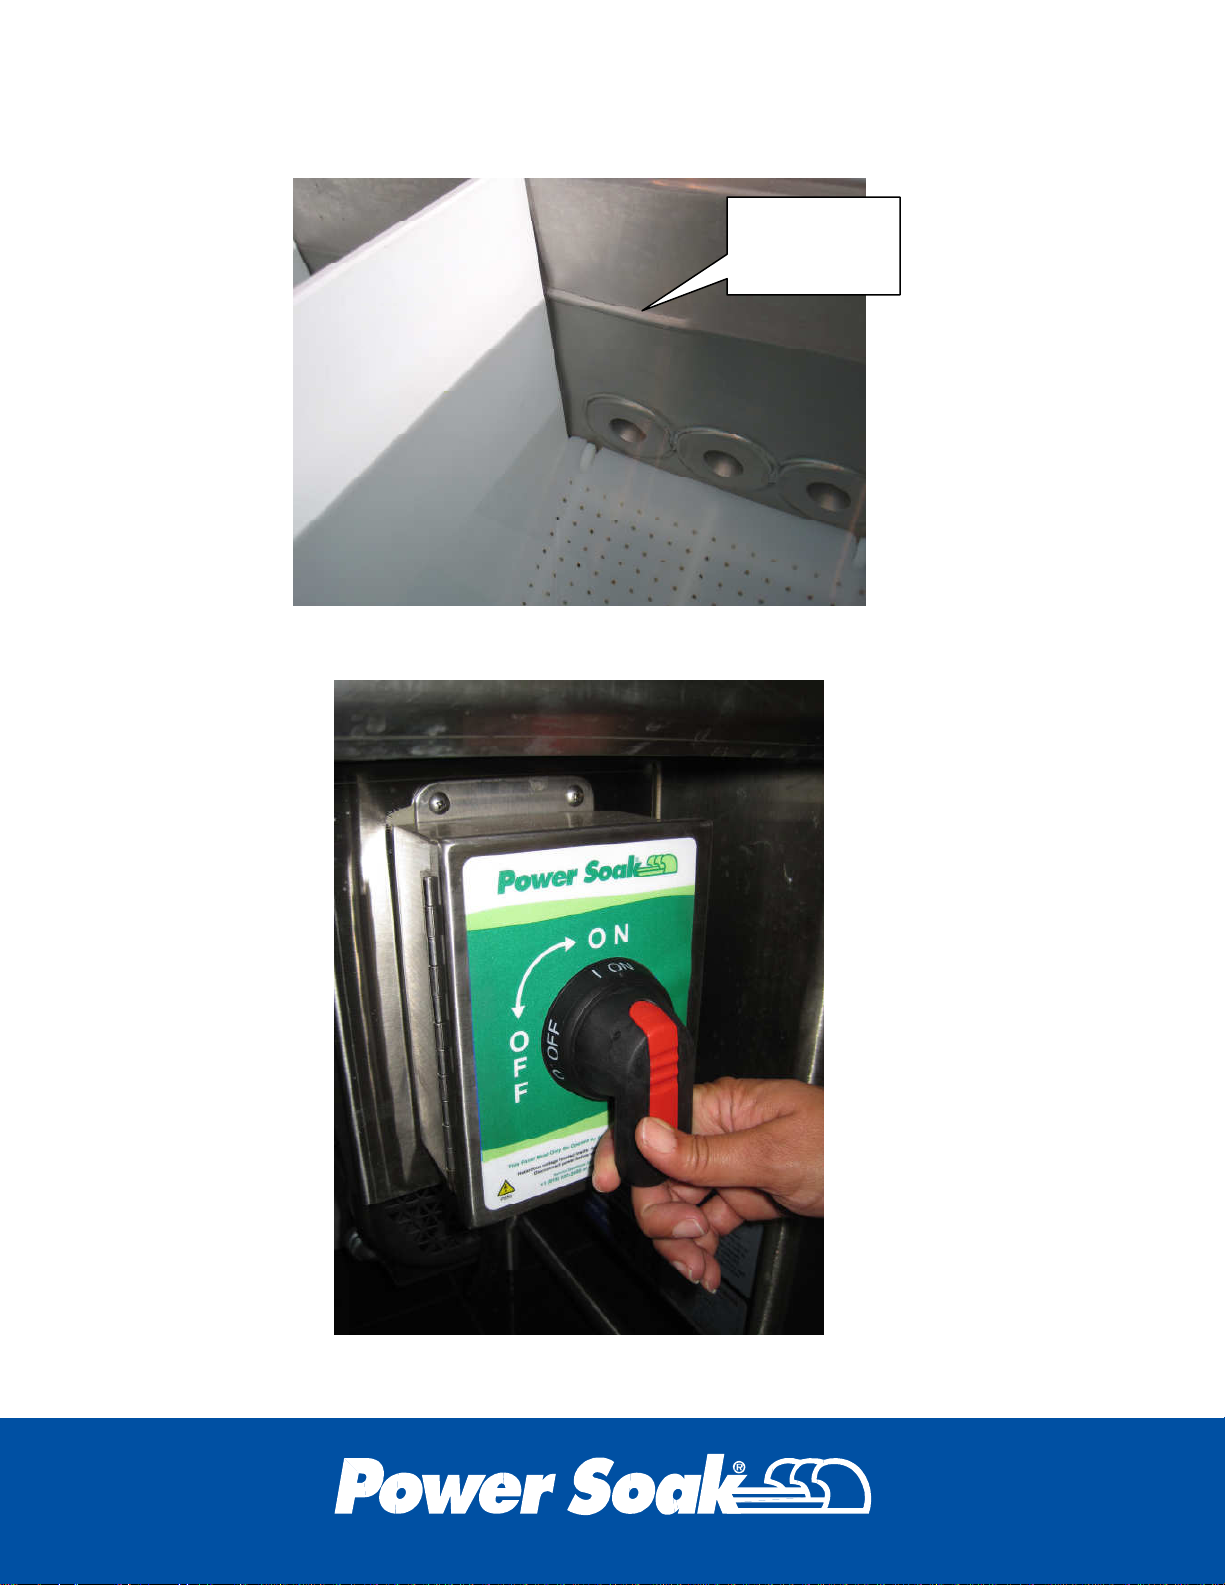
Fill the sink until the solution has reached the water level mark in the sink.
mark
Embossed
water level
Turn the switch to the ON position to start the pump.
17
Page 20
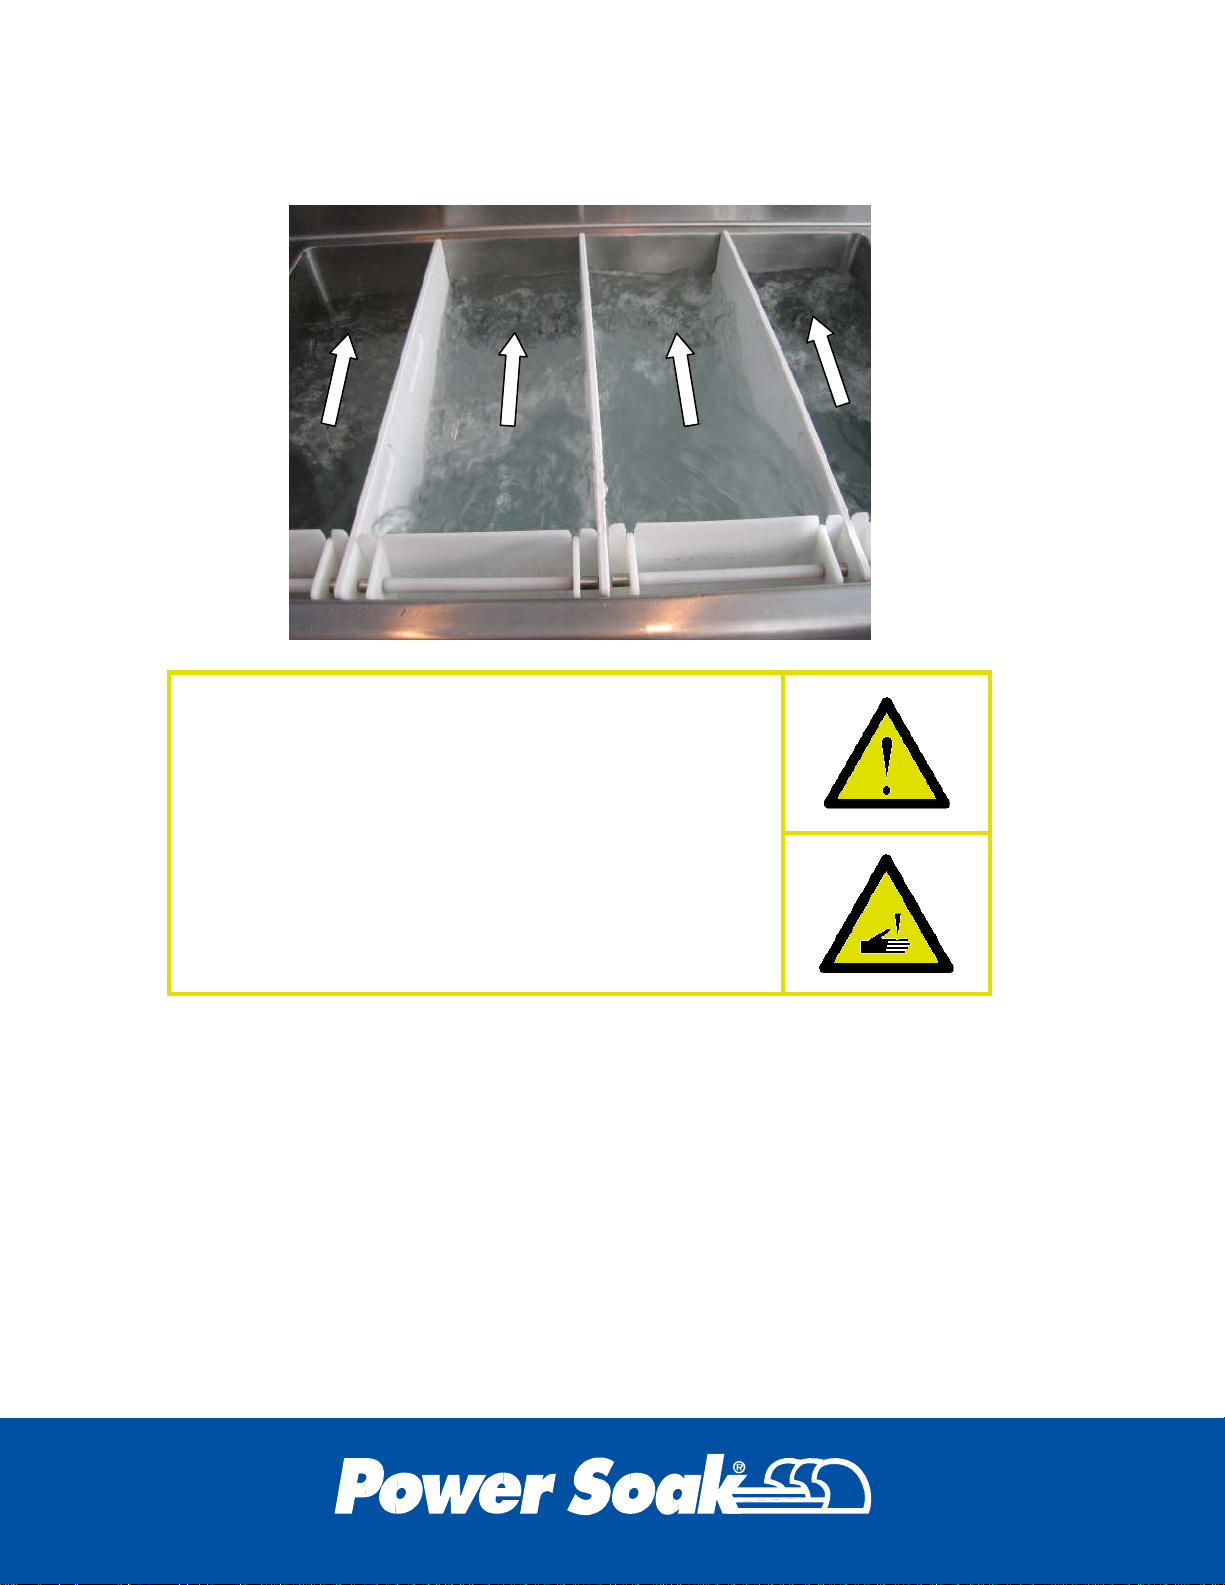
When the pump is running, the water will become turbulent, and a strong
front-to-back current will be established.
Do not place knives or other sharp objects in the
Produce Soak. Allowing knives or other sharp objects
to tumble freely in the Produce Soak tank may cause
damage to the equipment and bodily injury to the user.
18
Page 21
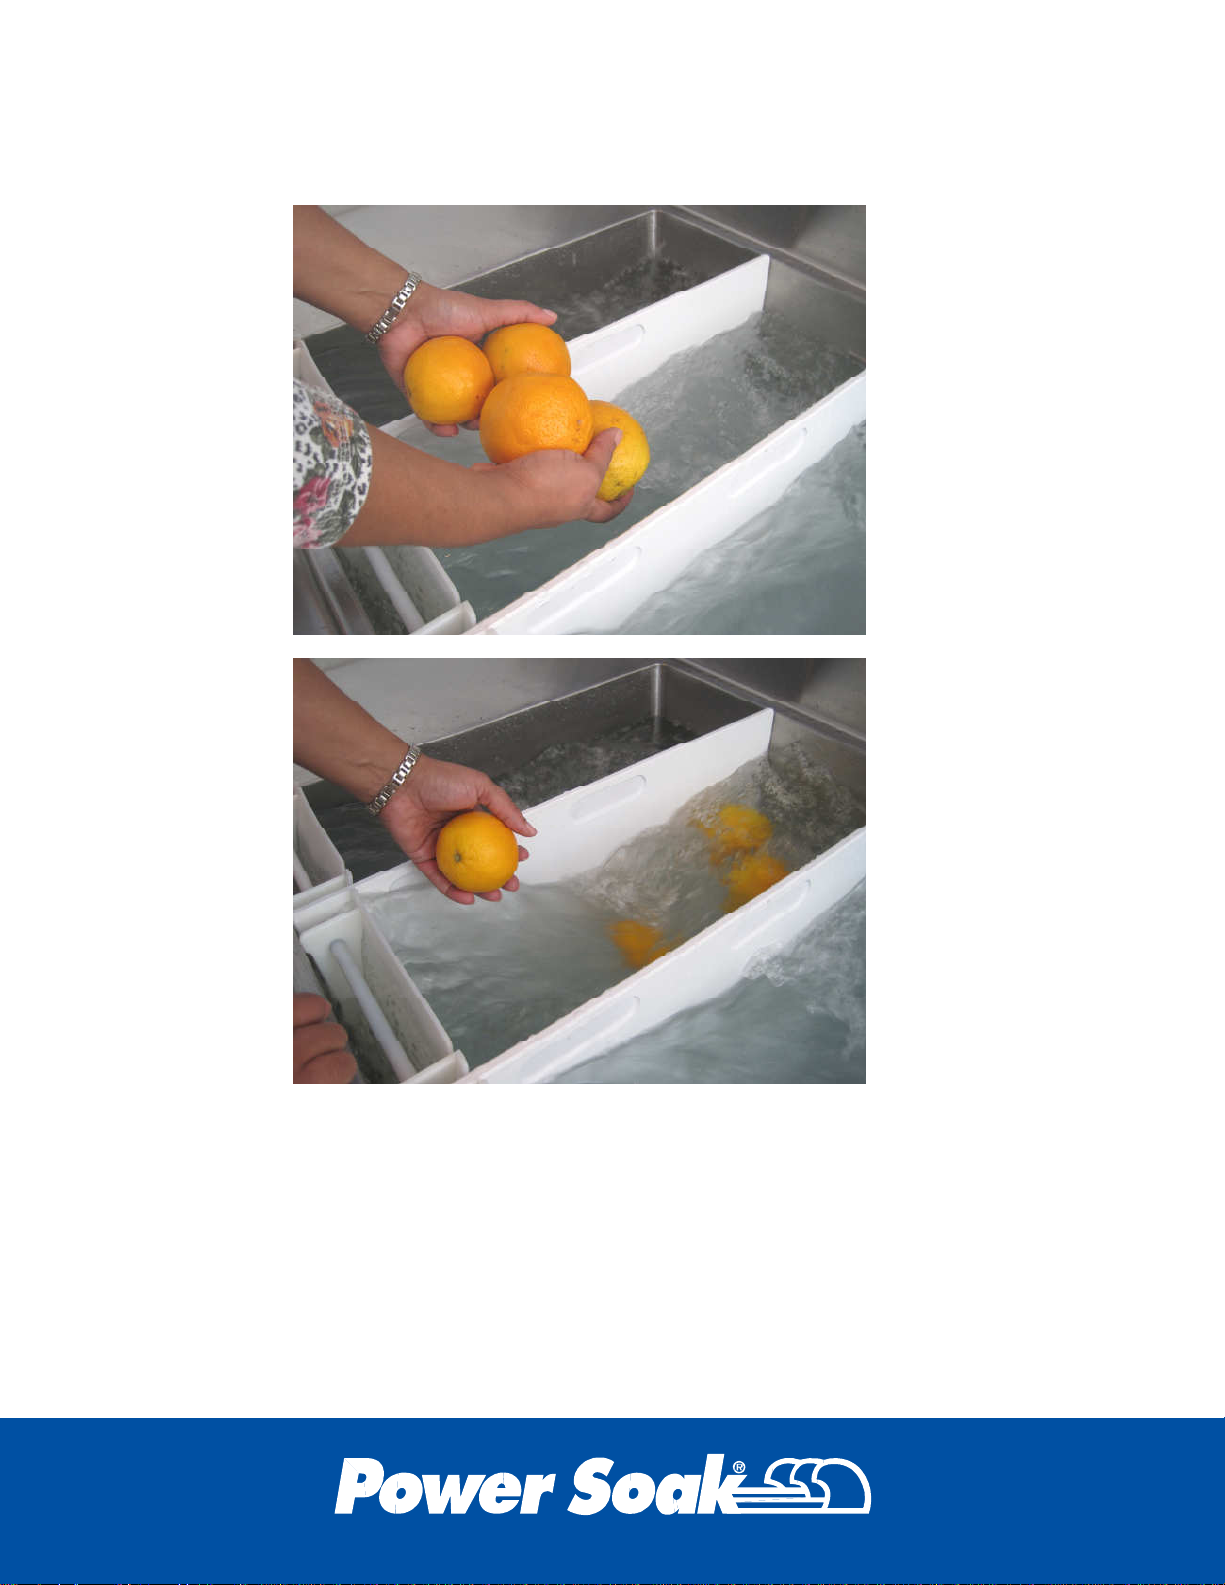
Begin placing produce in the Produce Soak. Since there are four
compartments, you may place a different type of produce in each one.
19
Page 22
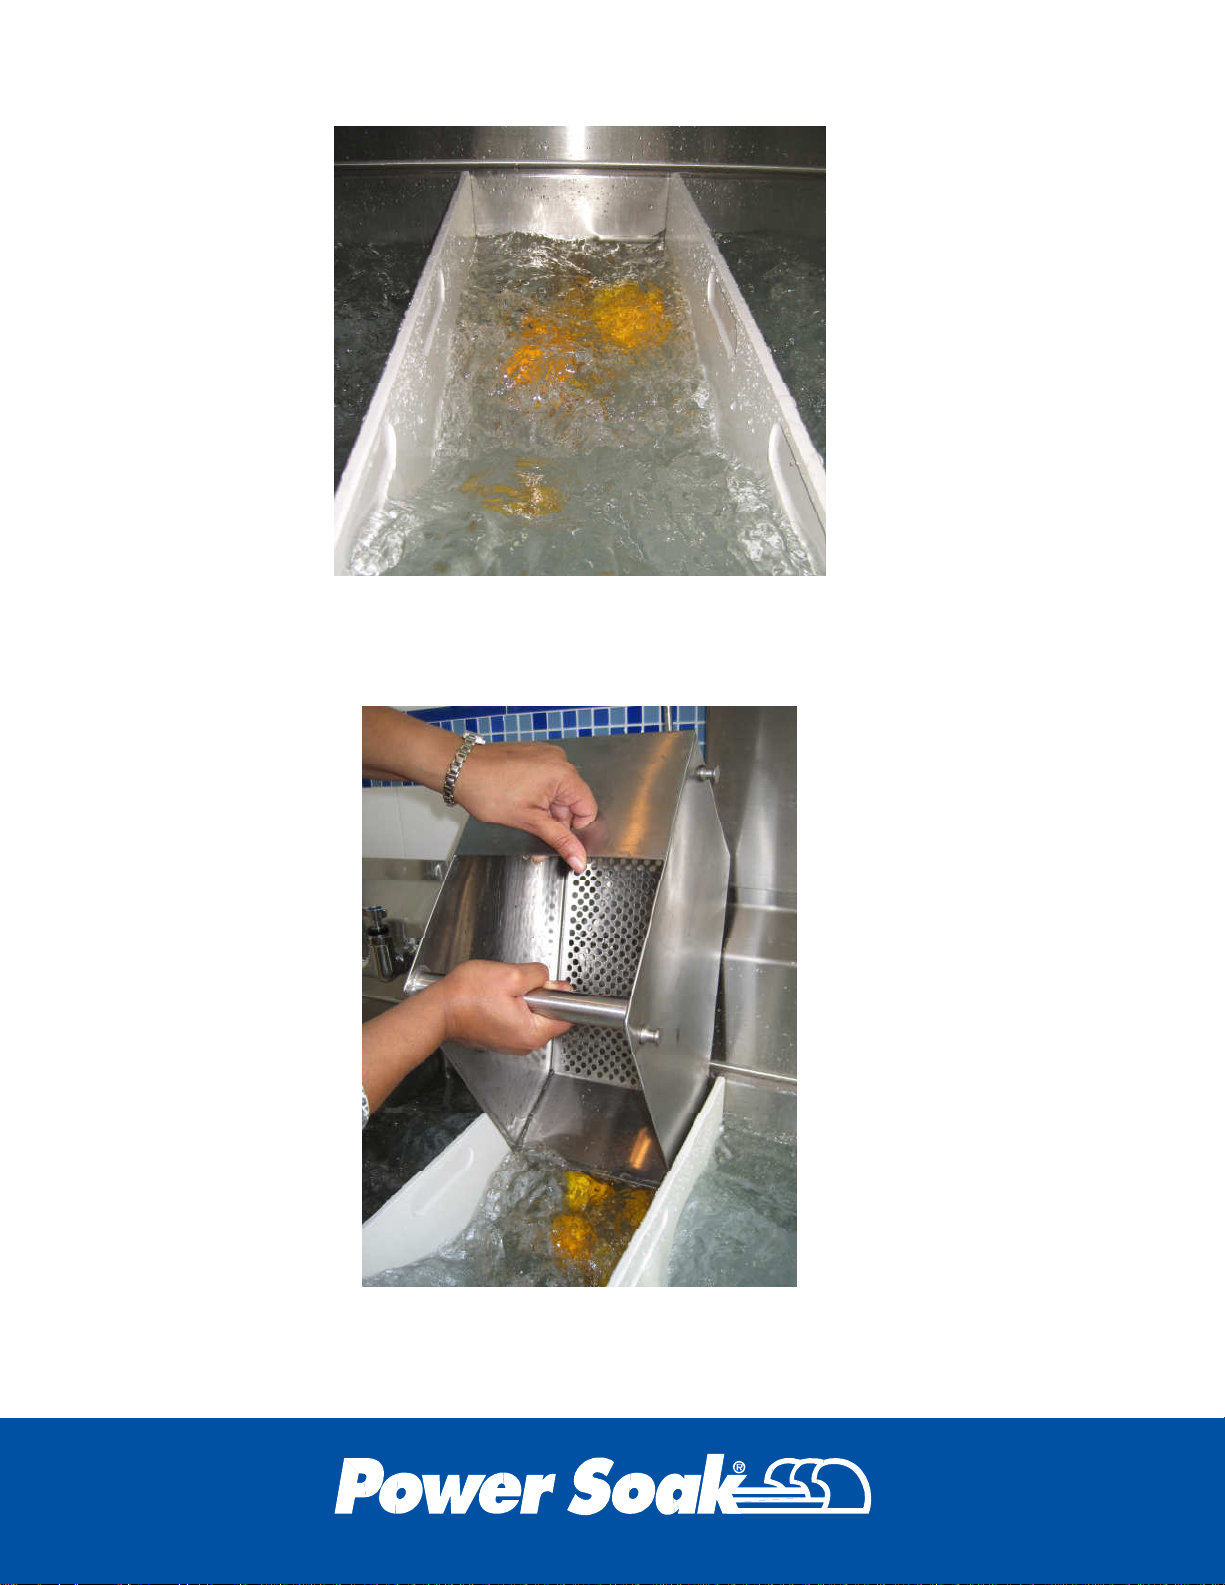
After the necessary time for soil removal and disinfection, the produce may
be removed by inserting a collection basket. Holding the basket as shown,
angle the basket so its leading edge is aligned with the flow in the sink.
As you swing the basket into position, produce will begin flowing into the
basket.
20
Page 23
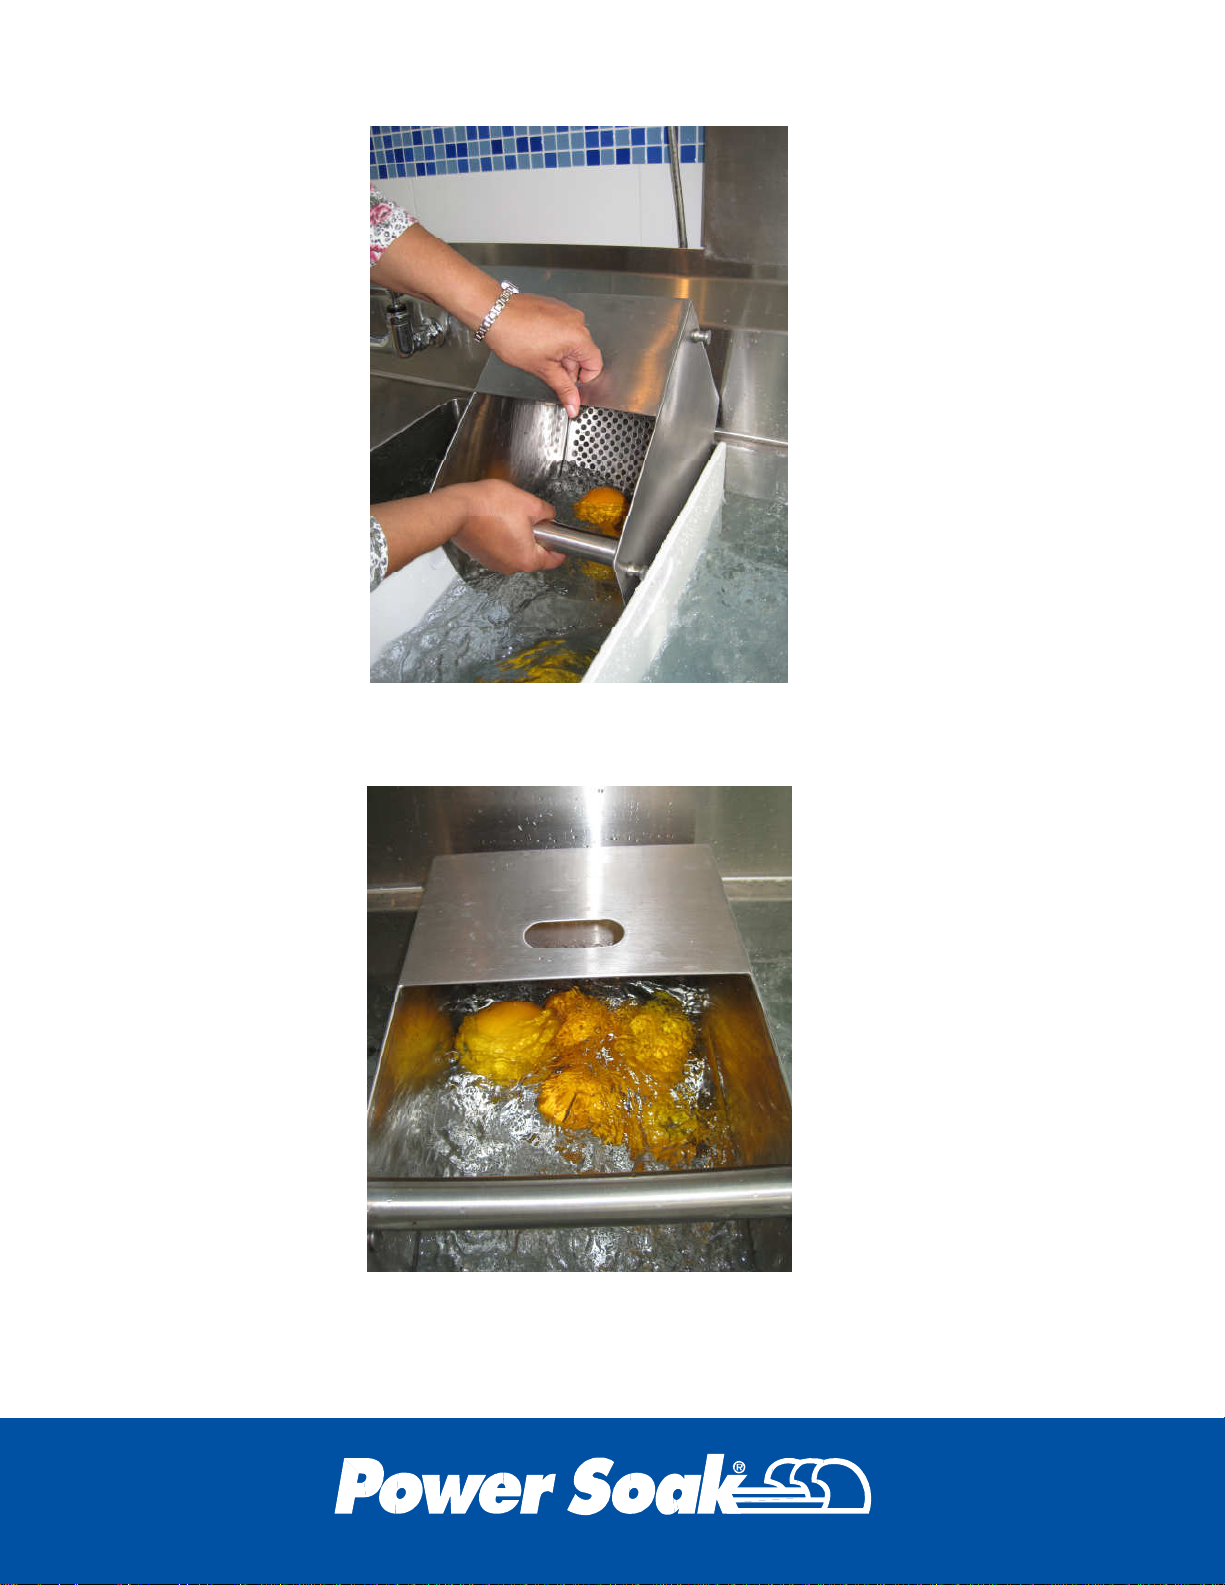
Rest the basket on the top edges of the partitions or the sink edges until all
the produce is collected.
Lift the full basket out when ready. Always observe safe lifting procedures.
21
Page 24
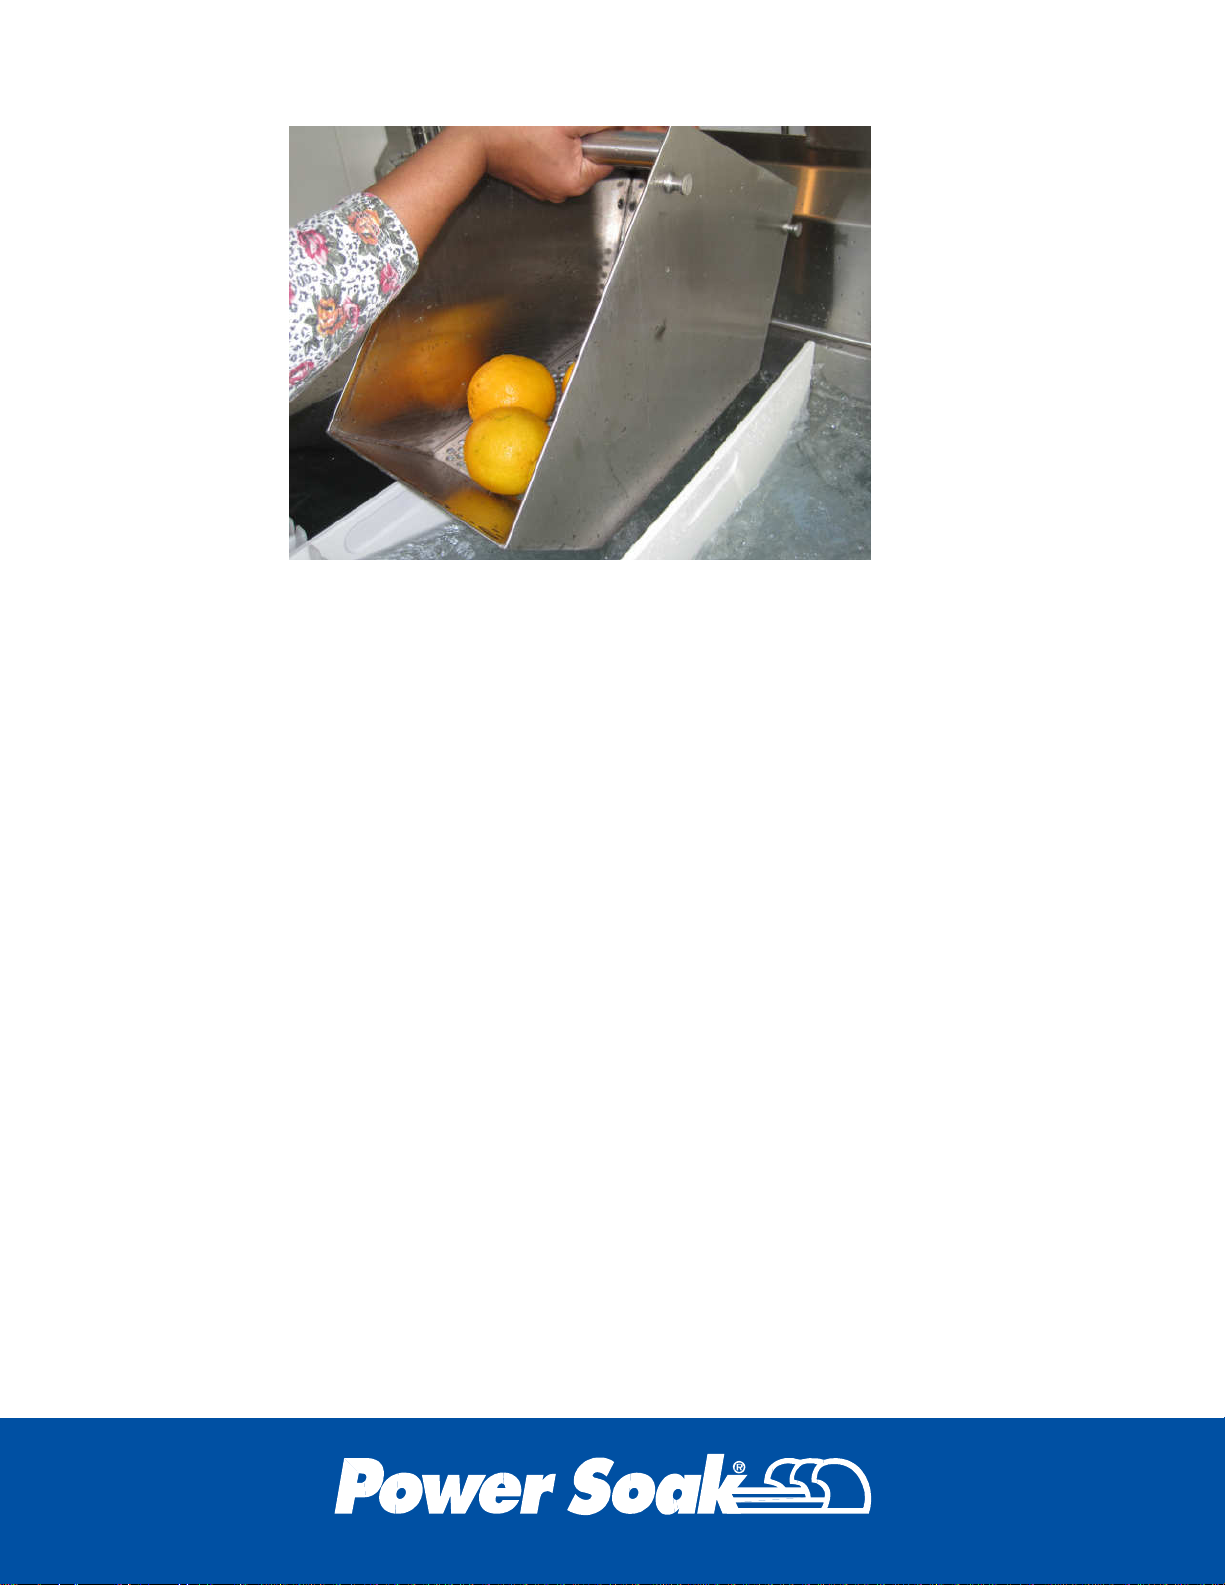
Washing Tips
Conserve water and washing chemicals by planning your produce
washing. For example:
• Wash more durable items like oranges and apples first, because
those items are less likely to foul the water.
• Wash less durable items like lettuce and greens later because of
their tendency release small green bits into the water.
• Wash heavily soiled items like potatoes and radishes last because
of their tendency to cloud the water.
Consider the effect of flavor mixing and color mixing with certain
combinations of produce. For example, it might be better to wash cut
cauliflower before washing blueberries. Were the blueberries to be
washed first, a very small number of bruised blueberries could "dye" the
water. Also, blueberry seeds might be released which are dark in color.
The cut surfaces of the cauliflower pieces may absorb the blueberry flavor
and color, and the dark seeds could easily get caught in the cauliflower
florets.
A little planning will reduce the number of washing solution changes to
save time and money.
22
Page 25
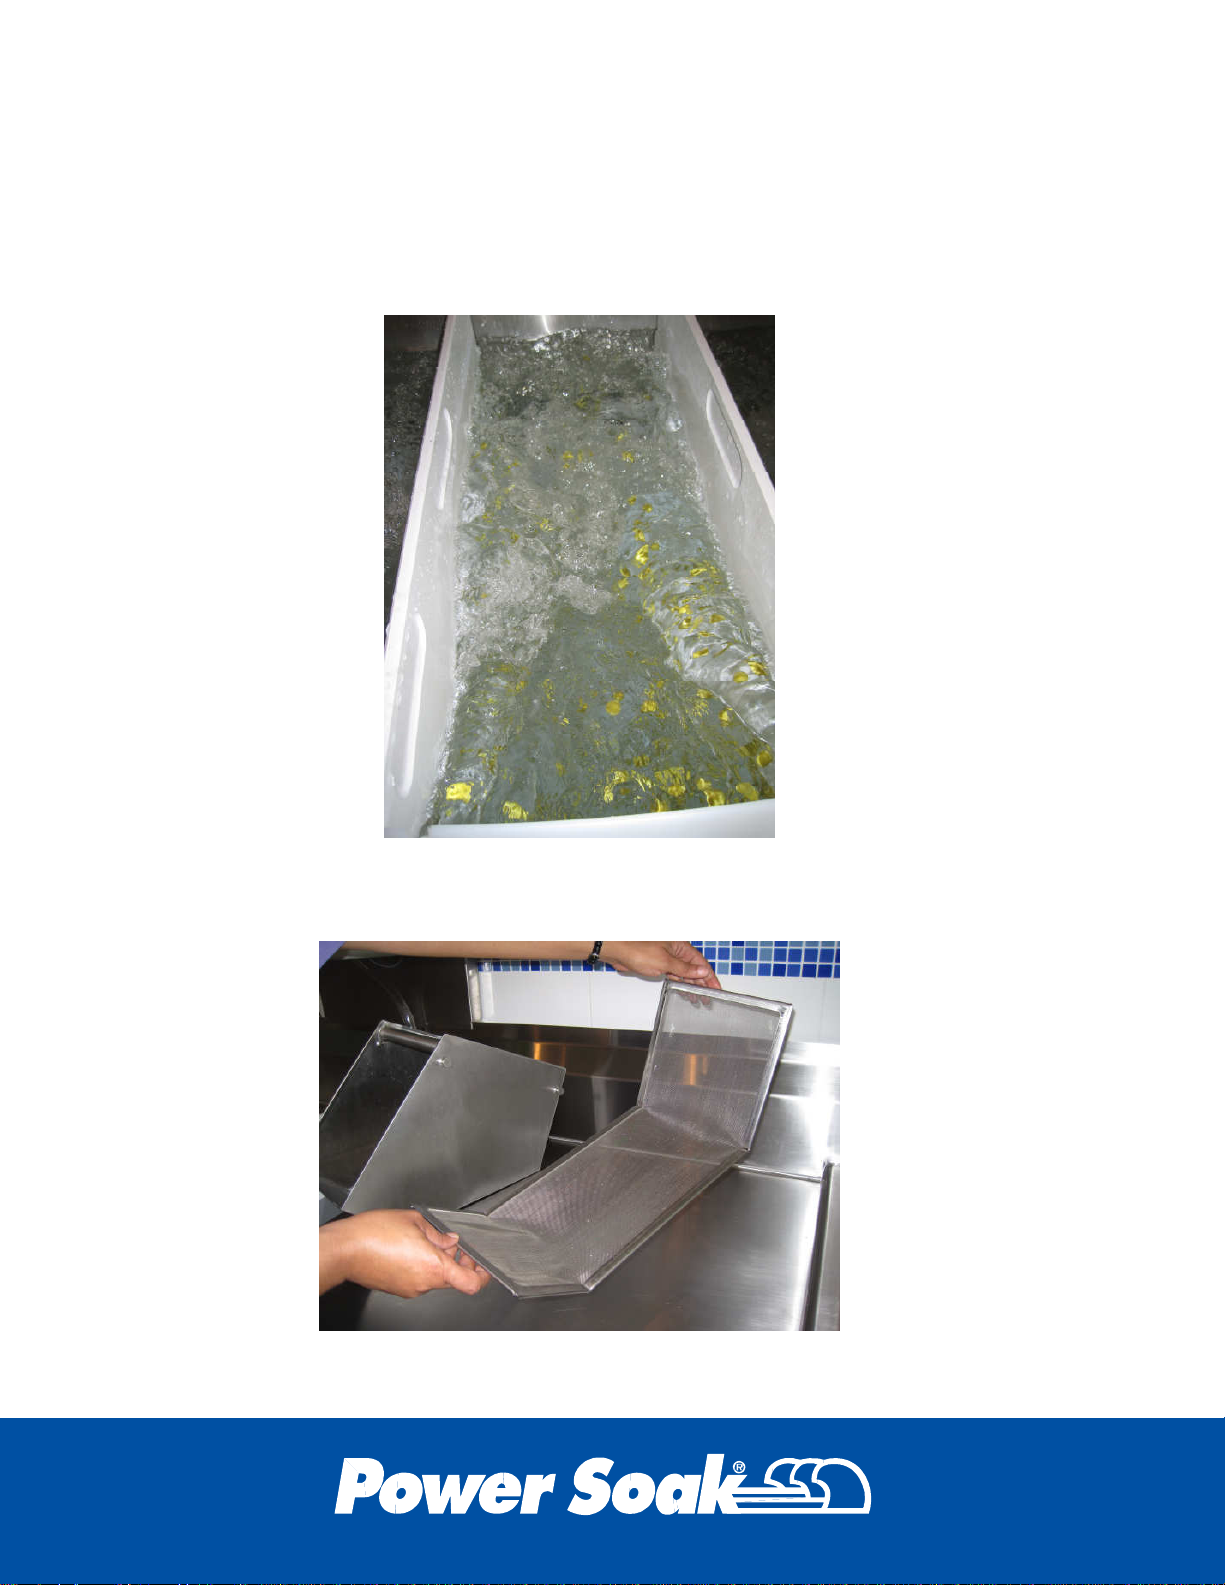
Emptying the Produce Soak
When all produce washing is finished and all produce has been removed,
collect the larger waste particles suspended in the wash water.
This can be done by placing a filter screen in a basket and then placing the
basket in each of the four wash sections.
23
Page 26
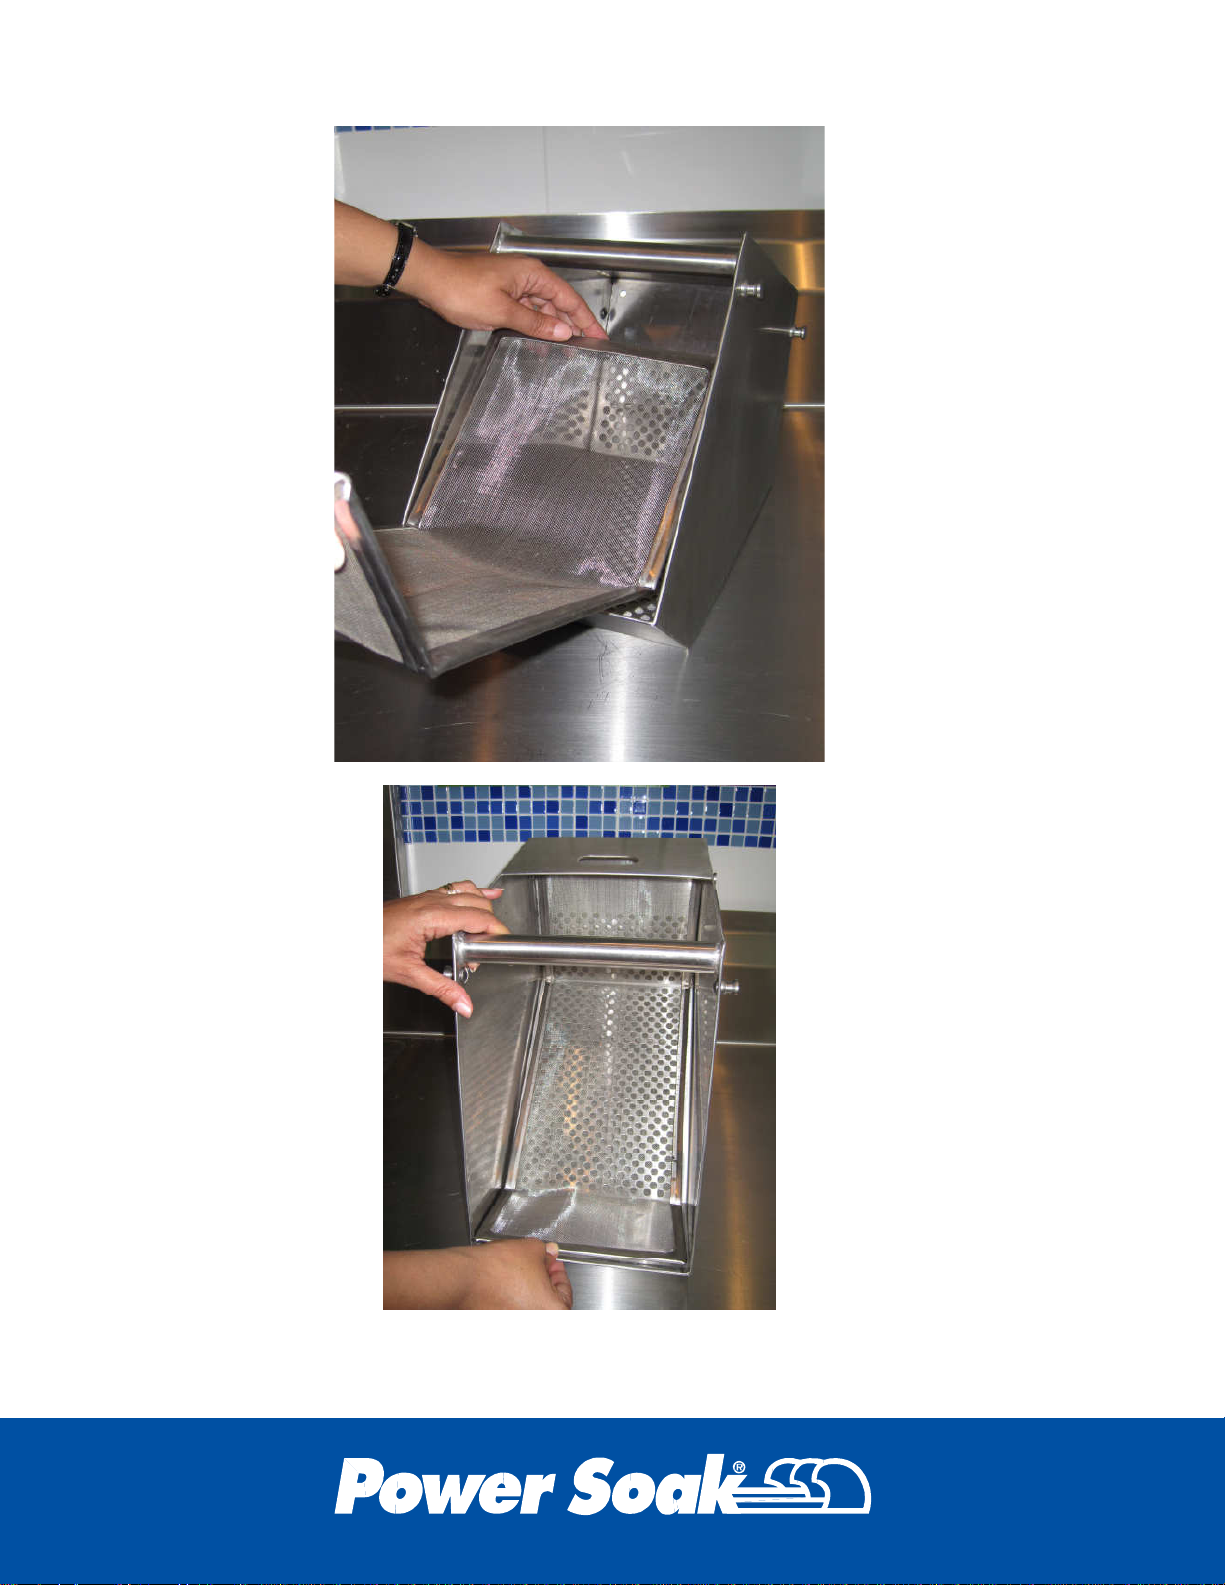
24
Page 27
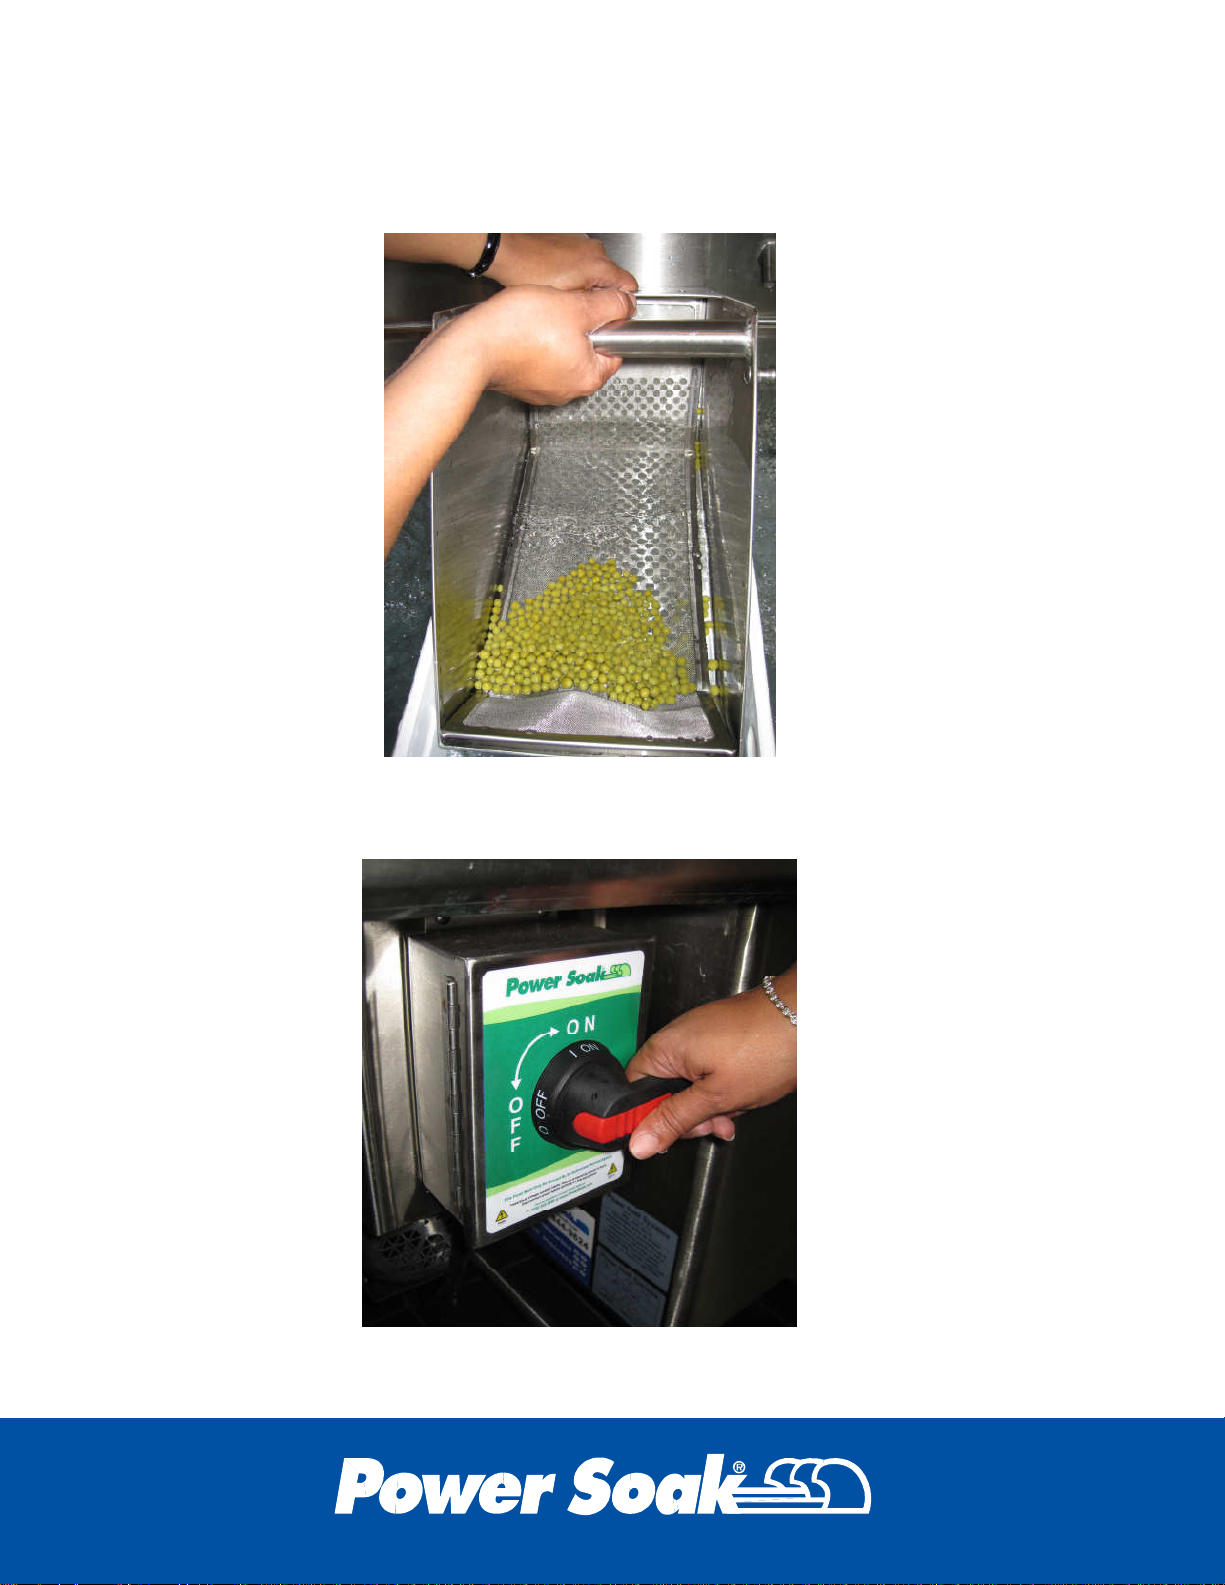
Allow a few minutes of collection time in each position. When finished,
empty the contents of the filter into a suitable waste container, and wash
out the filter and basket.
When you have completed the particle collection, turn off the pump by
turning the switch to the OFF position.
25
Page 28
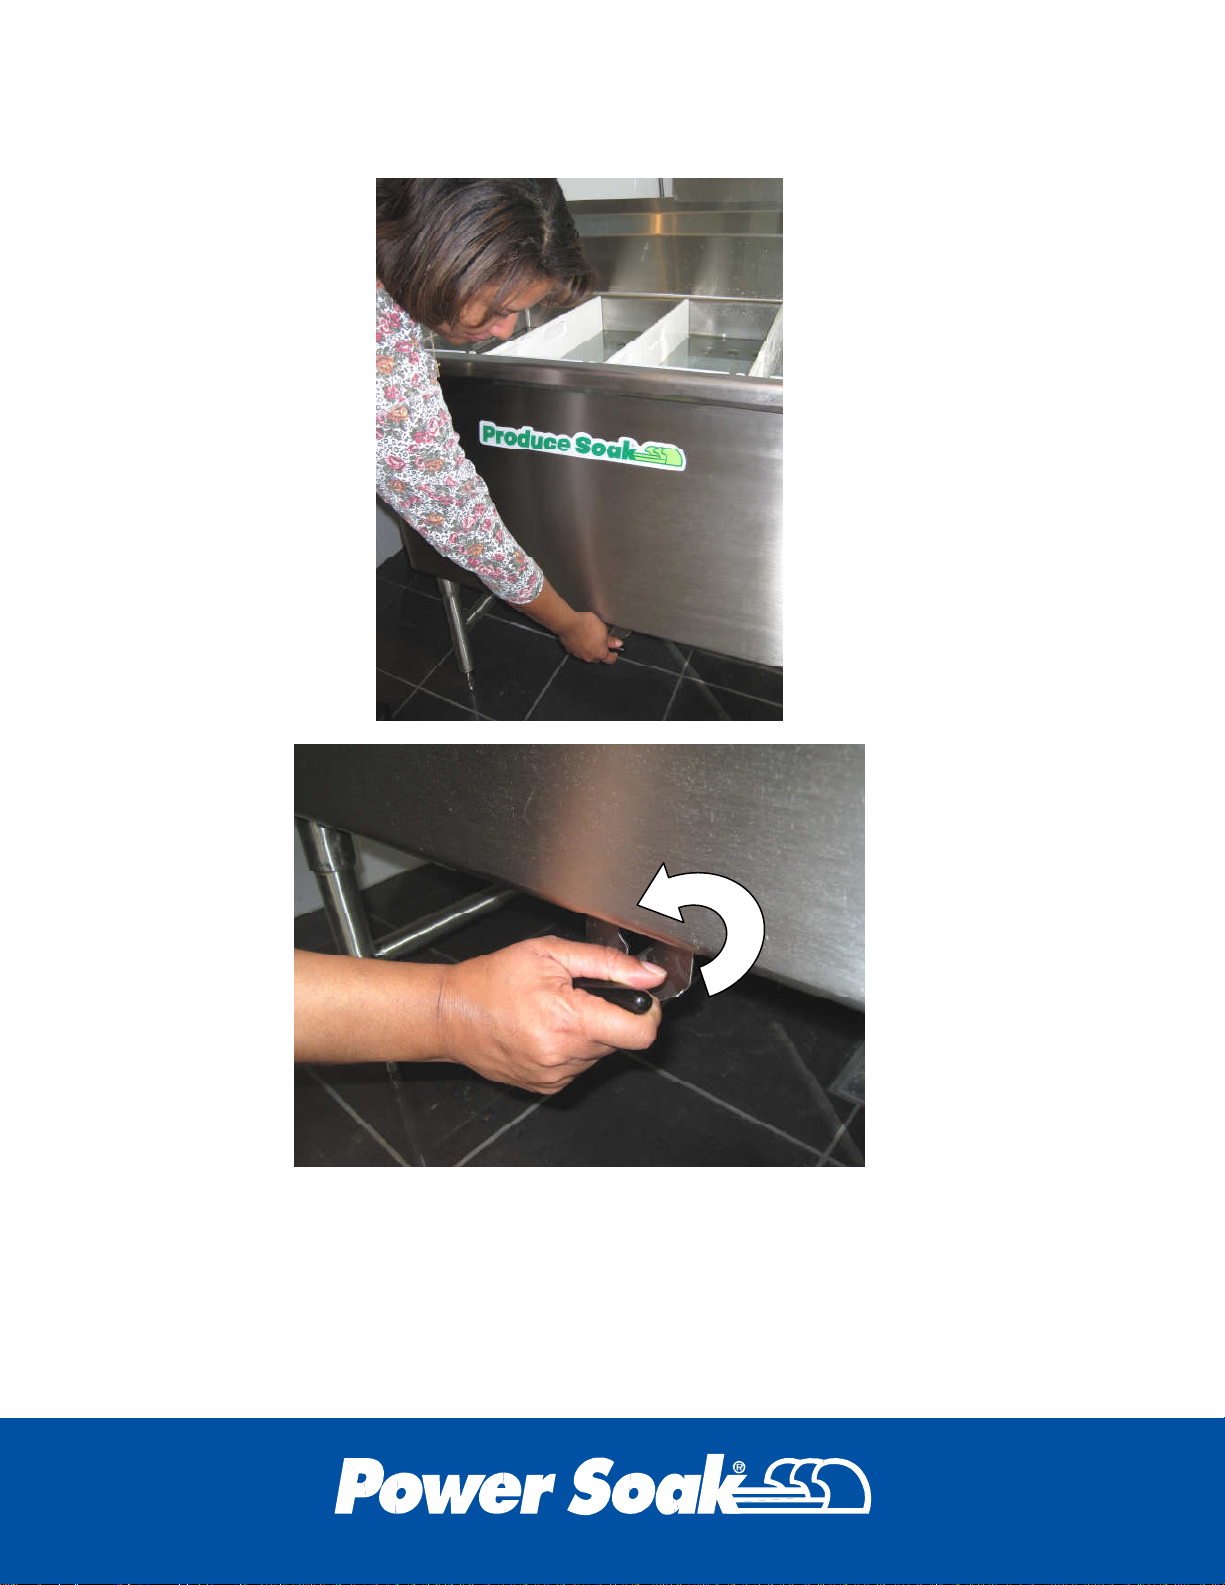
Open the drain valve by turning it counterclockwise 1/4 turn.
26
Page 29

Do not run the motor without water in the sink. Doing
so could damage the seals in the pump.
Remove each Produce Soak component (flow guides, partitions, and rib
sets) in the reverse order they were assembled. Wash each component to
remove all traces of produce debris. Position each component so that it
dries quickly. Pay particular attention to the flow guides; provide airflow
between each of them and do not stack them together wet.
27
Page 30

- -This page left intentionally blank - -
28
Page 31
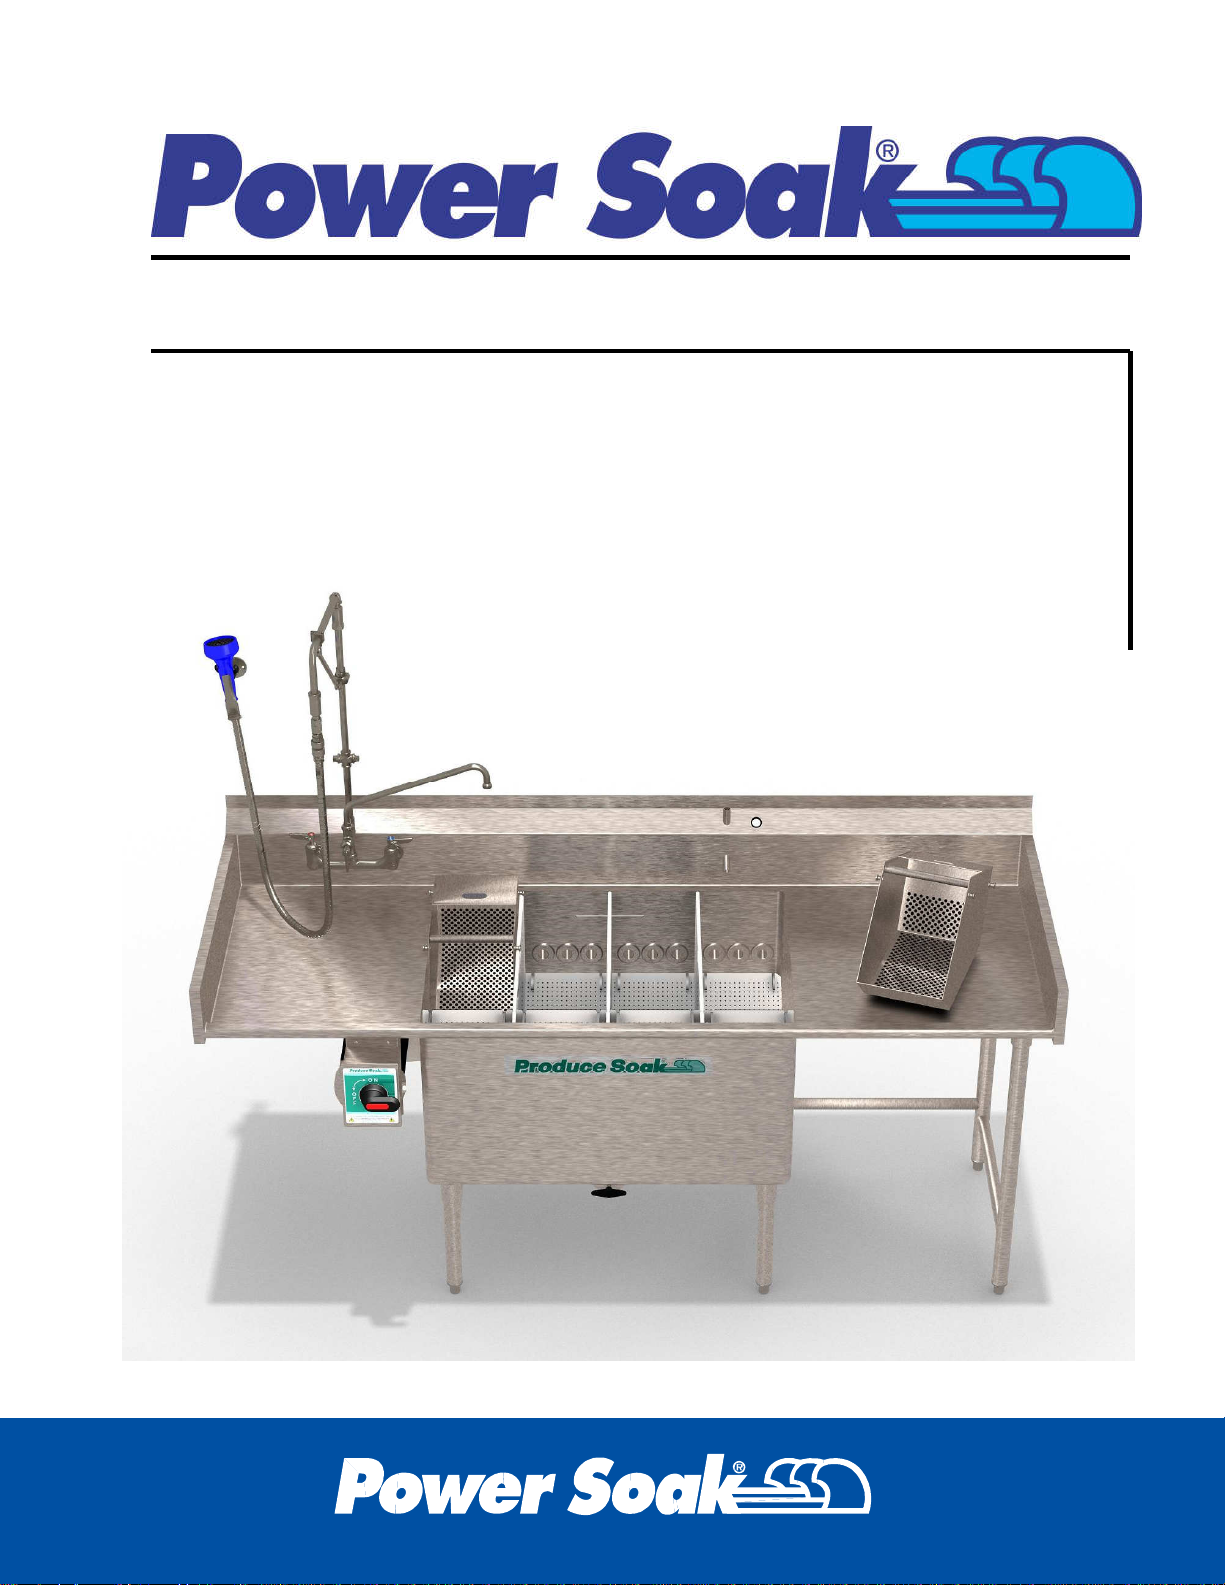
Preventive Maintenance
Produce Soak
29
Page 32
Your system requires minimal, routine preventive maintenance. As such,
the following should be done on a routine basis to ensure that your system
remains reliable.
IMPORTANT: Turn off the power to the unit at the main
breaker prior to performing the following task!
About once per month, clean the pump motor fan shroud with a damp,
soapy rag. The motor shroud is the "vented" cover located at the end of the
motor (closest to the control panel). This will prevent grease and dust from
accumulating in the cover's openings, which can obstruct the airflow that
cools the motor.
About once per month, de-lime the wash sink. Simply add a de-liming
agent to a sink of warm, fresh water and run the system overnight.
Ask your chemical sales representative to recommend a specific de-liming
agent.
You need not be concerned about greasing the motor bearings, as they
are permanently sealed.
There are no other preventive maintenance procedures that you will need
to perform on your Produce Soak system. If you have any questions
regarding the preventive maintenance procedures, please contact the
factory at 800-444-9624.
30
Page 33
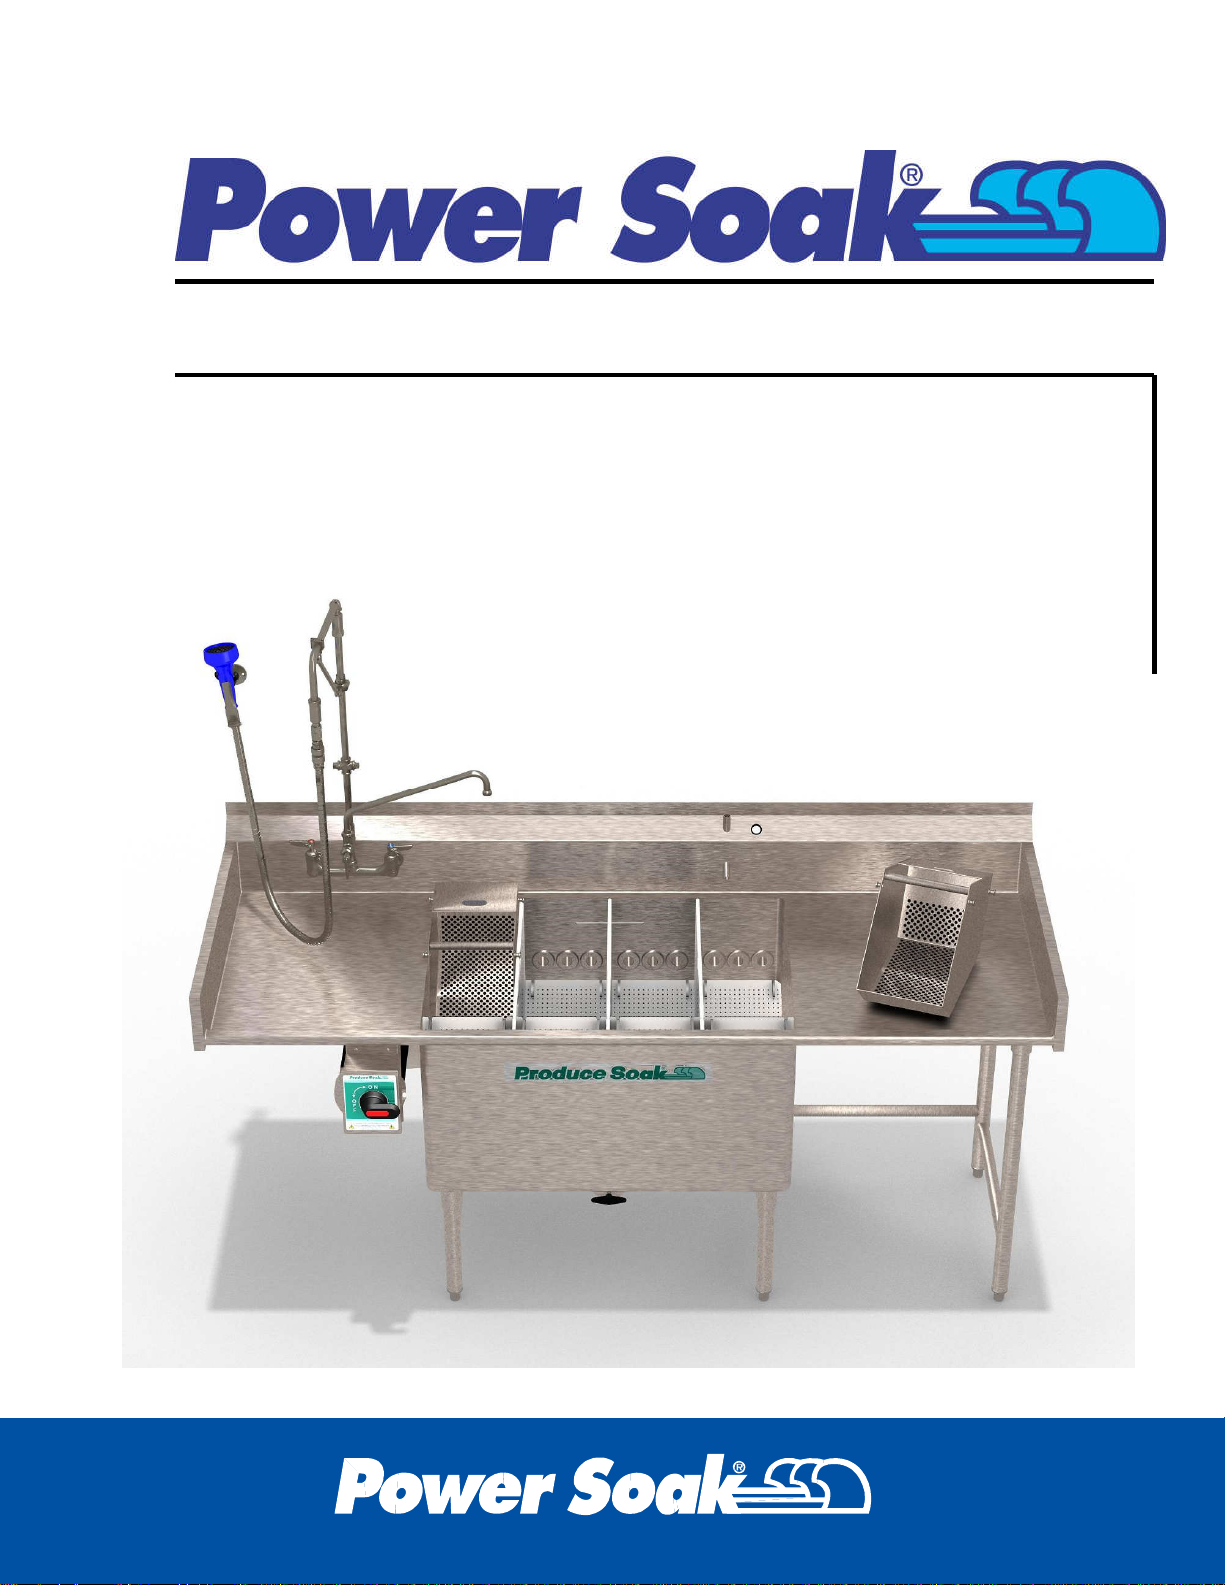
Troubleshooting
Produce Soak
31
Page 34
Only a limited number of troubleshooting and repair
procedures may be performed by the facility owner or
manager. Any troubleshooting or repair that requires
the removal of fasteners or that entails electrical
service must not be attempted by anyone other than an
authorized service agency. To obtain the name of a
recommended service agent in your area, please call
the Power Soak Service Department at 800-444-9624.
Symptom Possible cause Remedy
Pump motor
will not run
Circuit breaker
accidentally turned off
Circuit breaker tripped
Wall mounted
disconnect is turned
off
Motor thermal
overload tripped
Start capacitor
defective (single
phase motors)
Turn breaker on
Investigate reason for tripping, e.g.
damaged wiring, undersized breaker.
CONTACT POWER SOAK SERVICE OR
AN AUTORIZED SERVICE AGENCY.
Turn disconnect on
Investigate reason for overload tripping,
e.g. debris stuck in pump impeller. If debris
removal requires that you remove any
fasteners, YOU MUST CONTACT POWER
SOAK SERVICE OR AN AUTORIZED
SERVICE AGENCY. Once rectified, reset
thermal overload by pressing button on
bottom of motor junction box.
Replace capacitor. To do this, YOU MUST
CONTACT POWER SOAK SERVICE OR
AN AUTORIZED SERVICE AGENCY.
32
Page 35

Symptom Possible cause Remedy
Pump motor
runs, but
water flow is
inadequate
Motor is running on
the wrong voltage
Motor is running the
wrong direction
Confirm that the house wiring supply is
appropriate for the motor nameplate data.
Reconnect motor internal leads according
to the motor nameplate instructions. YOU
MUST CONTACT POWER SOAK
SERVICE OR AN AUTORIZED SERVICE
AGENCY to make these changes.
For three phase motors, reverse any two
motor leads. For single phase motors,
reconnect motor internal leads according to
the motor nameplate instructions. YOU
MUST CONTACT POWER SOAK
SERVICE OR AN AUTORIZED SERVICE
AGENCY to safely change the rotation.
Unit makes
a loud,
steady
noise when
running
Debris caught in the
motor's cooling fan
Motor seal running
dry
Debris caught in the
pump impeller
Lock and tag out the electrical power from
the unit, remove the motor fan cover, and
remove the debris. Replace the fan cover
and restore the power. For this task, YOU
MUST CONTACT POWER SOAK
SERVICE OR AN AUTORIZED SERVICE
AGENCY.
Lock and tag out the electrical power from
the unit, remove the motor fan cover, and
squirt some low viscosity oil such as WD40
between the fan and the motor end bell.
Replace the fan cover and restore the
power. YOU MUST CONTACT POWER
SOAK SERVICE OR AN AUTORIZED
SERVICE AGENCY for service of this
nature.
Lock and tag out the electrical power from
the unit. Remove the three 3/8-16 adapter
plate retaining screws adjacent to the
motor. Slide the motor, adapter plate, and
impeller out of the pump housing. Remove
debris from the impeller and reassemble.
YOU MUST CONTACT POWER SOAK
SERVICE OR AN AUTORIZED SERVICE
AGENCY for this service.
33
Page 36

- -This page left intentionally blank - -
34
Page 37
Installation
Produce Soak
35
Page 38
The installation and initial operational check of your
new system must be performed only by licensed and
certified plumbers and electricians.
Be sure to follow all applicable national and local
electrical codes when installing the electrical supply
and/or a new circuit breaker. DO NOT connect the
system using a power cord and plug or an extension
cord of any kind.
Please refer to the detailed installation instructions that were sent with your
Produce Soak system.
Electrical Requirements
The electrical requirements of your new system are on the serial number
plate located on the end of the wash sink near the front, adjacent to the
control panel enclosure. They are also shown inside the control panel
enclosure itself.
All Produce Soak systems have a single point electrical connection, and a
dedicated circuit is required.
The system is completely pre-wired and tested at the factory, and a hardwired connection from an appropriate power source is all that is required.
The installer is to provide a NEMA 3X disconnect that should be
incorporated in the fixed wiring.
Properly sized watertight conduit, fittings and parts are required, as well as
the appropriate gauge wire.
36
Page 39

If your system is a “left-to-right” unit, you should locate the disconnect at
the left end of the system. (The opposite would be true for a “right-to-left”
system.)
Ideally, the disconnect should be located on the wall directly behind the
pump motor and control panel provided this location is easily accessible by
the operator and does not interfere with the faucet.
A wiring diagram is located in the system’s control panel enclosure.
Specific part numbers and parts information can be obtained from the
factory by calling 800-444-9624.
Plumbing Requirements
Your unit requires the following plumbing connections:
• 3/4” (19mm) or 1/2” (12 mm) hot and cold water supply lines.
• One waste water connection (minimum 1 1/2” / 38mm).
37
Page 40

by
Power Soak and Produce Soak are registered trademarks of Cantrell Industries, Inc.
The Produce Soak design and concept are fully patented.
Power Soak Systems. Inc.
903 East 104th Street, Suite 130
Kansas City, MO 64131
Phone (816) 761-3250 Fax (816) 761-0544
(800) 444-9624
www.powersoak.com
Part#: 34201
Rev: B
Rev Date: C.E.P. 06/05/2015
38
 Loading...