

Powerseal 3121AS, 3131AS, 3121AS-LW, 3122AS, 3132AS Installation Manual
...
INSTALLATION SHEET - REPAIR CLAMPS
3121AS,3131AS,3121AS-LW, 3122AS, 3132AS, 3123AS
GENERAL NOTES:
• Use cave-in protection during excavation and back-fill
operations.
• Verify Pipe O.D. to make certain that the correct Repair
Clamp is being installed.
• Keep bolt threads clean and free from nicks, dents or
other damage.
• If conditions permit, mark the pipe for a reference point
to properly position the clamp.
• Lubrication of the gasket with a soap solution reduces
friction and more evenly distributes clamping force. For
cold weather lubrication, ethylene glycol can be added to
the soap solution to prevent freezing.
• Before start, the installer shall determine the suitability
of the product for his intended use and the installer
assumes all risk and liability for the application of the
product.
OTHER INFO:
• FOR SS BOLTS: To avoid galling during installation, the
threads MUST BE KEPT CLEAN AND FREE FROM
DAMAGE. The fitting should not be thrown around or
otherwise be abused, i.e. stored on truck without box,
dropped from top of ditch, etc. A deep socket and
ratchet wrench is recommended.
• When a gap exist of one inch or more between the ends
of the pipe, a small section of pipe or a rolled thin sheet
of metal should be formed around the gap to provide
support for the gasket and band.
• When a section of the pipe wall equating to 1/3 of the
total area to be repaired a rolled thin sheet of metal
should be formed over the missing area to provide
support for gasket and band.
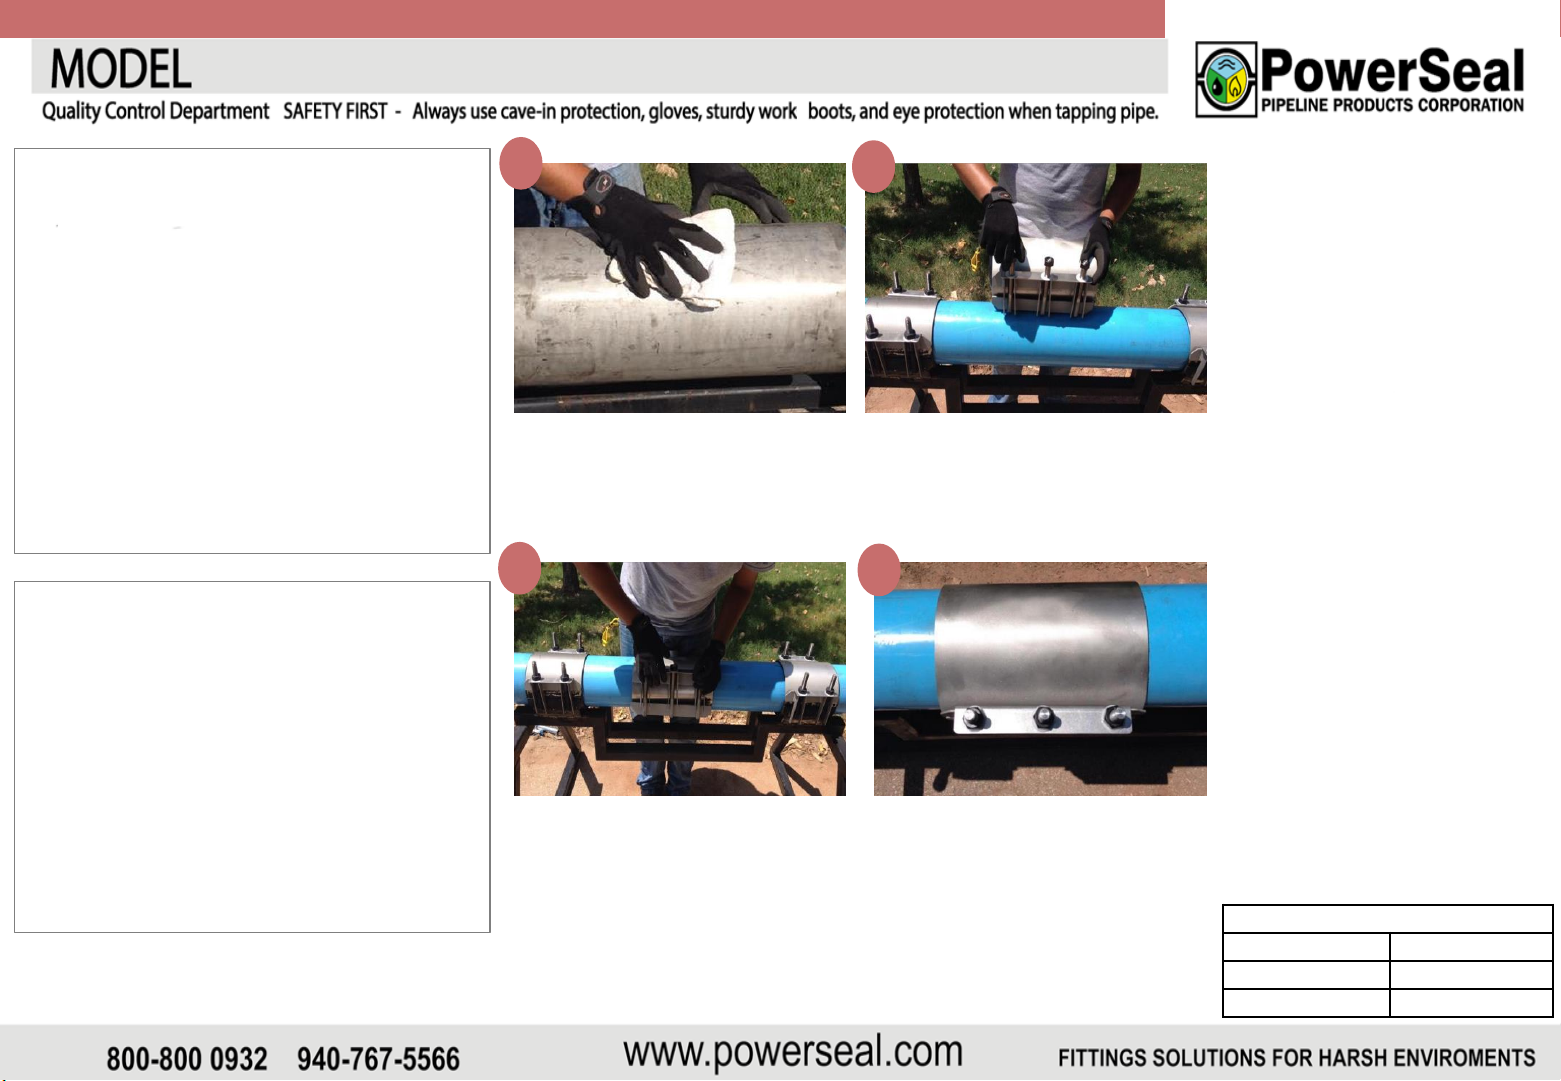
1
Thoroughly clean the pipe where the
clamp will be installed.
3
Tuck the gasket flap in place, close the
fingers studs, engage the centermost
stud(s) and finger tighten. NOTE: The
clamp can be assembled beside the
break and slid over the damaged area
if the pipe surface and gasket have
been properly lubricated.
2
Loosen nuts to the end of the stud,
place the clamp around the pipe
centered over the break or damage
area with the gasket flap at the top.
4
Rotate the clamp to flatten the
tapered-end of the gasket, and
position the bolts and nuts for
convenient tightening. Check the
reference mark (if used).
REPOSITIONING
INSTRUCTIONS
If initial installation of the clamp
does not satisfactorily seal the
leak then repositioning may be
necessary
Step 1: Loosen nuts until clamp
moves freely on the pipe.
Step 2: Perform steps 3 through
5 again.
RECOMMENDED TORQUE
Bolt Diameter Torque (ft-lb)
5/8” 70
3 /4” HD 100
INSTALLATION SHEET - REPAIR CLAMPS
3121AS,3131AS,3121AS-LW, 3122AS, 3132AS, 3123AS
PRE-INSTALL CHECKLIST:
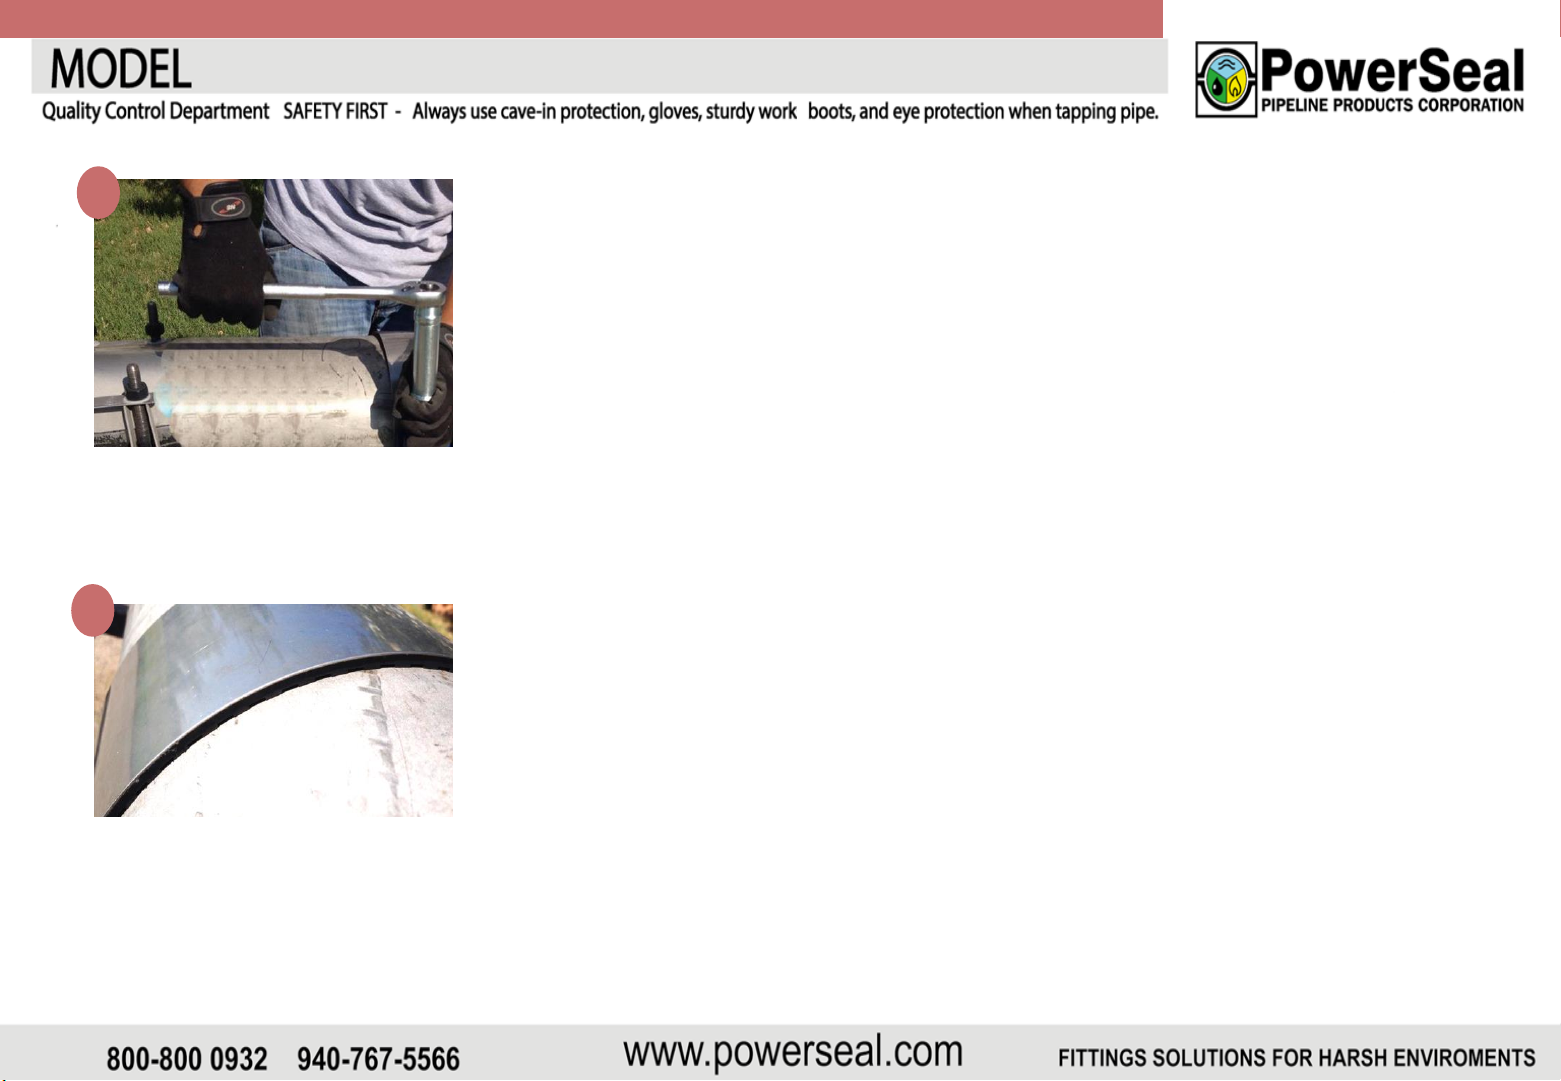
5
Evenly tighten the studs working from the
center outward. Maintain an even gap
between fingers studs when installing
multi-panel repair clamps.
DID YOU:
WARRANTY CHECKLIST (*):
6
Allow the gasket to fully compress, and
recheck the studs tightness. It is
important to re-torque Tapped Repair
Clamps when used as a “hot tap” saddle
after the tap has been made.
• Signature of On-Site Lead man: _______________________
* Must be completed on day of installation to Validate Warranty
● Clean pipe surface thoroughly? [Y] [N]
● Check O.D. of pipe with measuring tape? [Y] [N]
● Lubricate the Pipe with Dishwashing Soap? [Y] [N]
● Verify Proper Torque Required? [Y] [N]
● Date of Installation __/__/____
● Time of Installation ______ [AM] [PM]
● (PowerSeal recommends torqueing in 25 ft-lb increments)* Torque Applied: _______ ft-lbs
● Was standard re-torqueing applied 5 minutes after reaching torque requirements? [Y] [N]
 Loading...