

Power-Pole micro anchor Installation Manual
Installation Manual
Powered by
Powered by
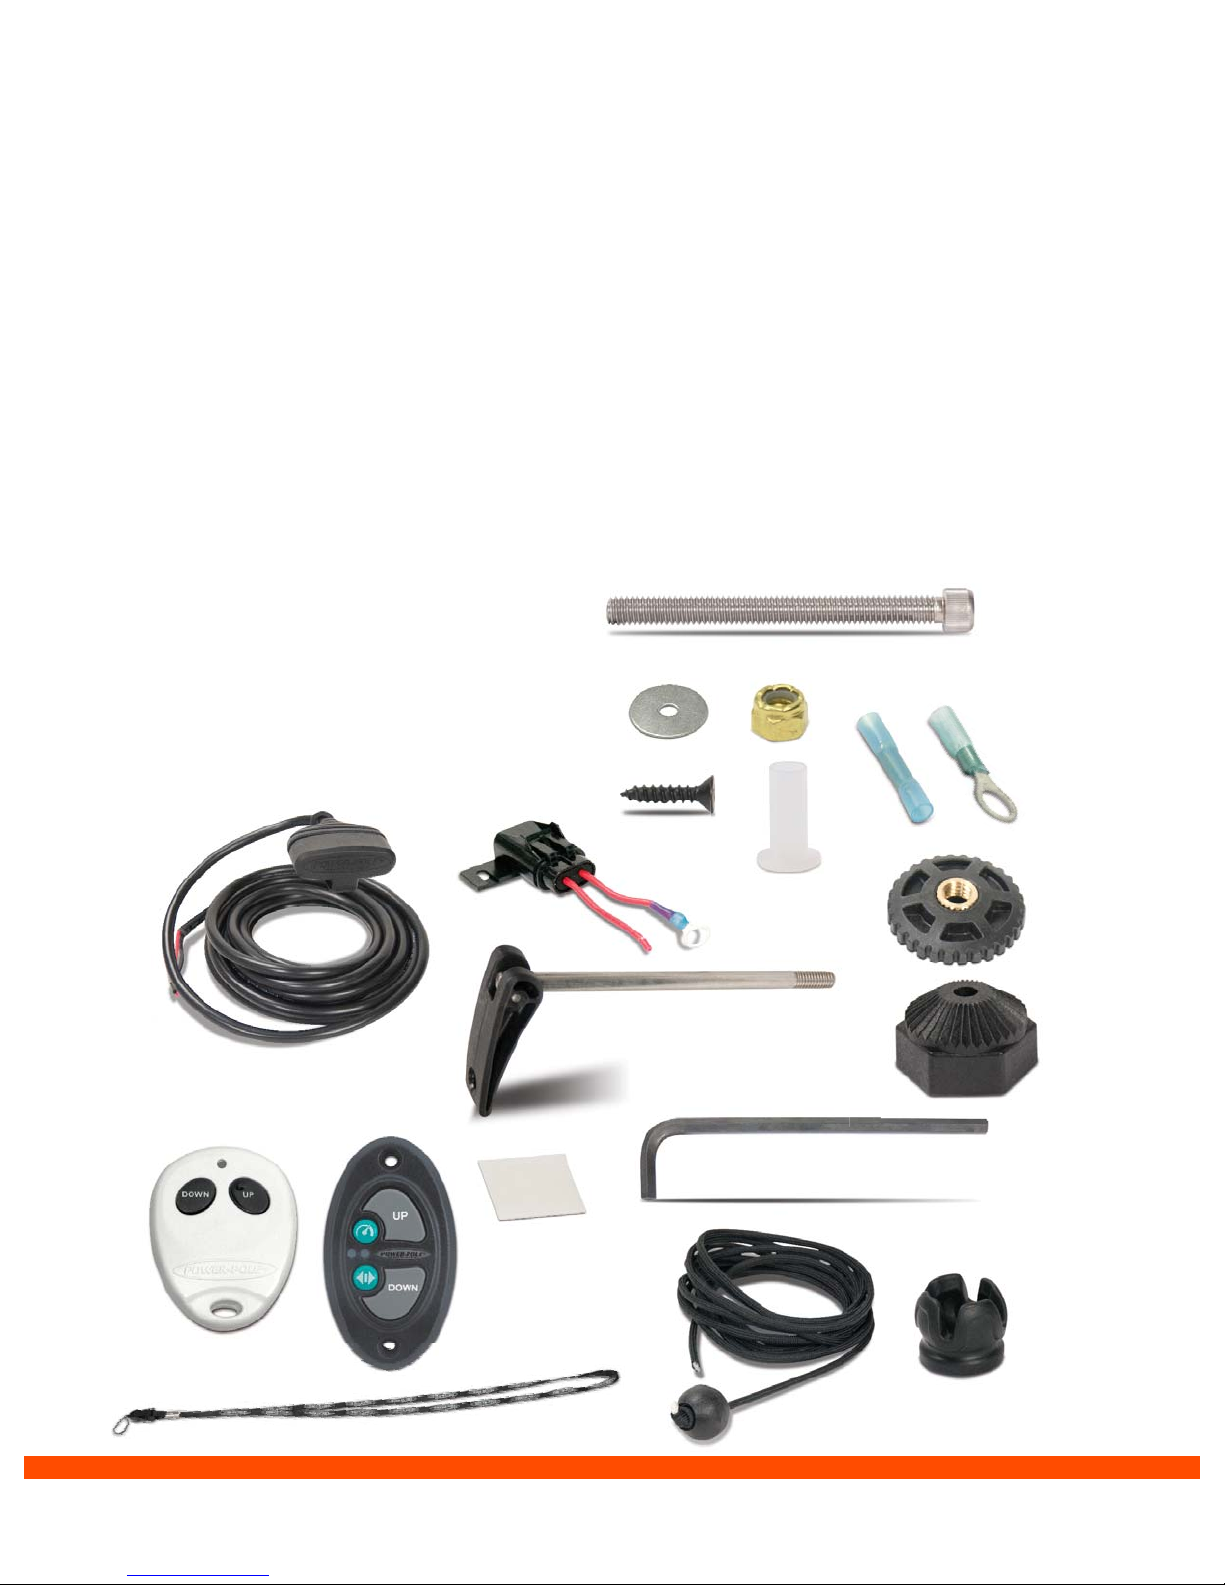
Included Hardware: Installation Tools:
A. Qty. (4) 5/16” x 3.5” all thread transom
mount bolts
B. Qty. (4) 5/16” fender washers
C. Qty. (4) 5/16” tall brass nuts
D. Qty. (1) butt connector
E. Qty. (1) ring terminal
F. Qty. (3) #8 x 3/4” black fl at head screws
G. Qty. (1) 5/16” white thru-hull bushing
H. Qty. (1) power cord plug
I. Qty. (1) fuse holder with 15 amp fuse
J. Qty. (1) quick release clamp with bolt
K. Qty. (1) adjustment nut
L. Qty. (2) adjustable hex lock
M. Qty. (1) standard key-fob
N. Qty. (1) lanyard for key-fob
O. Qty. (1) wireless dash switch
P. Qty. (1) adhesive strip
Q. Qty. (1) 1/4” Allen key
R. Qty. (1) quick release pull cord for kayaks
S. Qty. (1) cord holder
• ½” Wrench or ½” Socket with ratchet
• Electric or battery operated drill
• 5/16” & 1/8” drill bit
• Heat gun
• Marine grade sealant
• Fine point marker
• Wire cutters
• Wire strippers
• Wire terminal crimpers
• ¼” Allen wrench (included)
• Phillips screwdriver
A
CB
F
G
ED
M
H
N
O
I
J
P
Q
R
K
L
S

Mounting Options
Important: In all options it is recommended that the bottom of the MICRO Driver Unit
be mounted above the water line of the boat.
DECK MOUNT
Place bracket within 4” of edge
of mounting surface
Mark and drill holes with 5/16” drill
bit and install hardware as shown
Q
A
4”
B
TRANSOM MOUNT
Place bottom edge of bracket even or
higher than the boat’s water line
C
Mark and drill holes with 5/16” drill
bit and install hardware as shown
C
A
B
Q
 Loading...