

Powerplus POWXQ5335 User Manual

POWXQ5335 EN
1 APPLICATION .................................................................................. 3
2 DESCRIPTION ................................................................................. 3
3 PACKAGE CONTENT LIST ............................................................. 3
4 SYMBOLS ........................................................................................ 4
5 GENERAL POWER TOOL SAFETY WARNINGS .......................... 4
5.1 Working area ........................................................................................................... 4
5.2 Electrical safety ....................................................................................................... 4
5.3 Personal safety ....................................................................................................... 5
5.4 Power tools use and care ....................................................................................... 5
5.5 Service ..................................................................................................................... 5
6 ADDITIONAL SAFETY INSTRUCTIONS ........................................ 5
7 ADDITIONAL SAFETY INSTRUCTIONS FOR LASERS ................ 7
8 ASSEMBLY ...................................................................................... 7
8.1 Assembling the extension hoops ................................................................ .......... 7
8.2 Assembling the locking knob ................................................................................. 7
9 OPERATING INSTRUCTIONS ........................................................ 7
9.1 Transporting the mitre saw .................................................................................... 7
9.2 Dust and chip extraction ........................................................................................ 8
9.3 Clamping the work piece ........................................................................................ 8
9.4 Horizontal mitre angle............................................................................................. 8
9.5 Adjustment of the saw blade and guide rail. ......................................................... 8
9.6 Vertical bevel angle ................................................................................................. 8
9.7 Adjustment of the saw blade and the base ........................................................... 8
9.8 Switching ON / OFF ................................................................................................. 9
9.9 Laser ........................................................................................................................ 9
9.10 Sawing ..................................................................................................................... 9
9.11 Sawing special work pieces ................................................................................. 10
9.12 Replacing the saw blade ....................................................................................... 10
10 CLEANING AND MAINTENANCE ................................................. 10
10.1 Cleaning................................................................................................................. 10
10.2 Connecting cable .................................................................................................. 10
Copyright © 2014 VARO P a g e | 1 www.varo.com

POWXQ5335 EN
11 TECHNICAL DATA ........................................................................ 11
12 CUTTING CAPACITY..................................................................... 11
13 SOUND EMISSION ... FOUT! BLADWIJZER NIET GEDEFINIEERD.
14 STORAGE ...................................................................................... 11
15 TROUBLE SHOOTING .................................................................. 11
16 WARRANTY ................................................................................... 12
17 ENVIRONMENT ............................................................................. 12
18 DECLARATION OF CONFORMITY .............................................. 13
Copyright © 2014 VARO P a g e | 2 www.varo.com
POWXQ5335 EN
SLIDING MITRE SAW 1800W
POWXQ5335
1 APPLICATION
This power tool is intended as a stationary machine for making straight and cross cuts in wood.
You can saw hard and soft wood as well as chip and fibre boards.
Only adults may use this tool.
WARNING! For your own safety, read this manual and the general safety
instructions carefully before using the appliance. Your power tool should
only be given to other users together with these instructions.
2 DESCRIPTION
1. Protective hood
2. Saw blade
3. Side support bar
4. Fence
5. Saw table
6. Lever
7. Table insert
8. Scale for mitre angle (horizontal)
9. Mounting hole
10. Distance stopper
11. Tightening screws
12. Clamp
3 PACKAGE CONTENT LIST
Remove all packaging materials.
Remove remaining packaging and packing inserts (if included).
Check that the package contents are complete.
Check the appliance, the power cord, the power plug and all accessories for transportation
damage.
Keep the packaging materials as far as possible until the end of the warranty period. Then
take it to your local waste disposal system.
13. ON / OFF switch laser
14. Slide bar
15. Operating handle
16. ON / OFF switch
17. Safety switch
18. Handle
19. Locking knob
20. Dust collection bag
21. Angle scale
22. Angle lock knob
23. Slide bar lock
24. Extension hoop screws
WARNING! Packaging materials are not toys! Children must not play with
plastic bags! There is a danger of suffocation!
In this packaging, you can find:
Sliding mitre saw
1pc 3mm hex spanner,
1set clamp
5pcs foot pad
Manual
1 wrench
If any parts are missing or damaged, please contact your dealer.
2 side guides
2 Distance stopper
1 dust bag
1 handle
1 XQ catalogue
Copyright © 2014 VARO P a g e | 3 www.varo.com
POWXQ5335 EN
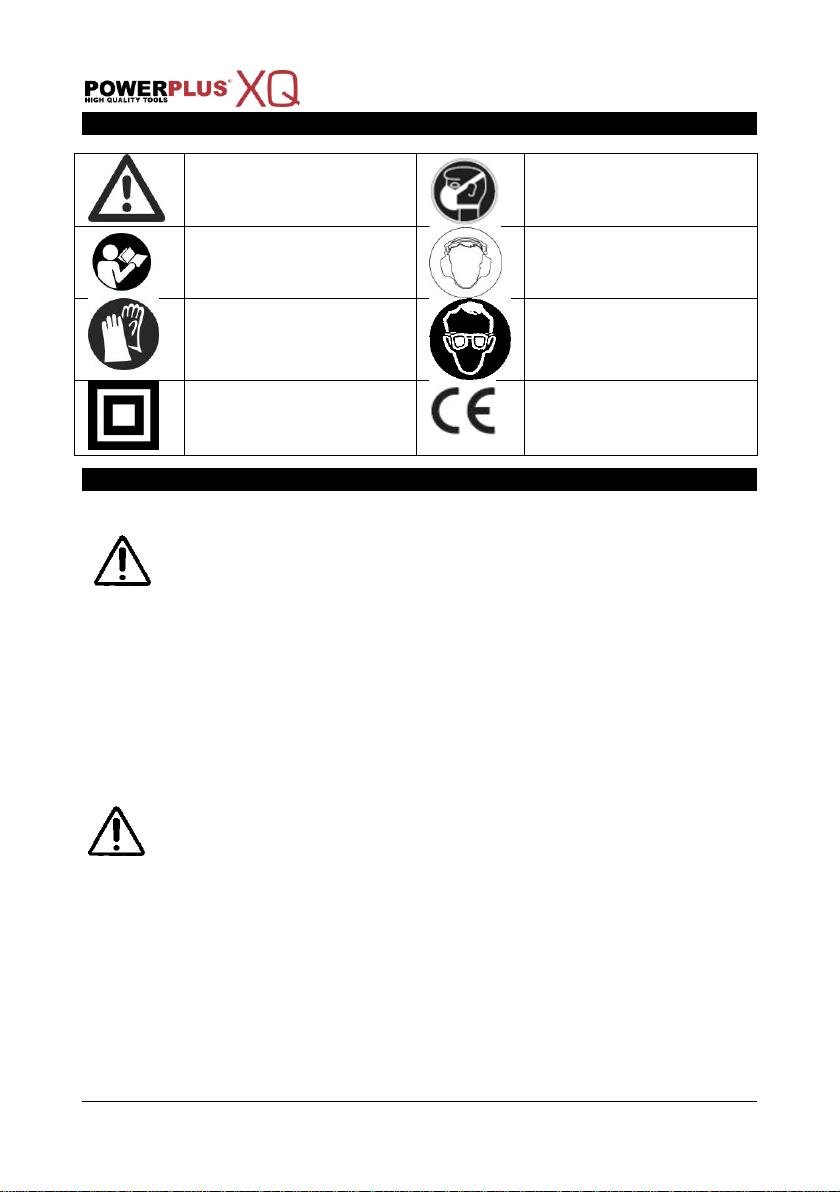
Denotes risk of personal
injury or damage to the tool.
Wear a mask In dusty
conditions.
Read manual before use.
Wear noise protection.
Wear gloves.
Wear eye protection .
Class II - The machine is
double insulated; Earthing
wire is therefore not
necessary.
In accordance with essential
requirements of the
European directive(s)
4 SYMBOLS
The following symbols are used in this manual and/or on the machine:
5 GENERAL POWER TOOL SAFETY WARNINGS
Read all safety warnings and instructions. Failure to heed warnings and
follow instructions may result in electric shock, fire and/or serious injury.
Keep safety warnings and instructions for future reference. The term
"power tool" in the safety warnings refers to your mains- operated (corded)
power tool or battery- operated (cordless) power tool.
5.1 Working area
Keep working area clean and well lit. Untidy and dark areas can lead to accidents.
Do not operate power tools in potentially explosive surroundings, for example, in the
presence of inflammable liquids, gases or dust. Power tools create sparks which may
ignite the dust or fumes.
Keep children and bystanders at a distance when operating a power tool. Distractions can
cause you to lose control of it.
5.2 Electrical safety
Always check that the power supply corresponds to the voltage on the
rating plate.
Power tool plugs must match the outlet. Never modify the plug in any way. Do not use
adapter plugs with earthed power tools. Unmodified plugs and matching outlets will reduce
the risk of an electric shock.
Do not expose power tools to rain or wet conditions. If water gets inside a power tool, it will
increase the risk of an electric shock.
Do not damage the cord. Never use the cord for carrying, pulling or unplugging the power
tool. Keep the cord away from heat, oil, sharp edges or moving parts. Damaged or
entangled cords increase the risk of an electric shock.
When operating a power tool outdoors, use an extension cable suitable for outdoor use.
Using a cord suitable for outdoor use reduces the risk of an electric shock.
If operating a power tool in a damp location is unavoidable, use a power supply protected
by a residual current device (RCD). Using an RCD reduces the risk of an electric shock.
Copyright © 2014 VARO P a g e | 4 www.varo.com
 Loading...