

Page 1

POWXG8015LI EN
1 APPLIANCE .................................................................................... 3
2 DESCRIPTION (FIG 1 & 2) ............................................................. 3
3 PACKAGE CONTENT LIST ............................................................ 3
4 SYMBOLS ....................................................................................... 4
5 GENERAL POWER TOOL SAFETY WARNINGS ......................... 4
5.1 Working area ........................................................................................................... 4
5.2 Electrical safety ....................................................................................................... 4
5.3 Personal safety ....................................................................................................... 5
5.4 Power tool use and care ......................................................................................... 5
5.5 Service ..................................................................................................................... 6
6 SAFETY INSTRUCTIONS AND ACCIDENT PREVENTION ......... 6
6.1 Safety instructions and accident prevention ........................................................ 6
7 KICKBACK ...................................................................................... 8
8 TRANSPORTING THE CHAINSAW ............................................... 8
9 BEFORE USING THE TOOL FOR THE FIRST TIME .................... 8
9.1 Advantage of Li-ion batteries. ................................................................................ 8
9.2 Charging Procedure ................................................................................................ 8
9.3 Charging (fig. A) ...................................................................................................... 9
9.3.1 Notes on charger :..................................................................................................... 9
9.4 General instructions: .............................................................................................. 9
10 ASSEMBLY ..................................................................................... 9
10.1 Fitting the guide bar and chain (Fig B, C & D) ....................................................... 9
10.2 Filling in chain oil (Fig E) ...................................................................................... 10
10.3 Chain lubrication ................................................................................................... 10
10.4 Checking the automatic lubrication ..................................................................... 10
10.5 Chain lubricants .................................................................................................... 10
10.6 Guide bar ................................................................ ............................................... 11
10.7 Chain wheel ........................................................................................................... 11
10.8 Chain guard ........................................................................................................... 11
10.9 Chain brake ........................................................................................................... 11
10.10 Releasing the chain brake .................................................................................... 11
Copyright © 2014 VARO P a g e | 1 www.varo.com
Page 2

10.11 Sharpening the saw chain .................................................................................... 11
11 STARTING UP .............................................................................. 11
POWXG8015LI EN
11.1 Switching the motor on (fig F) .............................................................................. 12
11.2 Switching the motor off ........................................................................................ 12
11.3 Chainsaw protection ............................................................................................. 12
11.4 Notes on working practice ................................................................................... 12
12 OPERATION - TIPS ON CHAIN SAW USE (FIG G, H & I) .......... 12
12.1 Sawing up wood .................................................................................................... 12
12.2 Felling trees ........................................................................................................... 12
13 CLEANING AND MAINTENANCE ............................................... 13
13.1 Oil guide groove of the sawing bar ...................................................................... 13
14 TROUBLESHOOTING .................................................................. 14
15 TECHNICAL DATA ....................................................................... 15
16 NOISE ............................................................................................ 15
17 STORAGE ..................................................................................... 15
18 WARRANTY .................................................................................. 16
19 ENVIRONMENT ............................................................................ 16
19.1 Battery ................................................................................................................... 16
20 DECLARATION OF CONFORMITY ............................................. 17
Copyright © 2014 VARO P a g e | 2 www.varo.com
Page 3

POWXG8015LI EN
CHAINSAW 18V LI-ION
POWXG8015LI
1 APPLIANCE
This model is intended for infrequent use by homeowners, cottagers, and campers, and for
such general applications as clearing, pruning, cutting firewood, etc. They are not intended for
prolonged use.
It is not designed for commercial use.
WARNING! Read this manual and general safety instructions carefully
before using the appliance, for your own safety. Your power tool should
only be passed on together with these instructions.
2 DESCRIPTION (FIG 1 & 2)
1. Rear grip
2. Front grip
3. Front finger guard / Chain break
4. Saw chain
5. SDS system
6. Guide bar cover
7. Guide bar
8. Battery charger
9. Battery pack
3 PACKAGE CONTENT LIST
Remove all packing materials
Remove remaining packaging and transit supports (if existing)
Check the completeness of the packing content
Check the appliance, the power cord, the power plug and all accessories for transportation
damages.
Keep the packaging materials as far as possible till the end of the warranty period.
Dispose it into your local waste disposal system afterwards.
10. Chain tensioning screw
11. Safety lock-off button
12. ON/OFF switch
13. Oil tank cap
14. Oil gauge
15. Chain wheel
16. Guide bolt
17. Red LED
18. Green LED
WARNING Packing materials are no toys! Children must not play with
plastic bags! Danger of suffocation!
1 chainsaw
1 Manual
1 chain
1 bar
When parts are missing or damaged, please contact your dealer.
1 bar sheath
1 spanner
Battery charger
Battery pack
Copyright © 2014 VARO P a g e | 3 www.varo.com
Page 4
POWXG8015LI EN
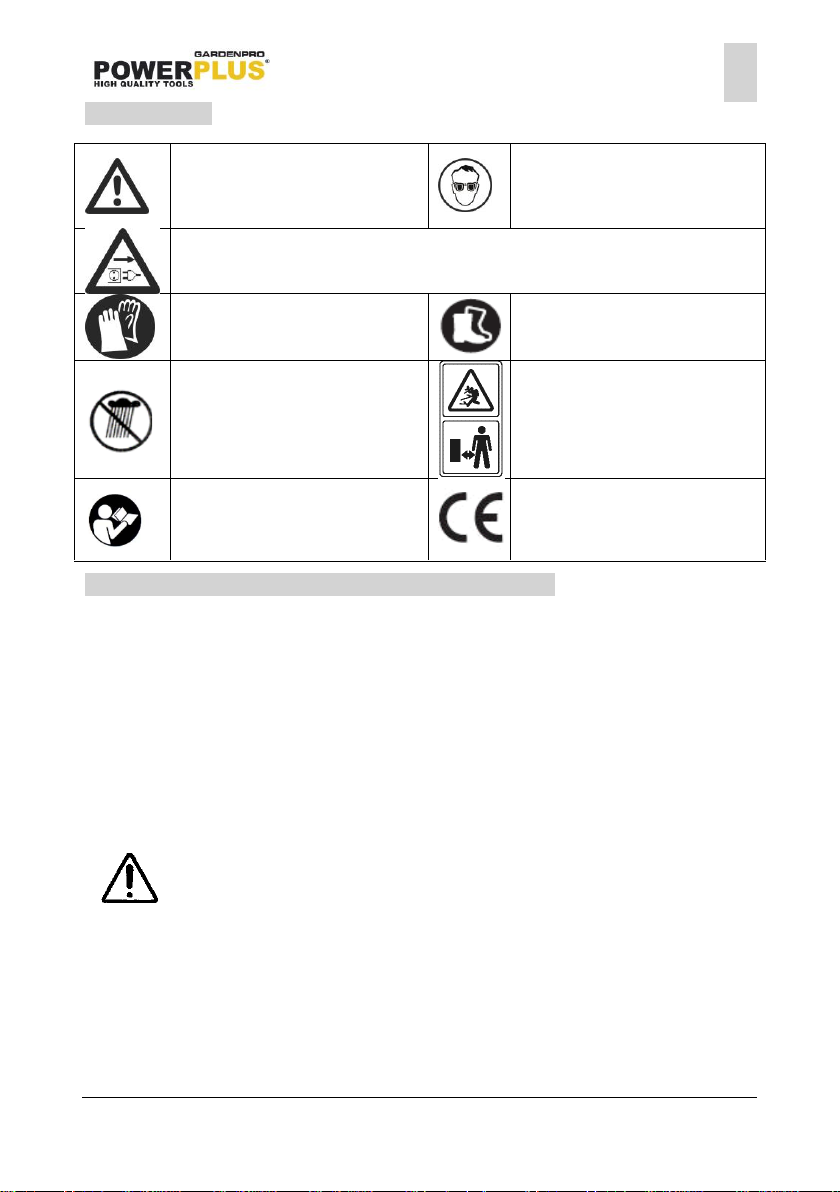
Denotes risk of personal injury or
damage to the tool.
Wearing of protection goggles
advised.
Wear protective helmet
Remove battery before adjusting or cleaning, and before leaving the machine
unattended for any period
Wear gloves
Wearing of protective shoes
advised
Never operate the machine in
the rain or in damp or wet
conditions. Moisture is an
electrical shock hazard.
Keep bystanders away
Read manual before usage
In accordance with essential
applicable safety standards of
European directives
4 SYMBOLS
In this manual and/or on the machine the following symbols are used:
5 GENERAL POWER TOOL SAFETY WARNINGS
Read all safety warnings and instructions. Failure to heed warnings and follow instructions
may result in electric shock, fire and/or serious injury. Keep safety warnings and instructions
for future reference. The term "power tool" in the safety warnings refers to your mainsoperated (corded) power tool or battery-operated (cordless) power tool.
5.1 Working area
Keep working area clean and well lit. Untidy and dark areas can lead to accidents.
Do not operate power tools in potentially explosive surroundings, for example, in the
presence of inflammable liquids, gases or dust. Power tools create sparks which may ignite
the dust or fumes.
Keep children and bystanders at a distance when operating a power tool. Distractions can
cause you to lose control of it.
5.2 Electrical safety
Always check that the power supply corresponds to the voltage on the
rating plate of the charger.
Always check that the power supply corresponds to the voltage on the rating plate.
Power tool plugs must match the outlet. Never modify the plug in any way. Do not use
adapter plugs with earthed power tools. Unmodified plugs and matching outlets will
reduce the risk of a lethal electric shock.
Avoid body contact with earthed surfaces such as pipes, radiators, kitchen ranges and
refrigerators. There is an increased risk of a lethal electric shock if your body is earthed .
Do not expose power tools to rain or wet conditions. If water gets inside a power tool, it will
increase the risk of a lethal electric shock.
Copyright © 2014 VARO P a g e | 4 www.varo.com
Page 5

Do not damage the cord. Never use the cord for carrying, pulling or unplugging the power
tool. Keep the cord away from heat, oil, sharp edges or moving parts. Damaged or
entangled cords increase the risk of a lethal electric shock.
When operating a power tool outdoors, use an extension cable suitable for outdoor use.
Using a cord suitable for outdoor use reduces the risk of a lethal electric shock.
If operating a power tool in a damp location is unavoidable, use a power supply protected
by a residual current device (RCD) . Using an RCD reduces the risk of a lethal electric
shock.
5.3 Personal safety
Stay alert, watch what you are doing and use common sense when operating a power tool.
Do not use a power tool when you are tired or under the influence of drugs, alcohol or
medication. A moment of inattention when operating a power tool may result in serious
personal injury.
Use safety equipment. Always wear eye protection. Using safety equipment such as a dust
mask, non-skid safety shoes, a hard hat, or hearing protection whenever it is needed will
reduce the risk of personal injury.
Avoid accidental starts. Ensure the switch is in the off position before inserting the plug .
Carrying power tools with your finger on the switch or plugging in power tools when the
switch is in the on position makes accidents more likely.
Remove any adjusting keys or spanners before turning on the power tool . A spanner or
key left attached to a rotating part of the power tool may result in personal injury.
Do not reach out too far. Keep your feet firmly on the ground at all times. This will enable
you retain control over the power tool in unexpected situations.
Dress properly. Do not wear loose clothing or jewellery. Keep your hair, clothing and
gloves away from the power tool. Loose clothes, jewellery or long hair can become
entangled in the moving parts.
If there are devices for connecting dust extraction and collection facilities, please ensure
that they are attached and used correctly. Using such devices can reduce dust-related
hazards.
5.4 Power tool use and care
Do not expect the power tool to do more than it can. Use the correct power tool for what
you want to do. A power tool will achieve better results and be safer if used in the context
for which it was designed.
Do not use the power tool if the switch cannot turn it on and off. A power tool with a
broken switch is dangerous and must be repaired.
Disconnect the plug from the power source before making adjustments, changing
accessories, or storing power tools. Such preventive safety measures reduce the risk of
starting the power tool accidentally.
Store power tools, when not in use, out of the reach of children and do not allow people
who are not familiar with the power tool or these instructions to operate it. Power tools are
potentially dangerous in the hands of untrained users.
Maintenance. Check for misalignment or jammed moving parts, breakages or any other
feature that might affect the operation of the power tool . If it is damaged, the power tool
must be repaired . Many accidents are caused by using poorly maintained power tools.
Keep cutting tools sharp and clean. Properly maintained cutting tools with sharp cutting
edges are less likely to jam and are easier to control.
Use the power tool, accessories and cutting tools, etc., in accordance with these
instructions and in the manner intended for the particular type of power tool, taking into
account the working conditions and the work which needs to be done. Using a power tool
in ways for which it was not intended can lead to potentially hazardous situations.
POWXG8015LI EN
Copyright © 2014 VARO P a g e | 5 www.varo.com
Page 6

5.5 Service
Your power tool should be serviced by a qualified specialist using only standard spare
parts. This will ensure that it meets the required safety standards.
6 SAFETY INSTRUCTIONS AND ACCIDENT PREVENTION
The safety instructions must be observed when using the chainsaw. For your own safety and
the safety of others, please read this information carefully before using the chainsaw and keep
it in a safe place for reference.
Use the chain saw only to saw wood or objects made of wood. Any other types of use are at
your own risk and could be dangerous. The manufacturer cannot be held liable for damage
caused by improper or incorrect usage.
6.1 Safety instructions and accident prevention
To prevent the incorrect handling of the chainsaw, please read the operating instructions in
their entirety before using the chainsaw for the first time. All the information on the handling of
the chainsaw is relevant to your personal safety. Ask a professional to show you how to use
the chainsaw!
Before plugging in, check the plug and cable for damage. If damage is discovered, have it
repaired by a specialist immediately.
Never use a damaged cable, connection or plug or a power cable which does not comply
with the requirements. If the cable is damaged or severed, unplug immediately.
Switch the chainsaw off before releasing the chain brake.
Always wear goggles and protective gloves when working with the chainsaw.
To prevent injury, wear tight-fitting clothes and safety boots.
To prevent damage to your hearing, wear earmuffs. Helmets with a visor are particularly
advantageous.
Make sure you have a firm footing when working with the chain saw.
Keep your place of work tidy.
To prevent electric shock, avoid contact with earthed parts.
Always pull the plug out of the power socket before doing any work on the chainsaw.
Only plug in when the chainsaw is switched off,
The chainsaw must be used only by one person at a time. All other persons must stay
clear of the chainsaw’s area of swing. Children and pets in particular must be kept well
away at all times.
The saw must not be touching anything when it starts up.
Hold the chainsaw firmly in both hands when working with it.
The chain saw must not be operated by children and young people. The only exception to
this prohibition are young persons of 16 years and over who can use the chain saw under
supervision as part of their training. Lend the saw only to those persons who are familiar
with this type of chainsaw and know how to handle it. Always pass on the operating
instructions together with the chainsaw.
Make sure the chain saw is stored in a place inaccessible to children.
The saw may be operated only by persons who are rested and in good health, i.e. in a
good physical condition. If you start to tire, have a break in time. The chainsaw should not
be used after the consumption of alcohol.
Never expose the chainsaw to rain or bad weather. Make sure there is enough light at the
place of work. Do not use power tools in the vicinity of combustible liquids or gases.
If the chainsaw is not being used for a while, it must be set aside in such a way that no
other person is endangered.
Before making a cut, always set the claw stop before you start to saw.
Remove the chainsaw from the wood only with the saw chain still running. Anyone who
saws without a stop can be pulled forwards.
Never use the chainsaw when standing on a ladder, in a tree or in any other instable
places. Do not saw with one hand.
Copyright © 2014 VARO P a g e | 6 www.varo.com
POWXG8015LI EN
Page 7

The power cable must always be behind the saw operator.
POWXG8015LI EN
The power cable must always lead away from the rear of the chainsaw.
Use only original accessories.
Chainsaws used outdoors must be connected up to an earth-leakage circuit-breaker.
Do not overload your power tools. They run best and safest within given range of capacity.
Always use the correct power tool. Do not use low-powered chainsaws for heavy jobs.
Use the cable only for its proper purpose. Never carry your electric tool by its cable. Do
not use the cable to pull the plug out of the socket. Protect the cable from heat, oil and
sharp edges.
Extension cables out doors
Use only authorized and accordingly labelled extension cables out of doors.
Use a strong support when sawing converted timber and thin branches. Do not stack the
timber and do not have it held by a second person or with your foot.
Logs must be secured in position.
On sloping ground, always work facing upwards.
When cross-cutting always set the claw stop against the timber you want to saw.
Always set the claw stop before cross-cutting. Only then switch on the chainsaw and start
sawing into the wood. Pull the chainsaw upwards at the rear and lead the direction with
the front grip. Use the claw stop as a fulcrum. To reposition for further cutting, interrupt the
sawing process and exert a slight pressure on the front grip. Pull the saw back a little,
position the claw stop further down the cut and pull up the rear grip.
Pull the saw out of the wood only when the saw chain is running.
If you carry out several cuts, switch off the chain saw in-between.
Plunge cuts and horizontal cuts may only be carried out by professionals.
For horizontal cuts, position the smallest possible angle. This requires extreme caution, as
the claw stop can not be applied in this case.
If the chain gets stuck when sawing with the upper side it may be thrust towards the
operator. For this reason you should saw wherever possible with the bottom side, as the
chainsaw will then be thrust away from the body towards the wood.
Pay extra attention when cutting splintered wood. Sawed off pieces of wood may be
catapulted in any direction (risk of injury!)
Do not use the chainsaw to remove nails or similar objects.
When lopping off branches, the chain saw should be supported wherever possible against
the trunk, Do not cut with the tip of the guide bar.
Leave branch lopping work should be carried out by trained personnel! Risk of injury!
Pay special attention to branches under tension. Do not cut through freely suspended
branches from underneath.
Never stand on the trunk when loping off branches.
The chainsaw should not be used for forest work, i.e. for felling and lopping off branches in
the forest. Because of the cable connection the saw operator does not have the necessary
mobility and his safety is not guaranteed!
Always stand to the side of the tree being felled.
When the tree is being felled, watch out for falling branches when stepping back.
On slopes the saw operator should stand to the upper or left or right side the trunk or lying
tree, never to the bottom side.
Watch out for trunks rolling towards you. Kick-back!
The power saw is likely to recoil if the tip of the guide bar (especially the top quarter)
accidentally touches wood or any other solid objects. In this case the saw will move
uncontrolled and will be hurled towards the operator at full power (risk of injury!).
When working with the chain saw, protective gloves, suitable shoes, leg protectors, eye
protectors and ear protectors should be used.
If the work involves any risk of head injury, a safety helmet must be worn When cutting
down trees and cutting and cutting off branches of felled or fallen trees. in addition a face
protector should be worn.
Copyright © 2014 VARO P a g e | 7 www.varo.com
Page 8

Always pull the plug from the socket outlet before attempting to check or adjust the chain
or to correct some fault and whenever moving one workplace to another.
Never switch on the chain saw unless you have a firm hold of the tool. a secure footing
and are sure that the guide bar and saw chain are not touching anything.
Always hold the saw with both hands (right hand on rear handle, left hand on handle ( 2).
Never saw above shoulder height, while standing on a ladder or In a tree or in any other
insecure position.
When sawing timber that has split, take particular care that no small pieces of wood are
broken off and thrown by the saw chain.
During breaks, the saw should be laid down in such a way that there Is no risk of injury to
anyone from the saw chain.
The chain saw should never be lent to or be allowed to come into the hands of persons
who are not familiar with the use of such a tool. The operating Instructions should also go
with the saw.
7 KICKBACK
POWXG8015LI EN
In order to prevent kick-back, please follow these safety instructions:
Never start cutting with the tip of the guide bar!
Never cut with the tip of the guide bar! Be careful, when continuing cuts you are already
working on!
Always start cuts with the chainsaw already running!
Make sure that the saw chain is always properly sharpened.
Never cut through more than one branch at a time! When lopping off branches, be careful
not to touch any other branches.
When cross-cutting, pay attention to trunks standing very close to each other. If possible
use a saw-horse.
8 TRANSPORTING THE CHAINSAW
Before transporting the chainsaw, always remove the plug from the power socket and slide the
chain guard over the rail and chain. If several cuts are to be performed with the chain saw, the
saw must be switched off between cuts.
9 BEFORE USING THE TOOL FOR THE FIRST TIME
9.1 Advantage of Li-ion batteries.
40% More Performance
40% Less Weight
100% Longer Life
40% More Compact
No Memory Effect
Environment-Friendly
9.2 Charging Procedure
The charging procedure starts as soon as the mains plug of the charger is plugged into a
power socket and the battery (14) is inserted into the charging compartment (13).
Thanks to the intelligent charging PCB (Protective circuit board), the charging condition of the
battery is automatically detected and the battery is charged in optimum condition.
(PCB takes into account : Over Charging/Discharging, Voltage and Current, Battery
temperature, Short-Circuit, Overload, Each Cell Unbalance (Out-put, In-put), resulting in
continuous optimum Voltage & Current when Charging or Working.
This gives longer life to the battery and always leaves it fully charged when kept in the charger
for storage.
Charge battery pack only with the charger provided.
Copyright © 2014 VARO P a g e | 8 www.varo.com
Page 9

Please note :
With continuous or several repetitive charging cycles without interruption, the charger can
warm up. This is not harmful and does not indicate a technical defect of the unit.
A battery that is new or has not been used for a longer period does not develop its full
capacity until after approximately 5 charging/discharging cycles. Leave such batteries in
the charging compartment until they have clearly warmed up.
A significantly reduced working period after charging indicates that the batteries are worn
out and must be replaced.
9.3 Charging (fig. A)
Attention! Only use battery charger in dry places.
Before first use, the battery needs to be charged for about 1,2 hours. Use only the original
charger.
Remove the battery from the device .
Insert the battery into the charger .
Connect the charger to the mains voltage (LED lights up green).
9.3.1 Notes on charger :
LED 17 lights up red: Battery is charging
LED 18 lights up green: Charging completed
LED 17 blinks red: Fault (e.g., battery is too hot)
Self-discharge of batteries! Remove the battery from the charger once it is
fully charged.
9.4 General instructions:
Regarding the battery, in order to maintain the long service life of the battery, always follow the
instructions below:
The tool will automatically be switched off when the battery voltage is low. The battery
must then be recharged before the tool can be used again.
Always recharge the lithium-ion battery prior to any prolonged period of non-use, i.e. before
storing the tool away in autumn.
The charging time is 1,2 hours for a battery that is completely empty.
The lithium-ion rechargeable battery can be charged at any charge level and charging can
be interrupted at any time without damaging the battery (no memory effect)
POWXG8015LI EN
10 ASSEMBLY
Attention ! Before performing any work on the equipment, remove the
battery from the machine.
10.1 Fitting the guide bar and chain (Fig B, C & D)
To prevent injury on the sharp cutting edges, always wear gloves when
assembling, tensioning and checking the chain.
Loosen the knob and remove the chain cover.
Place the saw chain around the sawing bar.
Copyright © 2014 VARO P a g e | 9 www.varo.com
Page 10

Take care to ensure that the chain is moving in the right direction.
Place the sawing bar along with the saw chain on the device.
Take care to ensure that the chain tensioning pin engages in the sawing
bar.
Ensure that the saw chain fits around the sporcket.
Place the chain cover and tighten it on the device.
The saw chain should not hang loose, but it should be possible to pull it a
few milimeters away from the sawing bar.
Turn the knob and loosen it enough so that the sawing bar can be moved by hand.
Tighten the chain tensioning screw using a screwdriver.
Turn the swa chain by hand in order to check that it runs smoothly and properly.
Turn the knob so that it is fastened tightly.
10.2 Filling in chain oil (Fig E)
To prevent dirt getting inside the tank, clean the oil tank cap (13) before opening. Check the
contents of the oil tank during sawing work by checking the oil gauge (14). Close the oil tank
cap tightly and wipe away any spills.
Tank capacity 65ml, is sufficient for aoorox. 30min. of operating time.
10.3 Chain lubrication
To prevent excessive wear, the saw chain and guide bar must be evenly lubricated during
operation.
Lubrication is automatic. Never work without chain lubrication. If the chain runs dry, the entire
cutting apparatus will quickly become severely damaged. It is therefore important to check
both chain lubrication and the oil gauge every use.
Never use the saw when the oil level is below the “Min.” mark.
Min.: When only approx. 5 mm of oil is visible at the lower rim of the oil gauge (14), you
must top up with oil.
Max.: Top up with oil until the window is full.
10.4 Checking the automatic lubrication
Before commencing work, check the automatic chain lubrication and oil gauge. Switch on the
chain saw and hold it above the ground. Be careful not to allow the chain saw to touch the
ground. For safety reasons it is best to keep a clearance of at least 20 cm. If you now see
growing traces of oil, the chain lubrication system is working correctly. if there are no traces of
oil at all, try cleaning the oil outlet, the upper chain tensioning borehole and the oil duct, or
contact your Customer Service.
10.5 Chain lubricants
The service life of saw chains and guide bars depends to a large extent on the quality of the
lubricant used. Old oil must not be used! Use only environment-friendly chain lubricant. Store
chain lubricant only in containers which comply with the regulations.
POWXG8015LI EN
Copyright © 2014 VARO P a g e | 10 www.varo.com
Page 11

10.6 Guide bar
The guide bar (7) is subjected to especially severe wear and tear at the nose and the bottom.
To avoid one-sided wear and tear, turn the guide bar over every time when you sharpen the
chain.
10.7 Chain wheel
The chain wheel (15) is subjected to especially high wear and tear. If you notice deep wear
marks on the teeth, the chain wheel must be replaced. A worn chain wheel curtails the service
life of the saw chain. Have the chain wheel replaced by a specialist dealer or your Customer
Service.
10.8 Chain guard
The chain guard must be clipped onto the chain and sword as soon as the sawing work has
been completed and whenever the chainsaw has to be transported.
10.9 Chain brake
In the event of kick-back, the chain brake (3) will be actuated via the front finger guard. The
front finger guard is pushed forwards by the back of the hand and this causes the chain brake
to stop the chain saw, or rather the motor, within 0.15 s.
10.10 Releasing the chain brake
To be able to use your chain saw again, you must release the saw chain again. First switch off
the chainsaw. Then push the front finger guard (3) back into the vertical position until it locks in
place. The chain brake is now fully functional again.
10.11 Sharpening the saw chain
You can have your saw chain sharpened fast and correctly by specialist dealers, from whom
you can also obtain chain sharpening equipment to enable you to sharpen the chain yourself.
Please follow the corresponding operating instructions.
Take care of your tools. Keep your tools sharp and clean to enable you to work well and safely.
Follow the maintenance regulations and the instructions for changing tools
11 STARTING UP
POWXG8015LI EN
Always wear safety goggles, ear muffs, protective gloves and heavy-duty
work clothes!
The chain saw has been designed for sawing wood and felling trees.
Fell only those trees whose trunk diameter is smaller than the length of the chain saw
blade.
Prior to each use:
Check the saw chain and sawing bar for any signs of damage.
Check the chain tension
Check the chain lubrication
During operation:
Take care to ensure that you have a stable standing position.
Work at an incline above the tree.
Hold the saw chain away from the body.
Never stand on a ladder or an unstablesurface or ground.
Do not use the device above shoulder height.
Caution! Risk of injury
Do not saw wood that is under tension
Do not saw any shrubs or brushes
Copyright © 2014 VARO P a g e | 11 www.varo.com
Page 12

11.1 Switching the motor on (fig F)
Pull back the brake to the position off.
Press the unlock button and keep it pressed.
Press the On/Off button at the rear.
Release the unlock button.
11.2 Switching the motor off
Release one of the two On/Off buttons
11.3 Chainsaw protection
Never use the chainsaw in the rain or in damp conditions.
Check the chainsaw for damage. Before using your tool again, check the safety devices or
any slightly damaged parts to ensure that they are in good working order.
Make sure the moving parts are working correctly.
All the parts must be correctly assembled and meet all the conditions required to ensure
that the chainsaw works correctly.
Any damaged safety devices and parts must be properly repaired or replaced immediately
by a Customer Service workshop, unless there are instructions to the contrary in these
operating instructions.
11.4 Notes on working practice
Kick-back
You can avoid accidents by not sawing with the tip of the guide bar as this may cause the saw
to rear up suddenly.
Always use the complete safety equipment and clothes when working with the saw.
Kick-back is an upward and/or backward movement of the guide bar which can occur if the
saw chain at the tip of the guide bar encounters an obstruction.
Make sure your work-piece is firmly secured. Use clamps to stop the work-piece slipping. This
also makes it easier to operate the chainsaw with both hands.
Kick-back causes the saw to behave uncontrollably and thus brings with a slack or blunt chain.
A poorly sharpened chain increases the risk of kick-back. Never saw above shoulder height.
12 OPERATION - TIPS ON CHAIN SAW USE (FIG G, H & I)
12.1 Sawing up wood
To saw up wood, please observe the safety regulations and proceed as follows:
Make sure the wood to be sawed cannot slip.
Clamp short pieces of wood in place before sawing
Saw only wood or wooden objects.
When sawing, make sure that no stones or nails are touched as these could be thrown out
and damage the saw chain.
Avoid bringing the running saw into contact with wire fences or the ground.
When lopping off branches, support the chainsaw as far as possible and do not saw with
the tip of the guide bar.
Watch out for obstacles such as tree stumps, roots, ditches and hillocks as these could
cause you to fall.
Remember!
The chain saw must be running before it comes into contact with the wood.
12.2 Felling trees
To fell trees, observe all the safety regulations and proceed as follows:
Remember!
POWXG8015LI EN
Copyright © 2014 VARO P a g e | 12 www.varo.com
Page 13

Danger zone: Falling trees can bring down other trees with them. The danger zone is therefore
POWXG8015LI EN
twice the length of the tree being felled.
And fell only those trees whose trunk diameter is smaller than the length of the chain saw
blade.
Felling trees is dangerous and requires practice. If you are a beginner or
inexperienced, do not try to teach yourself but seek professional training.
Falling direction:
First estimate the direction of fall, taking into account the centre of gravity of the crown and
the wind direction. The chain saw must be running before it comes into contact with the
wood. Switch on the chain saw. Saw an undercut in the tree in the direction of fall and
then make a horizontal cut (back cut) on the side opposite to the undercut.
Make the undercut: This will give the tree a direction and guidance.
Check the direction of fall: If you have to correct the undercut, always re-cut over the
entire width.
Call now “Timber! “
Only now make the back cut, which must be higher than the sole of the undercut. Insert
wedges in time.
Leave the bridge in place as it will function as a hinge. If you cut through the bridge, the
tree will fall randomly.
Fell the tree by driving a wedge into the back cut, not by sawing through it .
When the tree falls, step back and watch the crown.
Wait for the crown to stop swinging. Do not continue working under branches which have
got stuck.
When the chain saw is used to cut trees that exceed its power limits the chain can get stuck. If
the chain gets jammed, release it using a wooden wedge.
Do not fell trees:
If you can no longer distinguish details within the danger zone, e.g. owing to fog, rain,
snow drifts or twilight.
If the direction of fall cannot be reliably estimated owing to wind or gusts of wind. Felling
work on sloping ground, black ice, frozen or dewy ground is safe only if you can get a firm
foothold.
13 CLEANING AND MAINTENANCE
Always pull the plug out of the power socket before doing any work on the
chainsaw!
Keep the cooling vents on the motor housing clean and unobstructed at all times.
Only the maintenance work described in these operating instructions may be carried out.
Any other maintenance work must be carried out by our Customer Service.
Do not modify the power saw in any way as this could jeopardize its safety.
Should the chainsaw fail despite our careful manufacturing and inspection procedures,
have it repaired by an authorized Customer Service work-shop.
13.1 Oil guide groove of the sawing bar
Caution! In order to ensure working safely with the device and adequate oil
lubrication of the saw chain, the guide groove of the sawing bar must be
cleaned if it is very dirty.
Copyright © 2014 VARO P a g e | 13 www.varo.com
Page 14

Dismantle the chain cover, the saw chain and the sawing bar.
FAULT
CAUSE
REMEDY
Chain becomes hot
Excessive chain tension
Adjust the chain tension
Excessive friction on account of
inadequate lubrication
Fill up the oil tank
Saw chain is blunt
Look for a service
workshop
The saw chain is dry
No oil in the tank
Fill up the oil tank
Oil guide groove is clogged
Clean the sawing bar
The engine is not running
The battery is discharged or
defective
Charge the battery or
replace it.
The battery is too hot or too cold
Allow the battery to cool
down or warm up
Noisy operation, excessive
vibration of the device
Inadequate chain tension
Adjust the chain tension
Saw chain mounted in the wrong
direction of movement
Mount the saw chain
correctly
Saw chain or sawing bar
defective
Look for a service
workshop
POWXG8015LI EN
Clean the oil guide groove using a suitable tool (e.g., wire brush).
Mount the saw chain, the sawing bar and the chain cover.
Sawing bar wear
The sawing bar of the device becomes worn out over time.
After cleaning it, turn the sawing bar around by 180°. This balances the wear and tear and
enhances the service life of the sawing bar.
14 TROUBLESHOOTING
Copyright © 2014 VARO P a g e | 14 www.varo.com
Page 15

POWXG8015LI EN
POWXG8015LI
No load speed
2500 min-1
Bar length
10” (250 mm)
No load chain speed
4m/s
Tank capacity of lubricating oil
65 ml
Type
Li-ion
Voltage
18VDC
Rating
1500 mAh
Charger
Input Voltage ~Frequency
230-240VAC, 50-60 Hz, 45W
OUTput voltage / current
19,5 VDC, max. 2,2 A
Type
1 hour fast charger
Sound pressure level LpA
81 dB(A)
Sound power level LwA
97 dB(A)
Vibration aw
3.8 m/s²
K = 1.5 m/s²
15 TECHNICAL DATA
Battery
Battery charger
16 NOISE
Noise values measured according to relevant standard. (K=3)
ATTENTION! Wear hearing protection when sound pressure is over 85
dB(A).
17 STORAGE
Keep your chain saw in a safe place. The unused chainsaw should be stored clean, on a flat
surface and in a dry place which is inaccessible to children.
Copyright © 2014 VARO P a g e | 15 www.varo.com
Page 16

POWXG8015LI EN
18 WARRANTY
This product is warranted for a 36-month period effective from the date of purchase by the
first user.
This warranty covers all material or production flaws excluding : batteries, chargers,
defective parts subject to normal wear & tear such as bearings, brushes, cables, and
plugs, or accessories such as drills, drill bits, saw blades, etc. ; damage or defects
resulting from maltreatment, accidents or alterations; nor the cost of transportation.
Damage and/or defects resulting from inappropriate use also do not fall under the
warranty provisions.
We also disclaim all liability for any bodily injury resulting from inappropriate use of the
tool.
Repairs may only be carried out by an authorised customer service centre for Powerplus
tools.
You can always obtain more information at the number 00 32 3 292 92 90.
Any transportation costs shall always be borne by the customer, unless agreed otherwise
in writing.
At the same time, no claim can be made on the warranty if the damage of the device is the
result of negligent maintenance or overload.
Definitely excluded from the warranty is damage resulting from fluid permeation, excessive
dust penetration, intentional damage (on purpose or by gross carelessness), inappropriate
usage (use for purposes for which the device is not suitable), incompetent usage (e.g. not
following the instructions given in the manual), inexpert assembly, lightning strike,
erroneus net voltage. This list is not exhaustive.
Acceptance of claims under warranty can never lead to the prolongation of the warranty
period nor commencement of a new warranty period in case of a device replacement.
Devices or parts which are replaced under the warranty therefore remain the property of
Varo NV.
We reserve the right to reject a claim whenever the purchase cannot be verified or when it
is clear that the product has not been properly maintained. (Clean ventilation slots, carbon
brushes serviced regularly, etc.).
Your purchase receipt must be kept as proof of date of purchase.
Your appliance must be returned undismantled to your dealer in an acceptably clean state,
(in its original blow-moulded case if applicable to the unit), accompanied by proof of
purchase.
Your tool must be charged at least 1x per month to ensure optimal operation of this tool.
19 ENVIRONMENT
Should your appliance need replacement after extended use, do not discard it
with the household rubbish but dispose of it in an environmentally safe way.
Waste produced by electrical machine items should not be handled like normal
household rubbish. Please recycle where recycle facilities exist. Check with your
Local Authority or retailer for recycling advice.
19.1 Battery
Do not dispose of your battery pack in fire, water or domestic waste. Always
dispose of defective or worn out battery packs at a special waste collection point,
never with household garbage.
Copyright © 2014 VARO P a g e | 16 www.varo.com
Page 17

POWXG8015LI EN
20 DECLARATION OF CONFORMITY
VARO N.V. - Joseph Van Instraat 9 - BE2500 Lier - BELGIUM, declares that,
Product: Chain saw 18V Li-ion
trade mark: POWERplus
model: POWXG8015LI
is in conformity with the essential requirements and other relevant provisions of the applicable
European Directives, based on the application of European harmonized standards. Any
unauthorized modification of the apparatus voids this declaration.
European Directives (including, if applicable, their amendments up to the date of signature);
2011/65/EU
2004/108/EC
2006/42/EC
2000/14/EC
Annex V LwA 94 dB(A) / 97(A)
European harmonized standards (including, if applicable, their amendments up to the date of
signature);
EN60745-1: 2009
EN60745-2-13: 2009
EN55014-1: 2006
EN55014-2: 1997
Keeper of the Technical Documentation : Philippe Vankerkhove, VARO – Vic. Van Rompuy
N.V.
The undersigned acts on behalf of the company CEO,
Hugo Cuypers
Regulatory Affairs – Compliance Manager
Date: 14/11/2013
Copyright © 2014 VARO P a g e | 17 www.varo.com
 Loading...