

Page 1

POWXG4050 EN
1 APPLICATION .................................................................................. 2
2 DESCRIPTION (FIG A) .................................................................... 2
3 PACKAGE CONTENT LIST ............................................................. 2
4 SYMBOLS ........................................................................................ 3
5 GENERAL POWER TOOL SAFETY WARNINGS .......................... 3
6 ADDITIONAL SAFETY INSTRUCTIONS ........................................ 4
7 PETROL SAFETY WARNINGS ....................................................... 4
8 ASSEMBLY ...................................................................................... 5
8.1 Tube assembly ........................................................................................................ 5
8.2 Patio head ................................................................................................................ 5
9 USE ................................................................................................... 6
9.1 Fueling ..................................................................................................................... 6
9.2 Use ........................................................................................................................... 6
10 CLEANING AND MAINTENANCE ................................................... 8
10.1 Power loss or sudden stopping of the engine ...................................................... 8
10.2 Clean Fuel Filter ...................................................................................................... 8
11 STORAGE ........................................................................................ 8
12 TECHNICAL DATA .......................................................................... 9
13 NOISE ............................................................................................... 9
14 WARRANTY ..................................................................................... 9
15 ENVIRONMENT ............................................................................. 10
16 DECLARATION OF CONFORMITY .............................................. 10
Copyright © 2013 VARO P a g e | 1 www.varo.com
Page 2

POWXG4050 EN
BLOWVAC
POWXG4050
1 APPLICATION
The blower/vacuum is designed to blow/vacuum leaves as well as lawn debris such as grass
clippings and small twigs. It is not to be used for any other purpose. The device is only to be
used on dry surfaces. The device is intended for non-commercial use in private home* and
gardens. Under no circumstances is it to be used in public outdoor areas, sports stadiums or
in agricultural or forestry settings. It is not designed for commercial use.
WARNING! Read this manual and general safety instructions carefully
before using the appliance, for your own safety. Your power tool should
only be passed on together with these instructions.
2 DESCRIPTION (FIG. A)
1. Vacuum nozzle
2. Lower blower tube
3. Upper blower tube
4. Quick release collect bag
5. Strap buckle
6. On/Off switch
7. Blower / Vacuum Mode Selection
Lever
3 PACKAGE CONTENT LIST
Remove all packing materials
Remove remaining packaging and transit supports (if existing)
Check the completeness of the packing content
Check the appliance, the power cord, the power plug and all accessories for transportation
damages.
Keep the packaging materials as far as possible till the end of the warranty period.
Dispose it into your local waste disposal system afterwards.
8. Throttle trigger
9. Recoil starter
10. Choke lever
11. Primer bulb
12. Fuel cap
13. Fuel tank
WARNING Packing materials are no toys! Children must not play with
plastic bags! Danger of suffocation!
1 x Blow/vac
1 x Shoulder belt
1 x Manual
When parts are missing or damaged, please contact your dealer.
Copyright © 2013 VARO P a g e | 2 www.varo.com
Page 3
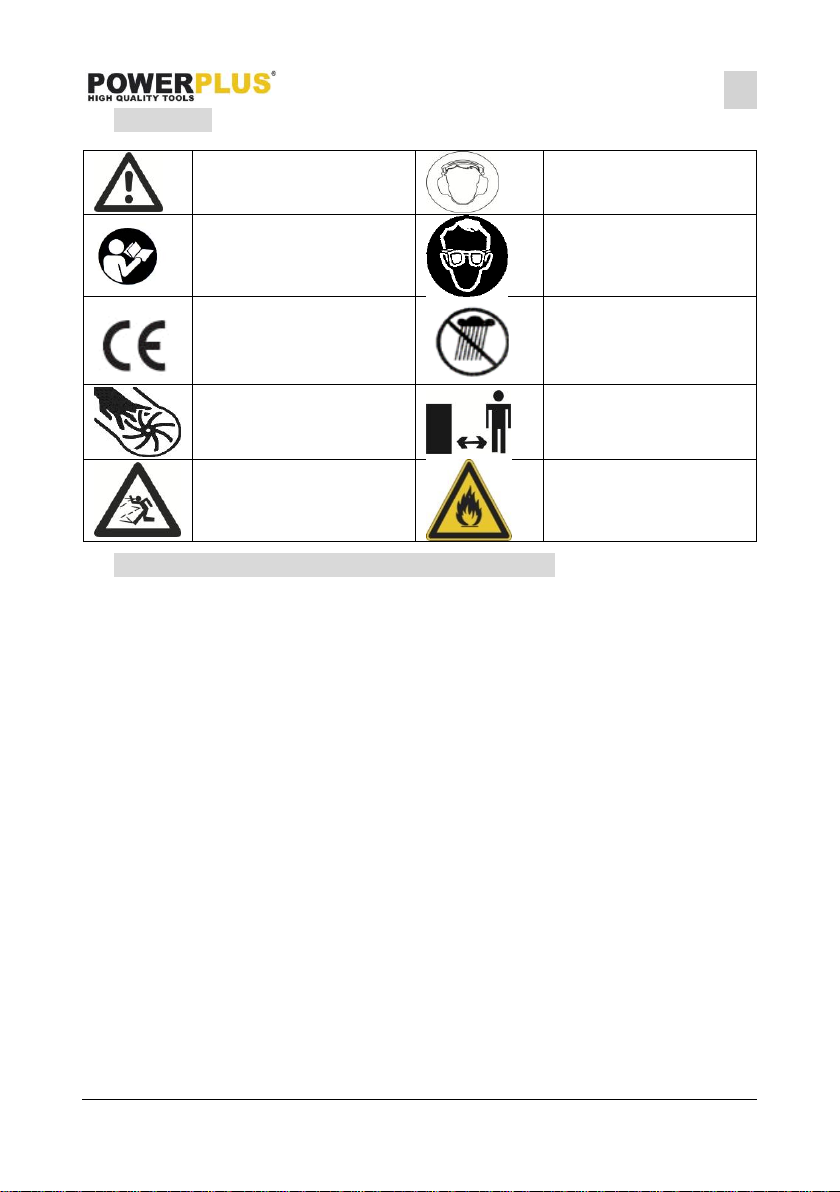
4 SYMBOLS
Denotes risk of personal
injury or damage to the tool.
Wear noise protection
Read the manual carefully
before use.
Wear eye protection
In accordance with essential
requirements of the
European directive(s)
Never operate the
machine in the rain or in
damp or wet conditions.
Blowers and blower
vacuums. Rotating impeller
blades can cause sever
injury
Keep bystanders away
Warning! Flying objects
Risk of fire
In this manual and/or on the machine the following symbols are used:
5 GENERAL POWER TOOL SAFETY WARNINGS
WAARSCHUWING! When using electric gardening appliances, basic safety precautions
should always be followed to reduce the risk of fire, electric shock and personal injury,
including the following:
Be familiar with the controls and proper use of the product.
Clear the work area before each use. Remove all objects, such as rocks, broken glass,
nails, wire or string that can be thrown or become entangled in the cutting line.
Wear heavy, long trousers, boots and gloves. Do not wear loose fitting clothing, shorts or
go bare foot.
Do not wear jewelry of any kind.
Secure hair above shoulder level to prevent entanglement in moving parts.
Do not allow children or untrained individuals to use this product.
Keep all bystanders, especially children and pets, at least 15 m from the operating area.
Do not operate this product when you are tired, ill or under the influence of alcohol, drugs
or medication.
Do not operate in poor lighting. Use the unit only in daylight or good artificial light.
Keep firm footing and balance. Do not overreach.
Overreaching can result in loss of balance or exposure to hazards.
Keep all parts of your body away from moving parts.
Inspect the product before use. Replace any damaged parts before use.
Do not operate the product in damp or wet locations.
Do not use the product in the rain.
Wear safety glasses or goggles when operating this product.
Use the right product. Use the product for the intended purpose only.
Do not use the product if the switch does not turn the product on or off. A product that
cannot be controlled with the switch is dangerous and must be repaired.
Avoid accidental starting.
Use common sense when using this product.
Stay alert and pay attention to what you are doing.
Copyright © 2013 VARO P a g e | 3 www.varo.com
POWXG4050 EN
Page 4

POWXG4050 EN
Do not force the product. It will do a better job with less likelihood of a risk of injury when
you operate it at the rate for which it was designed.
Pull the plug out immediately if the mains or extension lead is damaged or severed.
Disconnect the product from the power supply when it is not in use, before servicing and
when changing accessories.
The appliance is not intended for use by young children or infirm persons without
supervision.
Young children should be supervised to ensure that they do not play with the appliance.
Disconnect blower if you notice unusual vibrations.
Do not blow vegetal pieces towards bystanders.
Store the blower in a dry place.
6 ADDITIONAL SAFETY INSTRUCTIONS
To prevent damage to your hearing, wear earplugs, helmet with a visor.
Do not use the machine to pick up humid material,water, liquids, pieces of glass, iron,
stones or tin cans; this could damage your machine and chance to be injured.
Do not use the machine to pick up hot embers ormaterial, which is burning, smoking or
smoldering.
Do not use the machine to pick up material that has been contaminated by inflammable or
explosive substance.
Do not use the machine to pick up lighten cigarettes.
Do not suck in highly inflammable fumes.
Always make sure that the material picked up by your machine is not inflammable, toxic,
or explosive.
Do not use without the quick release collect bag in place.
Do not manually insert objects into the suction nozzle.
Do not put part of your body such as hands and fingers into the nozzle or exhaust
opening.
Do not switch the machine ON in enclosed or poorly ventilated space or in the presence of
inflammable and / or explosive substance such as liquids, gas etc.
7 PETROL SAFETY WARNINGS
WARNING: Use extra care in handling fuels. They are flammable and the vapours are
explosive. The following points must be observed.
Use only an approved container.
Never remove the fuel cap or add fuel with the power source running. Allow engine
exhaust components to cool before refueling.
Do not smoke.
Never refuel the machine indoors.
Never store the machine or fuel containers inside, where is an open flame, such as a
water heater.
If fuel is spilled, do not attempt to start the power source, but move the machine away
from the area of spillage before starting.
Always replace and securely tighten the fuel cap after refueling.
If the tank is drained, this should be done outdoors.
Copyright © 2013 VARO P a g e | 4 www.varo.com
Page 5

8 ASSEMBLY
8.1 Tube assembly
POWXG4050 EN
Loose the 3 screws ( screw gather A ), put the lower tube insert into upper tuber, and
make sure the ratchet has caught..Then tighten the screw gather A.
Loose and take out Screws(screw gather B). Loose the 2 screws ( screw gather C ). Put
the assembled tube insert into blower body. Then tighten the screw gather B, C.
Loose and take out Screws(screw gather D). Insert the air guide tube into blower
body.Then tighten the screws.Put the quick release collect bag over the air guide tube and
compact it to the blower body.
The vacuum blower needs to be completely mounted before you can use
this tool!
8.2 Patio head
Pull the two wheels at patio outwards, then turn the wheel around revolving central, and they
will fix at one hole by spring , which has completed patio height adjustment.
Copyright © 2013 VARO P a g e | 5 www.varo.com
Page 6

POWXG4050 EN
1.Set the mode selection lever (7) to the
right position Ensure the level have clicked
to place and is rotated to the furthest point.
2.Push the switch (6) to power on marked
“I”.
9 USE
9.1 Fueling
MOTOR FUEL: mix the petrol and oil at 40:1only – 2 stroke
Use fresh unleaded petrol. You must use 100% synthetic oil specifically made for heavily
stressed two stroke engines.
Mix the petrol and oil in an approved container. Never mix fuel directly in the line trimmer
fuel tank.
Place the brush cutter upright on the ground or on a sturdy bench and wipeany debris
from around the fuel cap.
Unscrew the fuel tank cap and pour the mixture into the tank with the aid of a funnel.
Be careful not to spill any mixture. If this happens, wipe the spill with a clean rag.
Start the engine at least three metres away from the area where the fuel tank has been
filled up in order to avoid any risk of fire.
9.2 Use
To reduce the risk of injury, safety switches are installed for the nozzle and
quick release collect bag. The Blower/Vac can not be turned on unless the
nozzle and quick release collect bag are attached.
Copyright © 2013 VARO P a g e | 6 www.varo.com
Page 7

POWXG4050 EN
3.Slowly press the primer bulb(11) 6-8
times,until the gas/oil mixture flows in and
out of the discharge hose above the fuel
tank.
4. Your unit is designed with a 3 position choke: FULL CHOKE “ ”, PARTIAL CHOKE
“ ”, and RUN “ ”.
Move choke lever to FULL CHOKE “ ” position.
Remark: You can use partial choke when the machine is not completely warmed up and/or
as an intermediate position (between full choke and run), when setting the choke back.
Partial choke can also be used when the motor is warmed up but does not start
immediately.
5.Hold the throttle trigger (8) with a hand,at
the same time,to pull the recoil starter(9)
2—3 times.
6.The motor may start,or it may be required
to pull on the recoil starter(9) until the
motor starts.
7. Wait 10 sec. after unit starts then move choke lever to position 3.
8. Position the suction mouth on the area to
be cleared.from side to side with the nozzle
a few inches above the ground or floor.
Move the Blower/Vac slowly, while
accumulating a pile of debris
Copyright © 2013 VARO P a g e | 7 www.varo.com
Page 8

POWXG4050 EN
9. push the switch (6) to power off marked
“stop” when you want to stop the machine
Do not to touch the motor with hand when the machine run and stop a
while,it may hurt you because the hot surface.
10 CLEANING AND MAINTENANCE
10.1 Power loss or sudden stopping of the engine
Check whether the fuel tank is empty.
The mixture does not reach the carburetor. Clean the fuel filter in the fuel tank.
There is water in the mixture. Drain and rinse all the fuel system.
The air filter is dirty. Clean the air filter.
There are carbon deposits in the cylinder exhaust pipe or the muffler. Clean those or
change the muffler.
10.2 Clean Fuel Filter
Fuel tank is fitted with a filter.
Filter is situated at the free end of fuel pipe and can be picked out through fuel port with a
piece of hooked wire or the like.
Check the fuel filter periodically. Do not allow dust to enter the fuel tank. Clogged filter will
cause difficulty when starting engine
When the filter is dirty, clean or replace the filter.
When the inside of the fuel tank is dirty, it can be cleaned by rinsing the tank out with
petrol. or abnormalities in engine performance.
11 STORAGE
Remove the blower tube and nozzle.
Drain and clean the fuel tank.
Run machine until carburetor is dry.this help prevent the carburetor diaphragms sticking
together.
Thoroughly clean the machine.
Storing the machine in a dry,high or locked location,out of the reach of children and other
unauthorized persons.
Copyright © 2013 VARO P a g e | 8 www.varo.com
Page 9

POWXG4050 EN
Engine displacement
30 cm³
Fuel tank
500 ml
Fuel type
Unlead
Fuel mixture
40:1
Max. engine speed
8200 rpm
Air velocity
70m/s
Air volume
10 m³/min
Acoustic pressure level LpA
98 dB(A)
Acoustic power level LwA
108 dB(A)
aw (Vibration)
5.5m/s²
K = 1,5 m/s²
12 TECHNICAL DATA
13 NOISE
Noise emission values measured according to relevant standard. (K=3)
ATTENTION! Wear hearing protection when sound pressure is over 85
dB(A).
14 WARRANTY
This product is warranted for a 36-month period effective from the date of purchase by the
first user.
This warranty covers all material or production flaws excluding: batteries, chargers,
defective parts subject to normal wear & tear such as bearings, brushes, cables, and
plugs, or accessories such as drills, drill bits, saw blades, etc. ; damage or defects
resulting from maltreatment, accidents or alterations; nor the cost of transportation.
Damage and/or defects resulting from inappropriate use also do not fall under the
warranty provisions.
We also disclaim all liability for any bodily injury resulting from inappropriate use of the
tool.
Repairs may only be carried out by an authorised customer service centre for Powerplus
tools.
You can always obtain more information at the number 00 32 3 292 92 90.
Any transportation costs shall always be borne by the customer, unless agreed otherwise
in writing.
At the same time, no claim can be made on the warranty if the damage of the device is the
result of negligent maintenance or overload.
Definitely excluded from the warranty is damage resulting from fluid permeation, excessive
dust penetration, intentional damage (on purpose or by gross carelessness), inappropriate
usage (use for purposes for which the device is not suitable), incompetent usage (e.g. not
following the instructions given in the manual), inexpert assembly, lightning strike,
erroneus net voltage. This list is not exhaustive.
Acceptance of claims under warranty can never lead to the prolongation of the warranty
period nor commencement of a new warranty period in case of a device replacement.
Devices or parts which are replaced under the warranty therefore remain the property of
Varo NV.
We reserve the right to reject a claim whenever the purchase cannot be verified or when it
is clear that the product has not been properly maintained. (Clean ventilation slots, carbon
brushes serviced regularly, etc.).
Your purchase receipt must be kept as proof of date of purchase.
Copyright © 2013 VARO P a g e | 9 www.varo.com
Page 10

POWXG4050 EN
Your appliance must be returned undismantled to your dealer in an acceptably clean state,
(in its original blow-moulded case if applicable to the unit), accompanied by proof of
purchase.
15 ENVIRONMENT
Should your appliance need replacement after extended use, do not discard it
with the household rubbish but dispose of it in an environmentally safe way.
Please dispose of used motor oil in a manner that is compatible with the
environment. We suggest you take it in a sealed container to your local service
station for reclamation. Do not throw it in the trash or pour it on the ground.
16 DECLARATION OF CONFORMITY
VARO N.V. - Joseph Van Instraat 9 - BE2500 Lier - BELGIUM, declares that,
Product: Blowvac
trade mark: POWERplus
model: POWXG4050
is in conformity with the essential requirements and other relevant provisions of the applicable
European Directives, based on the application of European harmonized standards. Any
unauthorized modification of the apparatus voids this declaration.
European Directives (including, if applicable, their amendments):
2006/42/EC
2004/108/EC
2000/14/EC Annex V LwA 105dB / 108dB
97/68/EC Engine Class SH2
EDP 50h
Testing Authority VCA / Bristol
European harmonized standards (including, if applicable, their amendments):
EN15503 : 2009
EN ISO14982 : 2009
The undersigned acts on behalf of the company management,,
Philippe Vankerkhove
Certification Manager
Date : 18/06/2012
Copyright © 2013 VARO P a g e | 10 www.varo.com
 Loading...