

Power Gear 7228AC, 7228DC, 7428AC, 7428DC User Manual
OPERATION MANUAL for AUTOMATIC
LEVELING SYSTEMS
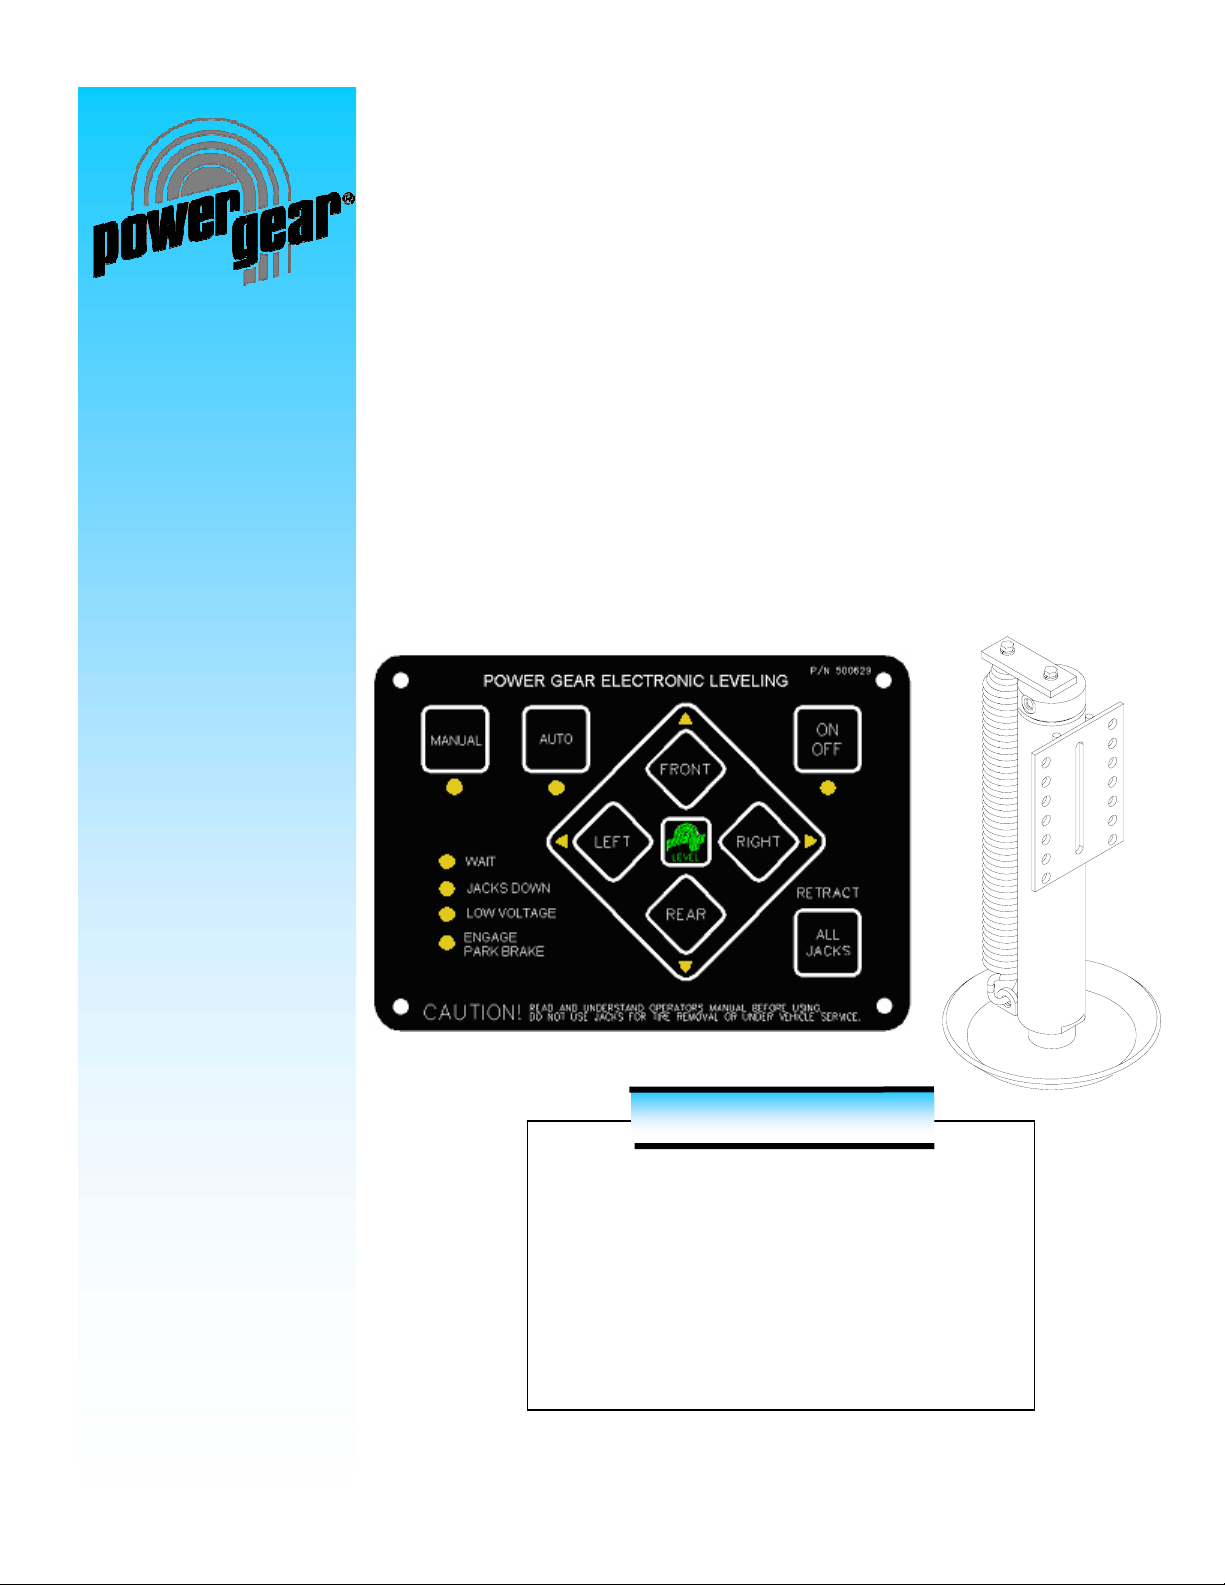
TOUCH PAD # 500629 or 140-1226
CONTROL BOX # 500630 or 140-1227
WITH
1217 E. 7th St.
Mishawaka IN
46544
800-334-4712
fax (574) 256-6743
CONTENTS
Before you level your coach 2
Operating Instructions 3
Retracting your leveling jacks 3
Manually operating your jacks 4
Preventive maintenance 5
Warranty information 5
Troubleshooting guide 6-7
www.powergearus.com
Page
Before You Level Your Coach
x Park brake must be set and transmission must be in “park” (“neutral” for diesel
coaches) before jacks will operate.
x Check leveling site to make sure obstructions have been cleared away for proper jack
operation.
x Selecting a site: When the coach is parked on an excessive slope the leveling
requirements may exceed the jack lift stroke capability. If the coach is parked on an
excessive slope, the coach should be moved to a more level surface before the
leveling system is deployed.
--CAUTION--
Keep people clear of coach prior to turning the leveling system on and while leveling
system is in use.
--CAUTION--
Never expose hands or other parts of the body near hydraulic leaks. High-pressure oil
leaks may cut and penetrate the skin causing serious injury.
--CAUTION--
If your coach is equipped with a slide out(s) always level your unit first, and then operate
the slide out room(s). When retracting the slide(s), always retract the room(s) first then
retract the leveling jacks. Following this procedure will produce the least amount of
stress on your chassis.
--CAUTION--
Please read the owners’ manual from the manufacturer who built and designed your
motor home for further leveling and slide out room operating information and safety
features.
2
WARNING
THIS IS A LEVELING SYSTEM ONLY AND IS NOT INTENDED TO LIFT YOUR COACH’S
TIRE OR TIRES COMPLETELY OFF THE GROUND. ATTEMPTING TO LIFT YOUR COACH
COMPLETELY OFF THE GROUND (FOR EXAMPLE, TO USE THIS LEVELING SYSTEM TO
CHANGE A TIRE) COULD CAUSE DAMAGE TO THE SYSTEM AND SERIOUS INJURY TO
THE PARTIES INVOLVED. IF A TIRE SHOULD REQUIRE CHANGING PLEASE HAVE THE
PROPER EQUIPMENT AND CONTACT A PROFESSIONAL.
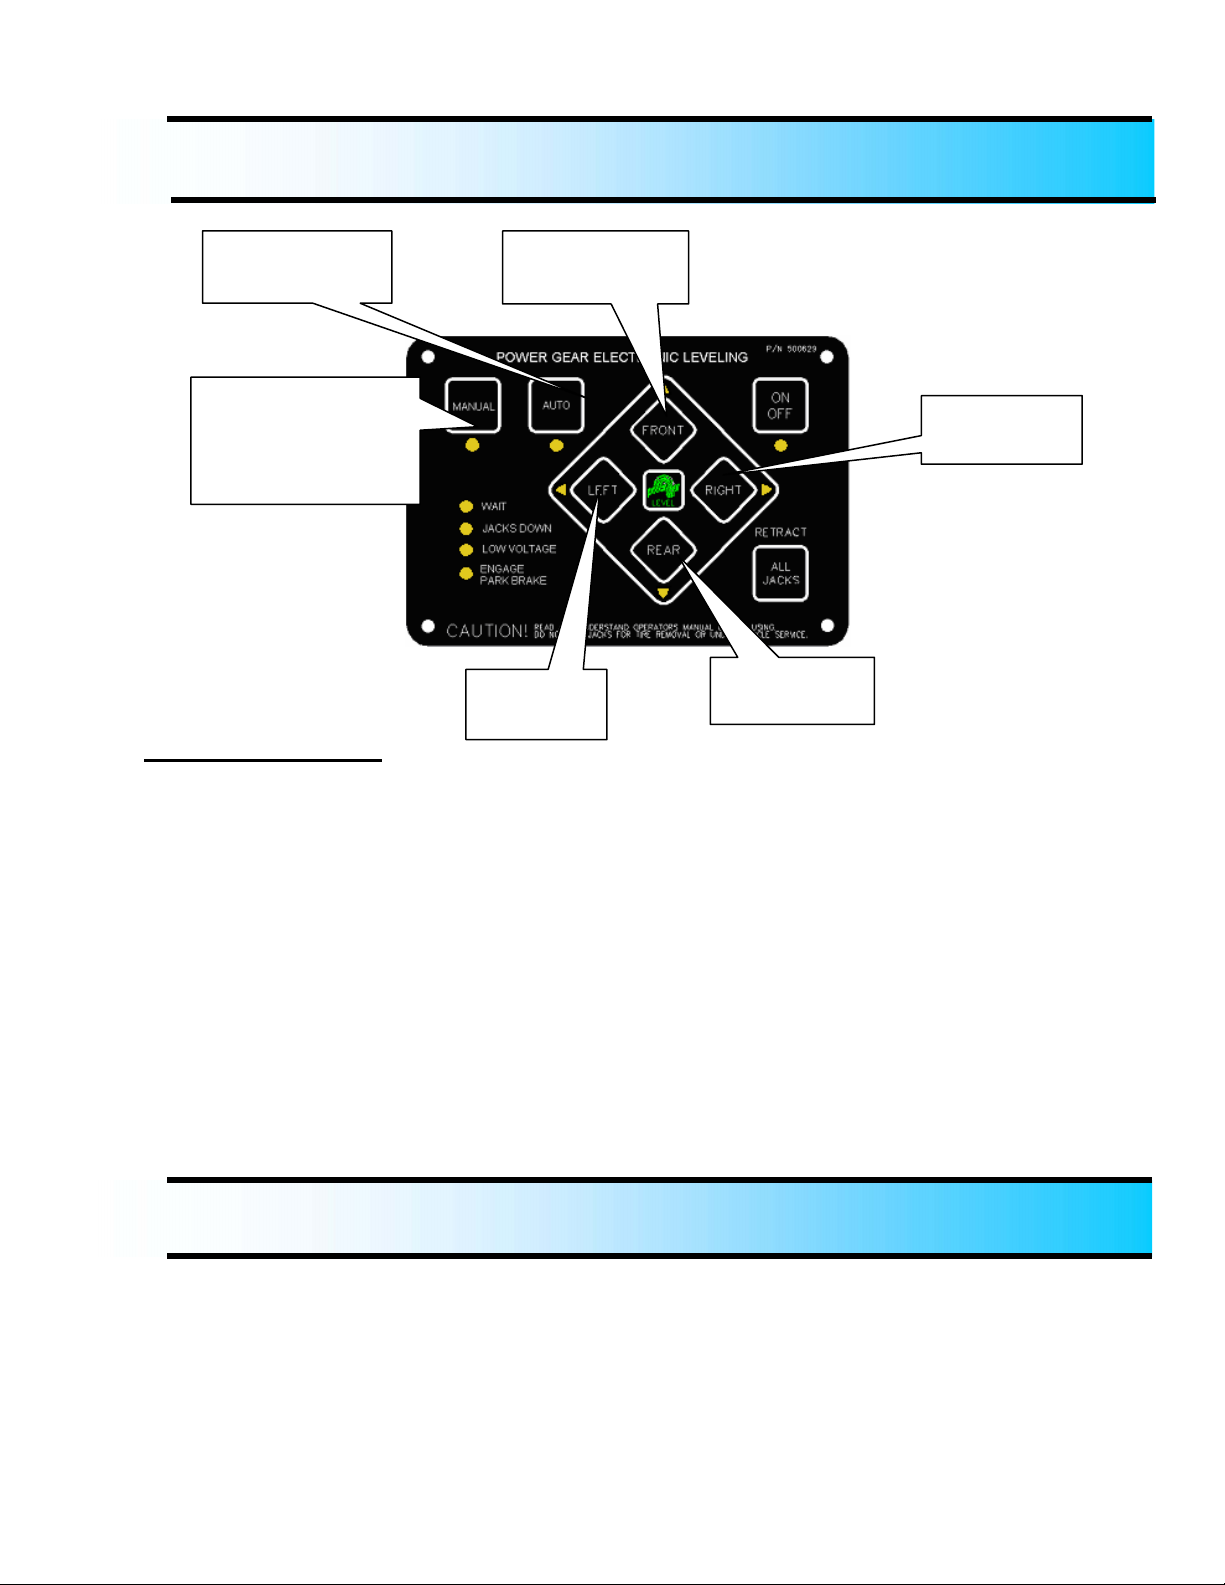
Operating Instructions
LEVELING YOUR COACH
Automatic
mode button
Manual operation
button (push and
hold for 5-7
seconds)
1. Turn on the ignition and start the coach. Your leveling control will start a self check sequence indicated
by the lights on the panel blinking in a rotating pattern. It will turn off when it has finished it’s self check.
2. Push the "On/Off" button on control panel. The system is now operational and the “On/Off” LED will
turn on.
3. Check to see that the engage park brake light is not illuminated. If so, engage the parking brake. (Your
coach will have to be in neutral or park to operate the system).
4. Push the “AUTO” button. The automatic leveling system will begin it’s leveling procedure. Please avoid
movement in the coach during automatic leveling as it can cause errors in the results. It will signal that
it has completed the process by illuminating the center green “LEVEL” light. Check to make sure that all
jacks are on the ground. Also check to make sure that no tire is off the ground. If so, your leveling
process is complete. If further adjustments are needed, refer to the “Manual Operation” section.
5. You can then turn the system off by pushing the on/off button again.
Retracting Your Leveling Jacks
1. Turn on the ignition
2. Turn on the system by pushing the “on/off” button. The system is now operational and the “On/Off” LED
will turn on.
3. Push the “RETRACT-ALL JACKS” button. When the “JACKS DOWN” light turns off, visually check to
make sure that all jacks have fully retracted. If so, your coach leveling system is ready to travel.
Front Jacks
Button
Left Jack
Button
Right Jack
Button
Rear Jacks
Button
3
 Loading...