

Power Fist Air Flux Chipper, 8436008 User Manual
User Manual
8436008
Air Flux
Chipper
Please read and understand all instructions before use.
Retain this manual for future reference.
V 2.
1

2
For technical questions call: 1-800-665-8685
8436008
Air Flux
Chipper
V 2.
1
SPECIFICATIONS
Air Consumption @ 90 PSI 4.2 CFM
Impact Rate 4,500 BPM
Stroke Length 7/8 in.
Exhaust Style Front exhaust
Air Inlet 1/4 in. NPT
INTRODUCTION
Ideal for all chipping applications including removal of slag, scale, weld and masonry.
SAFETY
IMPORTANT SAFETY PRECAUTIONS
WARNING! The operator must follow basic precautions to reduce the risk of personal injury and/or damage to
the equipment.
WARNING! The warnings, cautions and instructions discussed in this instruction manual cannot cover all
possible conditions and situations that may occur. Common sense and caution are factors that cannot be built
into this product, but must be supplied by the operator.
NOTE: Keep this manual for safety warnings, precautions, operating, inspection and maintenance instructions.

Air Flux Chipper
3
Visit www.princessauto.com for more information
8436008 V 2.
1
WORK AREA
1. Operate in a safe work environment. Keep your work area clean and well lit.
2. Keep anyone not wearing the appropriate safety equipment away from the work area.
3. Minimize distractions in the work environment. Distractions can cause you to lose control of the tool.
4. Store tools properly in a safe and dry location to prevent rust or damage.
5. Always lock up tools and keep them out of the reach of children.
PERSONAL SAFETY
CAUTION! Wear protective equipment approved by the Canadian Standards Association (CSA) or American
National Standards Institute (ANSI) when using the tool.
1. Head Protection
a. Always wear impact safety goggles that provide front and side protection for the eyes.
b. Wear the appropriate rated dust mask or respirator.
c. Wear earplugs if the tool or work environment is noisy.
d. Wear a full-face shield if your work creates metal filings or wood chips.
2. Gloves
a. The gloves should provide protection based on the work materials.
b. Wear suitable gloves to reduce the effects of vibration.
3. Foot Protection
a. Steel toe footwear or steel toe caps to prevent injury from falling objects.
b. Non-skid footwear is recommended to maintain footing and balance.
4. Maintain tool control
a. Keep articles of clothing, jewelry, hair, etc., away from moving parts to avoid entanglement with a tool.
b. Do not operate any machine/tool when tired or under the influence of drugs, alcohol or medications.
c. Do not overreach when operating a tool. Proper footing and balance enables better control of a tool in
unexpected situations.
d. Use clamps or other practical ways to support or secure the workpiece to a stable platform. Holding the
workpiece by hand or against your body is not stable and may lead to loss of control and injury.

Air Flux Chipper
4
For technical questions call: 1-800-665-8685
8436008
V 2.
1
VIBRATION PRECAUTIONS
1. This tool vibrates during use. Repeated or long-term exposure to vibration may cause temporary or
permanent physical injury, particularly to the hands, arms and shoulders.
2. Anyone using vibrating tools regularly or for an extended period should first be examined by a doctor and
then have regular medical check ups to ensure medical problems are not being caused by or worsened from
tool use.
3. If you feel any medical symptoms related to vibrations (such as tingling, numbness, and white or blue
fingers), seek medical attention as soon as possible.
4. DO NOT use this tool if one of the following applies:
a. Pregnant
b. Impaired blood circulation to the hands
c. Past hand injuries
d. Nervous system disorders
e. Diabetes
f. Raynaud’s Disease
5. Do not smoke while operating the tool. Nicotine reduces the blood flow to the hands and fingers, increasing
the risk of vibration-related injury.
6. Wear suitable gloves to reduce the effects of vibration.
7. Use the tool with the least amount of vibration, when there is a choice between different processes.
8. Do not use for extended periods. Take frequent breaks to when using this tool.
9. Let the tool do the work. Grip the tool as lightly as possible (while still keeping safe control of it).
10. To reduce vibrations, maintain the tool as explained in this manual. If abnormal vibrations occur, stop using
this tool immediately.

Air Flux Chipper
5
Visit www.princessauto.com for more information
8436008 V 2.
1
AIR TOOL PRECAUTIONS
1. Air tools produce more noise than their electric counterparts. Extended exposure to this noise may cause
hearing loss.
a. Wear ear protection gear to eliminate or reduce the noise.
2. Do not operate this tool if the air hose is damaged.
a. Inspect the tool’s air line for cracks, fraying or other faults before each use.
b. Discontinue use if a hissing can be heard from the air line or connectors while operating the tool.
c. Take the following steps if either of the above situations occur:
i. Tag or mark the tool as “defective” or “out of service” until repaired.
ii. Contact a qualified person repair or replace the defective component/hose.
3. Prevent damage to air hose by observing the following:
a. Never use the hose to carry the tool.
b. Keep the air hose of the tool and the tool’s work path while in operation. The hose should always stay
behind the tool.
c. Keep the hose away from heat, oil, sharp edges or moving parts.
d. Do not allow people, mobile equipment or vehicles to pass over unprotected air hose.
i. Position air hose away from traffic areas.
ii. Place hose in reinforced conduit.
iii. Place planks on either side of the hose to create a protective trench.
e. Do not wrap hose around the tool as sharp edges may pierce the hose or cause cracks if wound too
tight. Gently coil the hose and either hang on a hook or fasten with a device to keep hose together
when storing.
4. An air hose under pressure that is damaged or disconnected from an air tool may whip around and cause
damage to the work area or personal injury. Secure the compressor’s air hose to a fixed or permanent
structure with clamps or cable ties.
TOOL USE AND CARE
1. Use the correct tool for the job. Do not force a tool or attachment to do the work of a larger industrial tool.
Maximize tool performance and safety by using the tool for its intended task.
2. This tool was designed for a specific function. Do not modify or alter this tool or use it for an
unintended purpose.
3. Securely hold this tool using both hands. Using the tool with only one hand can result in loss of control.
4. Maintain tools with care (see Maintenance).
5. Avoid unintentional starts. Be sure that the throttle is in the neutral position when not in use and before
connecting it to any air source.
6. Do not carry the tool with fingers near or on the throttle.
Air Flux Chipper
6
For technical questions call: 1-800-665-8685
8436008
V 2.
1
AIR COMPRESSOR
Ensure the compressor used with the tool can supply the required Cubic Feet per Minute at the required PSI
(see Specifications).
1. Use proper size and type of air pressure line and fittings.
2. Use only clean, dry, regulated compressed air at the rated range as marked on the tool.
CAUTION! Do not use an air source other than an air compressor to power this tool.
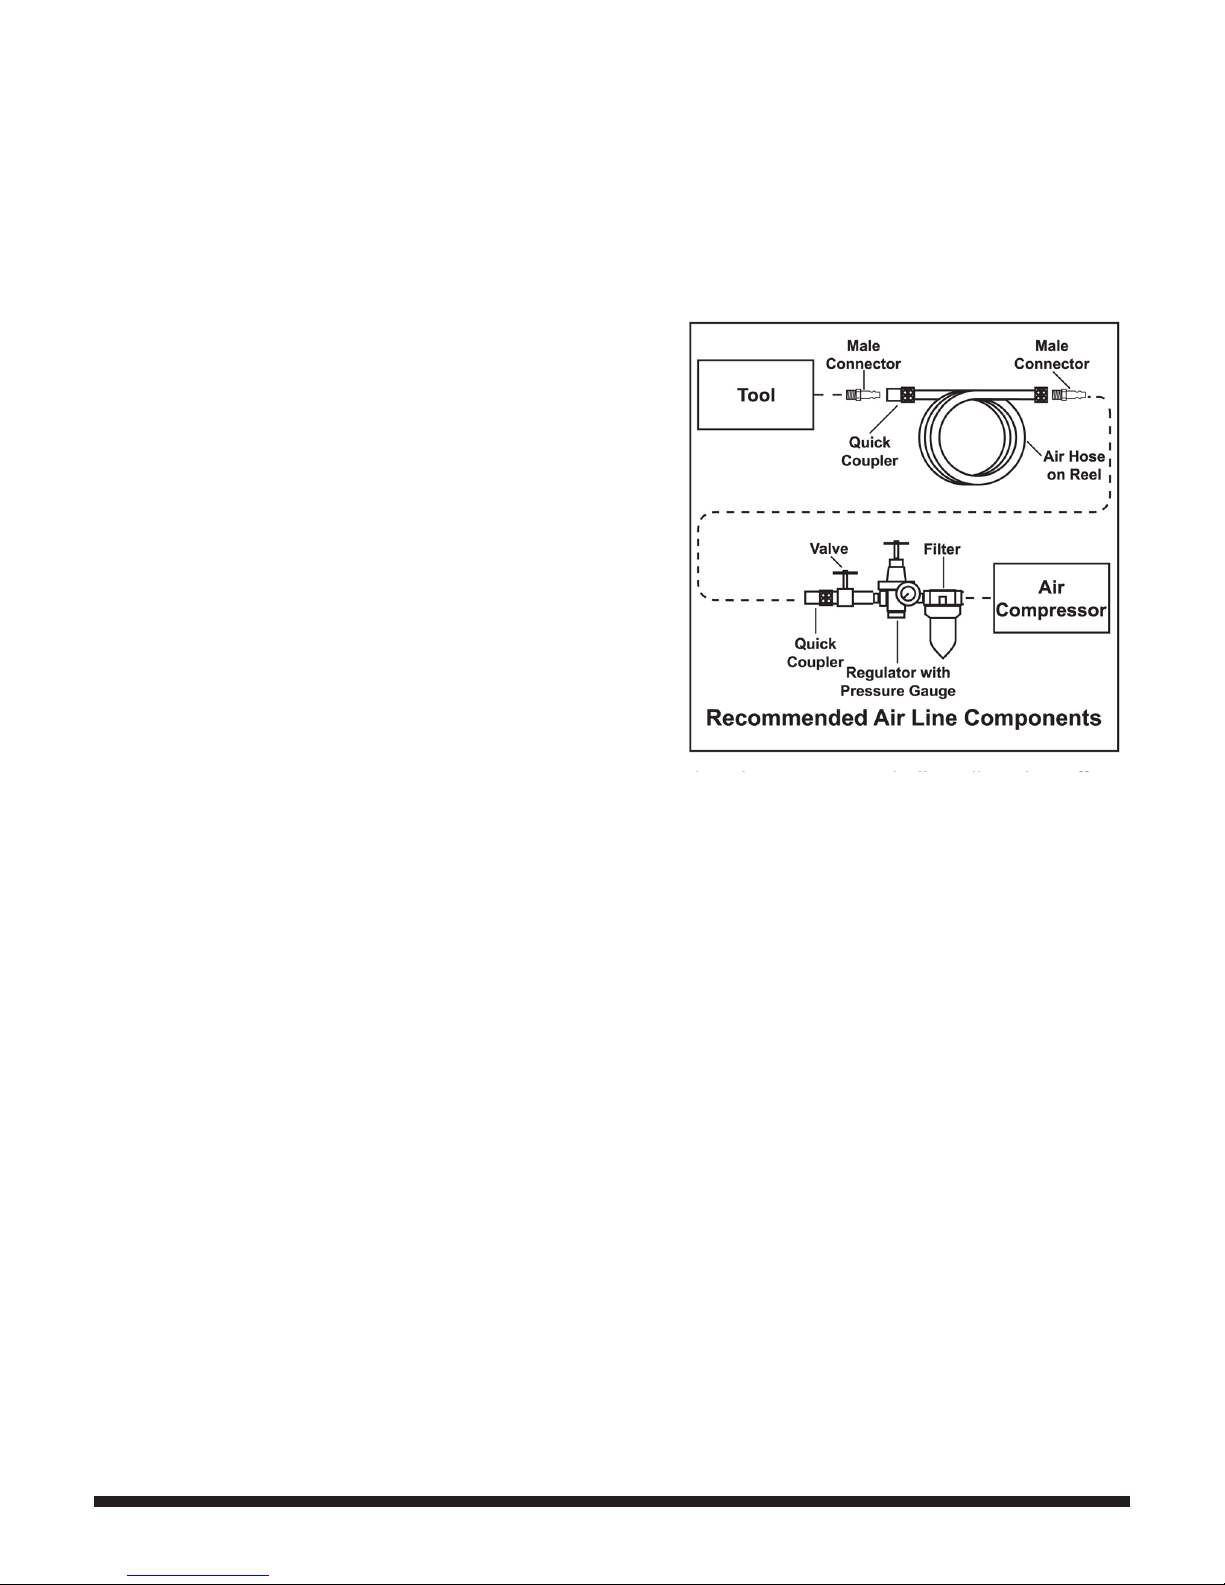
3. Always use an air regulator, an in-line filter and a
moisture trap in your compressed air system. These
accessories will increase the tool’s life and keeps the
tool in good working condition. See the diagram for
recommended components of an air line.
4. Avoid using an air hose that is too long. The longer
the hose, the lower the pressure that reaches the tool,
possibly causing it to cease functioning. As well, a
longer hose can become a tripping hazard.
5. Air tool CFM consumption ratings are based upon a
25% duty cycle. If you require continuous duty, a larger
compressor is required.
AIR SOURCE INSTALLATION
WARNING! Never use pure oxygen, carbon dioxide, combustible gases or any bottled gas as an air source for a
tool. Such gases are capable of causing an explosion and serious injury to persons.
1. Set the air pressure regulator on the air compressor to the recommended PSI level (see Specifications). Do
not exceed the tool recommended air pressure. Excess pressure could result in damage to the tool, to your
workpiece or serious injury.
2. Prepare a standard 1/4 in. air connector for use with your tool. Wrap the threaded portion of the air
connector with thread tape. Wrap in a clockwise direction so it will not unravel when attaching to a quick
connector. Attach it to the tool air inlet and tighten.
3. Attach a standard quick connector to the air source’s hose. Attach the air hose to the tool’s air connector.
4. Check the air line and its connections for air leaks. Do not use the tool until you have repaired all air leaks.
 Loading...