

Page 1
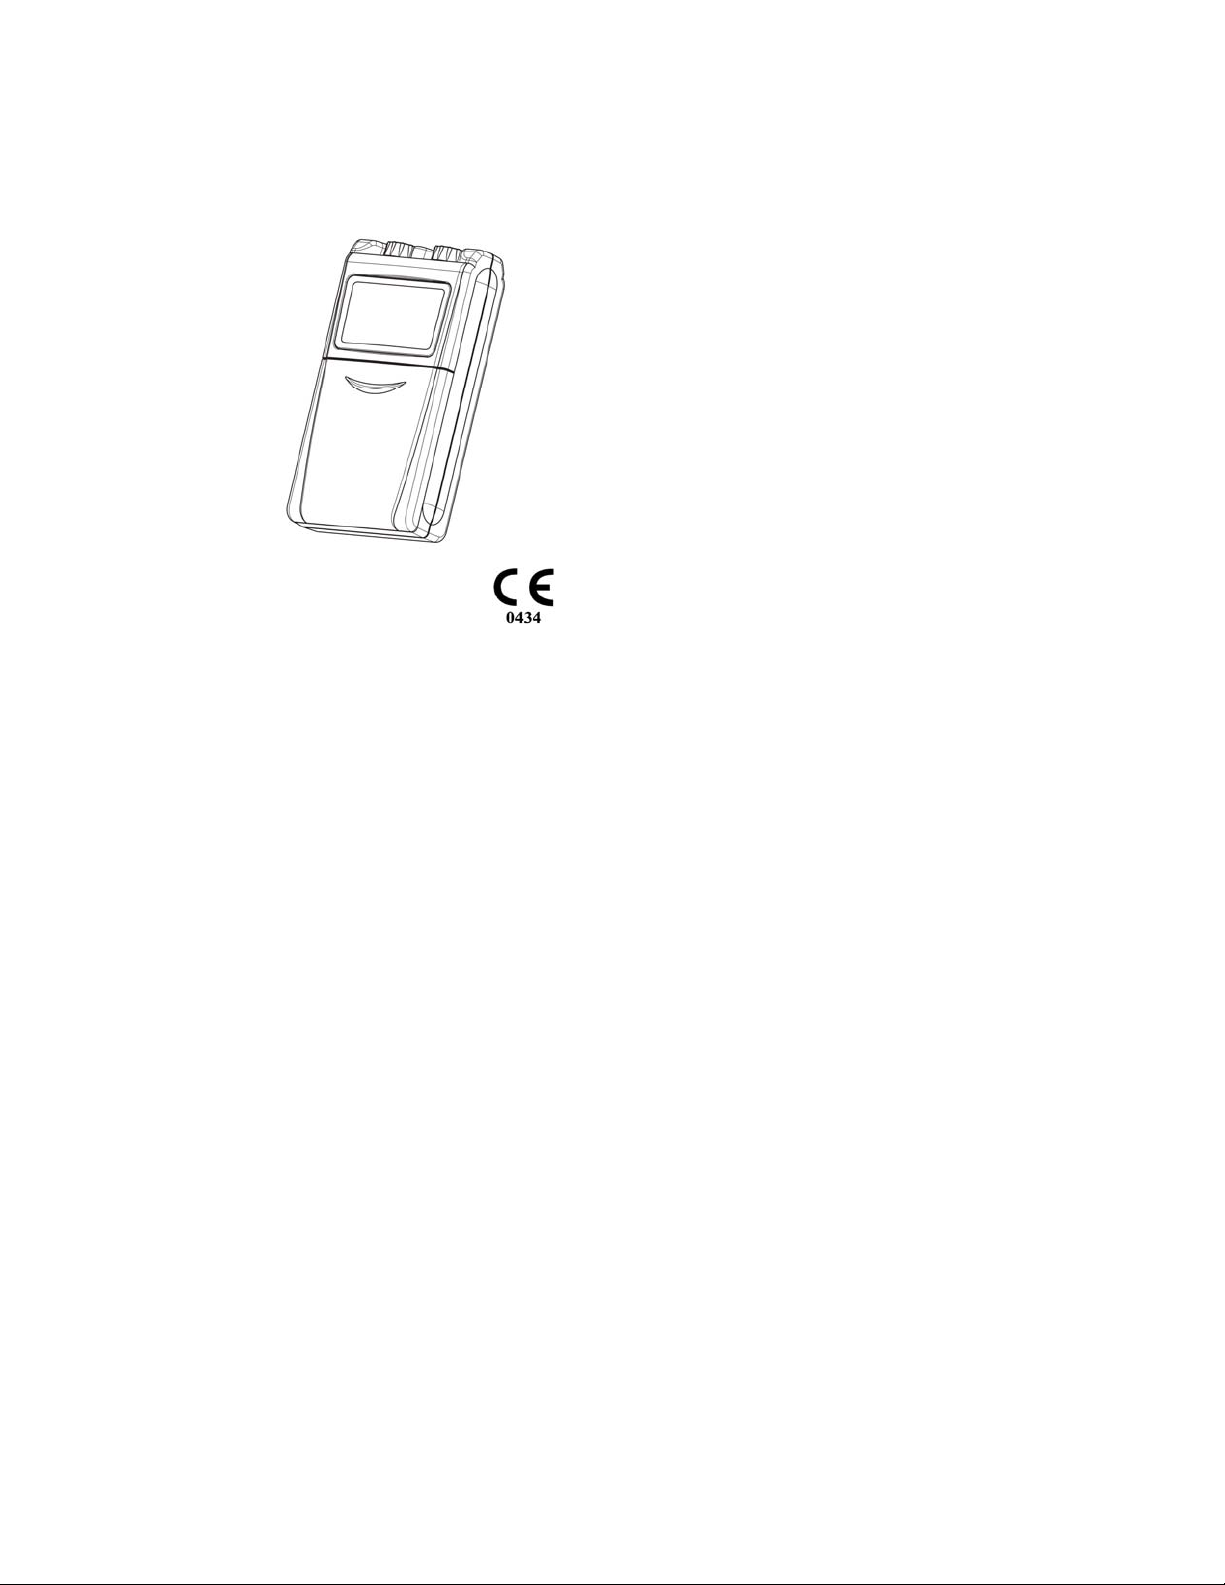
Powered Muscle Stimulator (EMS)
Read before using
FDA 510k
Model: GM320E (C)
Operation Manual
Page 2

TABLE CONTENTS
GENERAL DESCRIPTION 1
SYSTEM COMPONENTS 1
WARR ANTY 1
INDICATIONS AND CONTRAINDICATIONS 1
WARNINGS AND PRECAUTIONS 2
ABOUT THE DEVICE 3
THE DEVICE CONTROLS 4
DANGER 4
ATTACHING THE LEAD WIRES 5
ELECTRODE SELECTION AND CARE 5
TIPS FOR SKIN CARE 5
CONNECTING THE DEVICE 6
BATTERY INFORMATION 6
CHANGING THE BATTERY 7
CLEANING FOR YOUR DEVICE 7
TROUBLESHOOTING 7
TECHNICAL SPECIFICATIONS 8
PROCEDURE OF Compliance meter SETTING (Special
for physician)
9
Page 3

GENERAL DESCRIPTION
Electric myostimulation has proven its high value as a method of pain therapy and is a
great help to the experienced therapist.
With some indications, physicians can prescribe unit to patients for the use at home.
The unit is a dual-Channel electric stimulator for active treatment application, which is
equipped with a Liquid Crystal Display indicating operation modes and output as well as
an 8-bit micro computer for controlling the system.
The electronics of the unit create electric impulses: the intensity, duration, frequency per
second and modulation of these impulses can be adjusted through the button or knob.
SYSTEM COMPONENTS
Your device may include the following components or accessories:
Unit
Carrying case
Lead wires / Electrodes
9-volt battery
Operation Manual
WARRANTY
This device carries a one-year warranty from the date of purchase. The warranty applies
to the device and necessary parts and labor relating thereto. The distributor reserves the
right to replace or repair the unit at their discretion.
The warranty does not apply to electrode, battery, lead wires, carrying case, damage
resulting from failure to follow the operating instructions, accidents, abuse, alterations or
disassembly by unauthorized individuals.
INDICATIONS AND CONTRAINDICATIONS
Read the operation manual before using the device.
Federal law (USA) restricts this device to sale by or on the order of a physician. Observe
your physician’s precise instructions and let him show you where to apply the electrodes.
For a successful therapy, the correct application of the electrodes is an important factor.
Carefully write down the settings your physician recommended.
Indications for use
Relaxation of muscle spasms.
- 1 -
Page 4

Prevention or retardation of disuse atrophy.
Increasing local blood circulation.
Muscle re-education.
Immediate post-surgical stimulation of calf muscles to prevent venous
thrombosis.
Maintaining or increasing range of motion.
Contraindications
Powered muscle stimulators should not be used on patients with cardiac demand
pacemakers.
WARNI NGS AN D PRE CAUTIONS
Warnings
The long-term of chronic electrical stimulation are unknown.
Stimulation should not be applied over the carotid sinus nerves, particularly in
patients with a known sensitivity to the carotid sinus reflex.
Stimulation should not be applied over the neck or mouth. Severe spasm of the
laryngeal and pharyngeal muscles may occur and the contractions may be strong
enough to close the airway or cause difficulty in breathing.
Stimulation should not be applied transthoracically in that the introduction of
electrical current into the heart may cause cardiac arrhythmias.
Stimulation should not be applied over swollen, infected, or inflamed areas or skin
eruptions, e.g. phlebitis, thrombophlebitis, varicose veins, etc.
Stimulation should not be applied over, or in proximity to, cancerous lesions.
Stimulation should not be applied transcerebrally (across the head).
Precautions/adverse Reactions
Safety of powered muscle stimulators for use during pregnancy has not been
established.
Caution should be used for patients with suspected or diagnosed heart problems.
Caution should be used for patients with suspected or diagnosed epilepsy.
Caution should be used in the presence of the following:
a. When there is a tendency to hemorrhage following acute trauma of fracture;
b. Following recent surgical procedures when muscle contraction may disrupt
the healing process;
c. Over the menstruating or pregnant uterus; and
d. Over areas of the skin which lack normal sensation.
- 2 -
Page 5
Some patients may experience skin irritation or hypersensitivity due to the
electrical stimulation or electrical conductive medium. The irritation can usually be
reduced by using an alternate conductive medium, or alternate electrode
placement.
Electrode placement and stimulation settings should be based on the guidance of
the prescribing practitioner.
Powered muscle stimulators should be kept out of the reach of children.
Power muscle stimulators should be used only with the leads and electrodes
recommended for use by the manufacturer.
[FOR PORTABLE DEVICES ONLY] Portable powered muscle stimulators should
not be used while driving, operating machinery, or during any activity in which
involuntary muscle contractions may put the user at undue risk of injury.
Skin irritation and burns beneath the electrodes have been reported with the use of
powered muscle stimulators.
ABOUT THE DEVICE
- 3 -
Page 6

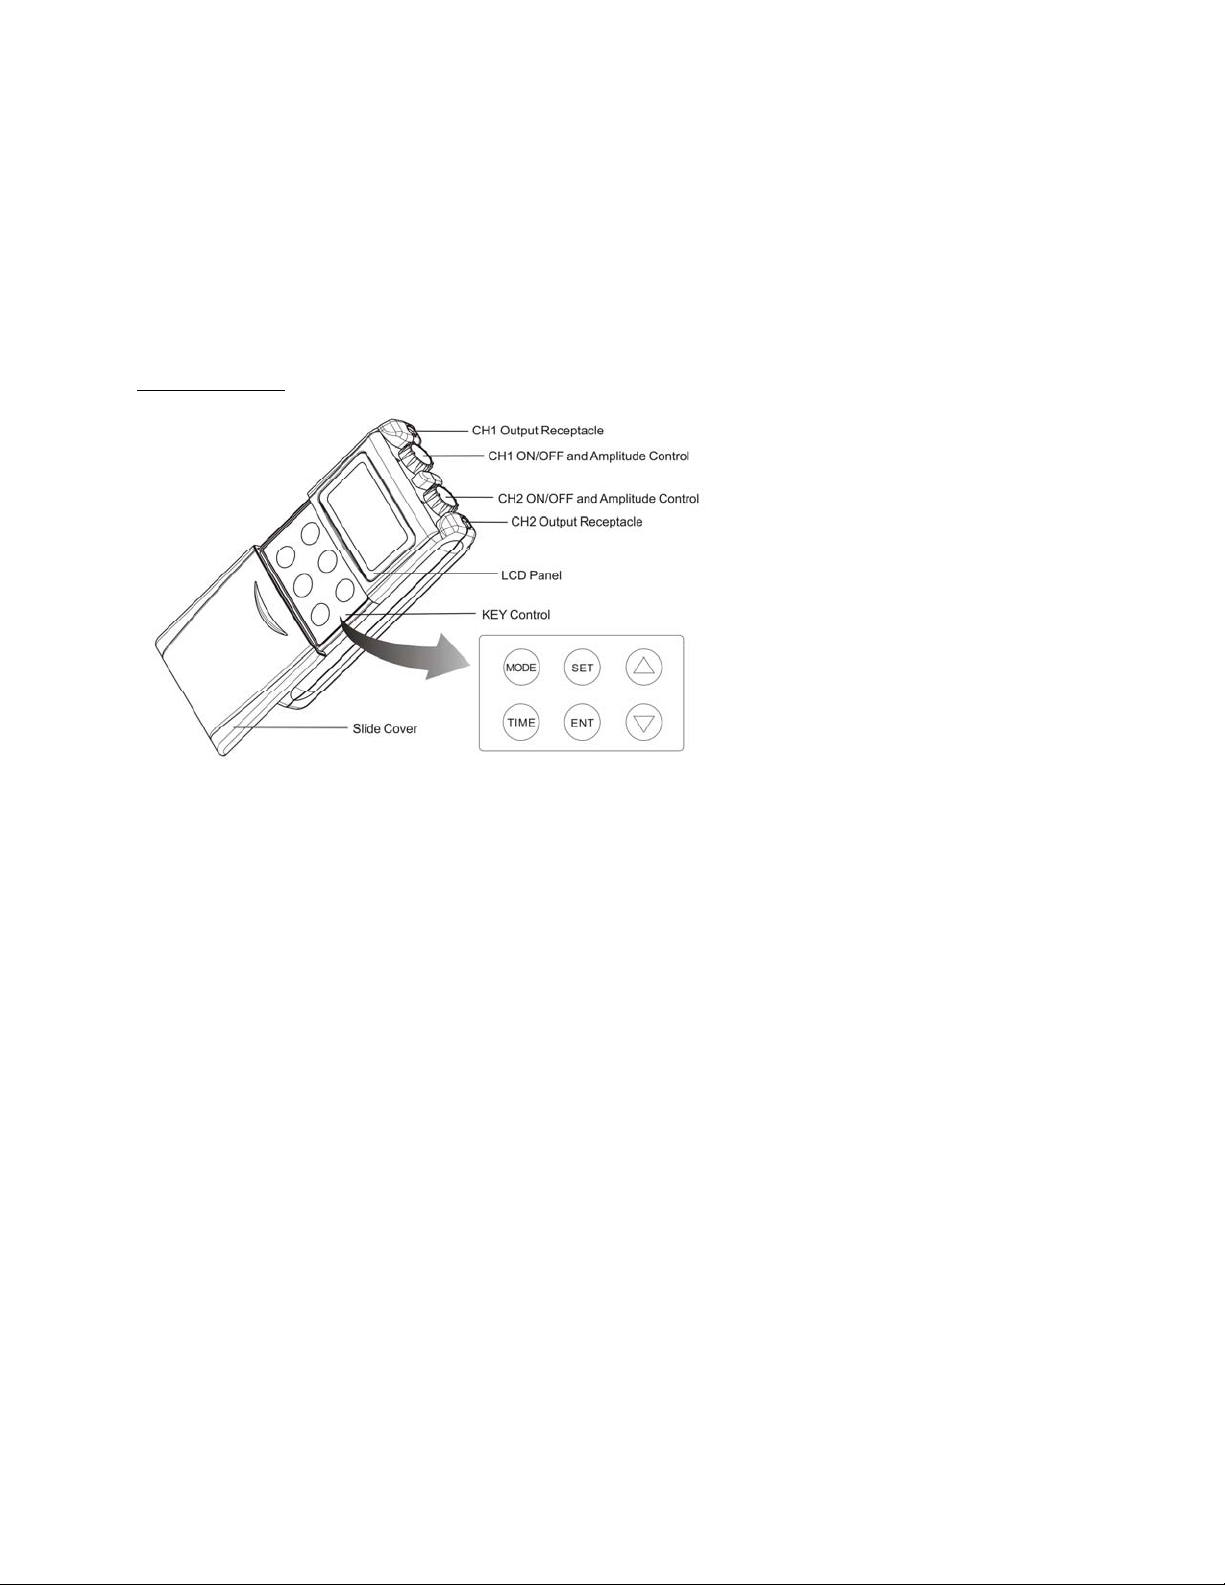
Your device offers two controllable output channels. This device creates electrical
impulses whose amplitude, duration, and modulation can be altered with the controls or
buttons. The device controls are very easy to use and the slide cover protects accidental
changes in settings.
THE DEVICE CONTROLS
Panel cover
A cover conceals the controls for Mode, Time, SET/ENT, ▲▼. Press the topside of the
cover and pull down in order to open the cover.
Intensity
The intensity knobs are located on the top of the unit for the strength adjustment of the
stimulation and also function as ON/OFF controls.
Mode
The Mode key is used to select / set the type of treatment utilized. The three modes are C
(Constant), S (Synchronous) and A ( Alternation).
TIME
Treatment Time of device can be pre-select / set with Time key. There are three
programs fixed duration of 15, 30 and 60 minutes and one program of continuous output.
Press the key until engaged in position desired.
15 min : 15 min icon light on.
30 min : 15, 30 min icons light on.
60 min : 15, 30 and 60 min icons light on.
Continue : 15 and 30 min icons light on but 60 min icon flash.
SET/ENT
The SET/ENT keys are used to select the type of treatment utilized. The type of
treatment utilized includes cycle On time, On Ramp time, cycle Off time and Rate. The
selected parameter will flash during adjust.
▲▼
The ▲▼ keys regulate the number of On, Ramp, Off value and Pulse Rate..
After completed new values setting, press ENT key to update the new value.
DANGER
The device does not have AAP/APG protection. Explosion hazard is possible if used in
the presence of explosives, flammable materials or flammable anesthetics. Caution
should be used when applying the device to patients suspected of having heart disease.
Further clinical data is needed to show if there are adverse side effects on those with
- 4 -
Page 7

heart disease.
ATTACHING THE LEAD WIRES
The lead wires provided with the device insert into the jack sockets located on top of the
unit. Holding the insulated portion of the connector, push the plug end of the wire into one
of the jacks. After connecting the wires to the stimulator, attach each wire to an electrode.
Lead wires provided with the device are compliant with mandatory compliance standards
set for the by FDA.
Note: Use carefully when you plug and unplug the wires. Pulling on the lead wire
instead of its insulated connector may cause wire breakage.
Caution: Never insert the plug of the lead wire into an AC power supply socket.
ELECTRODE SELECTION AND CARE
Your physician/practitioner should decide which type of electrode is best for your
condition. Follow application procedures outlined in electrode packaging to maintain
stimulation and prevent skin irritation. The electrode packaging will provide instruction for
care, maintenance and proper storage of your electrodes.
Be sure to use the electrodes provided by the manufacturer and/or the similar FDA
legally marketed electrode in particular the same cross section area.
TIPS FOR SKIN CARE
Good skin care is important for comfortable use of your device.
Always clean the electrode site with mild soap and water solution, rinse well, and
blot dry thoroughly prior to any electrode application.
Any excess hair should be clipped, not shaved, to ensure good electrode contact
with the skin.
You may choose to use a skin treatment or preparation that is recommended by
your physician. Apply, let dry, and apply electrode as directed. This will both
reduce the chance of skin irritation and extend the life of your electrodes.
Avoid excessive stretching of the skin when applying electrodes, this is best
accomplished by applying the electrode and smoothly pressing it in place from the
center outward.
- 5 -
Page 8

When removing electrodes, always remove by pulling in the direction of hair
growth.
It may be helpful to rub skin lotion on electrode placement area when not wearing
electrodes.
CONNECTING THE DEVICE
1. Prepare the Skin
Prepare the skin as previously discussed and according to instructions provided with
your electrodes. Before attaching the electrodes, identify the area in which your
physician/practitioner has recommended for electrode placement.
2. Connect lead wires to the electrodes
Connect the lead wires to the electrodes before applying the electrodes to the skin.
Note: Be sure both intensity controls for Channel 1 and 2 are turned to the “OFF”
position.
3. Place Electrodes on Skin
Place the electrodes on the skin as recommended by your clinician.
4. Insert Lead Wire Connector to device
Plug end of lead wire into the channel output receptacle to be used, pushing plug in as
far as it will go.
5. Select Treatment Settings
Check and be sure your unit is still set to the proper settings recommended by your
physician/practitioner.
6. Adjusting Channel Intensity Control
Locate the intensity control knob at the top of the unit. Slowly turn the intensity control
knob for Channel 1 clockwise until you reach the intensity recommended by your medical
professional. Always start with the lowest step and increase slowly. Repeat the same
process for Channel 2.
If the stimulation levels are uncomfortable or become uncomfortable, reduce the
stimulation amplitude to a comfortable level or cease stimulation and contact
your physician/practitioner if problems persist.
BATTERY INFORMATION
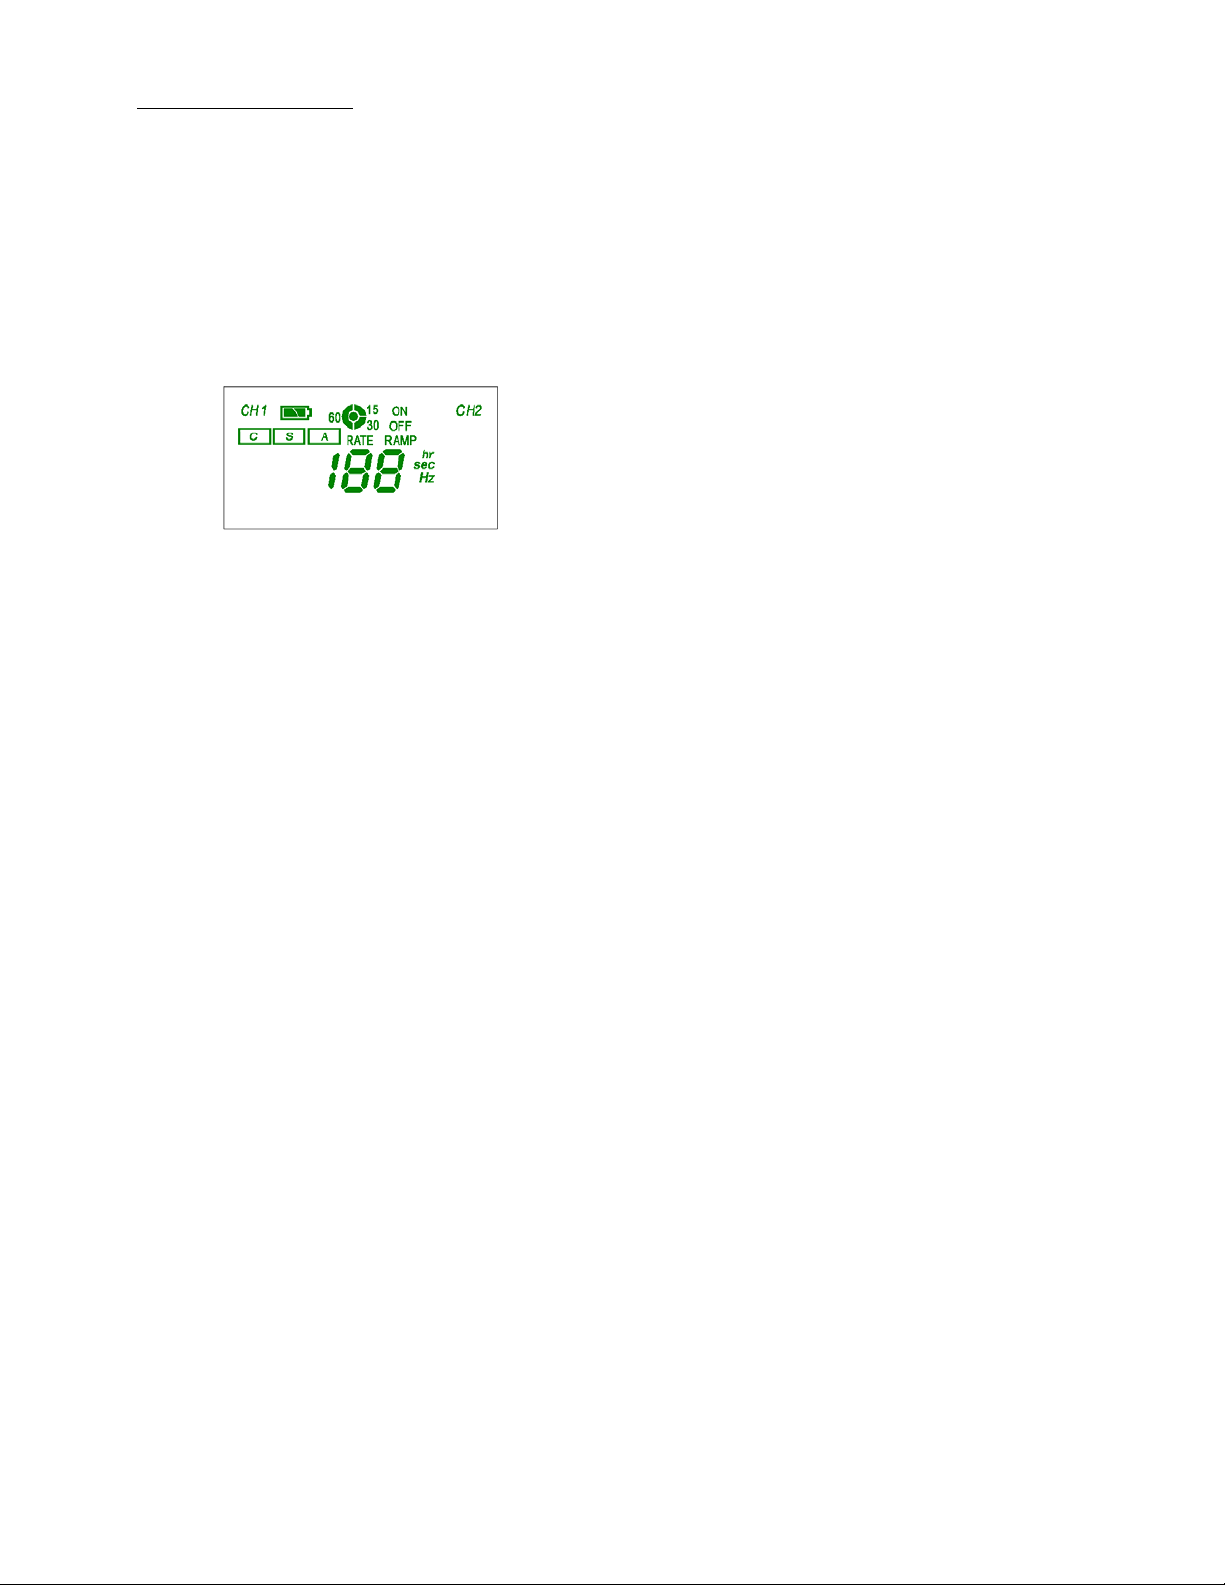
A 9-volt disposable battery is provided with your unit. When the low battery mark light on
the LCD the battery has become too weak to power the unit and it is time to change the
battery. At this point, the unit will shut off until a fresh battery is inserted.
- 6 -
Page 9

CHANGING THE BATTERY
When the low battery mark light is on the LCD panel, the battery should be replaced with
a fresh battery.
1. Remove the panel cover by pressing the top and sliding down until is completely
removed from the unit this will reveal the battery compartment.
2. Remove the discharged battery from the device.
3. Place new battery in compartment. Note the proper polarity alignment indicated on
the battery and the compartment.
CLEANING FOR YOUR DEVICE
Your device may be cleaned by wiping gently with a damp cloth moistened with mild
soap and water. Never immerse the device in water or other liquids.
Wipe lead wires with a damp cloth as above if they become soiled.
To properly store the device for an extended period of time, remove the battery from the
unit. Put the unit and accessories in the carrying case and store in a cool, dry location.
TROUBLESHOOTING
If the device does not function properly:
1. Make sure the battery is properly installed or replace battery. Be sure to observe
proper polarity markings when replacing the battery. If the low battery mark light is
on the LCD pane when the unit is turned on, replace the battery and check again.
2. If the intensity has been adjusted and there is no stimulation, check that the lead
wires are properly connected and the electrodes are in place. If the unit appears to
be functioning and no stimulation, the lead wires or electrodes may need to be
replaced.
3. If the battery appears to be charged and the unit is not functioning, turn both
intensity Control Knobs to the OFF position (counter clockwise) for about 5
sec. Then gradually turn the intensity Control Knob clockwise until stimulation is felt.
If device still is not working, turn the unit off and contact your distributor.
If there is any other problem, please consult or return the device to your
- 7 -
Page 10
distributor. Don’t try to repair a defective device.
TECHNICAL SPECIFICATIONS
Channel: Dual, isolated between channels
Pulse amplitude: Adjustable 0-80mA peak into 500 Ω load each channel,
Pulse Rate: 1Hz-160Hz (adjustable), 1Hz/step
Pulse Width: 250μs fixed.
Patient Compliance counter: Shows the treatment times. Account by hours.
Timer: 15, 30, 60 minute and continue selectable
LCD: Shows modes, pulse rate/On/Ramp/Off time, timer,
ON Ramp: Adjustable 1-8 seconds. 1sec/step.
Cycle ON Time: Adjustable 1-30 seconds. 1 sec/step.
Cycle OFF Time: Adjustable 1-30 seconds. 1 sec/step.
constant current
CH1/CH2.
Function Modes:
S: Synchronous.
C: Constant.
A: Alternation.
Wave form: Asymmetrical Bi-phasic square pulse.
Max charge per pulse: 20 micro-coulombs.
Voltage: 0-110 Volt (Open Circuit).
Power Source: 9-Volt Battery.
Dimensions: 108mm(H) ×61.5mm(W) ×25mm(T).
Weight: 140grams (battery included).
All electrical specifications are ±10% 500Ω load.
- 8 -
Page 11

PROCEDURE OF Compliance meter SETTING (Special for physician)
When the doctor want to see the compliance meter, to reset the compliance meter.
You must go into the doctor mode first.
1. Enter to Doctor mode: Press and hold on ‘TIME’ key, then turn on the unit with channel
1/2 knob. If you can see the ‘hr’ unit show on the LCD (the rate is 0 Hz), you are in the
doctor mode.
2. See Compliance meter value: After you enter the doctor mode, the compliance
meter value is showing on the LCD with ‘hr’ unit.
3. Reset the compliance meter value: When the doctor want to reset the compliance
meter value for a new treatment cycle, you can do as the follow steps:
When you are in the doctor mode, press ‘MODE’ key first, then press ‘▼’ key. Thus, the
value will be reset.
4. Exit the doctor mode: Turn off the unit, it will leave the doctor mode.
5. User mode: Normally turn on the unit (not hold on any keys), then you are on the user
mode.
Printed in Taiwan (Gemore 2003-QSL-AQ-7425) OP-320EC(V)-A01
- 9 -
Page 12

- 10 -
 Loading...