

Page 1
THIS PRODUCT IS NOT TO BE INSTALLED, DIRECT WIRED, OR BRANCHED TO THE BUILDING ELECTRICAL CIRCUIT/WIRING SYSTEM !
DO NOT MODIFY OR ALTER ANY PORTION OF THE COMPONENTS OF THE FACTORY ASSEMBLED APPLIANCE
Do not install this product near water, example, near a sink, tub, shower, swimming pool or laundry area.
Manufacturer is not liable for damages due to improper installation methods not followed herein.
This product does not have built-in electronic circuitry for surge protection or A/C filtering.
It is recommended that this product be connected to a quality surge-protector/power conditioner for equipment protection.
Disclaimer. HD-Products, Inc. the Manufacturer, it's agents, suppliers, and affiliates, shall not be liable for any damages, not limited to; misuse, acts of nature,
verbal and written expression and improper installation. Improper installation is determined such to include, not limited to, non-code compliant installation, product
modifications, alterations, adjustments, and substitutions of components or materials.
Limited 2-year Warranty from Manufactures Defects: The SBCK has a Limited Two Year product warranty against manufacturer's defects.
If you have any questions or experience any problems with this product, please contact HD-Products Customer Service.
In-Wall Power for SoundBar
SoundBar Connector Kit Model SBCK
Power Extension Cable Management
Kit Includes:
Slim-line In-Wall Power Outlet and Cable Pass Panel Pre-wired PowerConnectors.
1’ outlet connection / 6’ inlet connection. Cutout template.
PowerOUT Panel
Tools for Installation
Not Included
Stud Finder
Level
Drywall Saw
!
HD-Products, Inc., intent to make this manual accurate and complete. However, HD-Products, Inc., makes no claim that the information contained herein covers all details, conditions, or
variations. Nor does it provide for every possible contingency in connection with the installation or use of this product. The information contained in this document is subject to change
without notice or obligation of any kind. HD-Products, Inc., makes no representation of warranty, expressed or implied, regarding the information contained herein.
HD-Products, Inc. PowerBridge Solution 3869 Norwood Dr. Littleton, CO 80125 USA
Customer Service: 303-683-2434 [email protected] www.PowerBridgeSolution.com
Part No. 1113-1 2013 All Rights Reserved Patent Pending
Flat-Blade
This product SBCK requires installation with PowerBridge In-Wall Power Kits only.
Install only with models- TSCK, TSCK2, ONE-CK, TWO-CK, SWCK
!
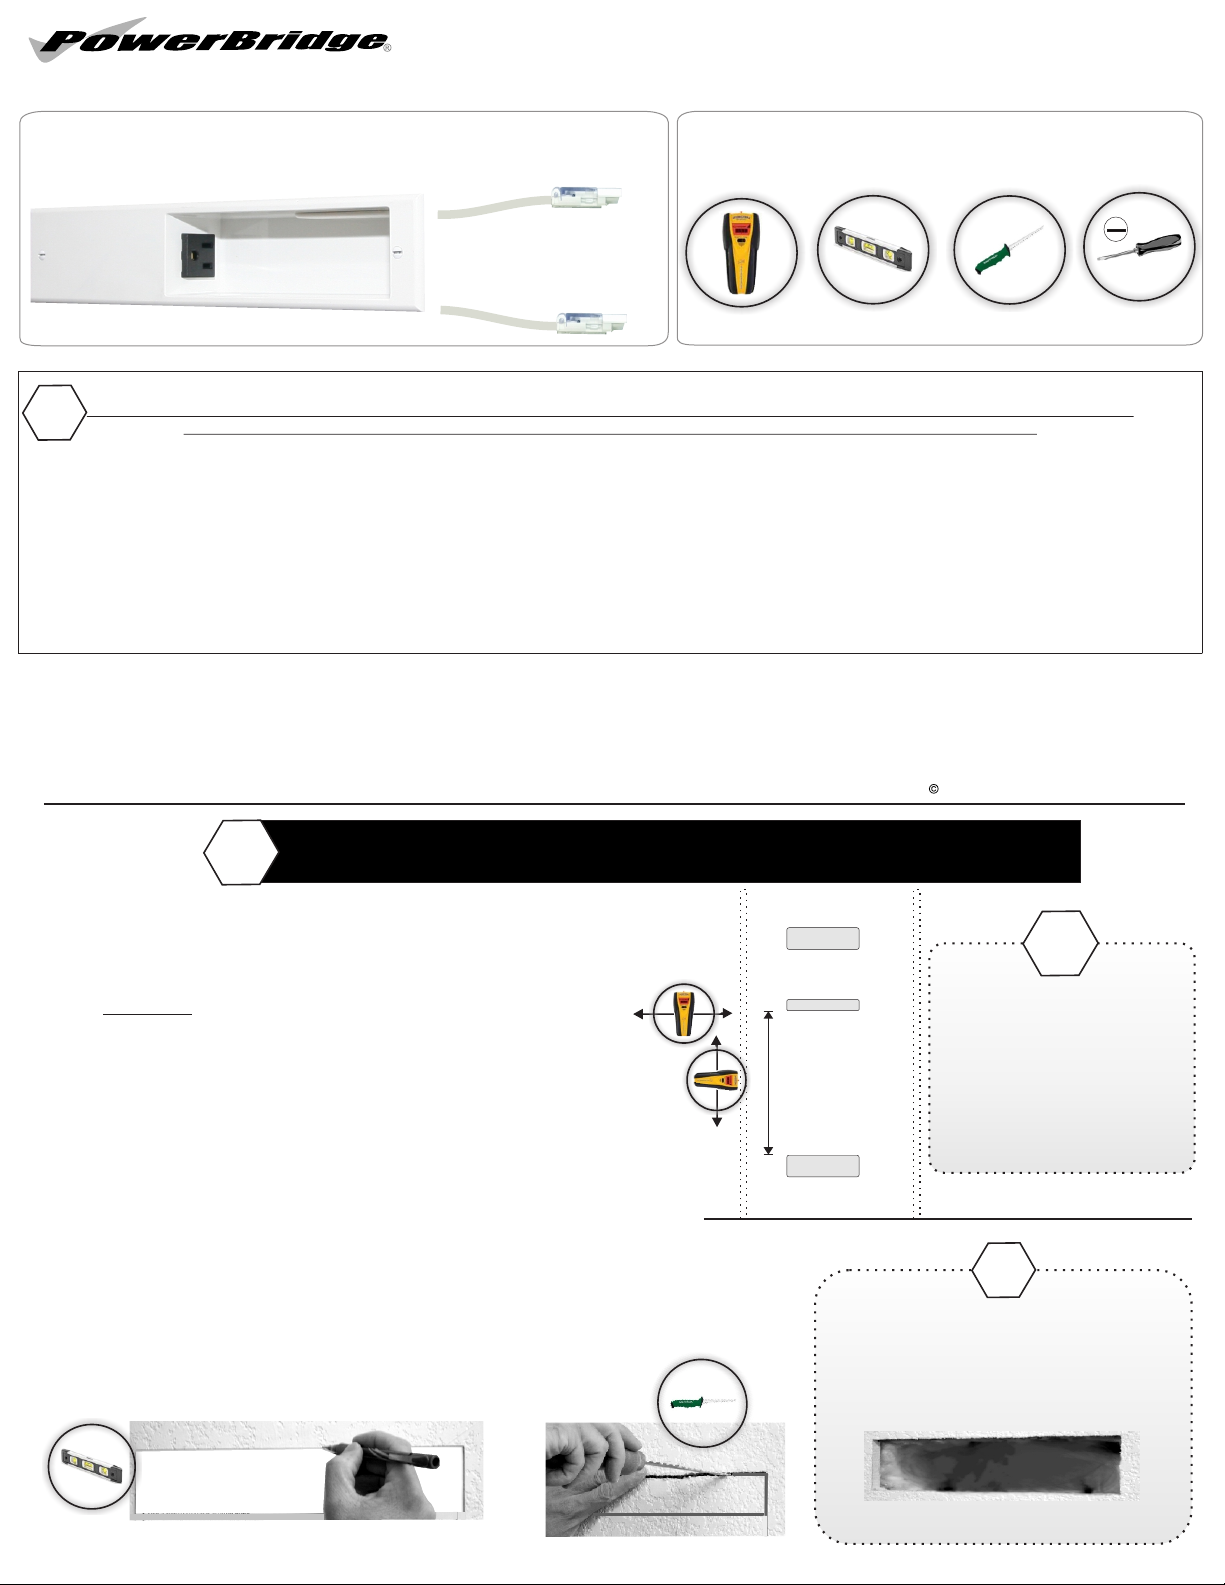
Step 1 Location - Wall Cutout
Determine SoundBar wall mount location.
Align between wall framing studs.
Use stud finder to determine in-wall obstructions between
PowerOUT
SoundBar
!
Only attempt installation within
2x2 or 2x4 wood/metal stud
framed wall.
framing both VERTICALLY and HORIZONTALLY.
Install horizontal below, TV PowerOUT and wall bracket.
Align with upper TV PowerOUT within same stud-bay
Do not exceed more
than 60” apart
PowerIN
Extend distance between
SoundBar and PowerIN
use optional part CKRE
PowerConnect Extension
no more than 60” apart.
Install no more than 60” apart from the lower PowerIN,
unless you install optional PowerConnector Extension part CKRE
Use supplied template sheet to mark area to cut out from drywall.
Use a level to maintain proper alignment.
Carefully use drywall saw to cut along outside of line.
LEVEL
Wall Cut-out Template:
Lay against wall, use a level on edge of pape
Use a pencil to trace around edge.
Use drywall saw or sharp utility knife cut on t
If insulation exists, remove or push
completely away from the openings
to allow flush mounting properly.
!
|
Page 2
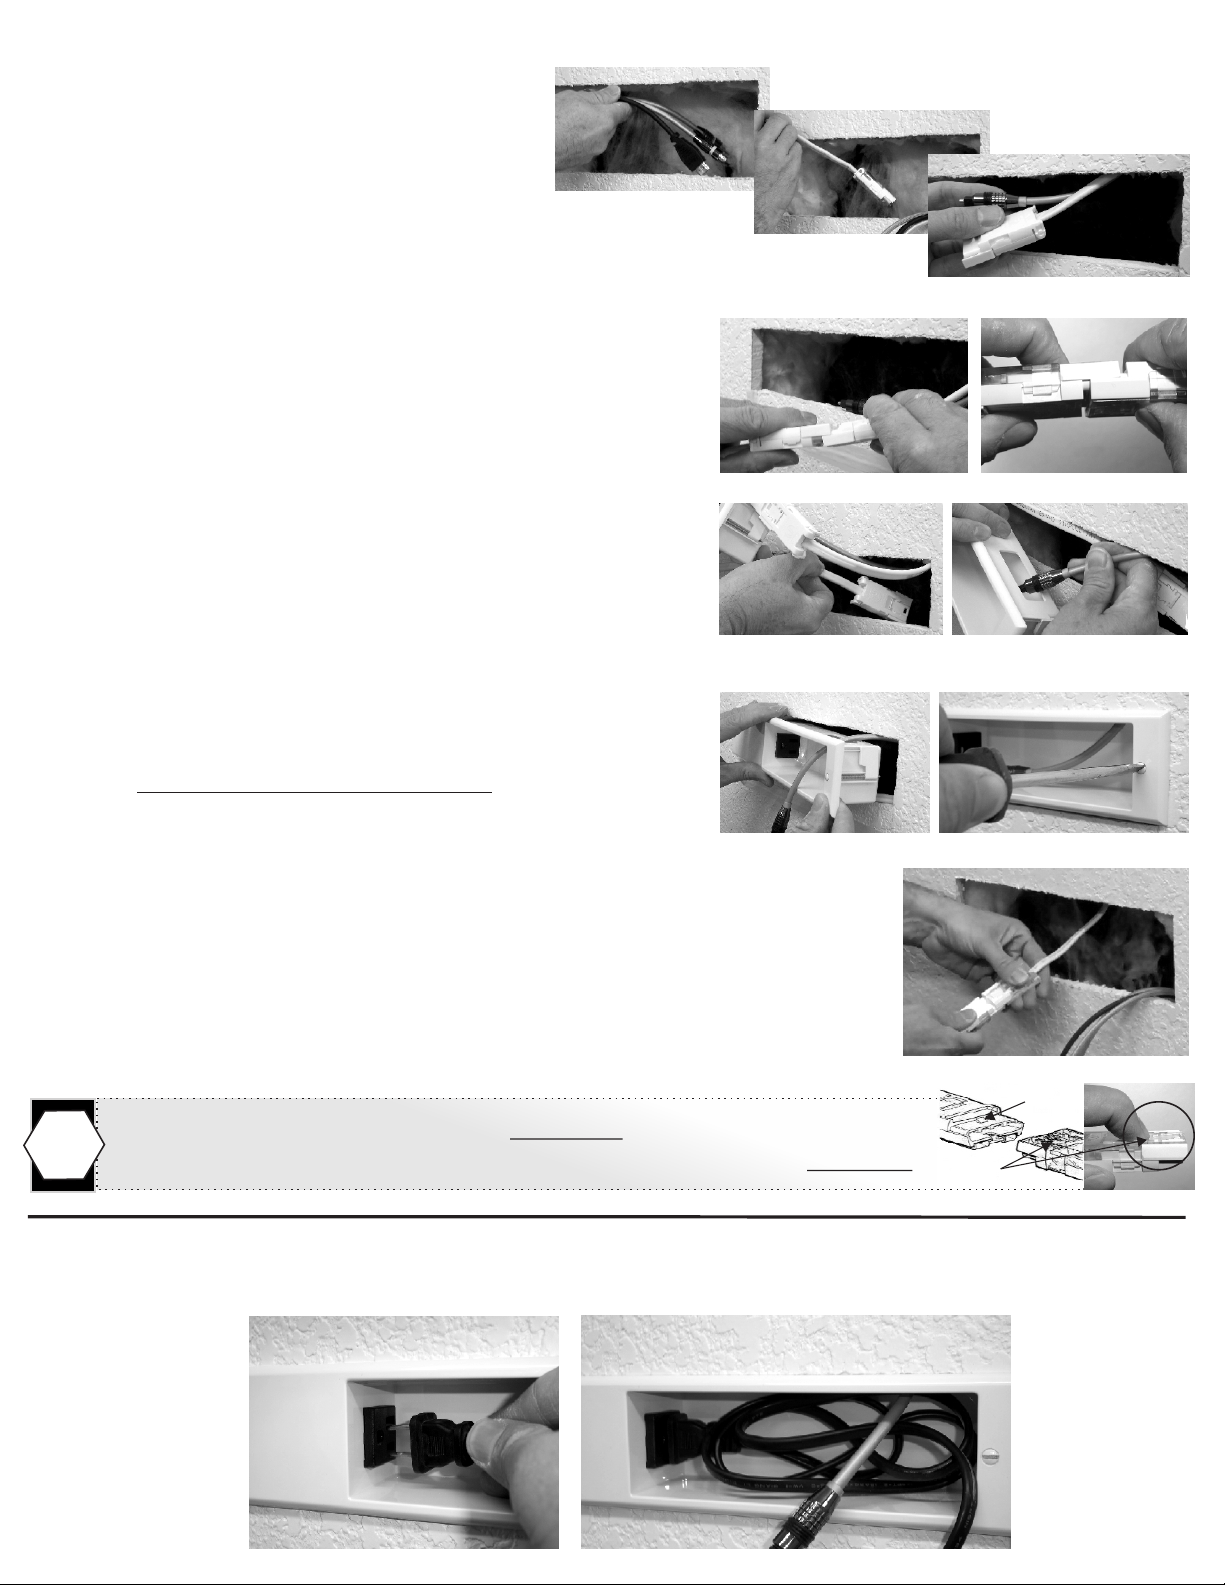
Step 2
A) Begin at the upper TV PowerOUT location.
1) Drop / wall-fish audio cables to the SoundBar
2) REPEAT for PowerConnect cable with connector.
3) Pull PowerConnect cable and audio cable through SoundBar cutout.
Connect the upper PowerOUT PowerConnect Cable connectors
B)
together to the short 1’ top PowerConnect Cable of the SoundBar.
You should hear a click sound locking both together.
C) Drop / wall-fish 6’ PowerConnect cable down
to the PowerBridge PowerIN location.
D) Slide any audio cables from the TV through cable opening.
Wall Installation
A1) Audio Cables from TV
A2) PowerConnect (TV)
A3) SoundBar opening
E) Slide SoundBar power panel into wall opening.
Use Flat-Blade screw driver to secure panel to wall.
Careful to not over-tighten
F) At PowerIN location, connect both PowerConnect Cable connectors together.
You should hear a click sound locking both connectors together.
Complete installation of PowerBridge Power Kit.
To disconnect PowerConnectors, push-in end of Locking Latch on the top side of both connectors.
Press with finger tips at the same time pulling apart connectors to disconnect from Locking Tabs.
!
Plug in SoundBar power cord. Wind cord in cavity.
Step 3
Install SoundBar per manufactures directions.
Locking Tab
Locking Latch
 Loading...