

POWERbreathe K-Series Quick Start Manual
Version 2.0 | May 2012 Public Page 1 of 3
Breathe-Link Quick Start Guide
The quick start guide is provided for quick reference only. We recommend that you read the full
manual before starting training for the first time.
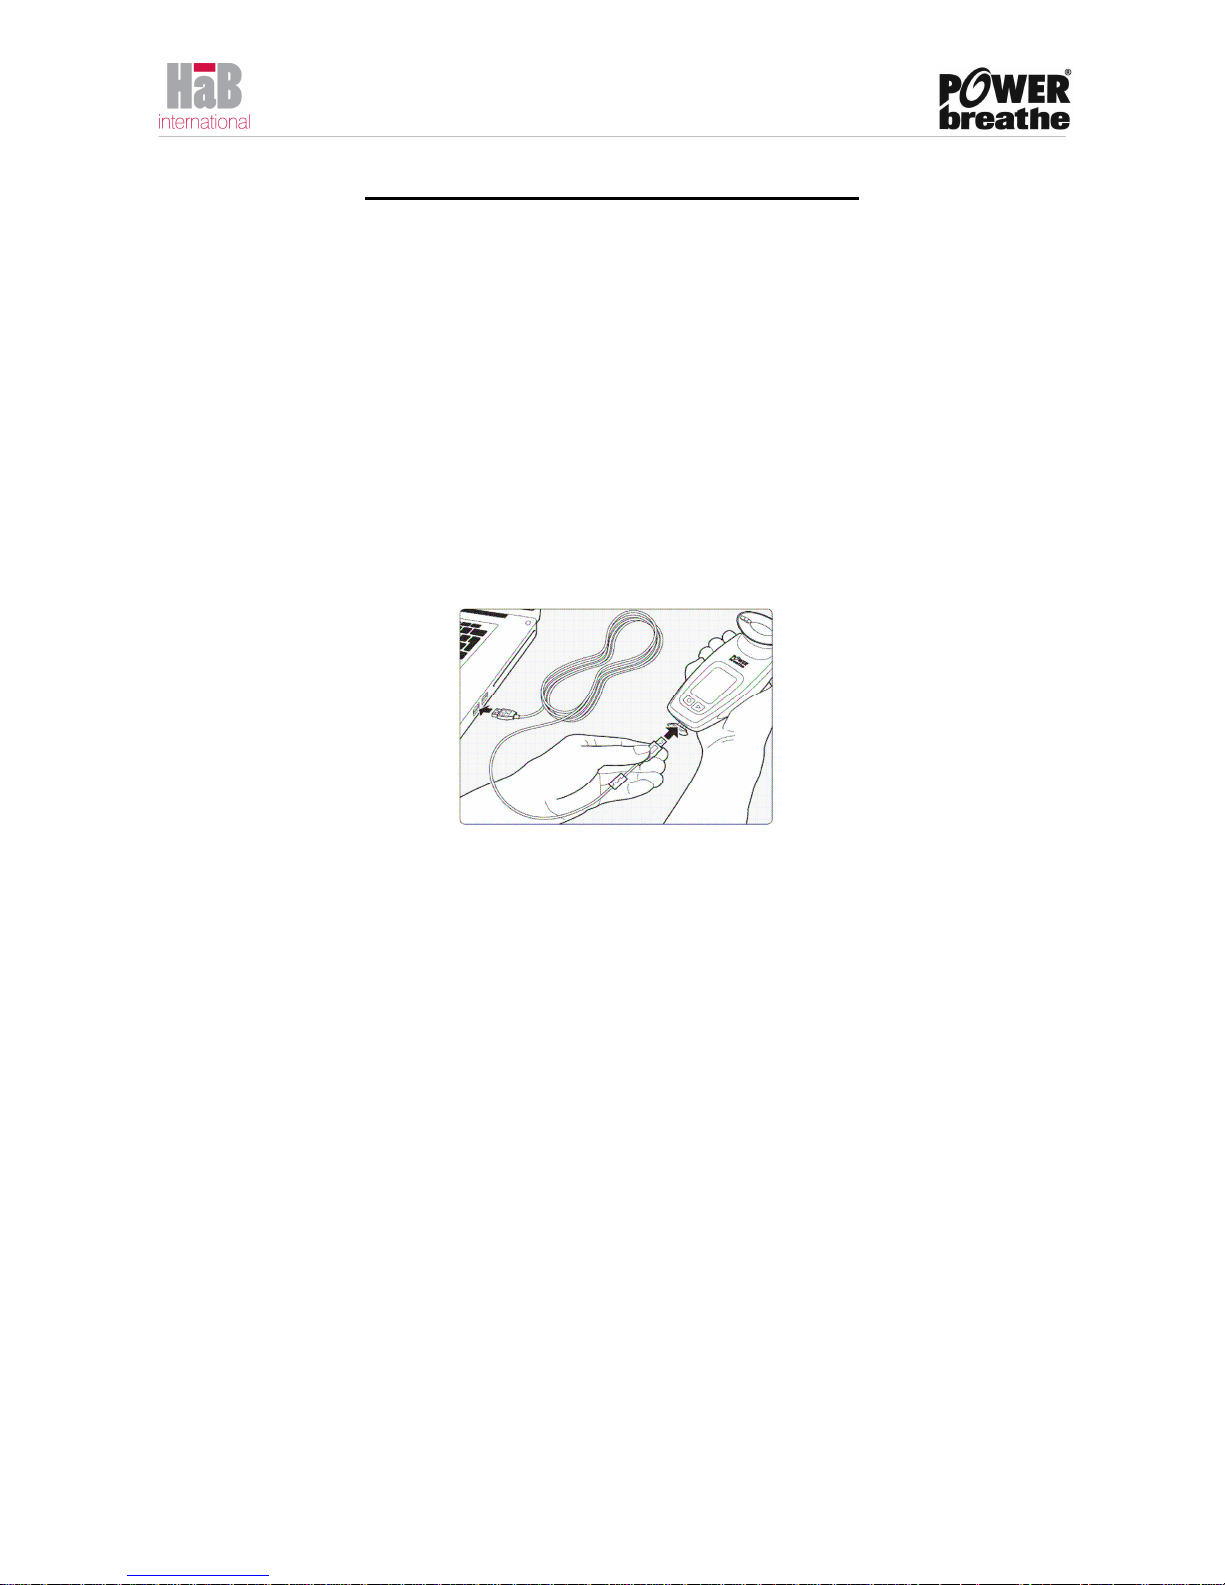
Connecting POWERbreathe K-Series device to PC
To connect the POWERbreathe K-Series device to your PC, You need to have installed the BreatheLink software and relevant drivers first.
1. Using the USB cable supplied, connect the mini USB end of the cable to the POWERbreathe
K-Series device at the charging port.
Figure 1 Connect POWERbreathe K-Series to PC
2. Connect the standard USB end of the cable to your PC USB ports.
3. Ensure that the POWERbreathe K-Series device is switched OFF. The POWERbreathe LCD
should be blank. (Please note in some instances the Red Charge light may be on.
It is OK to
start the Breathe-Link application).
4. Installing the software and drivers for the first time wait for 10 seconds so that the PC can
establish communications with the relevant device drivers. For windows
2000 or later a
windows message should appear notifying you that a new USB hardware was found. After
the initial connection, the wait time should be reduced to no more then 5 seconds.
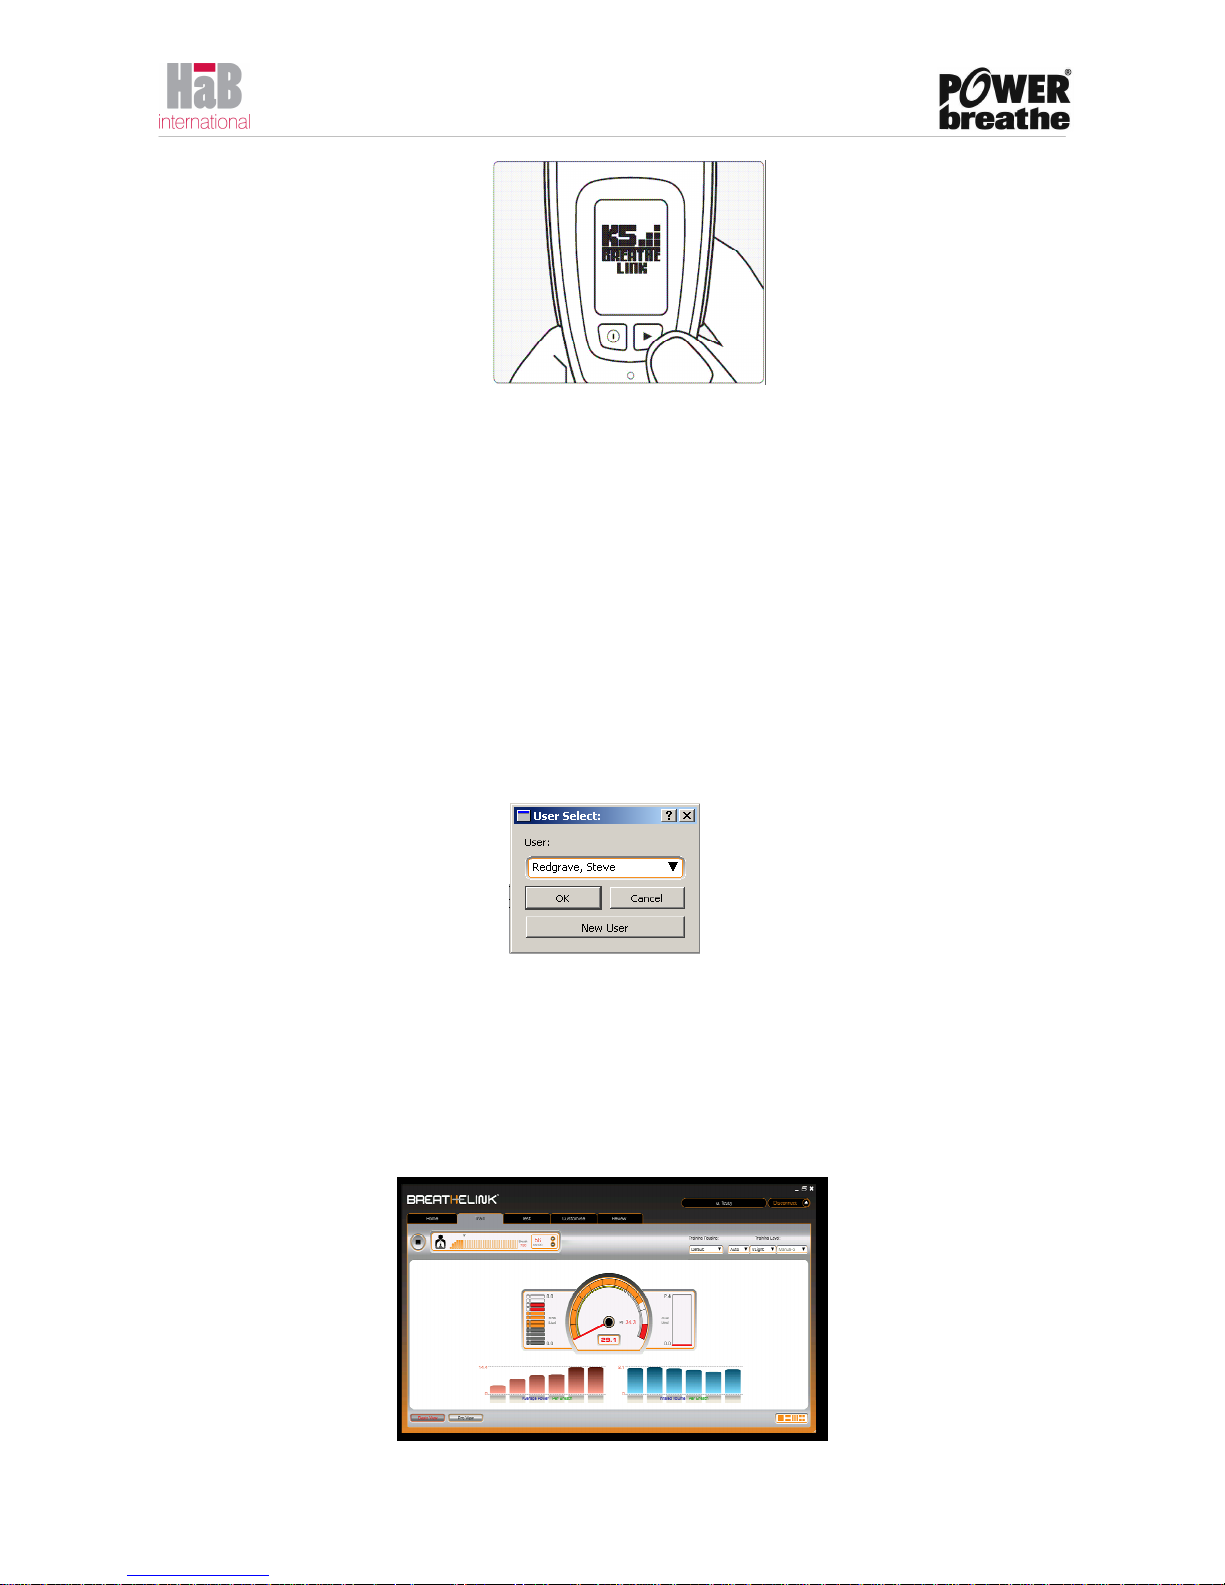
5. Start up Breathe-Link software, at this stage the application will initialize the POWERbreathe
K series device. The Breathe-Link screen will appear on the
POWERbreathe K-Series device.
Breathe-Link application will show an Breathe-Link logo screen and the valve will move
to the open position indicating that both the POWERbreathe K-Series device and the
Breathe-Link software are synchronised. The connect button will also change text to
disconnect indicating that the POWERbreathe K-Series device and Breathe-link has
successfully connected.
6.
If you receive a message stating that no POWERbreathe K-Series device is not
connected then go to section 3.3 Breathe-Link Driver Information.
Version 2.0 | May 2012 Public Page 2 of 3
Figure 2 POWERbreathe Device is Connected (K5 Representation)
Register as a New User
The first time you access the Breathe-Link software; you will need to register as a new user.
To create a new user profile click on the new user button from the user select dialog box.
You are prompted to enter the Units of Measurement, Date of Birth, Weight, Height and
Gender. This information will be used to estimate your predicted inspiratory muscle strength and
provide feedback on your performance. This information can be edited at any time within the
software.
1. Connected the POWERbreathe K-Series device to the PC via the supplied USB cable.
2. Start up the Breathe-Link Software from the start tool bar.
3. A Login dialog box appears on screen, click on New User button.
Figure 3 Breathe-Link User Select Dialog (K5 Representation)
4. New User Profile Input form will appear. Enter your Name, Height, Weight, Date of Birth and
select Unit type.
Please Note: Predicted inspiratory muscle strength values are
5. Click OK. A new user profile will be created.
6. Enter Training Screen by clicking on the Tab labeled ‘Train’. The default setting will be the
Basic graphical view screen.
Figure 4 Breathe-Link Basic Screen (K5 Representation)
 Loading...