

Page 1
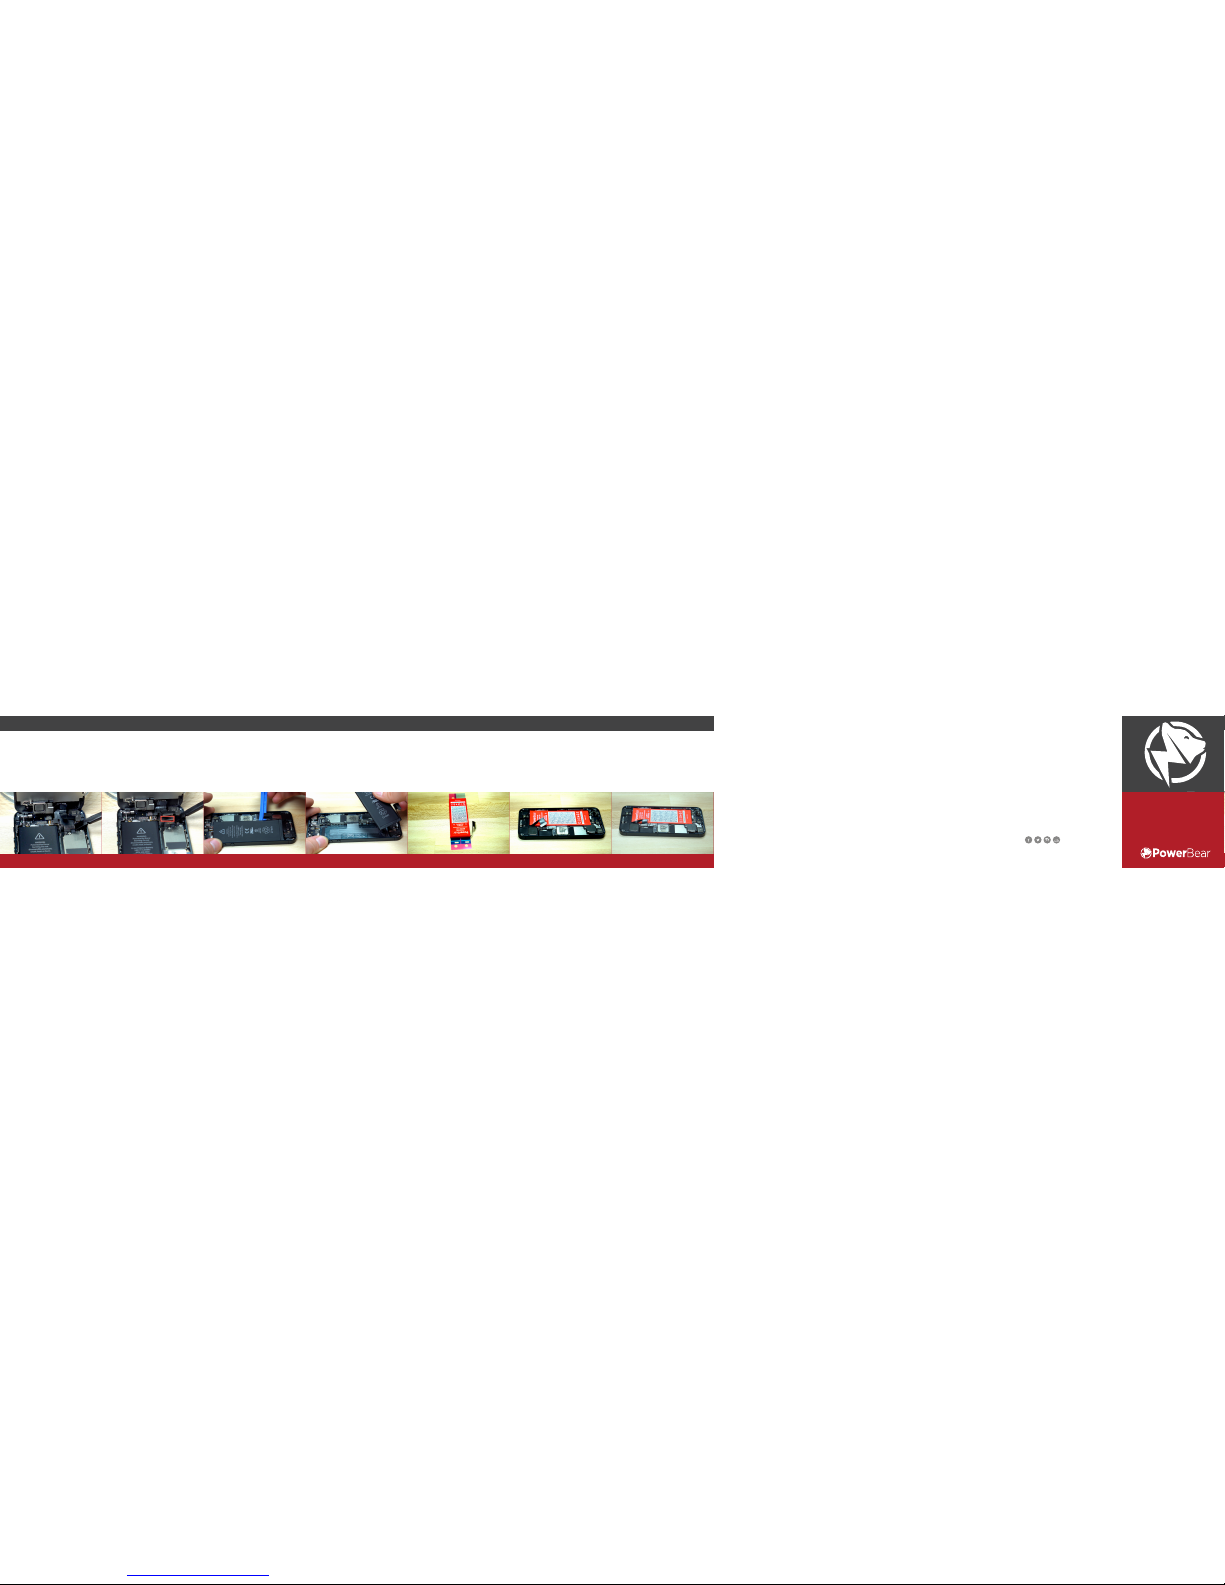
Connect the battery to
the Logic Board. Follow
the in reverse to
complete the installation.
Congratulations! You now have
a fully functioning brand new
PowerBear Battery!
Place the new battery into
the housing of the phone.
Apply the battery adhesive
to your new PowerBear
Battery. Make sure that it is
on the correct side before
applying it permanently.
When the battery comes
free, remove it from the
housing.
Once the cables are disconnected,
remove the screen from the
housing and begin to pry out the
battery with the Plastic Opening
Tool. Make sure to not put any
excessive pressure on the battery
and avoid prying against the
sensitive technology underneath
the plastic tab.
Disconnect the Digitizer
Cable from the Logic Board
with the Spudger.
Disconnect the LCD Cable
from the Logic Board with
the Spudger.
STEP 10 STEP 11
STEP 13
STEP 14 STEP 15 STEP 16STEP 12
REPLACING THE iPHONE 5 BATTERY
REPLACING THE
iPHONE 5 BATTERY
The Perfect Solution:
PowerBear batteries are engineered to perfectly complement
your iPhone 5 Battery. When high-performance, quality, and
longevity are your criteria, PowerBear is your answer! Our
batteries are designed to meet and exceed factory specifications so now you can get more out of your device. Newer
means better than New!
Powerful and Responsible:
PowerBear Batteries are made with high capacity grade A+
battery cells and are environmentally responsible. They feature RoHS certification to be free of lead, mercury, cadmium,
PBBs, and PBDE.
24 Month Warranty:
We aim to reach the highest limits of customer service
excellence! If there is ANY REASON why you are unhappy
or unsatisfied with ANY of our products, we guarantee you
an exchange or refund within 2years! If you want to register
your warranty, please visit: mypowerbear.com/warranty to
register your product today!
Go Beyond Your Power:
Keep yourself powered with PowerBear Accessories! We offer top quality products to reliably ensure that you and your
phone are always energized. Products include battery cases,
spare batteries, extended batteries, power cables, and all
your power needs. We’re dedicated to make your life easier
by taking the responsibility of keeping your phone charged
away. Using PowerBear products will make life easy again!
Safety and Maintenance Guide:
Your device is a product of superior design and craftsmanship but should be treated with care. The following
suggestions and recommendations will help you prevent any
damages or injury:
• This product contains a lithium polymer battery. Most battery
issues arise from improper handling of this product and/
or continued use of damaged batteries. DO NOT put a high
degree of pressure on the battery, or attempt to change the
form of the battery; these are the main cause of overheating.
Avoid dropping, knocking or shaking the device to prevent
damage of battery.
• Keep both the device and battery away from liquids and
sources of extreme heat or excessively cold temperatures. The
safe operable temperature range of this product is between
-20°C and 60°C (-4°F and 80°F) for maximum eciency.
• In case of battery liquid leakage, keep away from eyes and
skin.
• DO NOT use harsh chemicals, paints or cleaning solvents to
paint or clean the device.
• DO NOT touch the battery with a metal object, this can cause
short-circuiting and can damage the battery.
• If the product begins to overheat, turn o the device and
leave it to cool to a safe temperature and then proceed to
remove the product from the device as well as disconnecting
any cables/power sources from the device until deemed safe.
• DO NOT disassemble battery or any other component of this
device.
• If your suspect your PowerBear© device is defective or
malfunctioning, especially if the unit becomes excessively hot
to the touch, emitting odor, is deformed, cut or is operating
abnormally, DISCONTINUE USE IMMEDIATELY AND CONTACT
US.
• PowerBear© does not recommend use of this device by a
minor. However, if this device is intended to be used by a
minor, the adult purchaser agrees to provide detailed instructions and warnings to minor-user prior to any use. Failure
to provide warnings is the sole responsibility of the adult
purchaser, who agrees to indemnify PowerBear© from misuse
or unintended use by the minor-user.
• KEEP THIS AND ANY OTHER ELECTRONIC DEVICE AWAY
FROM CHILDREN AND ESPECIALLY INFANTS. The battery in
this unit contains chemicals harmful if ingested or comes in
contact with skin directly. If ingestion or skin contact occurs,
contact your local Poison Control Center or the American
Association of Poison Control Centers at 1-800-222-1222.
Warranty Note:
PowerBear© is not responsible for any damage caused by the
consumer. We only provide coverage for manufacturer defects
or damage caused by improper shipping and PowerBear©
cannot be liable for property damage or personal injury from
the mishandling, misuse, or negligence by a consumer or any
of their agents.
Disclaimer:
Except as expressly provided herein, provider disclaims all
warranties, express or implied, including without limitation,
any warranty or merchantability or fitness for a particular purpose, with regard to the US. No commercial or any other than
individual use is intended for PowerBear© products.
Terms & Conditions: FCC Class B Notice
This device complies with Part 15 of the FCC Rules. Operations
is subject to the following two conditions:
1. This device may not cause harmful interface.
2. This device must accept any interference received, including
interference that may cause undesired operation.
FCC Note:
This equipment has been tested and found to comply with the
limits for Class B digital device, pursuant to Part 15 of the FCC
Rules. These limits are designed to provide reasonable protection against harmful interference in a residential installation.
This equipment generates, uses and can radiate radio frequency energy and, if not installed and used in accordance with
the instructions, may cause harmful interference to radio communications. However, there is no guarantee that interference
will not occur in a particular installation. If this equipment
does cause harmful interference to radio or television recep-
@gopowerbear
tion, which can be determined by turning the equipment o
and on, the user is encouraged to try to correct the interference by one or more of the following measures:
• Reorient or relocate the receiving antenna.
• Increase the separation between the equipment and receiver.
• Connect the equipment into an outlet on a circuit dierent
from that to which the receiver is connected.
• Consult the dealer or an experienced radio/television technician for help.
• Consult a certified device provider for more help.
Disposal:
Regulations and laws pertaining to the recycling and disposal
of lithium ion batteries vary from country to country as well
as by state and local governments. You will need to check
the laws and regulations where you live to figure out. USA
and Canada customers may find a nearby Drop-O locator
by calling Call2Recycle at 1-877-273-2925.
Contact Us:
Any questions, inquiries, concerns, suggestions or even a
friendly hello can be sent to us via the following gateways:
Amazon(US): www.goo.gl/vmiqxe
Email: [email protected]
Website: www.gopowerbear.com
Hope to hear from you soon!
Thank you for your purchase!
Page 2
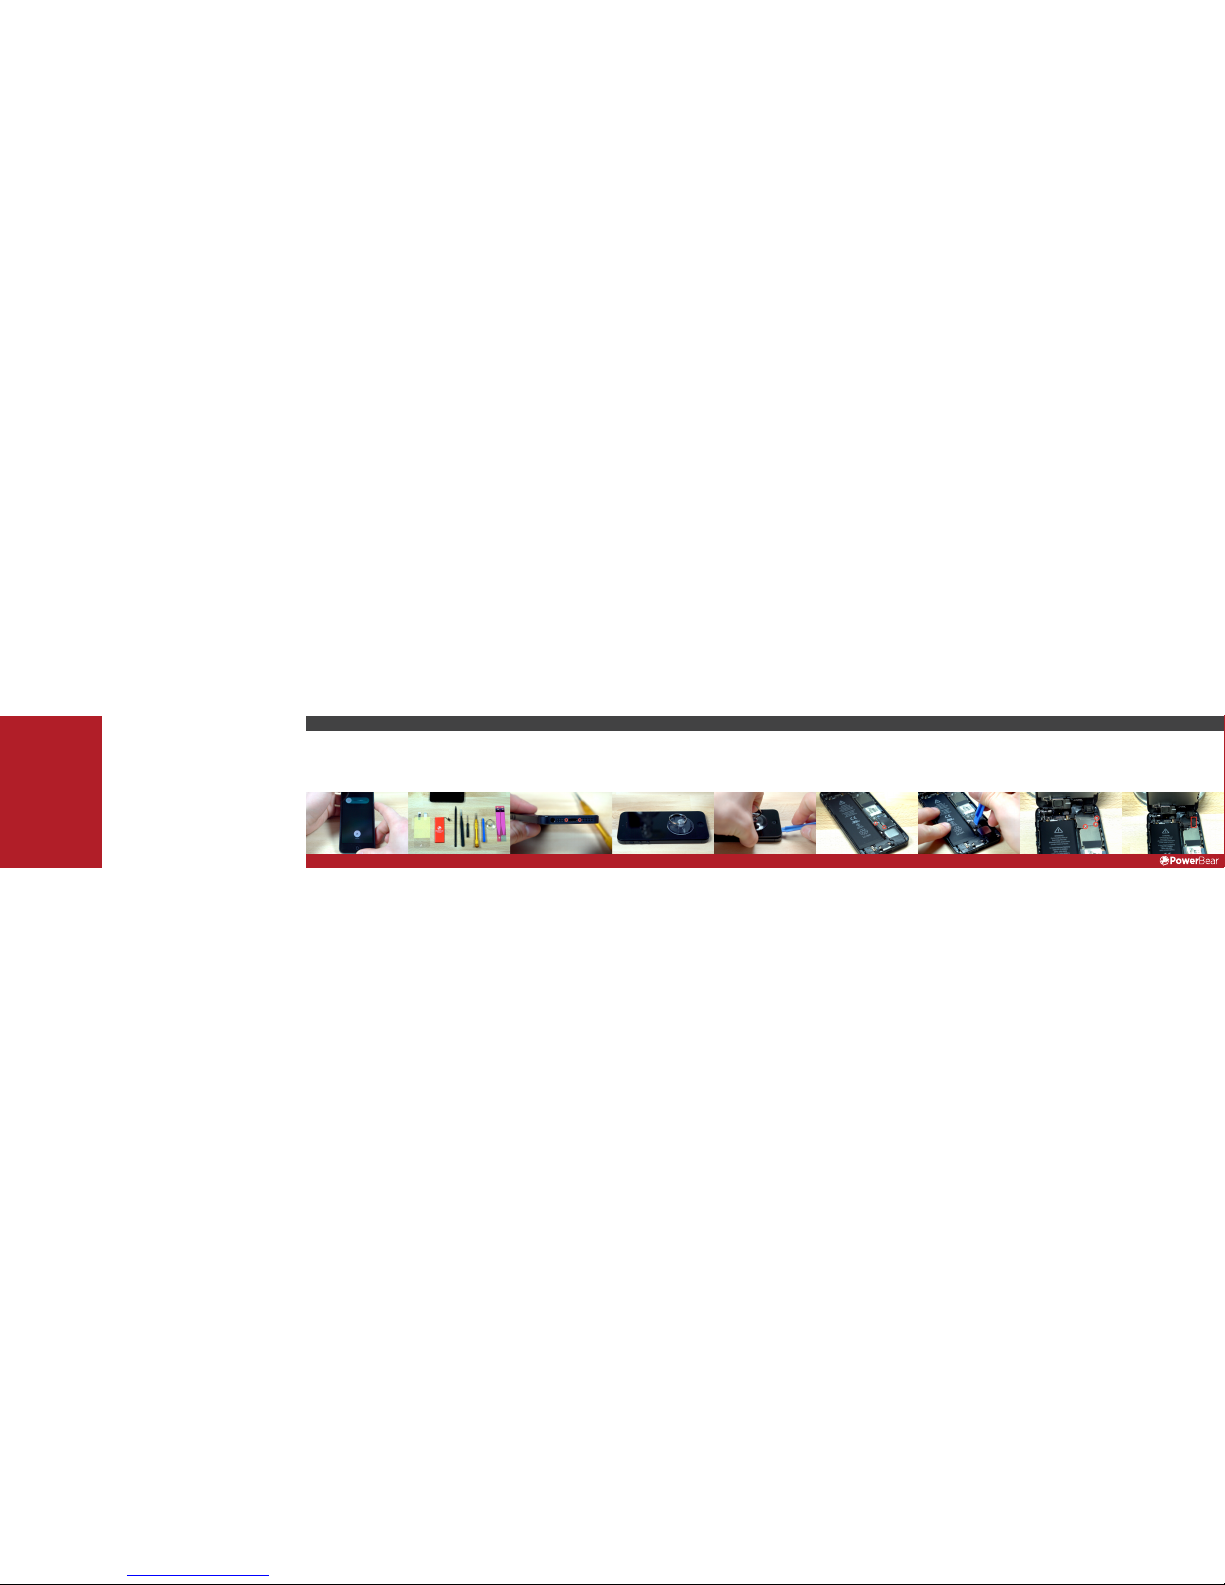
Disconnect the Front Facing
Camera and Sensor Cable
from the Logic Board with
the Spudger.
Unscrew the three screws
from the Screen Cable
Bracket with the Phillips
Screwdriver and remove the
panel with the Tweezers.
Disconnect the battery
connector from the Logic
Board with the Plastic
Opening Tool.
Once the screen is separated,
prop the screen against a heavy
bottle with a rubber band
and remove the two screws
securing the battery connector
with the Phillips Screwdriver
and remove the panel with the
Tweezers.
Steadily start to pull up on the
suction cup while using the palm as
leverage and begin to pry the screen
from the housing with the Plastic
Opening Tool. We recommend to
start from the headphone jack and to
work your way around slowly since it
is held tightly.
Place the suction cup on the
bottom of the phone next to
the home button creating an
airtight seal.
Neatly arrange all the
contents from the kit on a
table and double check that
all the tools are present. Make
sure to have a clean and
organized workspace before
proceeding.
Turn your phone o at least
20 minutes prior to any step.
Locate and remove the two
pentalobe screws with the
Pentalobe Screwdriver found
on the bottom of the phone
next to the lightning port.
STEP 5STEP 2STEP 1 STEP 3 STEP 4 STEP 6 STEP 7 STEP 8 STEP 9
REPLACING THE iPHONE 5 BATTERY
WARNING!
BEFORE STARTING ANY
PROCESS INSTRUCTED IN
THIS MANUAL, PLEASE MAKE
SURE YOUR DEVICE HAS BEEN
POWERED OFF FOR AT LEAST
20 MINUTES PRIOR TO ANY
OPERATION. THIS LOWERS THE
RISK OF BATTERY DAMAGE
WHEN REMOVING IT FROM
YOUR DEVICE. BY PROCEEDING
WITH THE REPLACEMENT
OF YOUR BATTERY YOU ARE
ASSUMING FULL RISK AND
DO NOT HOLD POWERBEAR
LIABLE FOR ANY DAMAGE
TO YOU OR YOUR DEVICE.
PLEASE REFER TO THE BACK
OF THE MANUAL FOR FURTHER
DETAILS.
PLEASE NOTE THAT WHEN
REMOVING THE ORIGINAL
BATTERY THERE MAY BE
LEFTOVER BATTERY ADHESIVE.
DO NOT FORCEFULLY REMOVE
THE BATTERY OR CAUSE ANY
DEFORMATIONS. PLEASE BACK
YOUR PHONE UP AS AN EXTRA
MEASURE OF PRECAUTION.
Product Features & Contents:
The PowerBear iPhone 5
Replacement Battery Kit arrives
with the following:
• 1 PowerBear iPhone 5 Battery
• 1 Pentalobe Screwdriver
• 1 Metal Tweezer
• 1 Suction Cup
• 1 Spudger
• 1 Plastic Opening Tool
• 1 Set of Adhesive Strips
• 1 Phillips Head Screwdriver
Battery Usage/Calibrating
Instructions:
Do not allow the battery to drain
completely before charging. Overdischarging the battery causes
damage to the negative electrode
before it is properly calibrated,
which in turn reduces the lifetime
of the battery.
1. Allow the battery to drain
completely.
2. Once the battery has died, let
it charge undisturbed until it
reaches 100%. DO NOT use
your device during this time.
3. Allow the battery to
completely drain again before
the next charge cycle.
4. Repeat steps 1-3 around 3
times. Your battery should now
be properly calibrated with
your phone.
 Loading...