

PowellKids 929-290 Assembly Instructions Manual
ASSEMBLY INSTRUCTIONS (EL)
MODEL NO. 929-290
PARTS
(A) VANITY TOP
(B) LONG LEGS (4)
(C) BENCH TOP
(D) SHORT LEGS (4)
(E) MIRROR
(F) MIRROR POSTS (2)
(G) DECORATION
(H) DRAWER
HARDWARE ILLUSTRATION
O J K N I L M
Tools required: Screwdriver (not included)
IMPORTANT NOTE: Follow instructions listed below in the
proper sequence as numbered to assure fast, easy and
correct assembly.
1. Note: Upon opening, thoroughly clean all wood surfaces
with furniture polish to remove dust and dirt that may
have settled onto finish during shipment.
(I) LONG SCREWS (16)
(J) LARGE WASHERS (16)
(K) SHORT SCREWS (4)
(L) T-BOLTS (2)
(M) MIRROR HANDLES (2)
(N) MEDIUM SCREWS (2)
(O) SMALL WAHERS (6)
Made in China
Thank you for purchasing this quality product. Be sure to
check all packing material carefully for small parts which
may have come loose inside the carton during shipment.
Separate, identify, and count all parts and metal
hardware. Compare with parts list to be sure all parts are
present. If any part(s) are missing or damaged, phone,
fax, or mail to our Customer Service Department. For
efficient and speedy service, please indicate the model
number and code letter of part(s) needed.
ATTENTION: SOME NUMBERED PARTS LISTED ON THE
INSTRUCTION SHEET MAY NOT BE IN PARTS BAG AS THEY MAY
ALREADY BE ASSEMBLED. CAREFULLY CHECK PARTS AND
PACKING MATERIALS PRIOR TO ORDERING REPLACEMENTS.
#1
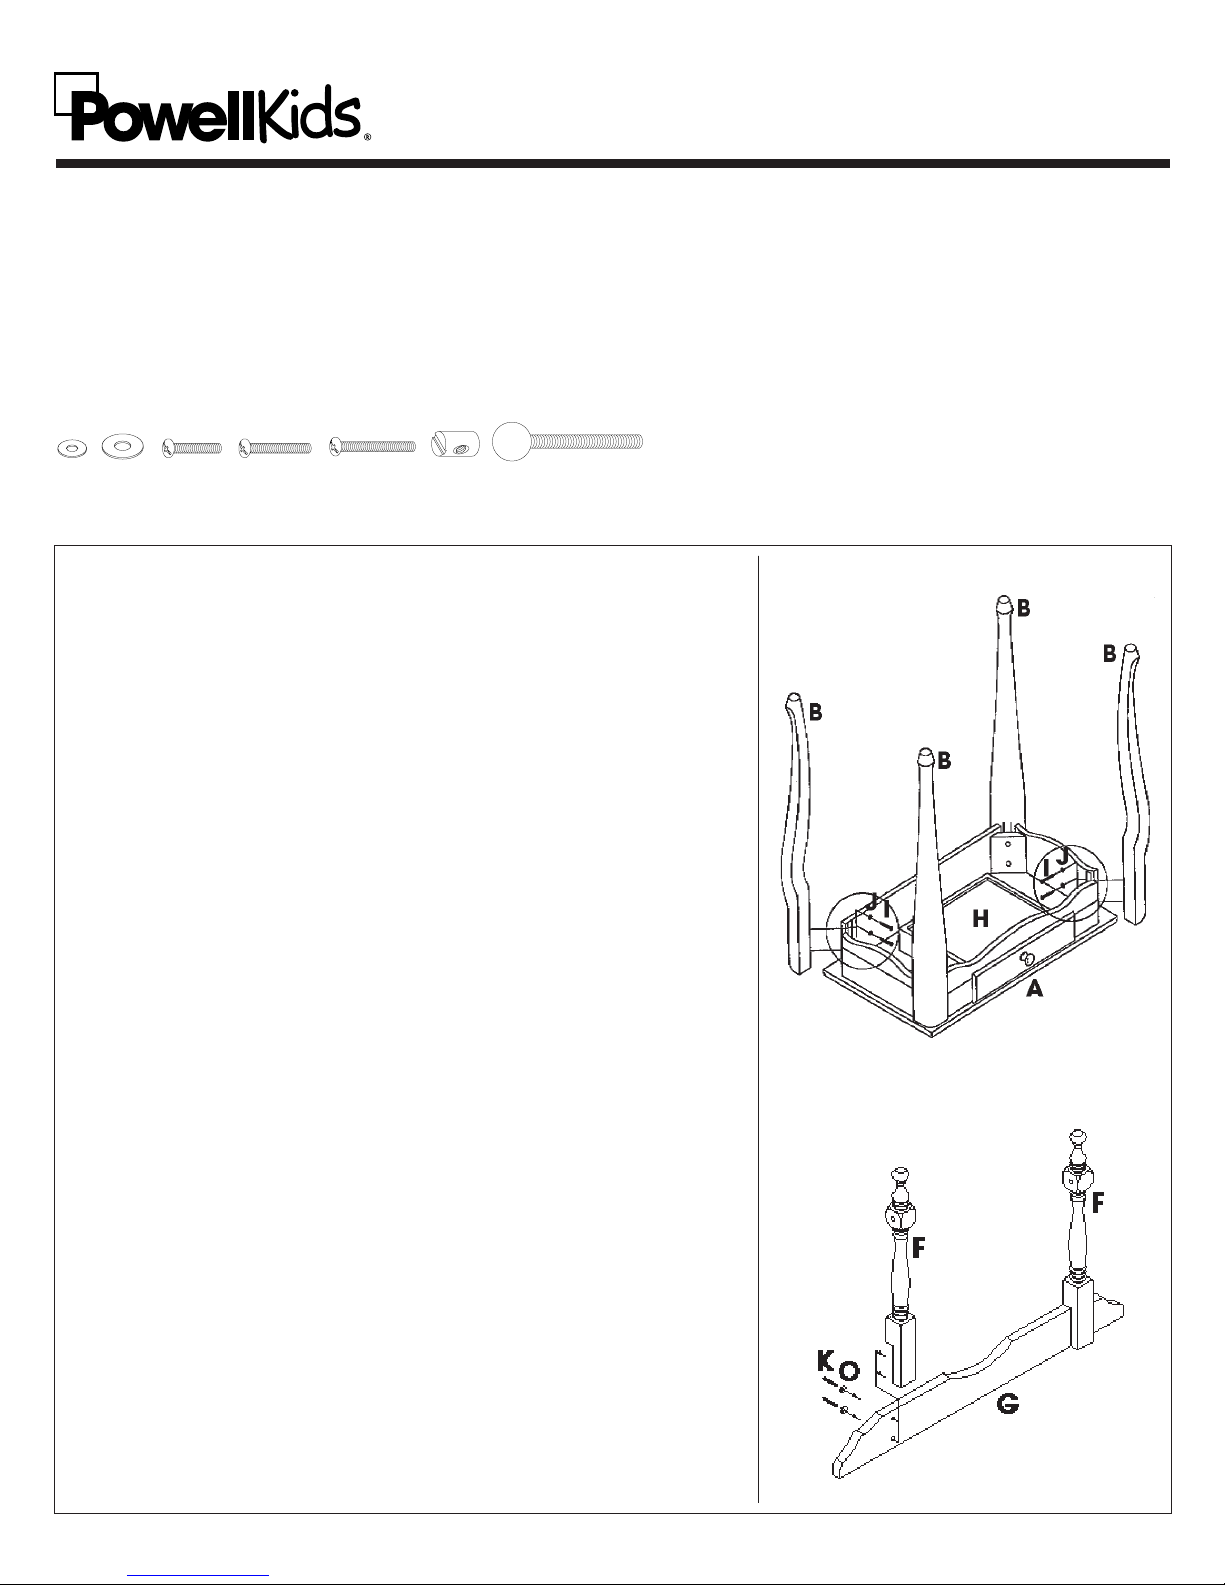
2. Place parts on a soft cloth. Place Vanity Top (A) upside
down. Slide Drawer (H) outward. Insert Long Screws (I)
through Large Washers (J), corners of Vanity Top (A), and
tighten into Long Legs (B). Slide Drawer (H) into place
and stand vanity upright. (See ill. #1)
3. Align screw holes at base of Mirror Posts (F) with screw
holes in Decoration (G). Note: Mirror Posts (F) should be
against finished side of Decoration (G). Insert Short
Screws (K) through Small Washers (O), back of
Decoration (G) and tighten into Mirror Posts (F). (See ill.
#2)
4. Insert T-Bolts (L), with slot for screwdriver facing outward,
into large holes on back of Decoration (G). Position
assembled Decoration (G) over holes along top rear
edge of Vanity Top (A). Insert Medium Screws (N)
through Small Washers (O), underside of Vanity Top (A),
bottom edge of Decoration (G) and tighten into T-Bolts
(L). Note: If screws do not tighten, rotate T-Bolts (L) so that
threads of T-Bolts (L) are facing downward. (See ill. #3)
#2
5. While holding Mirror (E) in position between Mirror Posts
(F) insert Mirror Handles (M) through Mirror Posts (F) and
tighten into sides of Mirror (E). (See ill. #4)
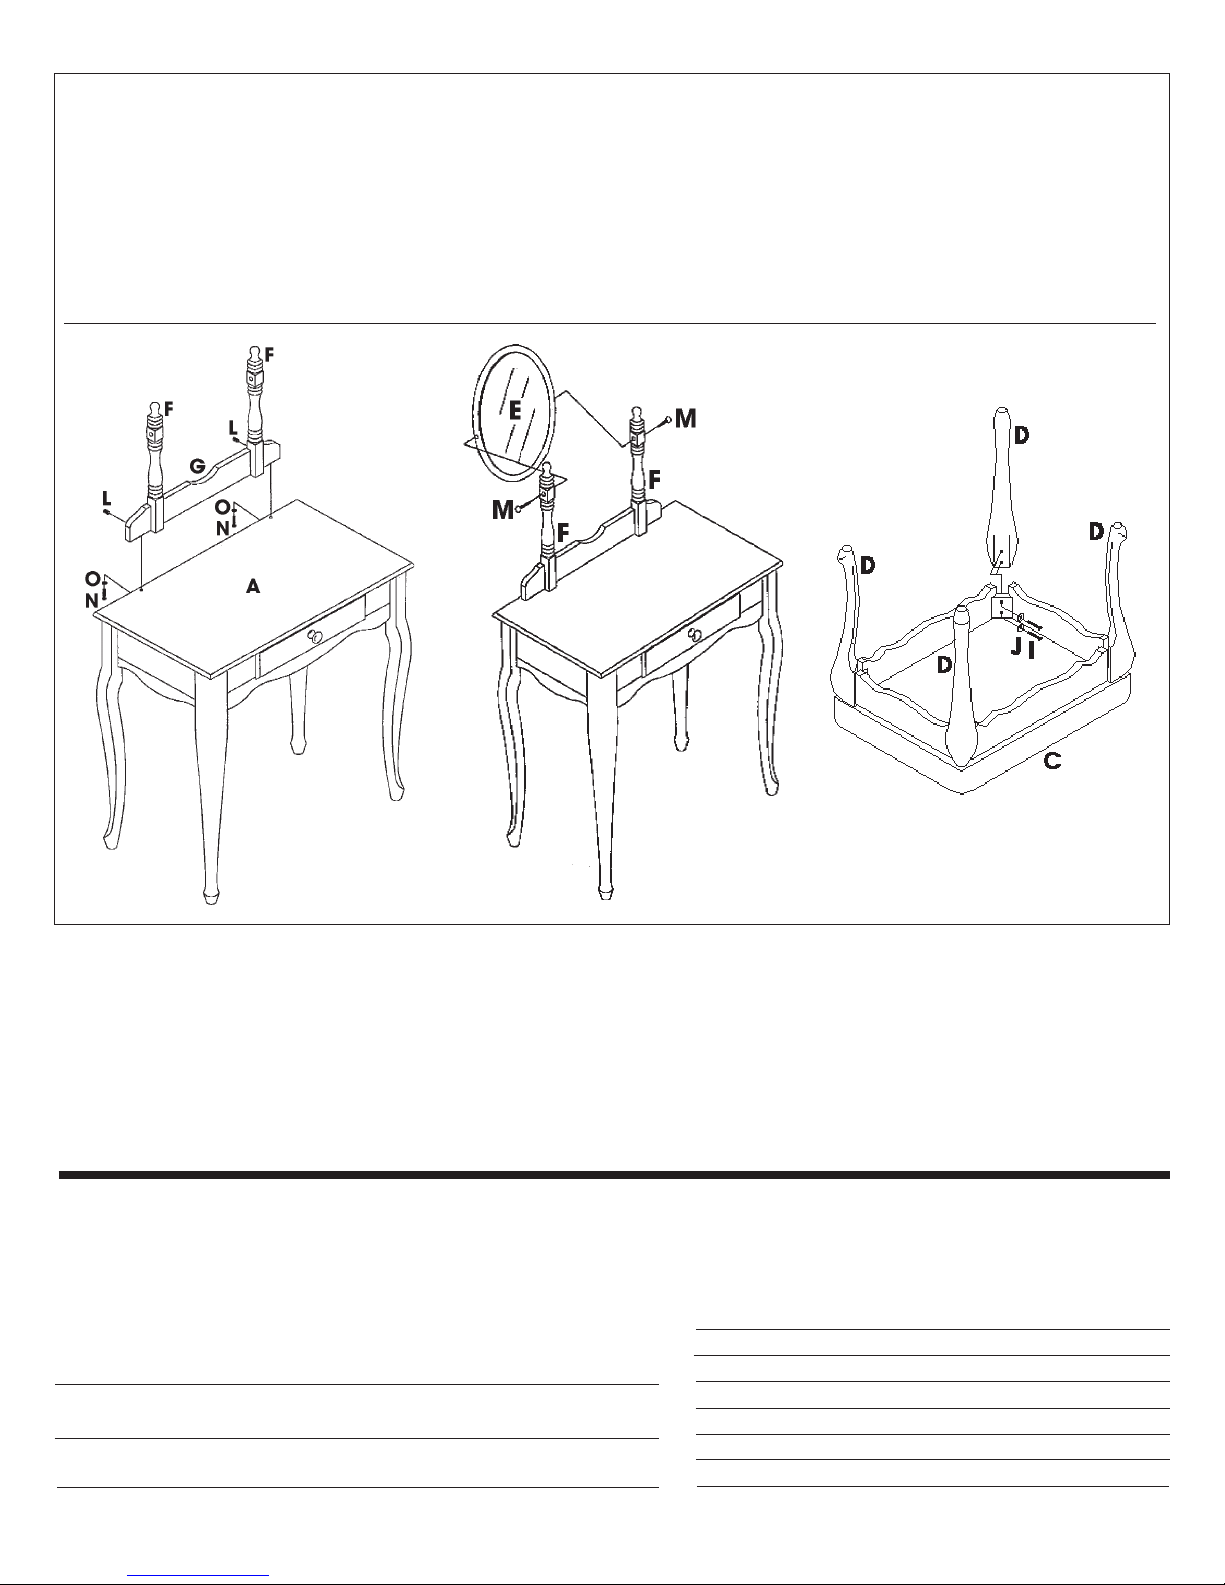
6. Place Bench Top (C) upside down. Insert Long Screws (I) through Large Washers (J), corners of
Bench Top (C), and tighten into Short Legs (D). (See ill. #5)
7. Your furniture has been handcrafted and skillfully finished by fine craftsmen. Rich, deep antique
finishes have been applied which require very little polish. However, should you desire a shinier
finish, simply use any good grade of furniture polish, rubbing the finish lightly as it is being
applied. Allow to dry and buff lightly with a soft cloth.
#3
#4
#5
IF YOU HAVE A PROBLEM, WE WANT TO HAVE THE OPPORTUNITY TO MAKE IT RIGHT!
Should there be any missing or defective part(s),
© 1997 Powell
MODEL NO. 929-290
FAX this form to (310) 841-0842
or call Customer Service at (800) 622-4456 or (310) 204-2224
Have your model number and part code letter handy.
Name
Address
Part Letter Description Quantity
Daytime Phone
Reason for Replacement
Place of Purchase
Powell Service Department • P.O. Box 1408, Culver City, CA 90232-1408 Made in China
( )
Rev. 07/21/03
 Loading...