

Page 1
Pottery barn kids
OPEN TOY BOX
PRE-ASSEMBLY:
• Remove all parts and hardware from the box and lay out on a clean carpeted or scratch-free work
surface (The shipping box provides and ideal work surface). This will avoid damaging any parts
during assembly. Do not dispose of any content s un til assembly is completed to avoid accidentally
discarding small parts or hardware.
• Two people are recommended for ease of assembly.
• Use the parts and hardware lists to identify and separate each of the pieces included prior to
starting assembly.
• The illustrations provided allow for easier assembly when used in conjunction with the assembly
instructions.
• If using power tools to aid in assembly please use caution. Power tools can damage hardware or
split wood.
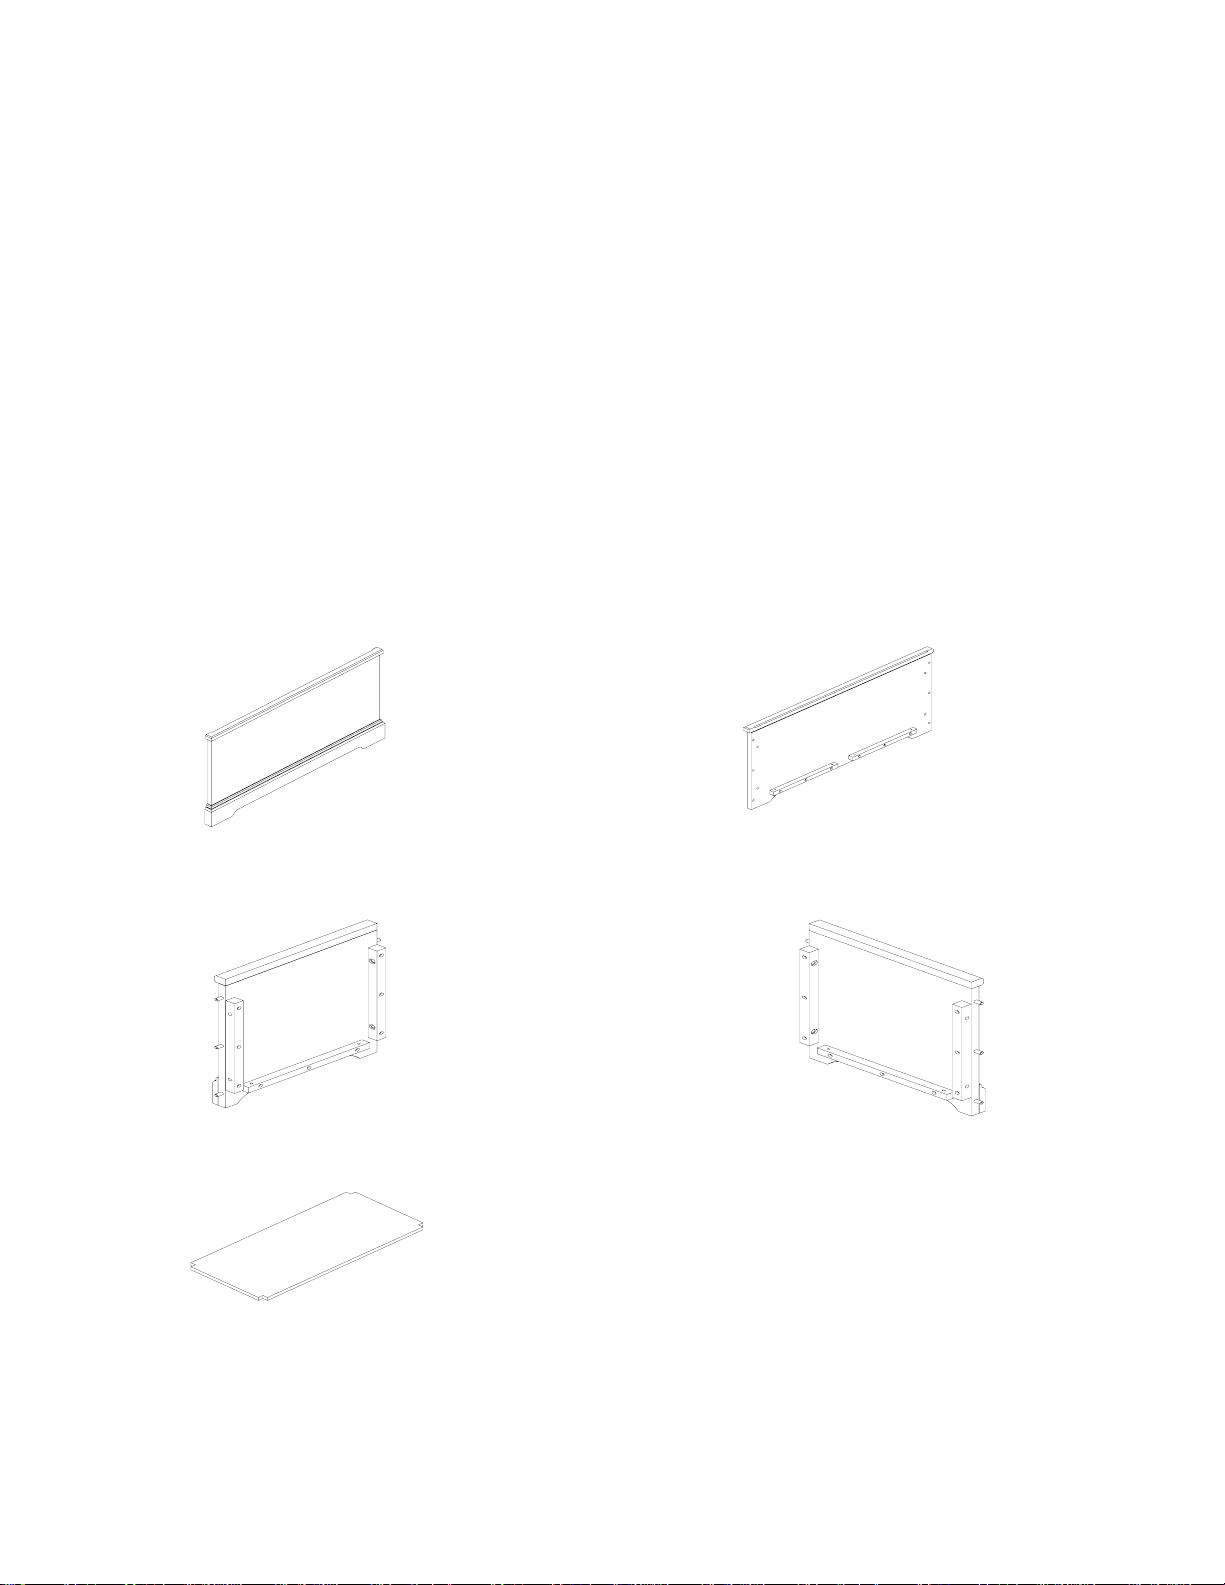
P ARTS INCLUDED:
A – Front panel (x1) B – Back panel (x1)
C – Left side panel (x1) D – Right side panel(x1)
E – Bottom Panel (x1)
1
Page 2
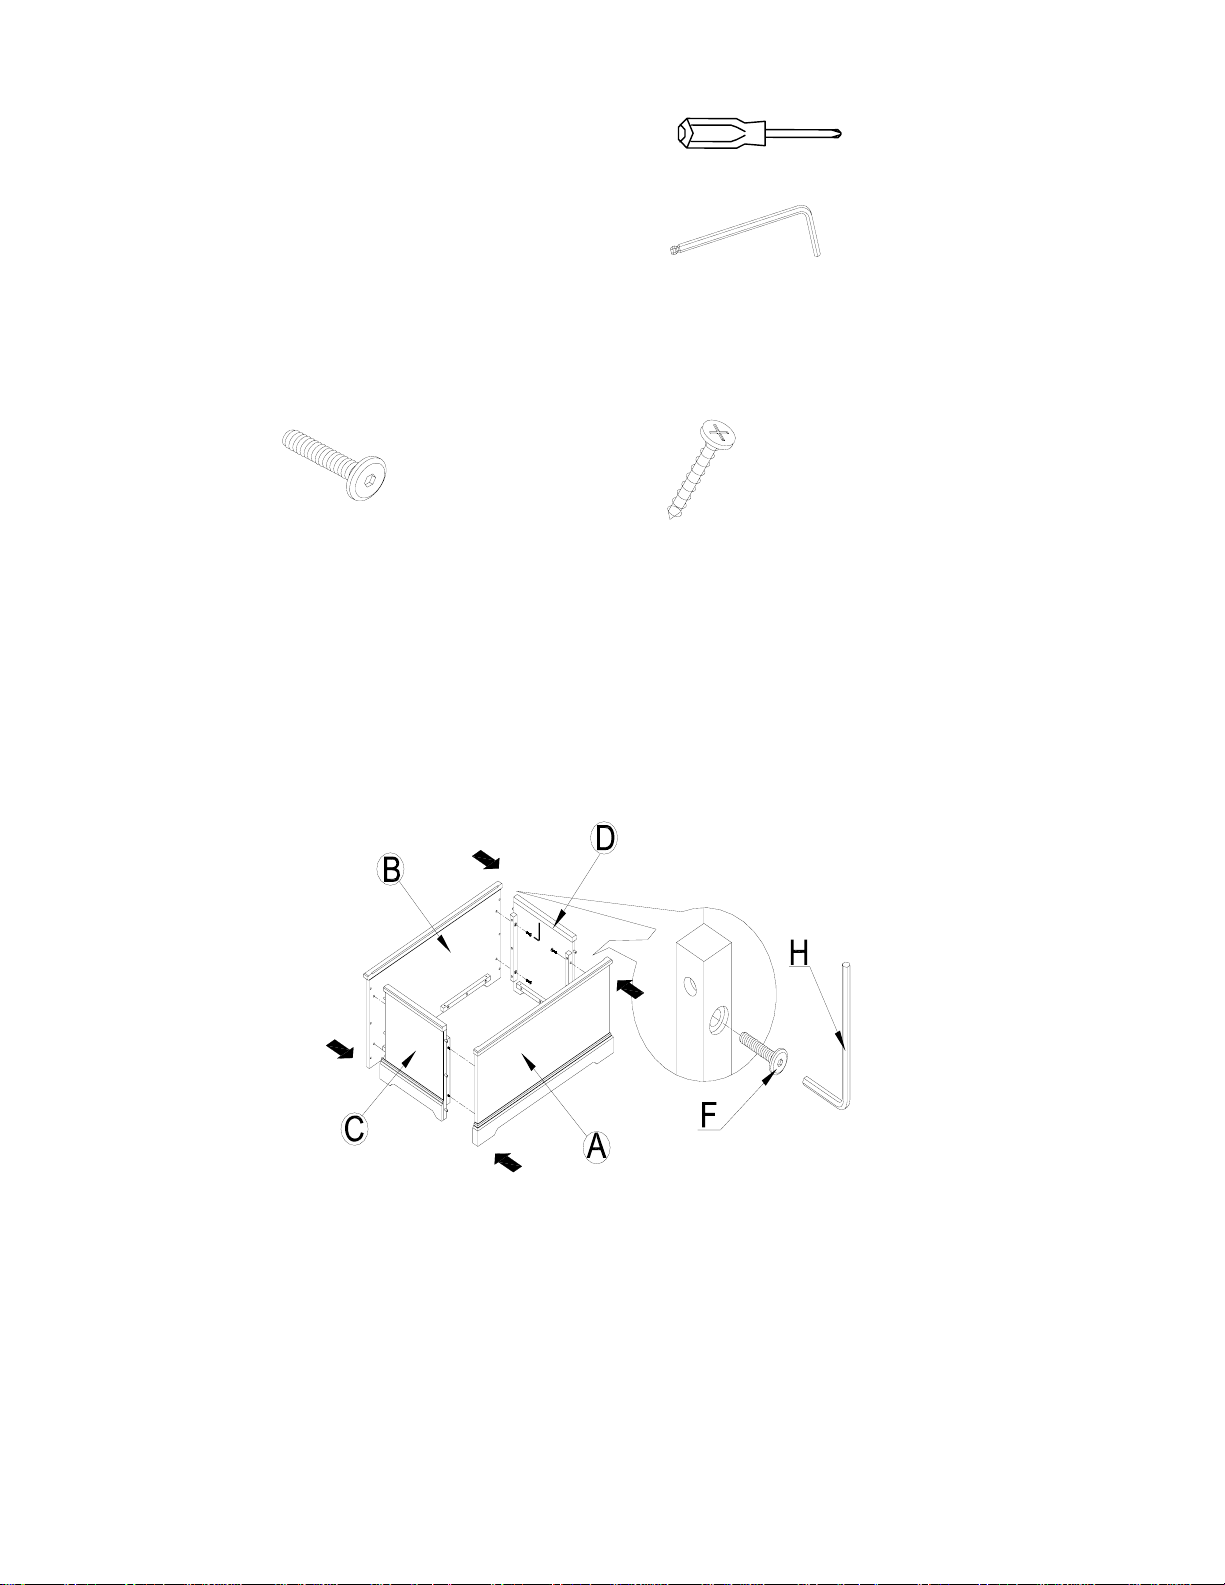
TOOLS REQUIRED:
Phillips head screwdriver (not included)
H - Allen Key (included)
HARDWARE:
F –Allen Bolts 1/4”x 28 x15mm (x8) G–Phillips head screws 8x25mm (x12)
ASSEMBLY:
1. On a soft, scratch-free surface such as carpet or rug, lay the Front panel (A) , Back panel (B) , left
side panel (C ) and Right side panel (D) as shown , attach them using 8pcs Allen Bolts1/4”x 28
x15mm (F) and Allen Key (H). See illustration.
2
Page 3

2. Put the Bottom panel (E) into the open toy box as shown carefully.
3. Carefully lay the Toy Box on a soft, scratch-free surface as shown in illustration. This position will
make assembly easier. Make sure the warning label apply to the bottom of Toy Box inside raised
area. And fix the Bottom panel (E) to the Front panel (A) , Back panel (B) , left side panel (C ) and
Right side panel (D) using 12pcs Phillips head screws 8x25mm (G).
Caution: adjust levelers on the bottom of the unit in or cut to ensure that it stand secure and does not
rock.
Thank you for your purchase
stores | catalog | www.potterybarnkids.com
3
 Loading...