

Pottery Barn Thomas Wall Media System Assembly Instruction
pottery barn kids
thomas wall media system
PRE-ASSEMBLY:
• Please read all instructions carefully before assembling.
• For your safety, assembly by two people is recommended.
• Save all packing materials until assembly is complete to avoid accidentally discarding smaller parts or
hardware.
• The use of power tools during the assembly of this item can cause the hardware to strip or the wood to split.
Please proceed with extreme care.
• The wall system should not be moved unless the connector screws are removed.
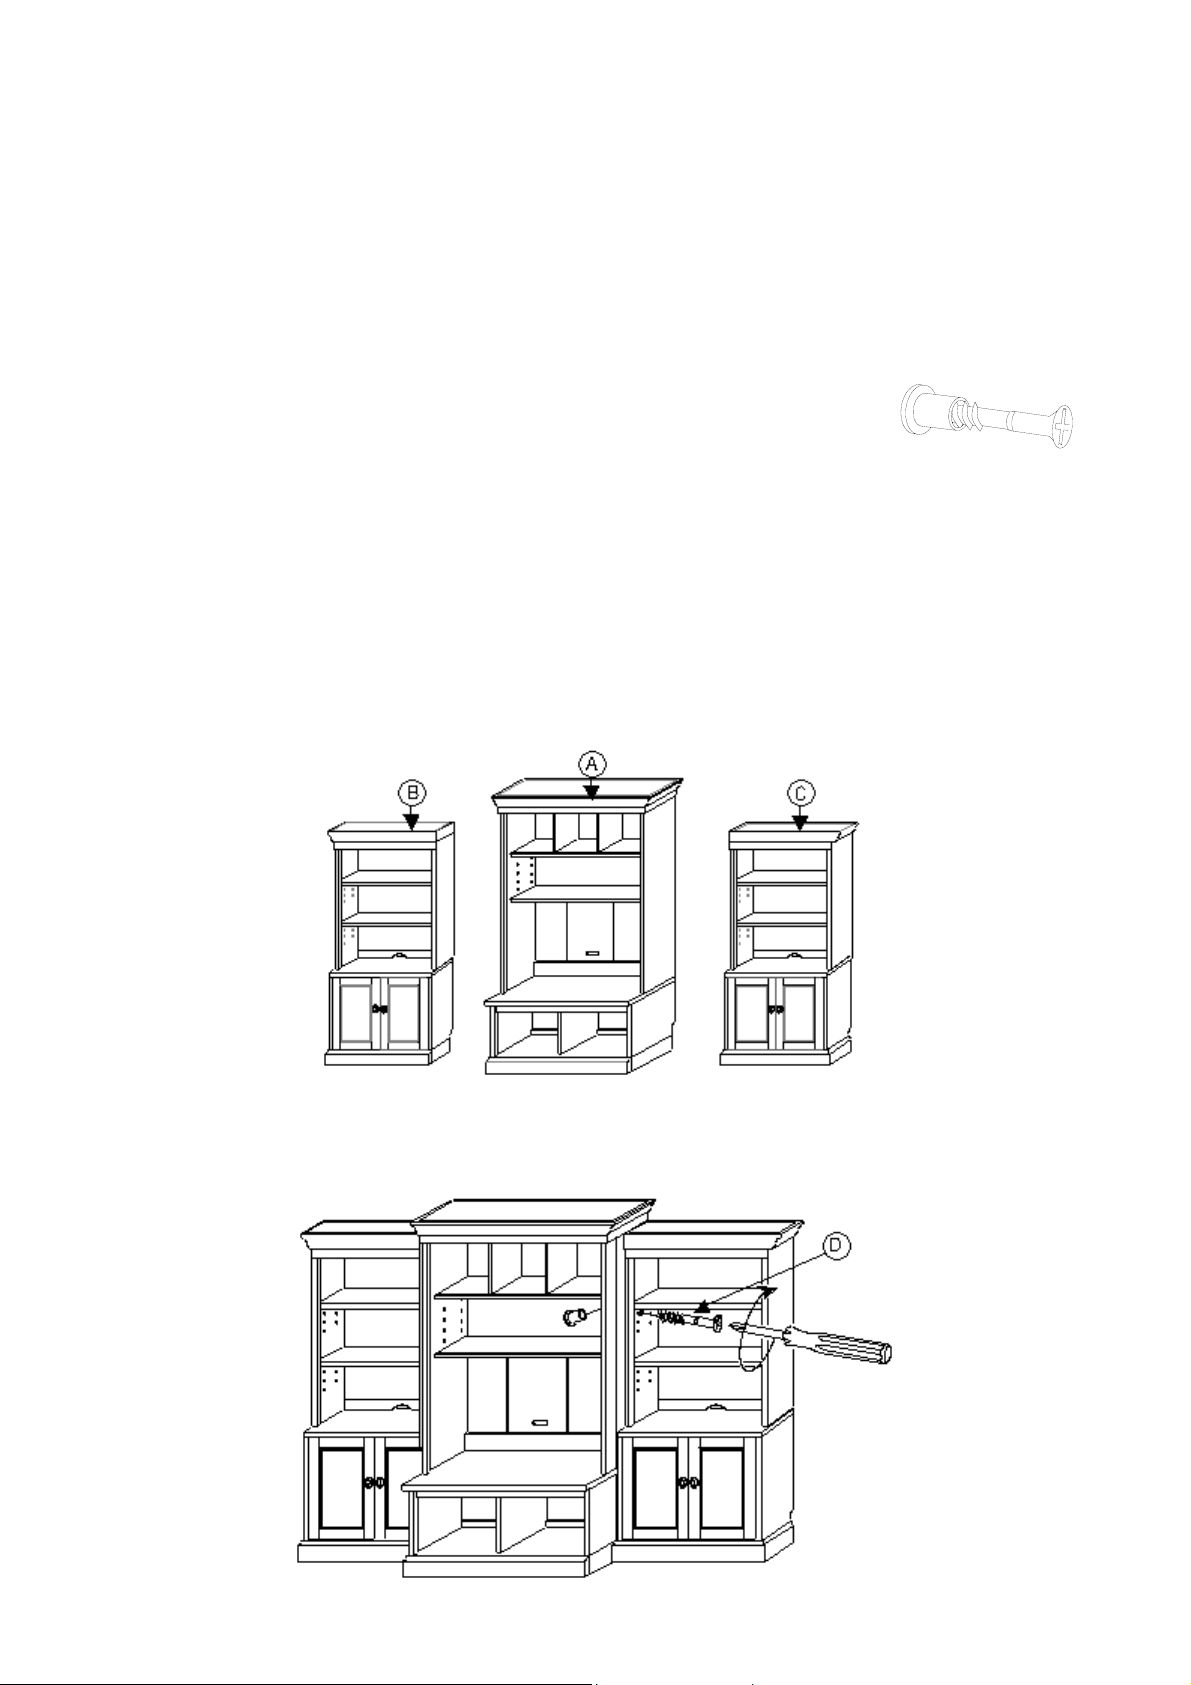
PARTS REQUIRED : HARDWARE ENCLOSED :
• (A) Media Base & Hutch – 1pc
• (B) Left Cabinet & Hutch – 1pc
• (C) Right Cabinet & Hutch – 1pc
TOOLS REQUIRED:
• Philips head screwdriver (not included)
ASSEMBLY:
1. Ensure the 3 units (A, B, C) are leveled by adjusting the leveler at the bottom of each unit. Once the tops of all
3 units (A, B, C) are perfectly level, you can proceed to Step 2.
2. Bring all the pieces together. Determine the final position of Wall System. Align the pre-drilled holes on each
piece. (Fig. 1)
• (D) Connector screw – 1pc
(Fig. 1)
3. Unscrew each the Connector screw (D). Place the female half on the inside of the Media Hutch (A) and the
male half on the inside of the Right cabinet hutch (C). Tighten the two pieces together. Repeat with the
remaining connector screws for the opposite side. (Fig. 2)
(Fig. 2)
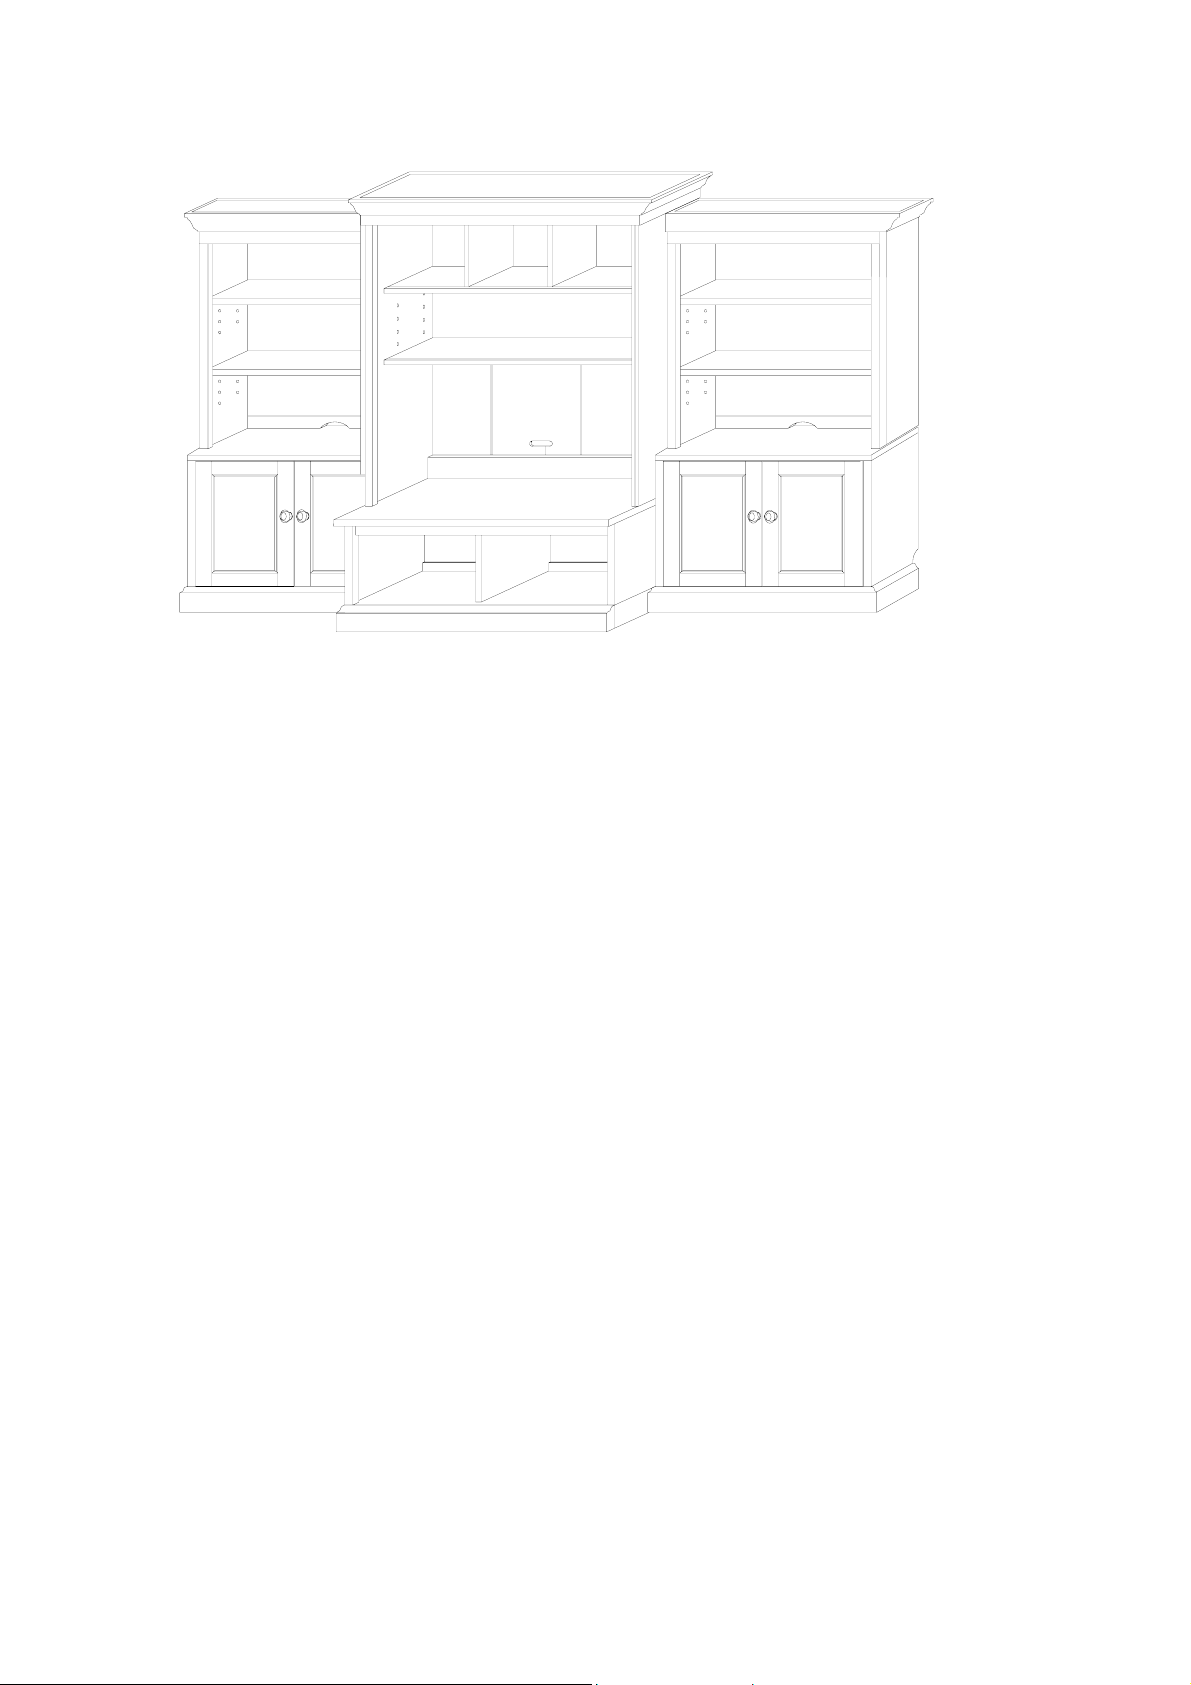
4. Assembly is complete. (Fig. 3)
CARE INSTRUCTIONS:
• Dust with a clean, soft cloth
• Avoid the use of chemicals and harsh cleaning agents
(Fig. 3)
Thank you for your purchase
Stores | catalog |
USA 1.800.290.8181
www.potterybarnkids.com
 Loading...