

Page 1
pottery barn kids
thomas narrow hutch
PRE-ASSEMBLY
• Please read all instructions carefully before beginning assembling.
• Remove all parts and hardware from the box and lay out on a clean, carpeted, or scratch-free work surface,
as this will avoid damaging any parts during assembly. The shipping box provides an ideal work surface. Do
not dispose of any contents until assembly is completed to avoid accidentally discarding small parts or
hardware.
• We recommend adult assembly by two people for your safety.
PARTS INCLUDED:
(A) Top Panel – 1pc
(B) Top Cover – 1pc
(C) Left & Right Panel – 2pcs
(D) Back Panel – 1pc
(E) Back Rail – 1pc
(F) Shelf – 2pcs
TOOLS REQUIRED:
(K) Allen Key (included)
(L) Screwdriver (not included)
ASSEMBLY INSTRUCTIONS:
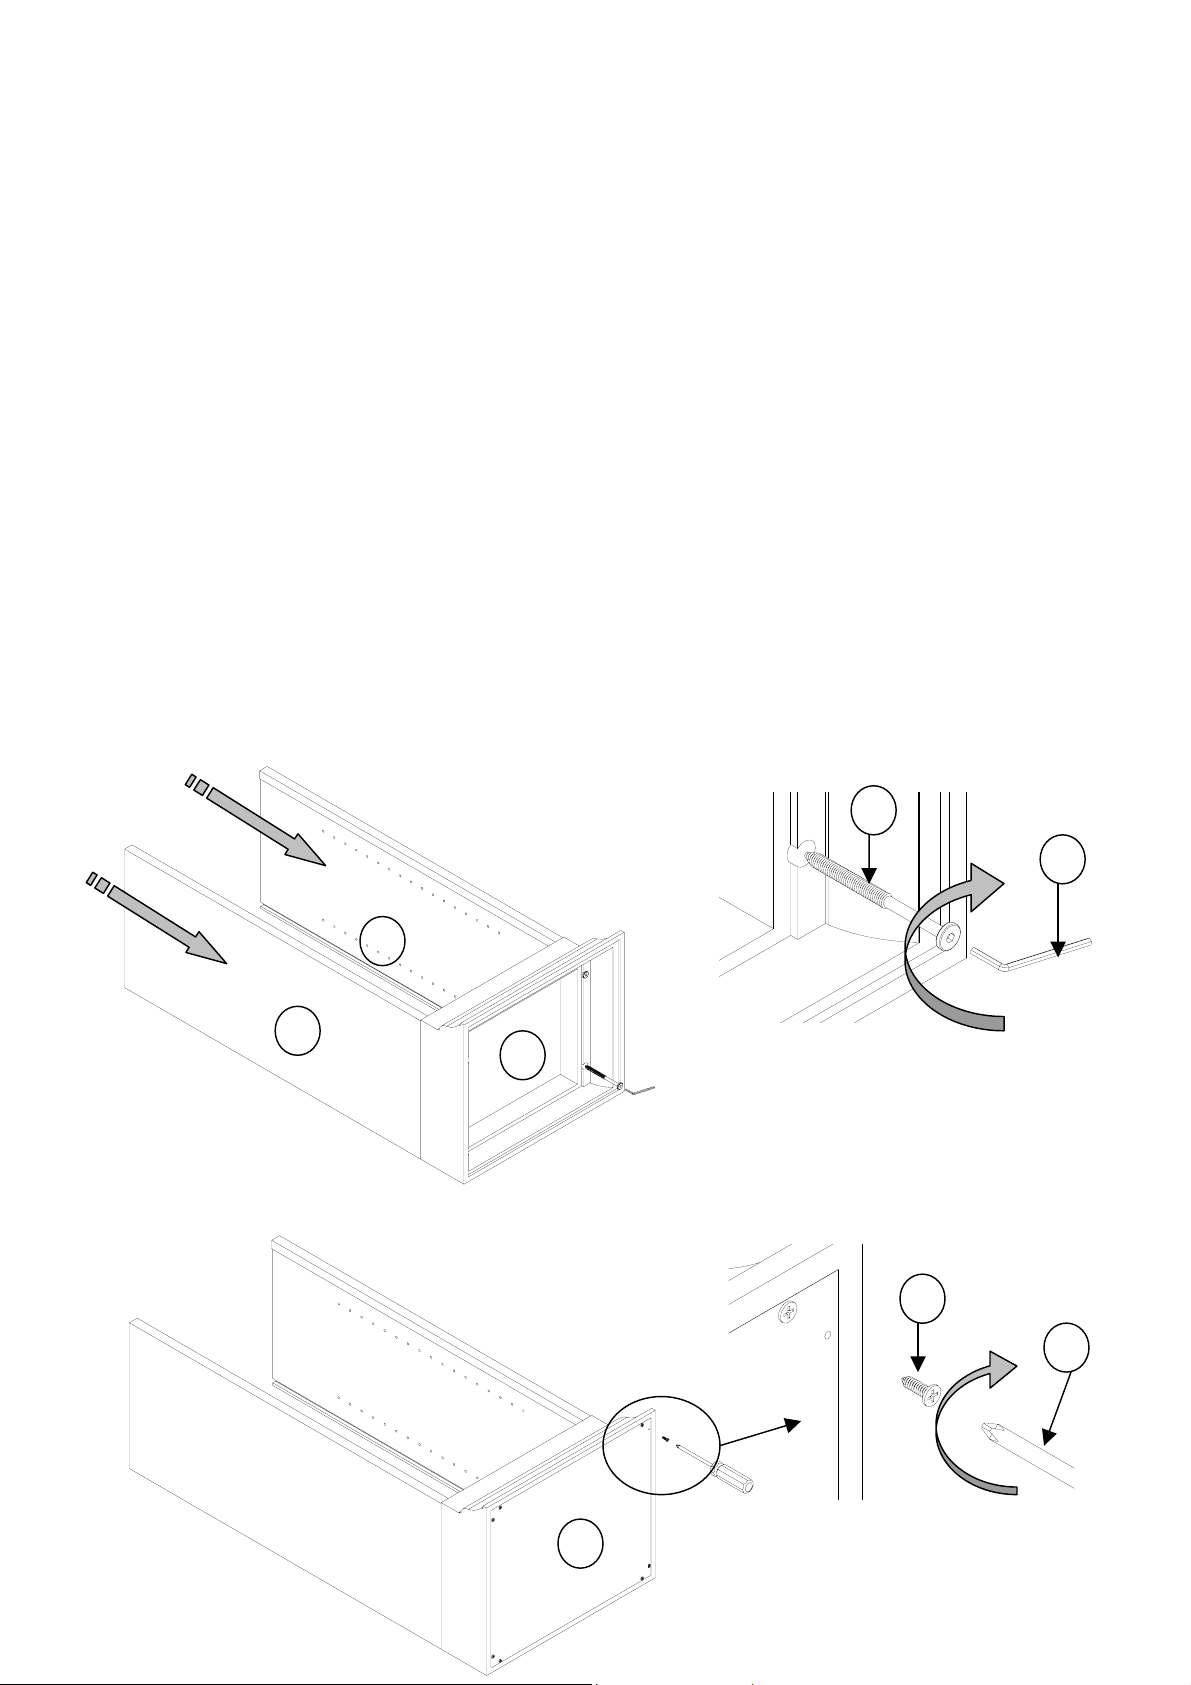
1. Align the pre-drilled holes of the Left & Right Panel (C) with those on the Top Panel (A). Insert a JCBCW
Screw (G) through the pre-drilled holes of the Top Panel (A) and into the pre-drilled holes of the Left & Right
Panel (C). Tighten using the Allen Key (K). (Fig. 1)
2. Fasten CBS screws (H) using Philips Head Screwdriver (L) to the Top Cover (B). (Fig. 2)
C
C
HARDWARE ENCLOSED:
(G) JCBCW M7 x 95 MM – 4pcs
(H) CBS M3.5 x 16 MM – 11pcs
(I) Rattan Screw M4 x 30 MM –
4pcs
(J) Shelf Peg – 8pcs
(Fig.1)
G
A
(Fig. 2)
H
B
K
L
Page 2
3. Slowly slot in the Back Panel (D) to the back. (Fig. 3) and also the Back Rail (E). Fasten Rattan screws (I)
using Philips Head Screwdriver (M) through the pre-drilled holes on the Back Rail (E) into the Side panel (C)
as shown. (Fig.4) Fasten CBS screws (H) using Philips Head Screwdriver (L) to the Back Panel (D). (Fig. 5)
(Fig. 3)
(Fig. 4)
E
I
D
C
H L
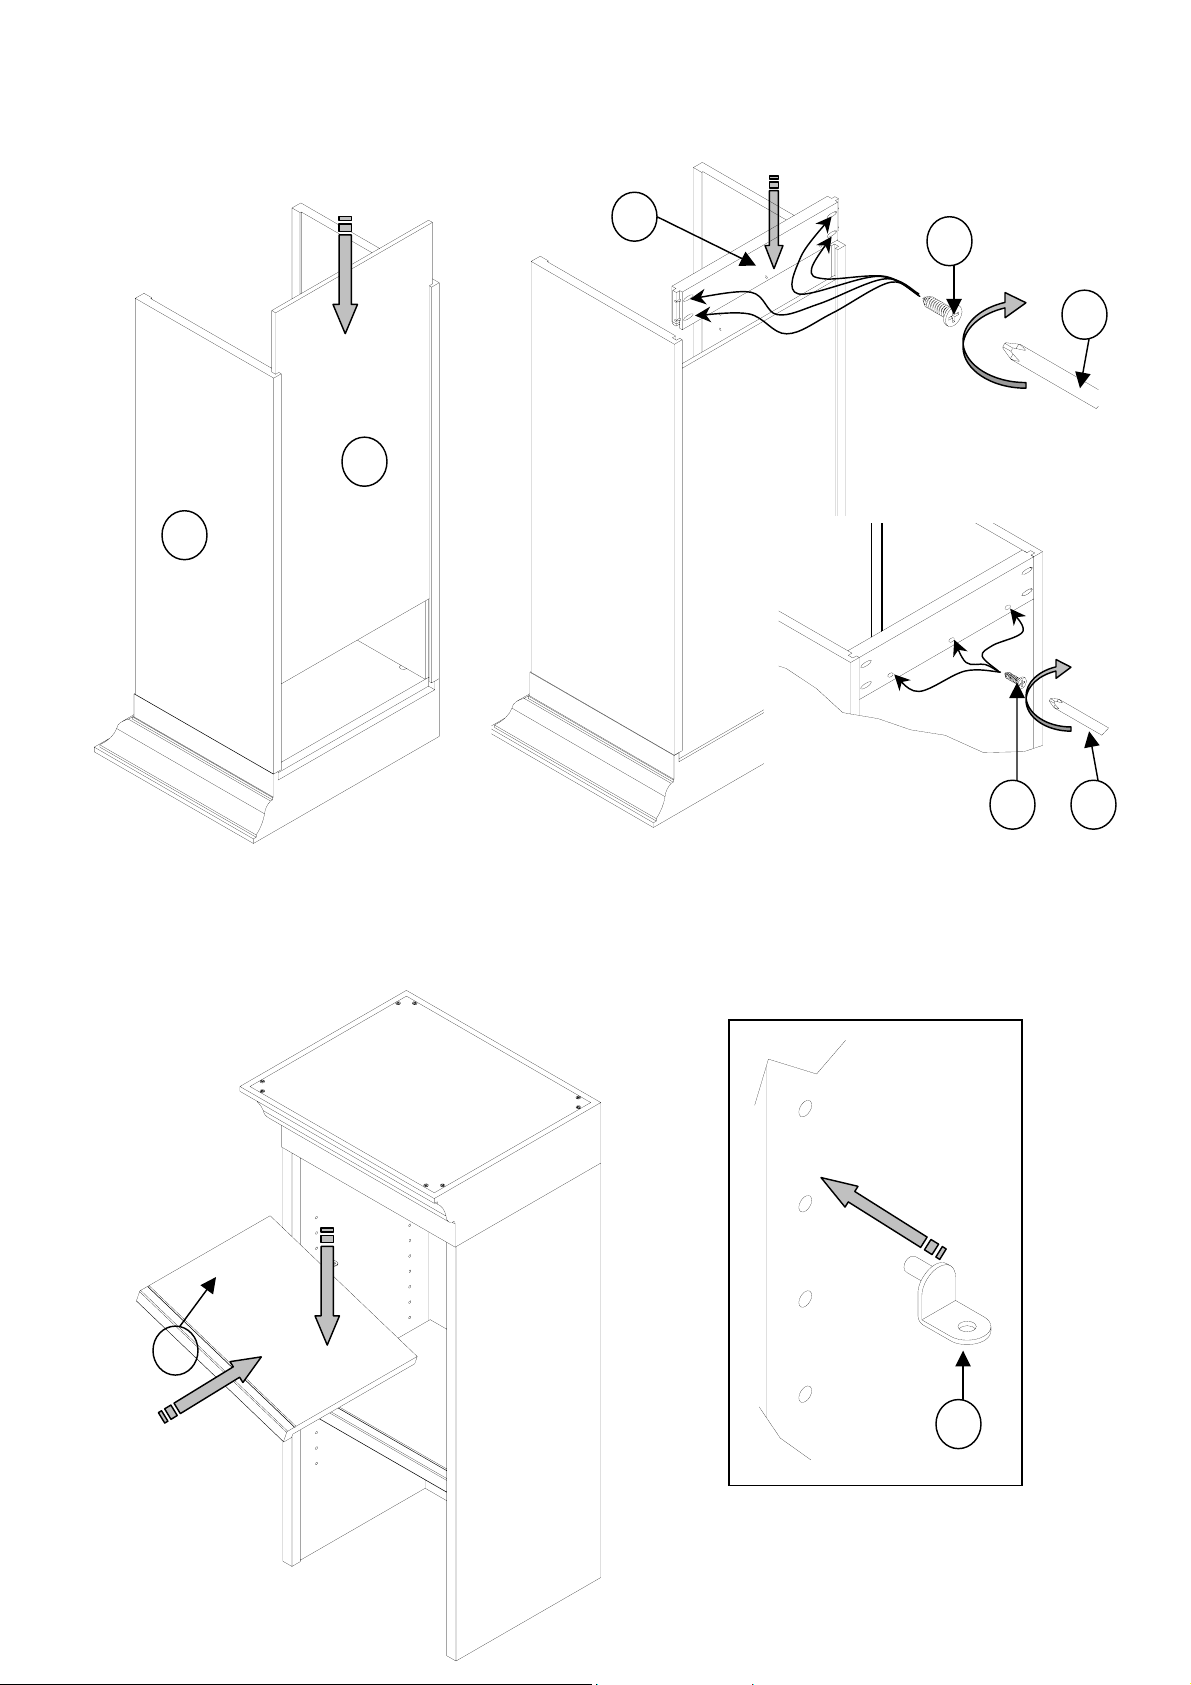
4. Determine the desired height for the shelf (F). Note: Do not insert all the shelf pegs at once. Insert two
shelf pegs (J) into the pre-drilled holes on one side pushing firmly until fully inserted. (Fig 6).
(Fig.6)
F
J
L
(Fig. 5)
Page 3

5. Gently tilt the shelf by lowering the other end of the shelf until it seats onto the shelf pegs. Hold the other end
in upright position and insert two shelf pegs into the pre-drilled holes until fully inserted. (Fig 7)
(Fig. 7)
J
6. Gently lower the shelf and rest the entire shelf onto the shelf pegs. (Fig 8)
(Fig.8)
CARE INSTRUCTIONS:
• Use a soft dry or slightly damp cloth to clean periodically.
• To protect the finish always avoid the use of chemical and abrasive cleansers.
Thank you for your purchase
stores | catalog |
www.potterybarnkids.com
USA 1.800.290.8181
 Loading...