

Page 1
pottery barn kids
ROADSTER BED
PRE-ASSEMBLY:
• Remove all parts and hardware from the box and lay out on a clear carpeted or scratch-free work surface. (The shipping
box provides an ideal work surface), this w ill avoid damaging any p arts during assembly. Do n ot dispose of any cont ents
until assembly is completed to avoid accidentally discarding smal l parts or hardware.
• Two peopl e re commend ed for ea se o f asse mb ly.
• Use the parts and hardw are lists to identify and sep ara te each o f the p ieces incl uded prior to starting assembly.
• The illustrations provided allow for easier assembly w hen used in conj unction w i th the assemb ly in stru ction s.
• Note: Do not fully tighten all bolts until all parts are in place. Failure to follow these instructions may cause the bolts to
misalign during assembly.
• If using power tools to aid in assembly please use caution. Power tools can damage hardware or split wood.
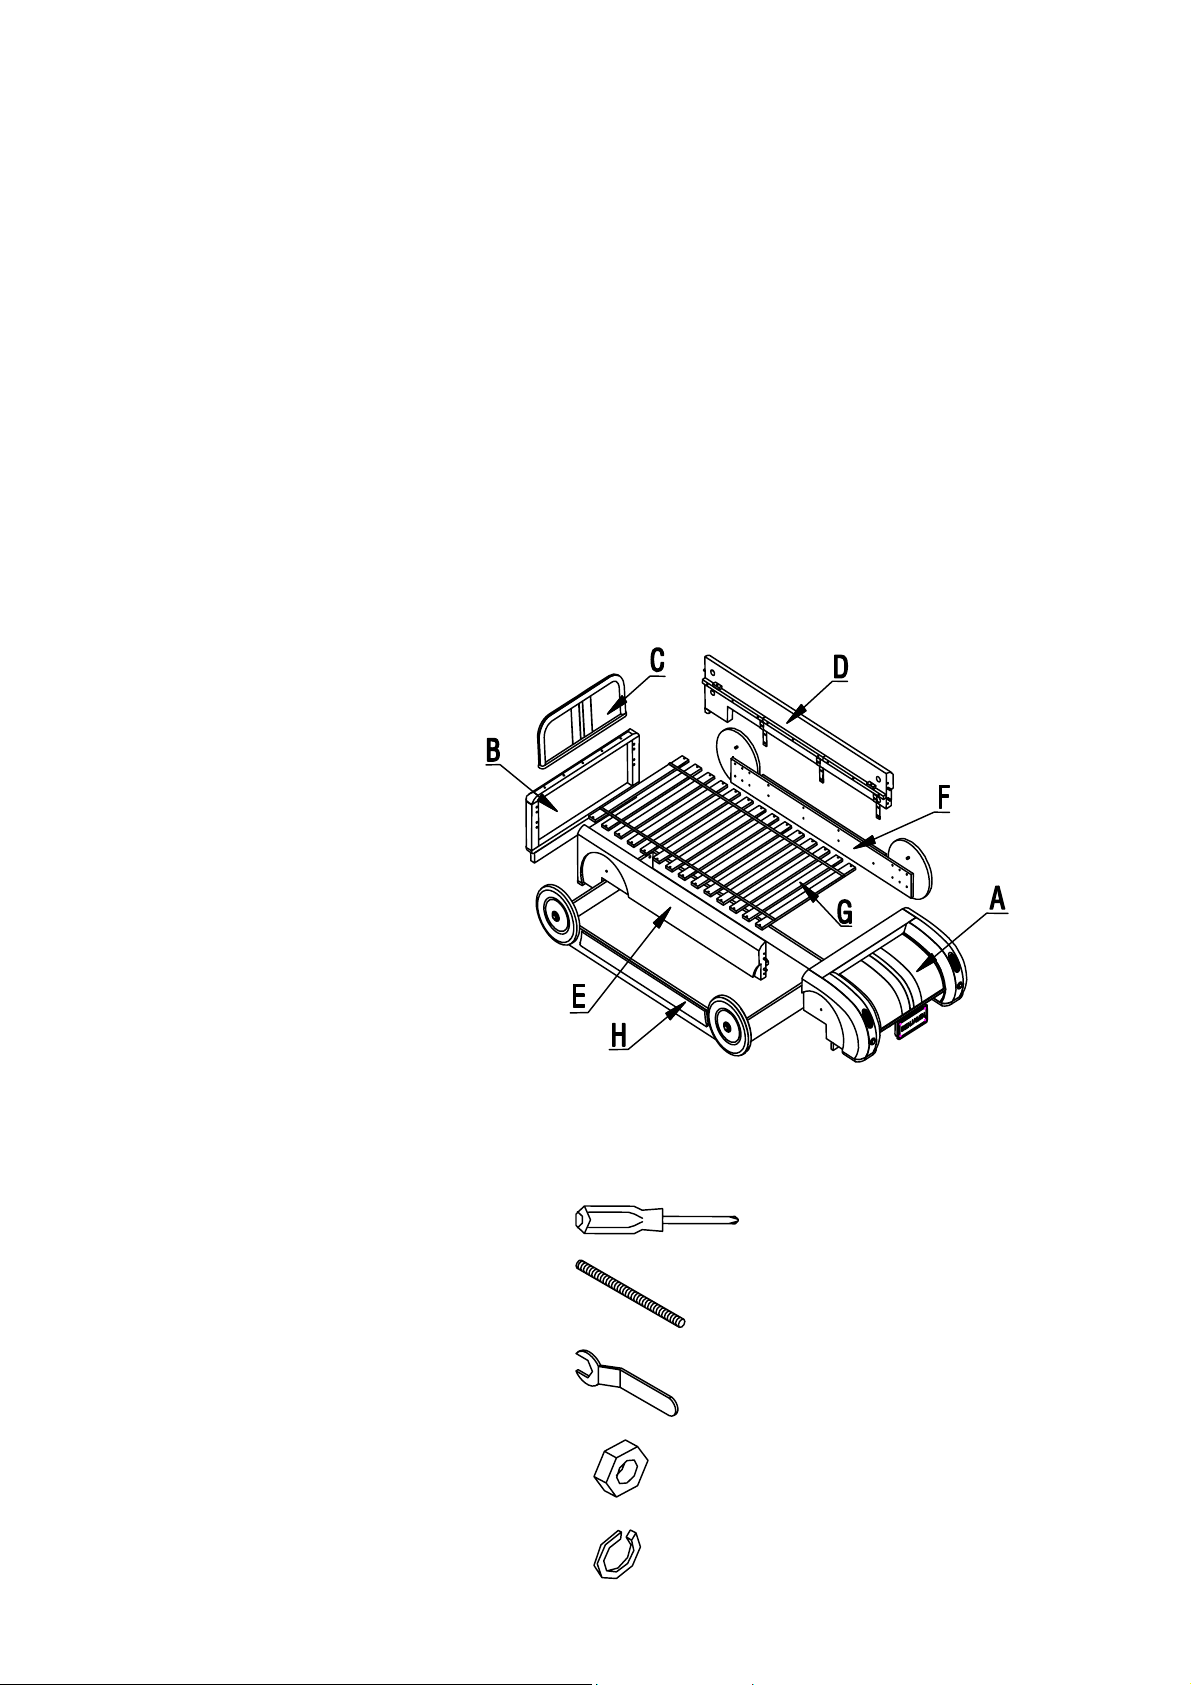
PARTS INCLUDED:
A – Front Section (x1)
B – Headboard (x1)
C – Headboard Top (x1)
D –Right side rail (x1)
E –Left side rail (x1)
F –Right Trundle side panel (x1)
G –Slat roll (x1)
H – Left Trundle side panel (x1)
HARDWARE INCLUDED:
Phillips head screwdriver (not included)
I – Long bolt (x8)
J – Wrench (x1)
K –Lock washer (x8)
L – Spring washer 5/16”x13mm (x8)
1
Page 2
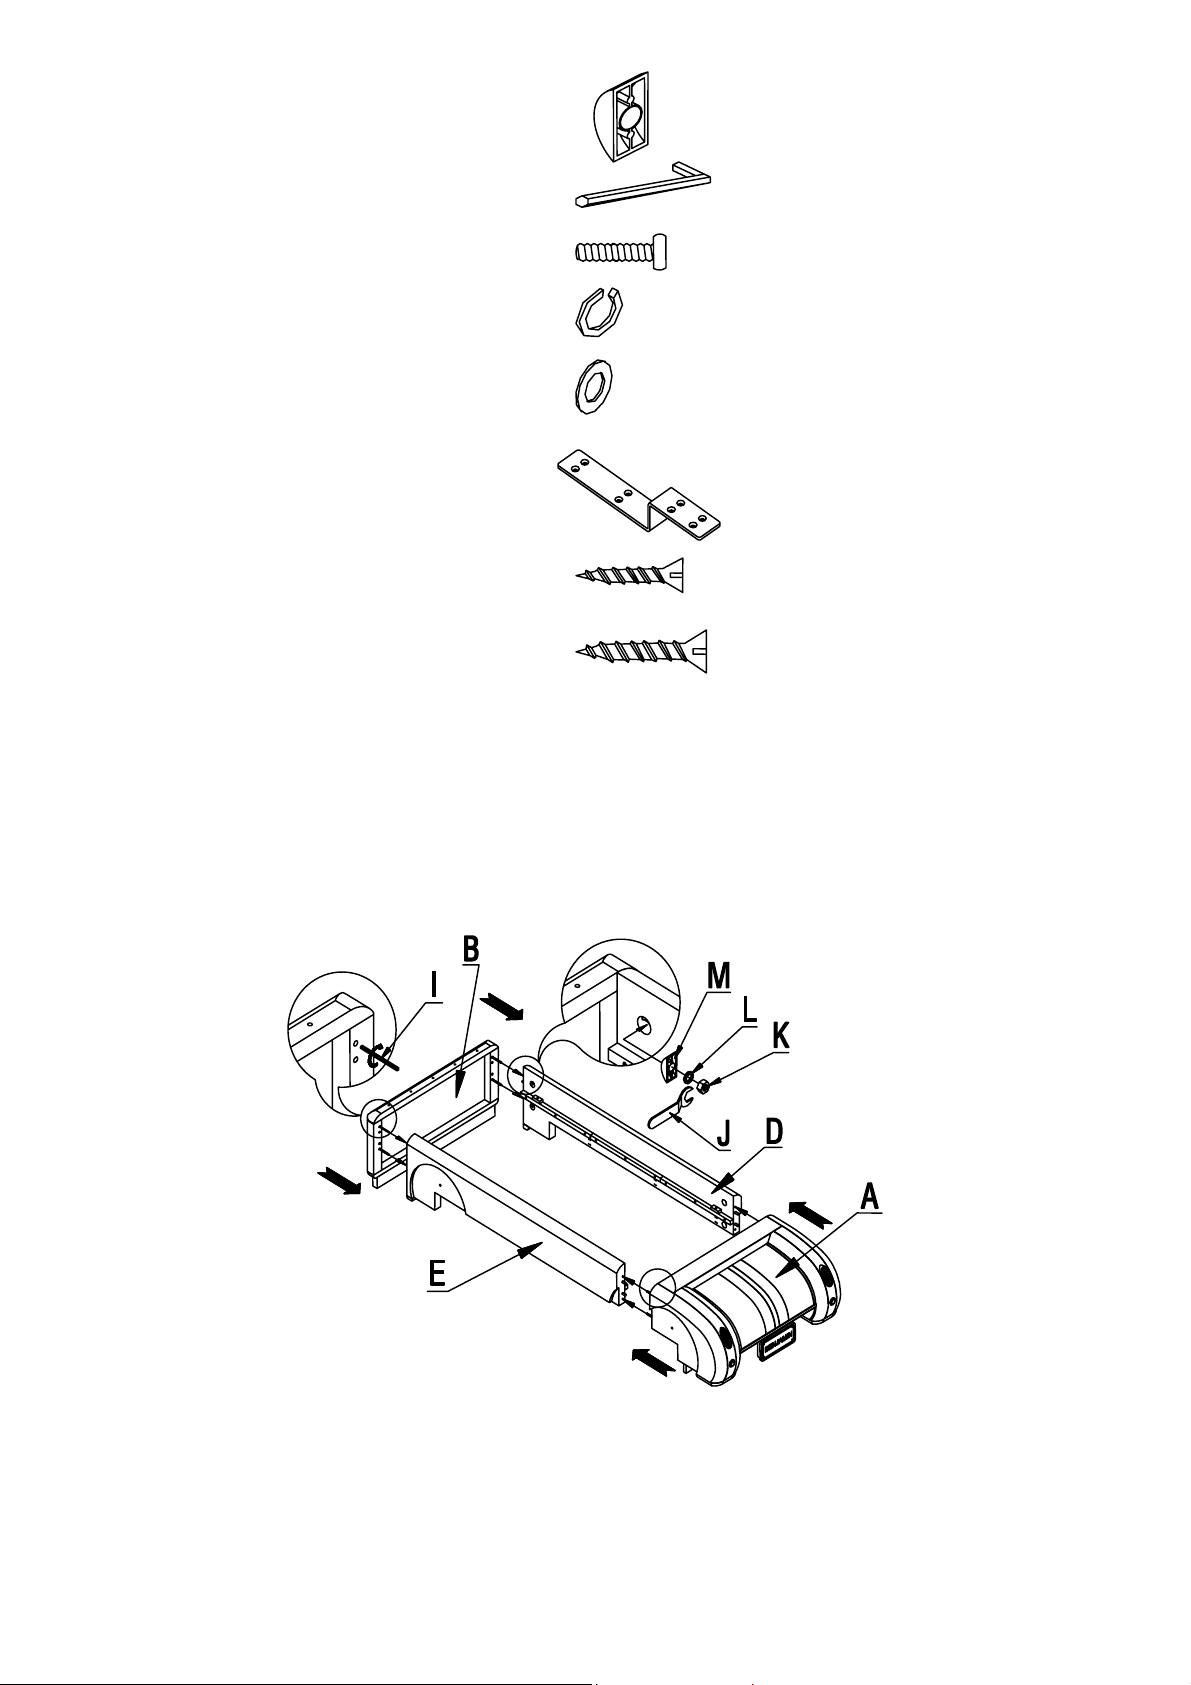
M – Metal washer (x8)
N – Allen key (x1)
O – Connector (x5)
P - Spring washer 1/4”x11mm (x5)
Q – Flat washer (x5)
R – “S” shape metal bracket (x6)
S – Small Phillips head screw (x24)
T – Large Phillips head screw (x28)
ASSEMBLY:
1. Hold Right side rail (D) and Left side rail (E) up to slot s on the Front Section (A) and Footboard (B) and insert
the side rail to Front Section, Footboard using the long bolts (I ). Fasten the side rails u sing the metal washer
(M), spring washer 5/16”x13mm (L), Lock washer (K) as shown below.
2
Page 3
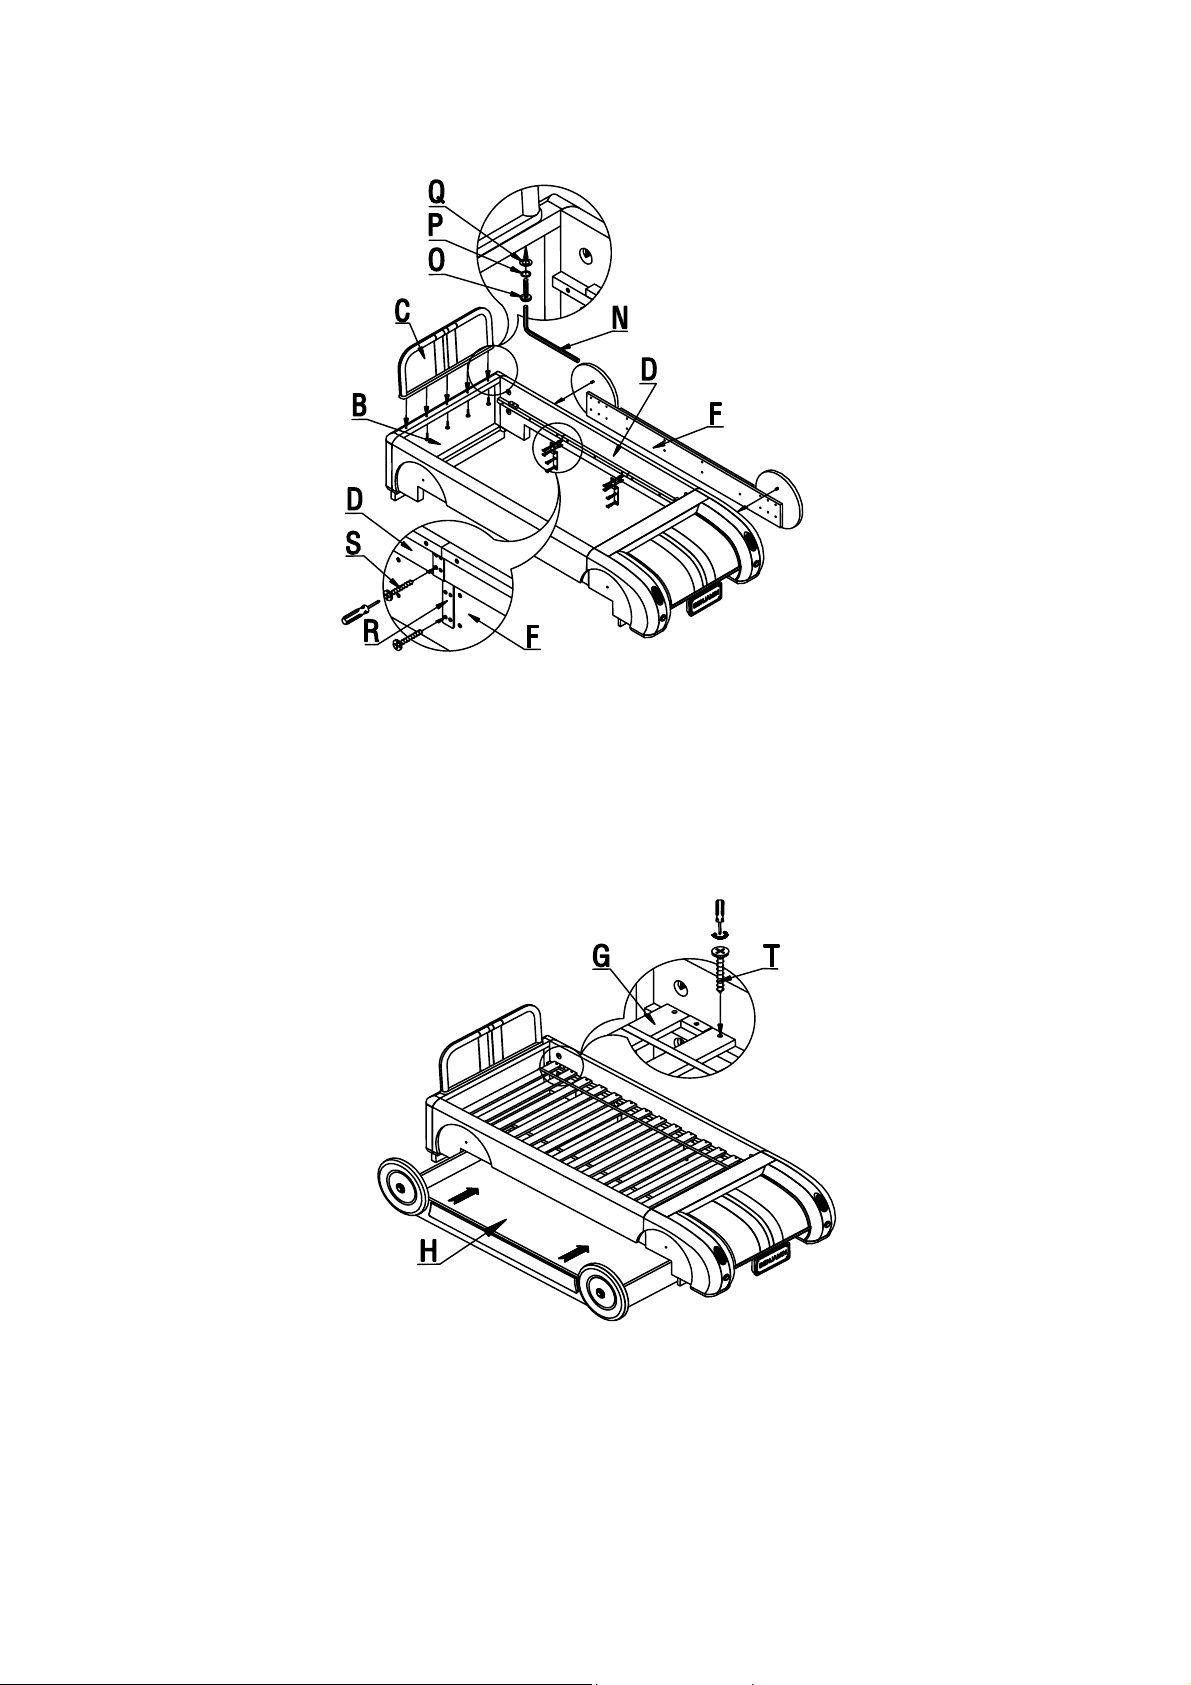
2. Attach the Head Board Top (C) to the Footboard using the Connector (O), spring washer 1/4”x11mm (P), Flat
washer (Q) as shown. Then assembly the “ S” shape metal bracket (R) to the side rail and trundle.
3. Lay the Slat roll (G) in between the Side rail and use (28) L arge Phillips Head screws (T) to fasten Slats to
the Side rail with the Phillips head screwdriver. Place the trundle under the bed.
4. Retighten all bolts and screws to make sure all are tight and bed structure is rigid. It is recommended all
connections be retightened from time to time.
Thank you for your purchase.
stores | catalog | www.potterybarnkids.com
3
 Loading...