

Page 1
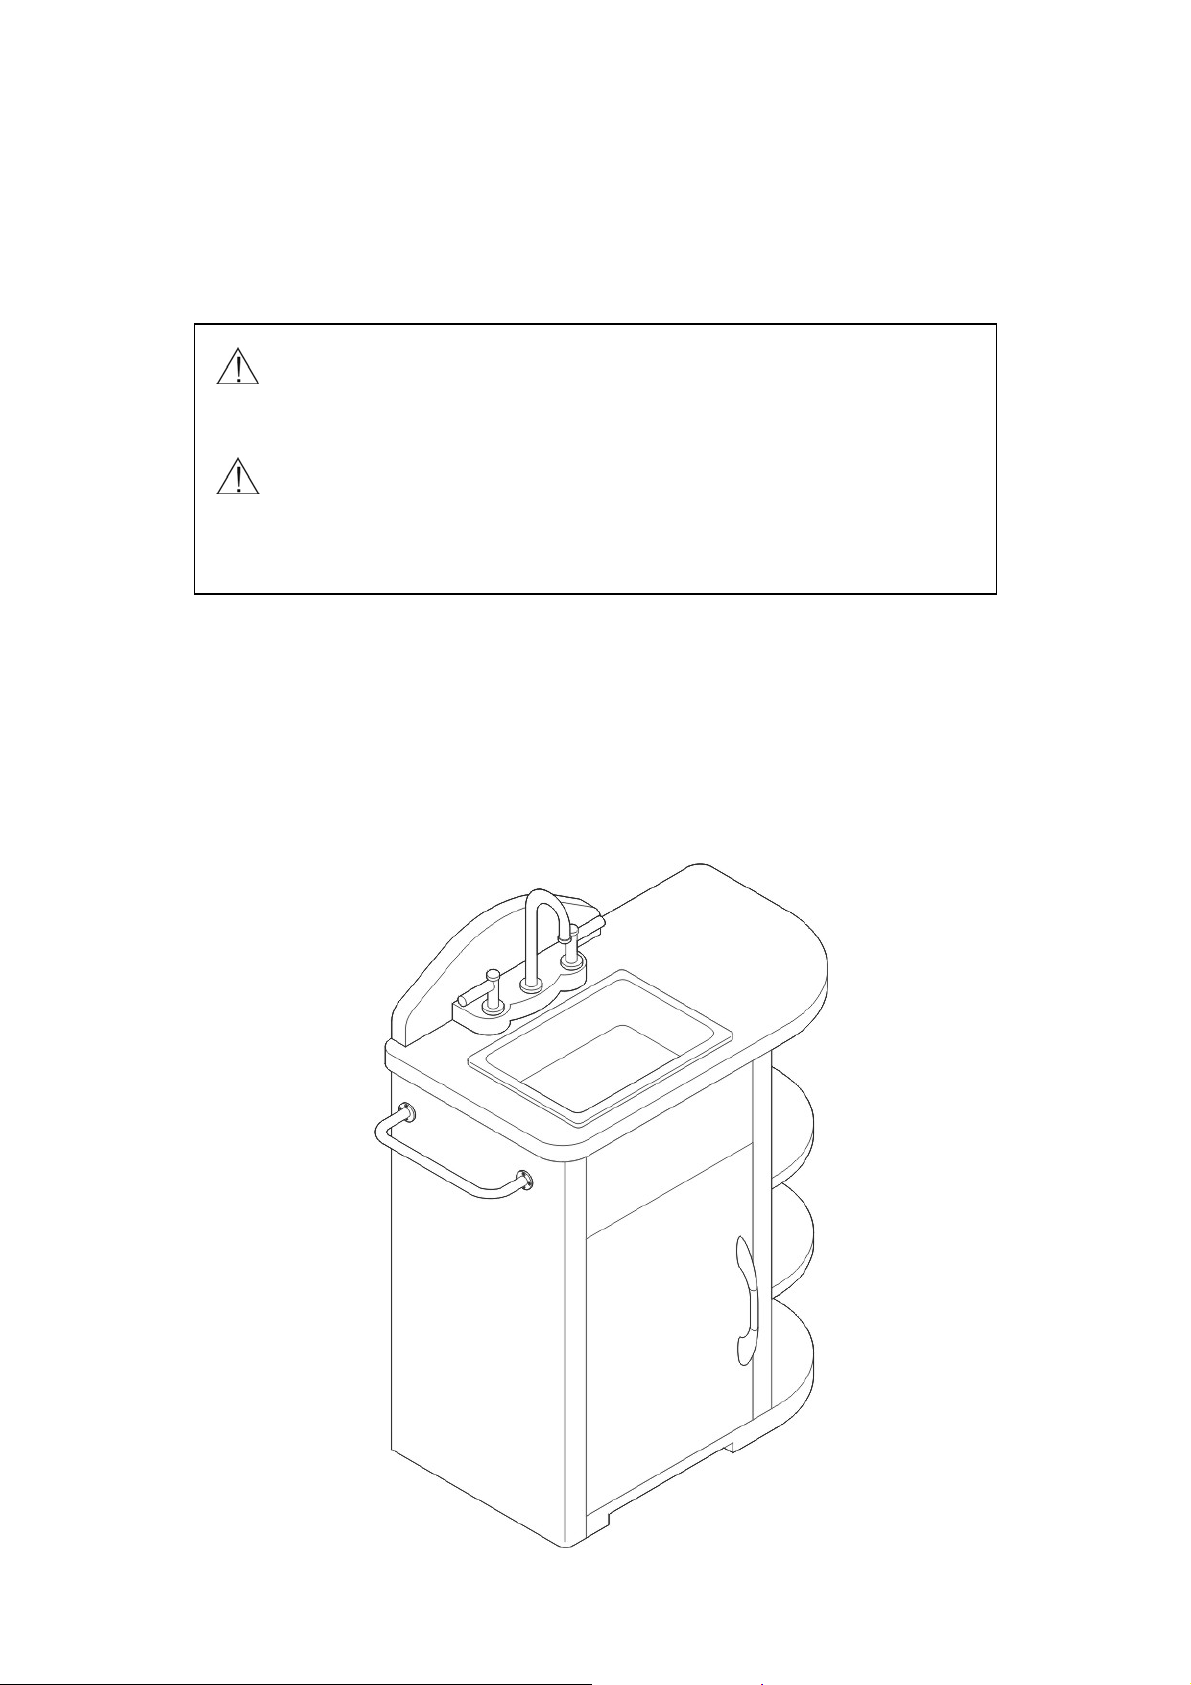
pottery barn kids
retro sink
ÉVIER RÉTRO
for age 3 and up
à partir de 3 ans
CAUTION: Adult assembly required. This item contains small
parts in the unassembled state and care should be taken in the
unpacking and assembly of the product.
MISE EN GARDE : Assemblage par un adulte nécessaire. Non
assemblé, cet article comprend de petites pièces et il faut donc
le déballer et l’assembler avec soin.
Caution – Assembly required. Please read
this assembly instruction carefully before
beginning. Please take care when unpacking
the item. Make sure all pieces are present.
Use caution when using power tools to aid in
assembly. Power tools can split wood or strip
hardware if not used carefully.
Mise en garde ⎯ Assemblage nécessaire.
Lire attentivement le mode d’assemblage
avant de commencer. Procéder avec
précaution lors du déballage de l’article.
Vérifier que toutes les pièces soient bien là.
Faire attention en utilisant des outils
électriques, car ils peuvent fendre le bois ou
arracher le filet du matériel.
Page 1 of 6
Page 2
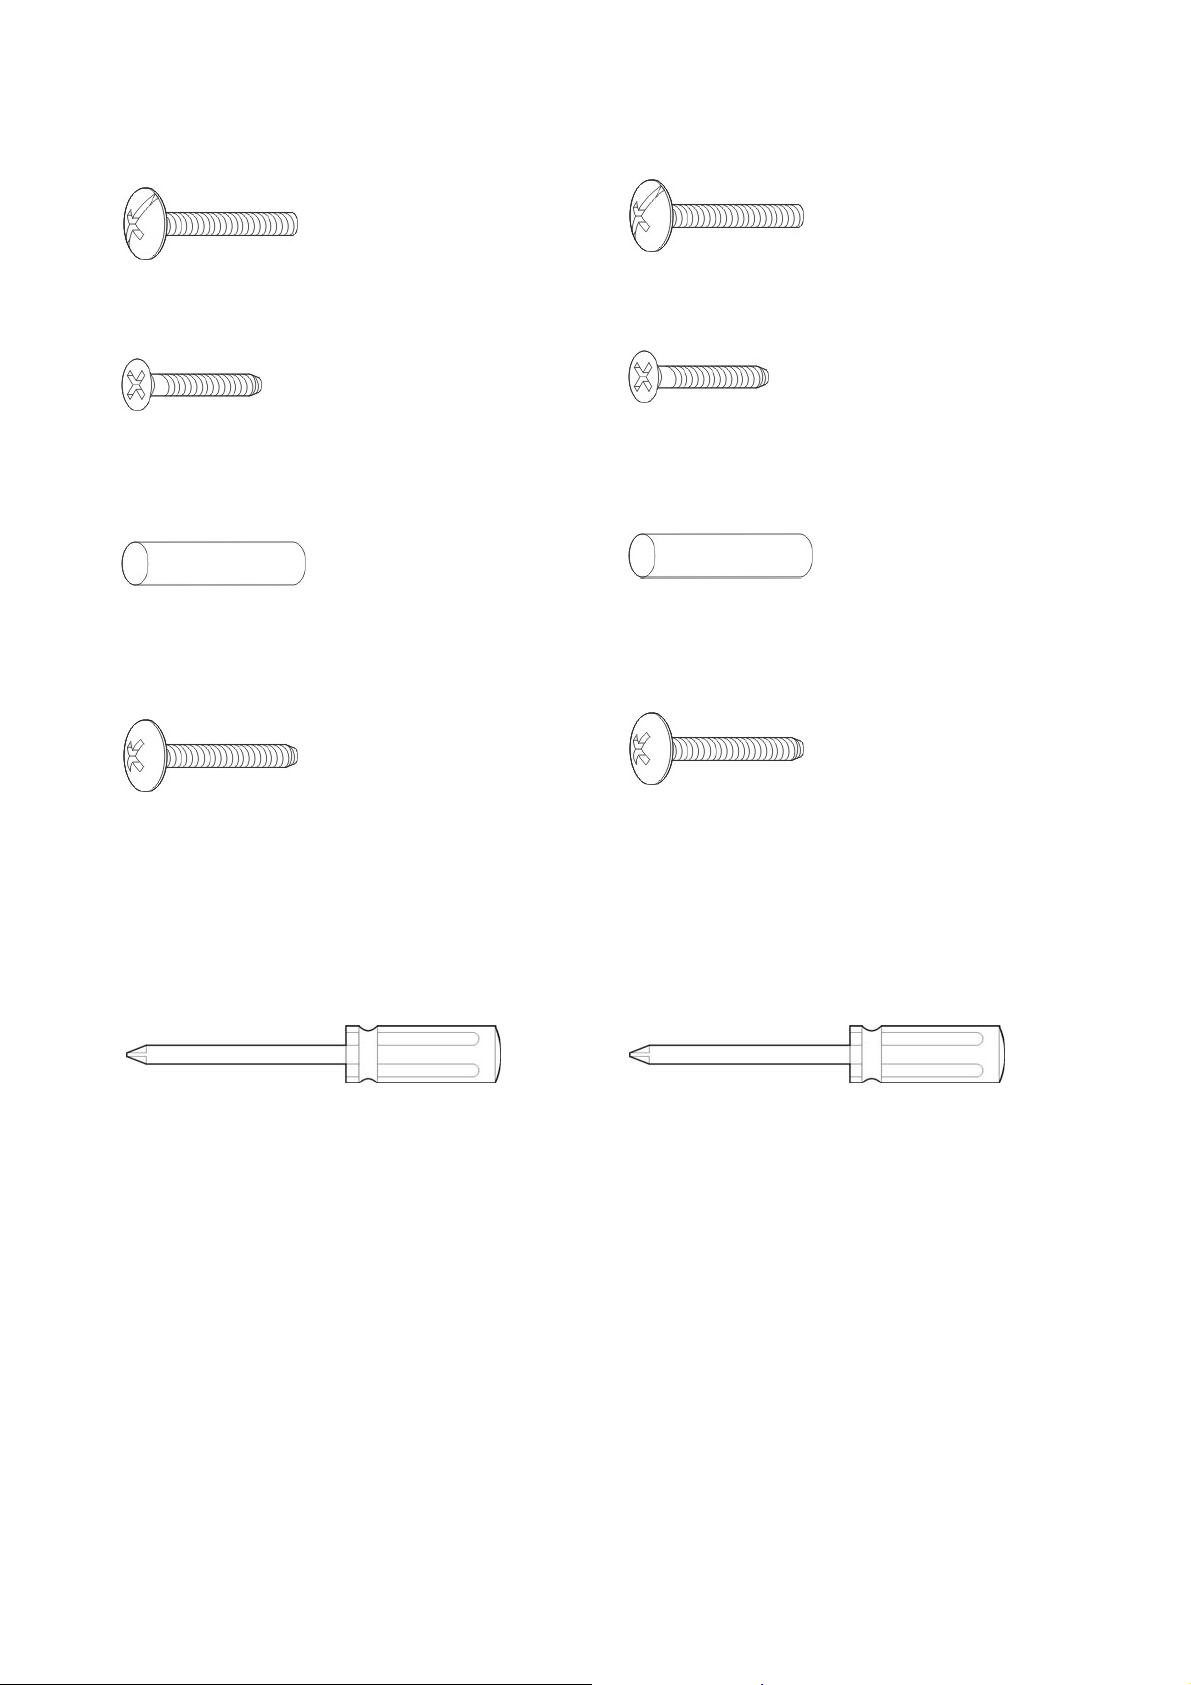
HARDWARE INCLUDED
6 Phillips Head Bolt (A)
6 Blunt Screw (B)
4 Metal Shelf Peg (C)
2 Pan Head Screw (D)
TOOLS NEEDED
1 Phillips Head Screwdriver (not included)
MATÉRIEL INCLUS
6 boulons à tête cruciforme (A)
6 vis à bout arrondi (B)
4 supports d’ étagère en metal (C)
2 vis à tête cylindrique bombée (D)
OUTILS NÉCESSAIRE
1 Tournevis à tête cruciforme (non fourni)
Page 2 of 6
Page 3
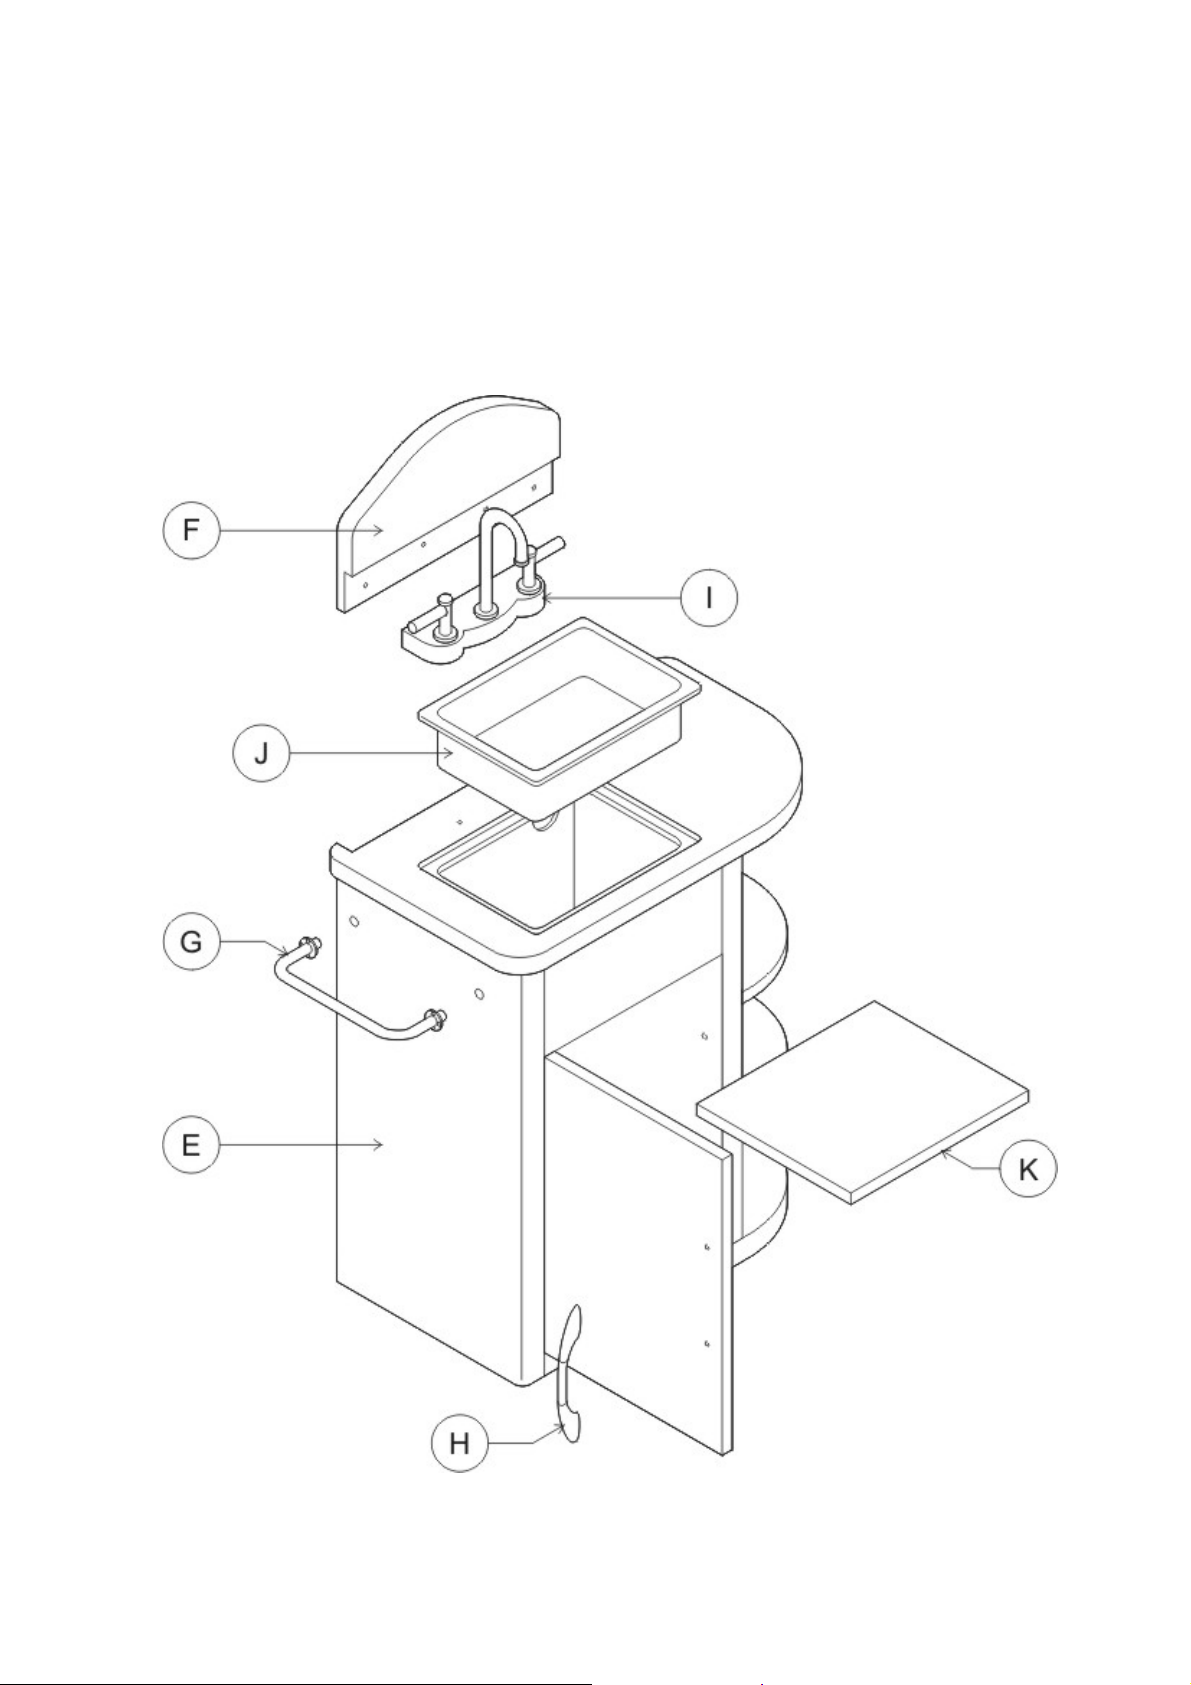
PARTS INCLUDED
1 Body (E)
1 Backsplash Board (F)
1 Metal Towel Holder (G)
1 Door Handle (H)
1 Faucet Set (I)
1 Sink (J)
1 Shelf (K)
PIÈCES FOURNIES
1 armoire (E)
1 dosseret (F)
1 porte-serviettes métallique (G)
1 poignée d’armoire (H)
1 bloc-robinet (I)
1 évier (J)
1 étagère (K)
Page 3 of 6
Page 4
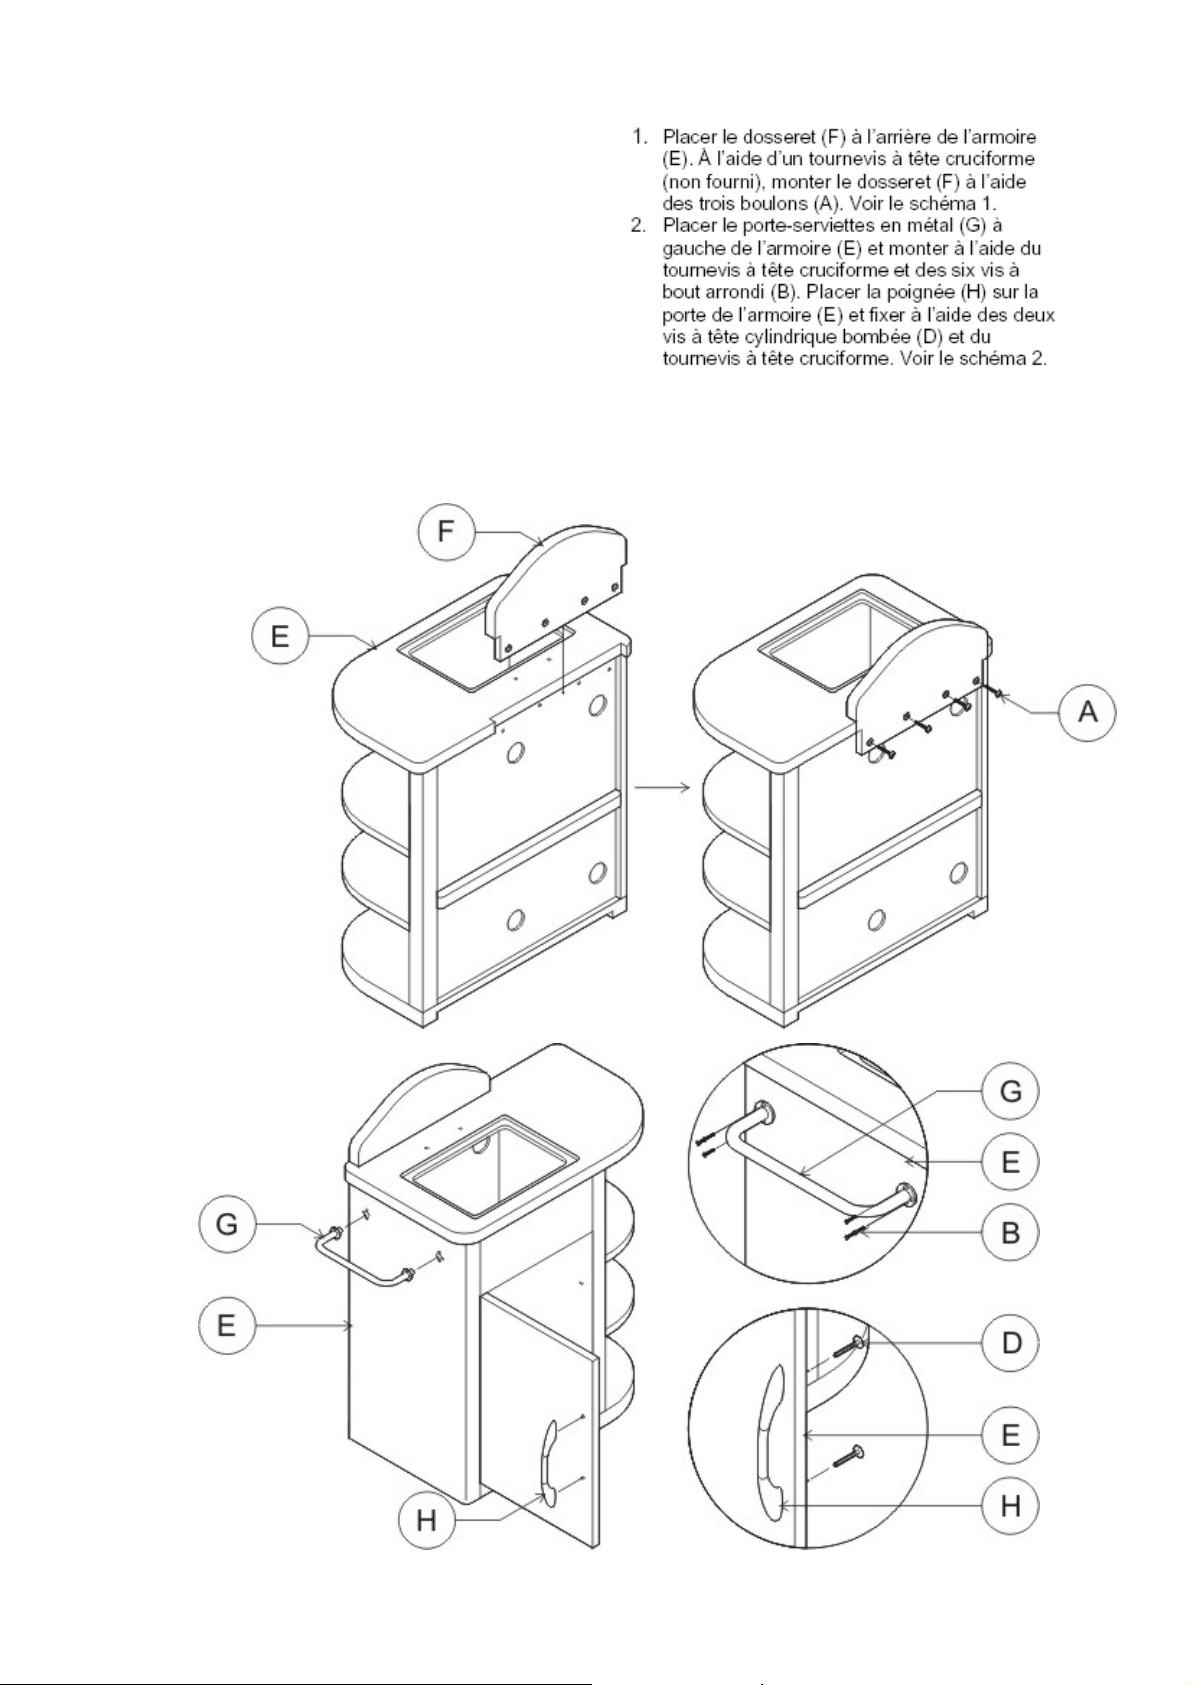
ASSEMBLY
1. Position the backsplash board (F) at
the back of the body (E). Using a
phillips head screwdriver (not included)
secure the backsplash board (F) with
four bolts (A). See diagram 1.
2. Position the metal towel holder (G) on
the left side of the cabinet (E) and
using a phillips head head screwdriver
(not included), secure with six blunt
screws (B). Position the door handle
(H) on the door of the cabinet (E) and
using a phillips head head screwdriver
(not included), secure with two pan
head screws (D). See diagram 2.
ASSEMBLAGE
Diagram 1
Schema 1
Diagram 2
Schema 2
Page 4 of 6
Page 5
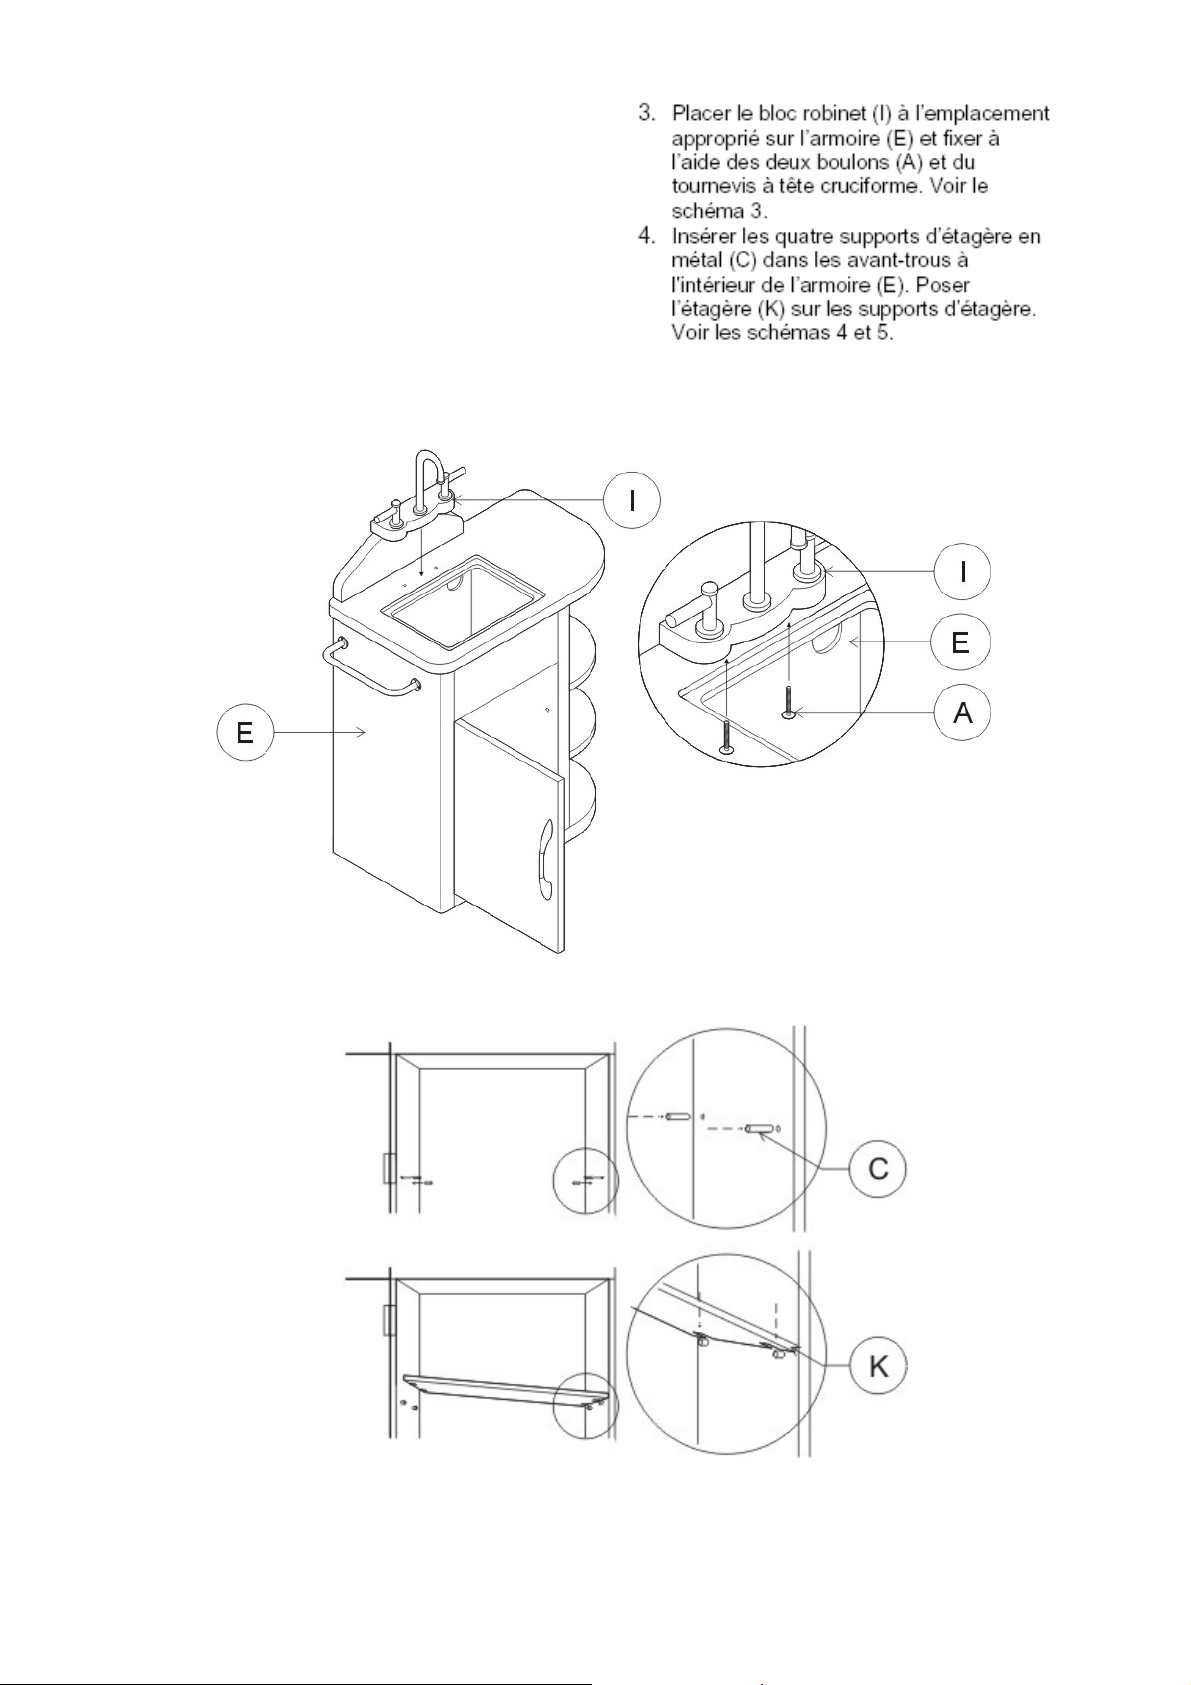
3. Position the faucet set (I) on its
proper postion on the cabinet (E) and
using a phillips head screwdriver (not
included) secure with two bolts (A).
See diagram 3.
4. Insert the four metal shelf pegs (C)
into the pre-drilled holes inside the
cabinet (E). Set the shelf (K) on the
metal shelf pegs. See diagram 4 and
diagram 5.
Diagram 3
Schema 3
Diagram 4
Schema 4
Page 5 of 6
Page 6
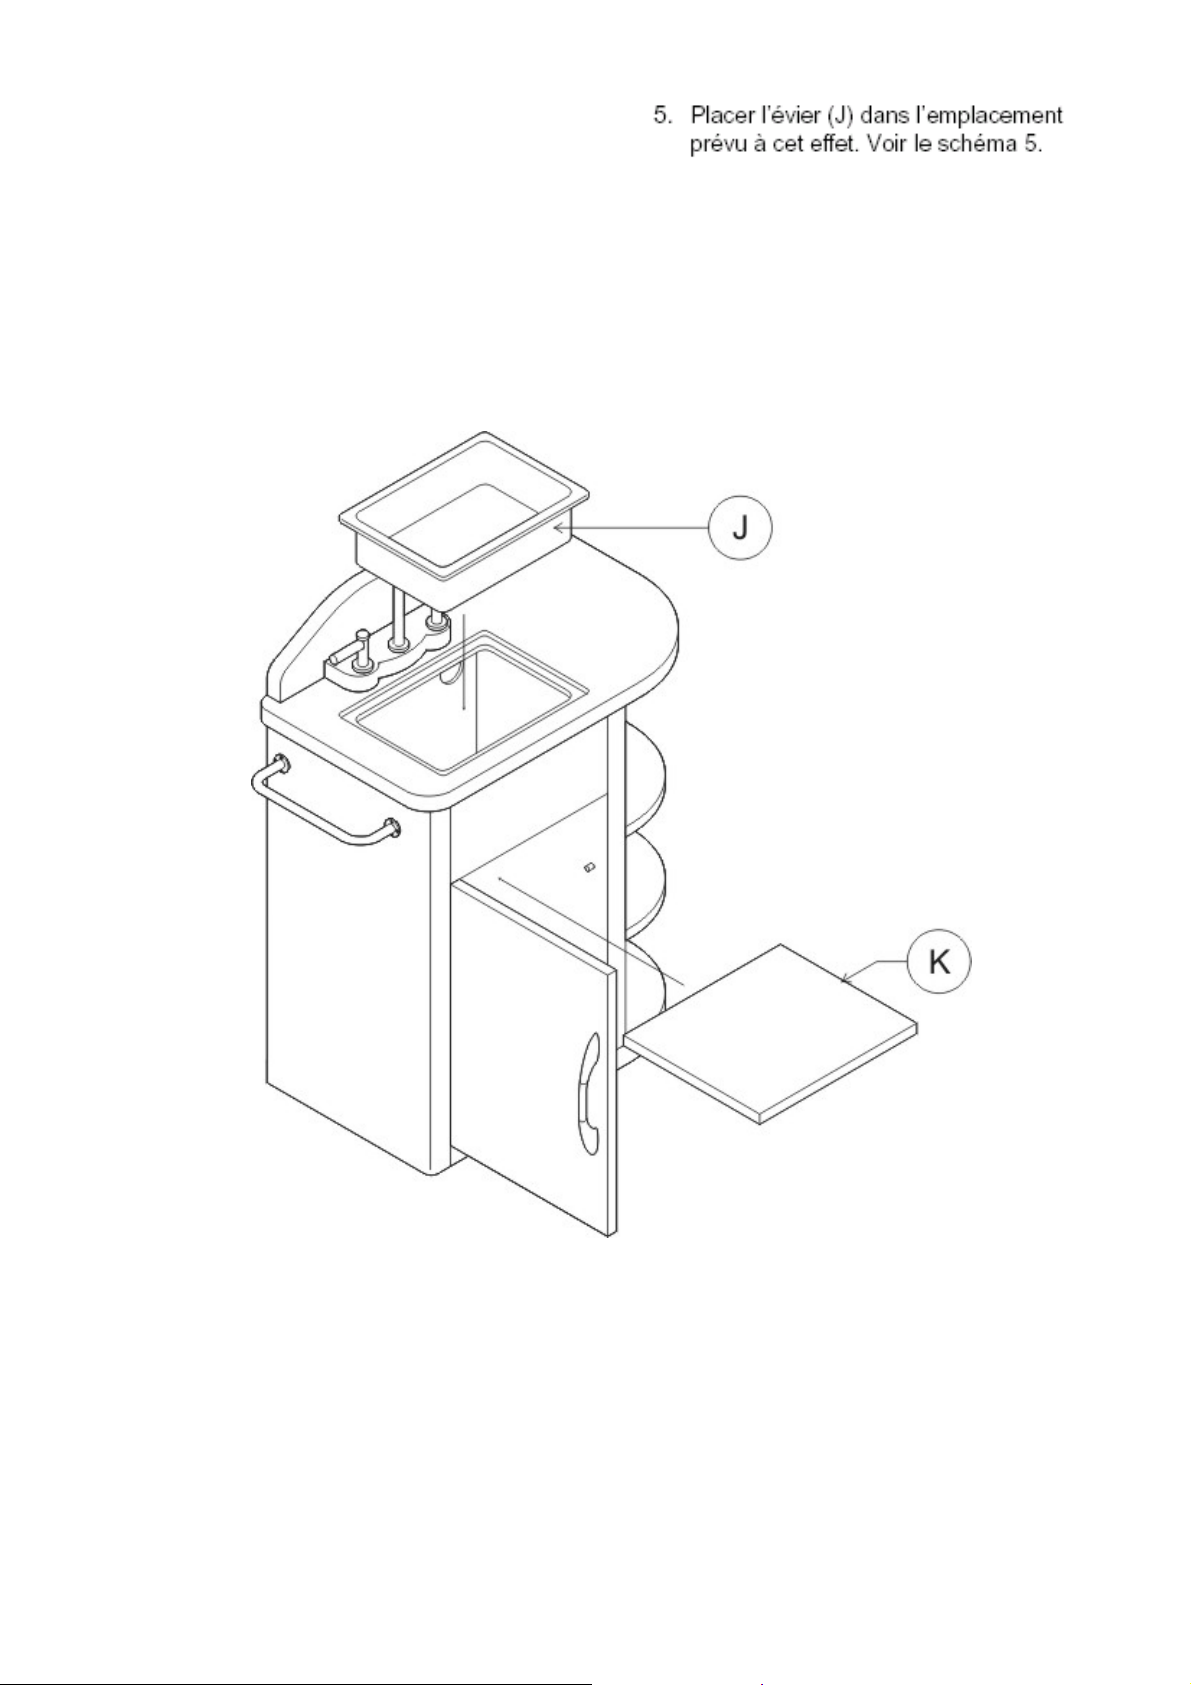
5. Set the sink (J) into the basin hole in
the cabinet. See diagram 5.
Diagram 5
Schema 5
Thank you for your purchase
Nous vous remercions de cet achat
Page 6 of 6
 Loading...