

Page 1
pottery barn kids
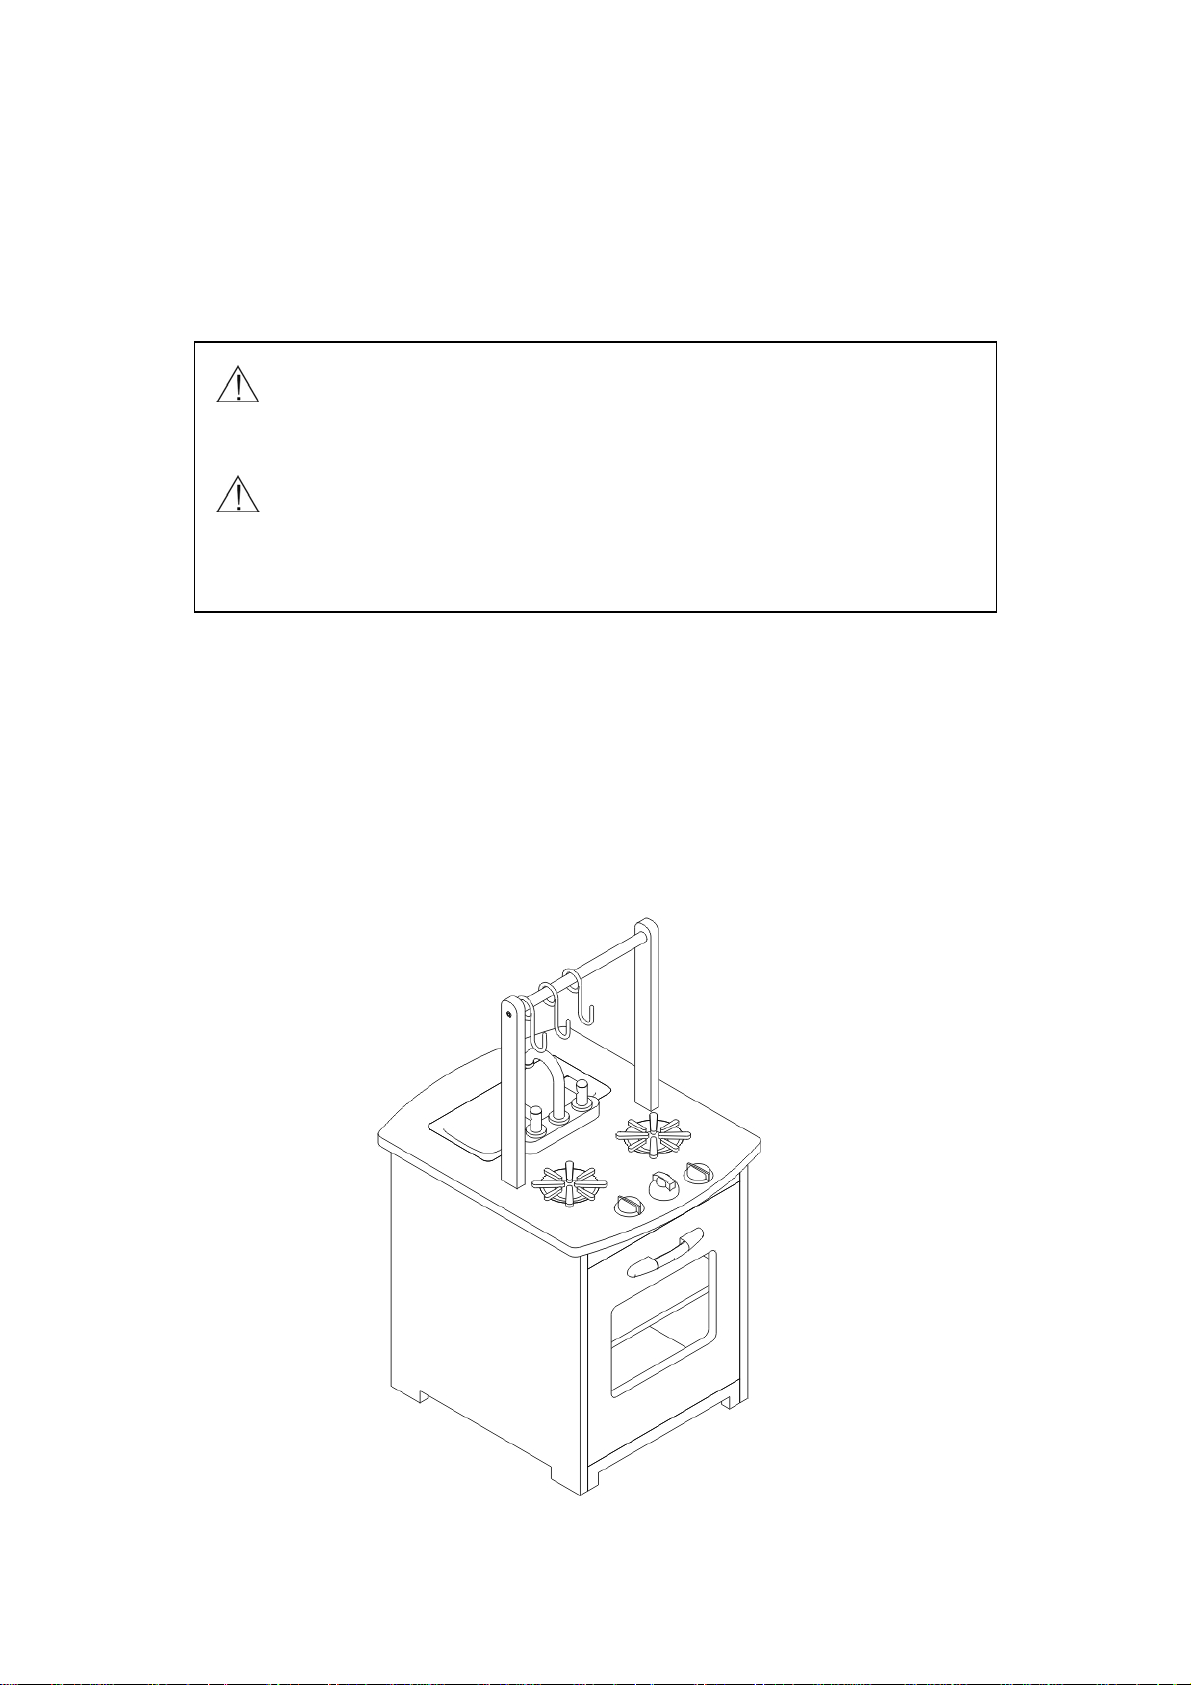
retro kitchen 360 island
Îlot de cuisine rétro 360
for age 3 and up
à partir de 3 ans
CAUTION: Adult assembly required. This item contains small
parts in the unassembled state and care should be taken in the
unpacking and assembly of the product.
MISE EN GARDE : Assemblage par un adulte nécessaire. Non
assemblé, cet article comprend de petites pièces et il faut donc
le déballer et l’assembler avec soin.
Caution – Assembly required. Please read
this assembly instruction carefully before
beginning. Please take care when unpacking
the item. Make sure all pieces are present.
Use caution when using power tools to aid in
assembly. Power tools can split wood or strip
hardware if not used carefully.
Mise en garde ⎯ Assemblage nécessaire.
Lire attentivement le mode d’assemblage
avant de commencer. Procéder avec
précaution lors du déballage de l’article.
Vérifier que toutes les pièces soient bien là.
Faire attention en utilisant des outils
électriques, car ils peuvent fendre le bois ou
arracher le filet du matériel.
Page 1 of 6
Page 2
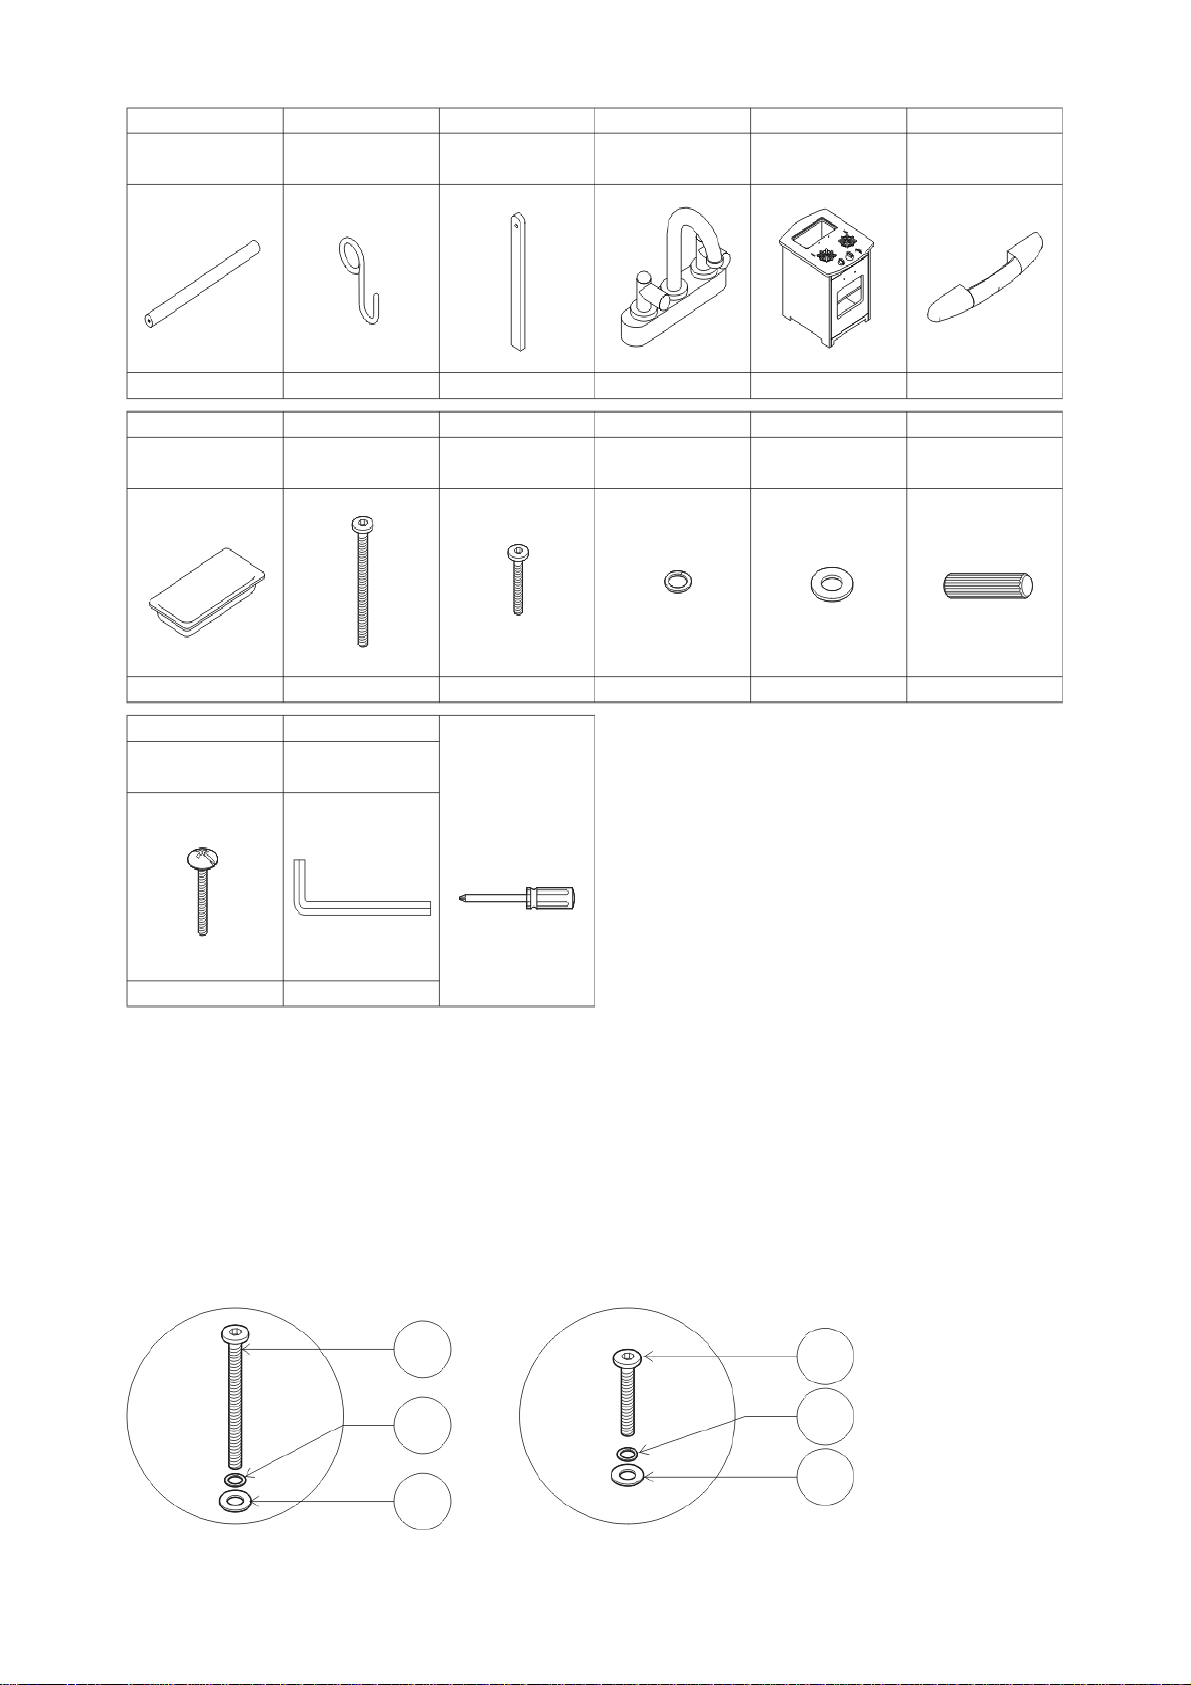
HARDWARE INCLUDED :
MATÉRIEL INCLUS :
A
Metal Rod
Tige métallique
S-Hook
Crochet en S
B
C
Wood Support
Support en bois
D
Water Faucet
Robinet
E
Island Body
Îlot
F
Door Handle
Poignée de
porte
1 PC
G
Sink
Évier
1 PC
M
Head Bolt Screw
Vis à tête ronde
2 PCS
3 PCS
H
Long Bolt
Boulon long
2 PCS
N
Allen Key
Clé Allen
1 PC
2 PCS
I
Short Bolt
Boulon court
4 PCS
HARDWARE
NEEDED (Not
Included) :
MATÉRIEL REQUIS
(non compris) :
Phillips Head
Screwdriver
Tournevis à tête
Phillips
1 PC
J
Lock Washer
Rondelle de
blocage
4 PCS
1 PC
K
Flat Washer
Rondelle
4 PCS
1 PC
L
Wood Dowel
Goujon en bois
4 PCS
ASSEMBLY :
1. Assemble a long bolt and washers set by
threading a lock washer (J) and flat washer (K)
onto a long bolt (H). Make 2 sets.
Assemble a short bolt and washers set by
threading a lock washer (J) and flat washer (K)
onto a short bolt (I). Make 2 sets. See fig. 1.
H
J
K
Page 2 of 6
ASSEMBLAGE :
1. Monter des ensembles de boulons longs
et de rondelles en enfilant une rondelle de
blocage (J) et une rondelle plate (K) sur un
boulon long (H). Monter 2 ensembles.
Monter des ensembles de boulons courts
et de rondelles en enfilant une rondelle de
blocage (J) et une rondelle plate (K) sur un
boulon court (H). Monter 2 ensembles. Voir
schéma 1.
I
J
K
Fig. 1
Schema 1
Page 3

A
A
2. On a soft, clean surface, thread the metal rod
(A) into the loops of the s-hooks (B). See fig. 2.
2. Sur une surface souple et propre,
enfiler la tige métallique (A) dans
les boucles des crochets en S
(B). Voir schéma 2.
B
3. Insert each end of the metal rod (A) into the
pre-drilled hole in the wood support (C). Secure
the wood support (C) on both ends of the metal
rod (A) by screwing in a short bolt (I) using the
provided allen key (N). See fig. 3.
Fig. 2
Schema 2
3. Insérer chaque extrémité de la
tige métallique (A) dans les trous
percés dans le support en bois
(C). Fixer le support en bois (C)
sur les deux extrémités de la tige
métallique (A) en vissant un
boulon court (I) à l'aide de la clé
Allen fournie(N). Voir schéma 3.
C
I
C
A
I
Fig. 3
Schema 3
Page 3 of 6
Page 4

A
4. Attach the Fig. 3 assembly onto the island
body (E) with two wood dowels (L) on each of
both ends. Place the water faucet (D) onto the
island body (E) making sure all the secrewholes
are aligned. See fig. 4.
4. Fixer l’assemblage du schéma 3
sur le corps de l’îlot de cuisine (E) à
l'aide de deux goujons en bois (L) à
chaque extrémité. Placer le robinet (D)
sur l'îlot (E) en s'assurant que les trous
de vis sont alignés. Voir schéma 4.
Fig. 3 Assembly
ssemblage
L
E
5. Secure the fig. 3 assembly onto the island
body (E) by screwing two long bolt assemblies
from under the island body top (E) using the
provided allen key (N). You will have to open
the oven door to access the screwholes. See
fig. 5.
D
Fig. 4
Schema 4
5. Fixer l’assemblage du schéma 3 sur
l’îlot (E) en vissant deux assemblages de
boulons longs d’en-dessous du dessus
de l’îlot (E) à l’aide de la clé Allen (N). Il
faut ouvrir la porte du four pour accéder
aux trous de vis. Voir schéma 5.
Long Bolt and
Washers Assembly
Assemblage
de boulon long et
de rondelles
Fig. 5
Schema 5
Page 4 of 6
Page 5

y
6. Secure the water faucet (D) from fig. 4
onto the island body top (E) by screwing two
short bolt assemblies from under the island
body top (E) using the provided allen key
(N). You will have to access the screwholes
from the side without a door. See fig.6.
Short Bolt and
Washers Assembl
Assemblage
de boulon court et
de rondelles
6. Fixer le robinet (D) du schéma 4
sur l’îlot (E) en vissant deux
boulons courts d’en-dessous du
dessus de l’îlot (E) à l’aide de la clé
Allen (N). Il faut passer du côté
sans porte pour atteindre les trous
de vis. Voir schéma 6.
Fig. 6
Schema 6
7. Attach the door handle (F) onto the door of
the island body (E) and secure by screwing two
head bolt screws (M) using a phillips head
screwdriver (not included). See fig.7.
M
7. Fixer la poignée de porte (F) sur
la porte de l’îlot (E) à l'aide de
deux vis à tête ronde (M) et un
tournevis Phillips (non compris).
Voir schéma 7.
F
E
Fig. 7
Schema 7
Page 5 of 6
Page 6

8. Place the sink (G) onto the sink counter of
the island body (E). See fig. 8.
8. Placer l’évier (G) sur le comptoir
d’évier de l’îlot (E). Voir schéma 8.
E
G
Fig. 8
Schema 8
Thank you for your purchase
Nous vous remercions de cet achat
Page 6 of 6
 Loading...