

Page 1
pottery barn kids
OLIVIA HI-LOW CHANGING TABLE
WARNING: FALL HAZARD – To prevent death or serious injury from falls,
always keep child within arm’s reach. NEVER LEAVE CHILD UNATTENDED and always use
restraining system.
This changing table is intended for use with children weighin g up to 50 pounds.
IMPORTANT SAFETY INSTRUCTIONS:
• This changing table is designed to be used with or without a changing pad. The only pad approved for use is the
Pottery Barn Kids Contoured Changing Pad (sold separately). The dimensions of that pad are 31 7/8 "(810mm)
wide x 15 3/4" (400mm) length x 1 1/2 (40mm) minimum thickness.
• Do not use Changing Table, add on Changing Unit or Contoured Changing Pad if any parts are damaged or
broken.
PRE-ASSEMBLY:
• Please read all instructions before beginning assembly. The illustrations provided allow for easier assembly when
used in conjunction with the assembly instructions. Keep instructions for future use.
• For your safety and ease, assembly by two adults is re commend ed.
• Remove all parts and hardware from box and lay out on a carpeted or scratch-fee work surface, as this will avoid
damaging any parts du r ing assembly. The shipping box provides and ideal work surface. Do not dispose of any
contents until assembly is completed to avoid accidentally discarding email parts or hardware.
• Use the parts and hardware lists to identify and separate each of the pieces included.
• Note: Do not fully tighten all bolts until all parts are in place. Failure to follow these instructions may cause the bolts to
misalign during assembly.
• The use of power tools for assembly is not recommended. Power tools can damage hardware or split wood.
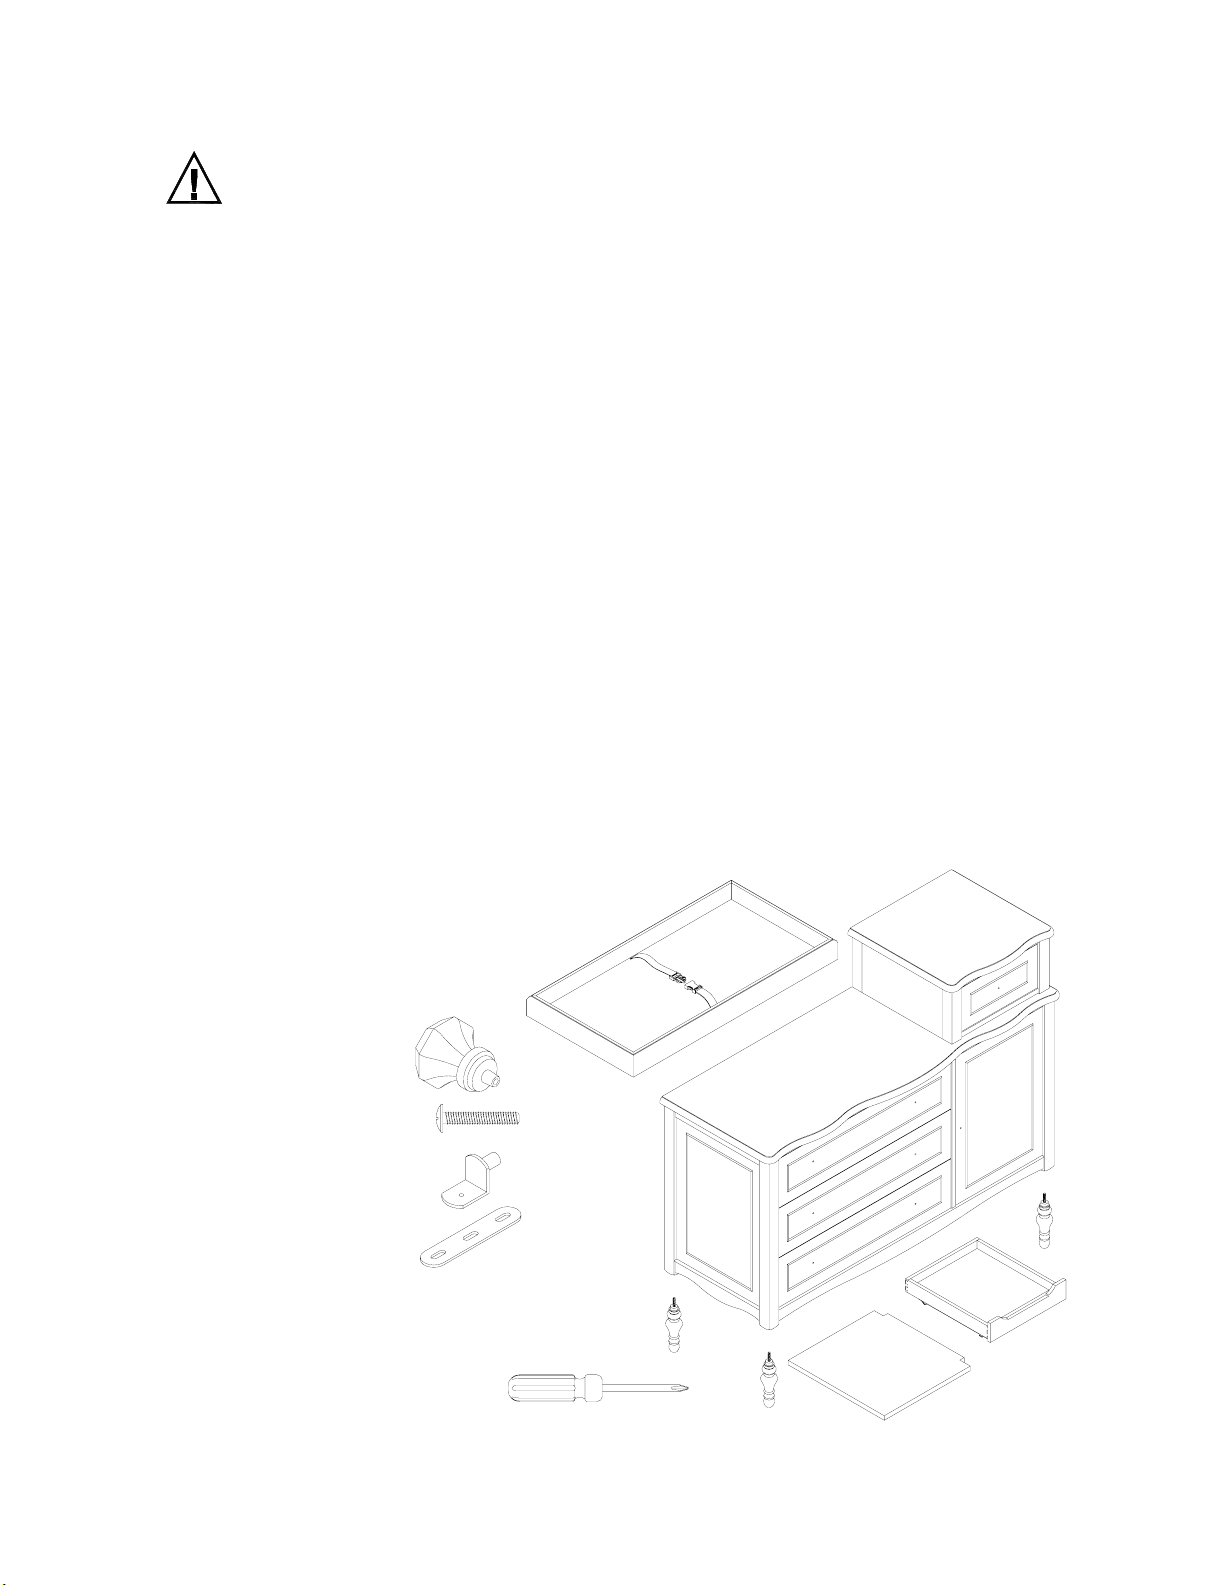
PARTS INCLUDED:
(A) Dresser - 1pc
(B) Leg - 4pcs
(C) Shelf - 1pc
(D) Drawer - 1pc
(E) Topper - 1pc
HARDWARE ENCLOSED:
(F) Knob - 8pcs
(G) #4x15mm Screw - 14pcs
(H) Shelf Support - 4pcs
(I) Mending plate- 2pcs
TOOLS REQUIRED:
Phillips head screwdriver (not included)
E
A
D
C
B
Page 1/5
Page 2
ASSEMBLY INSTRUCTIONS:
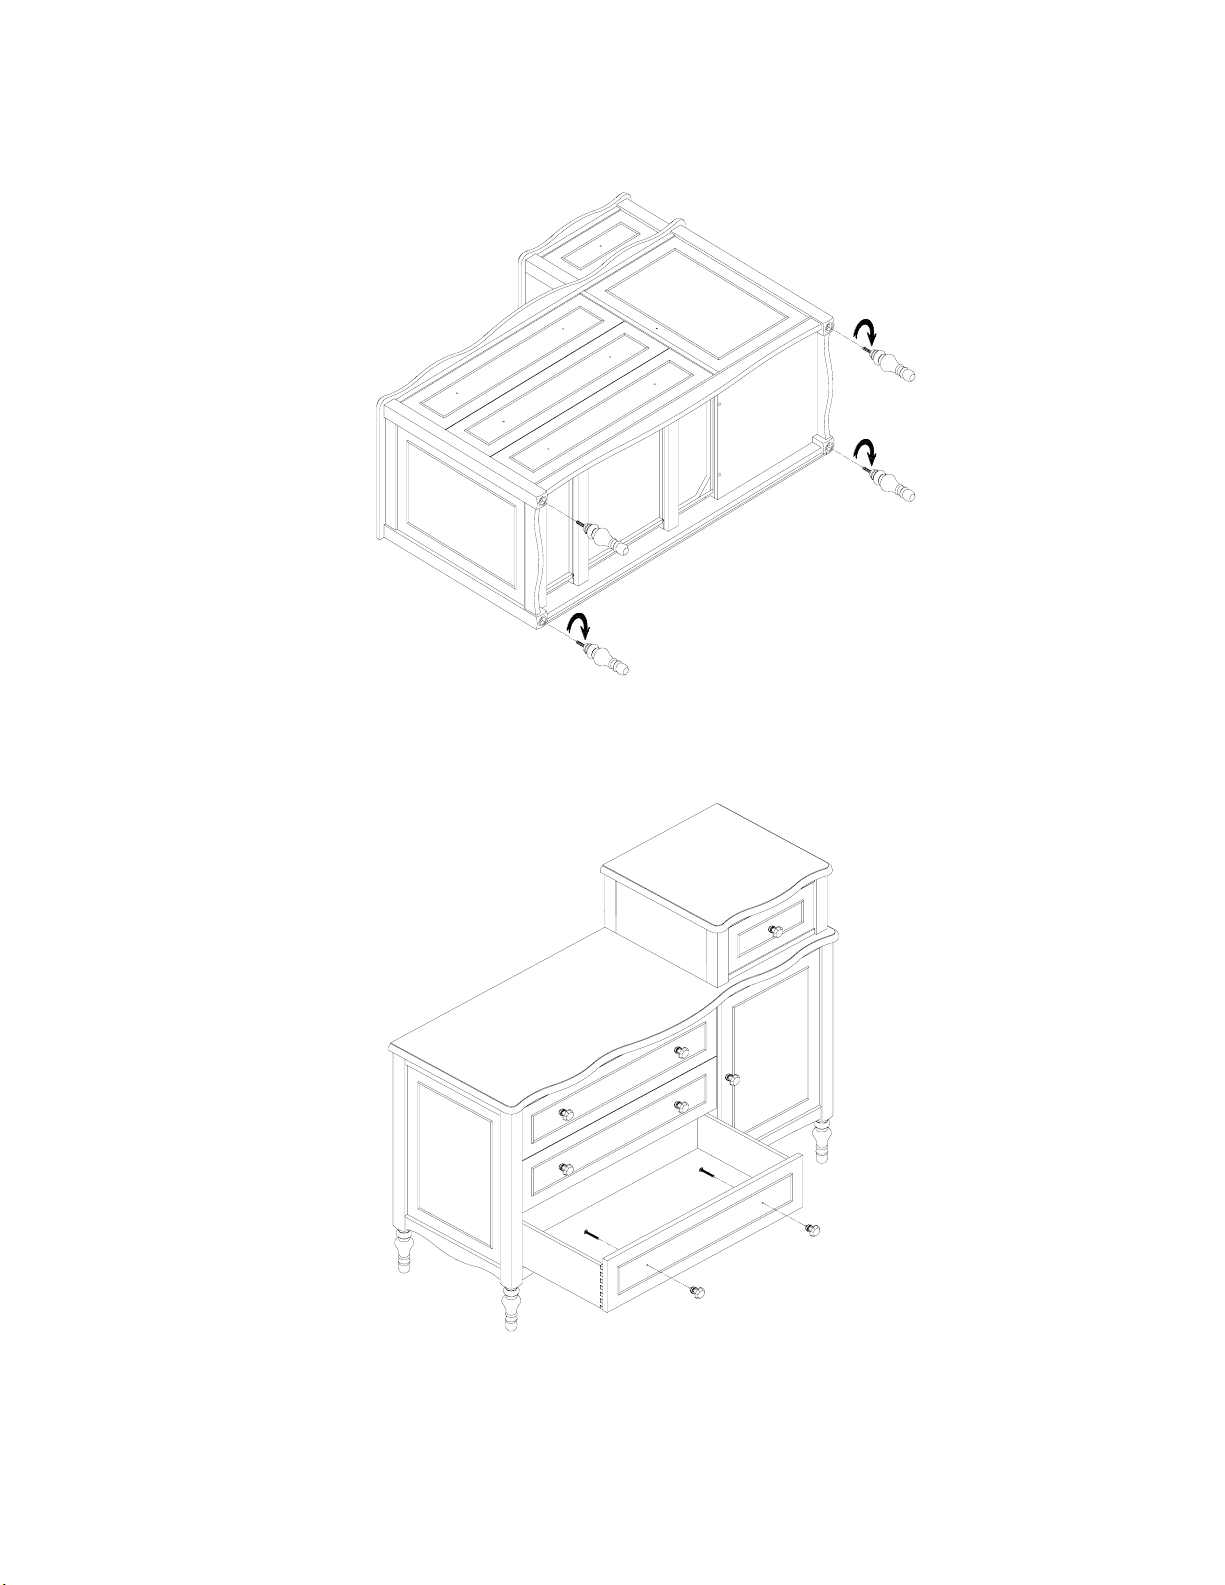
1. Lay Dresser (A) down on a soft surface such as a carpet. Attach the Leg (B) to the Dresser (A) (see Fig. 1).
(Fig.1)
A
B
2. Turn the Dresser upright. Fasten Knobs (F) to drawers and door using Screws (G). Tighten with Phillips head
screwdriver. (See Fig. 2).
(Fig.2)
G
G
F
F
Page 2/5
Page 3

3. Attach the Drawer (D) to Dresser (A) by aligning the metal runner mounted under Drawer (D) with the metal runner
located interior of cabinet (Fig 3).
(Fig. 3)
D
4. Insert (4) Shelf Supports (H) into the pre-drilled holes on the inner side panels of Dresser (A) at the desired height.
(See Fig. 4).
(Fig. 4)
H
Page 3/5
Page 4

5. Place the Shelf (C) onto the Shelf Supports (H). Ensure Shelf (C) is properly supported by all (4) Shelf Supports (H).
(See Fig.5)
(Fig. 5)
6. Carefully place the Topper (E) on Dresser (A), as shown in figure 6. Align the pre-drilled holes of the Topper (E) to
the pre-drilled holes at the back of the Dresser (A). Fasten Mending plate (I) to the Topper (E) and the Dresser (A)
using (3) Screws (G). Tighten with Phillips head screwdriver. Repeat with second Mending plate (I).
(Fig. 6)
E
C
I
G
6. As a safety precaution, please follow the instructions enclosed to secure the changing
table to the wall using tipping-restraint kit included.
Page 4/5
Page 5

7. To fasten restraint strap, insert the buckle as shown in Figure 7. To release, press inward on tabs.
(Fig. 7)
To Fasten
To Release
8. If your floor is not perfectly even, the furniture may not sit level. Determine which corner does not touch the ground
correctly. With two people follow these steps:
• Carefully elevate the item slightly to provide access to the levelers attached to the bottom.
• Turn the levelers in a counter-clockwise direction.
• Gently set down the piece and check stability.
• Repeat steps until the furniture sits firmly on the ground. (See Fig.8)
(Fig. 8)
9. If you purchase the pottery barn kids Contoured Changing Pad, place it in the bounded area of the Changing
Table Topper (E) for use.
CARE INSTRUCTIONS:
• Dust often using a clean, soft, dry lint-free cloth.
• Blot spills immediately, and wipe with a clean, damp, cloth.
• We do not recommend the use of chemical cleansers, abrasives, or furniture polish on our lacquered finish.
• Check fasteners periodically for tightness. DO NOT over tighten. This may cause distortion or breakage.
• Parents should ensure a safe environment for the child by checking regularly, before placing the child in the
product, that every component is properly and securely in place.
Thank you for your purchase.
stores | catalog | www.potterybarnkids.com
USA 1.800.290.8181
Page 5/5
 Loading...