

Page 1
1
P
ottery barn kids
MADELINE WALLSYTEM BASE
PRE
-
ASSEMBLY:
Remove all parts and hardware
from box and lay out on a carpeted or scratch
-
free work surface (The
shipping box provides and ideal work surface)
, as t
his will avoid damaging any parts during assembly
.
Do not dispose of any contents until assembly is completed to avoid accidentally discarding small parts
or hardware.
Two people
are
recommended for ease of assembly.
Use the parts and hardware lists to identify and separate each of the pieces included pr
ior to starting
assembly.
The illustrations provided allow for easier assembly when used in conjunction with the assembly
instructions.
HARDWARE INCLUDED:
(Q) Sleeve
S
crew 4x9.5x32mm (4)
(R)
Sleeve
Nut 4x9.5x28mm (
4)(S) 5x83mm
Drill bit (1)
(T)
Wood
B
lock 50x50x19mm (1)
TOOLS REQUIRED FOR ASSEMBLY:
(1)
Phillips Head Screwdriver
,
not
included
(1) Power
Drill,not included (note: hand drill may be used)
Page 2
2
ASSEMBLY:
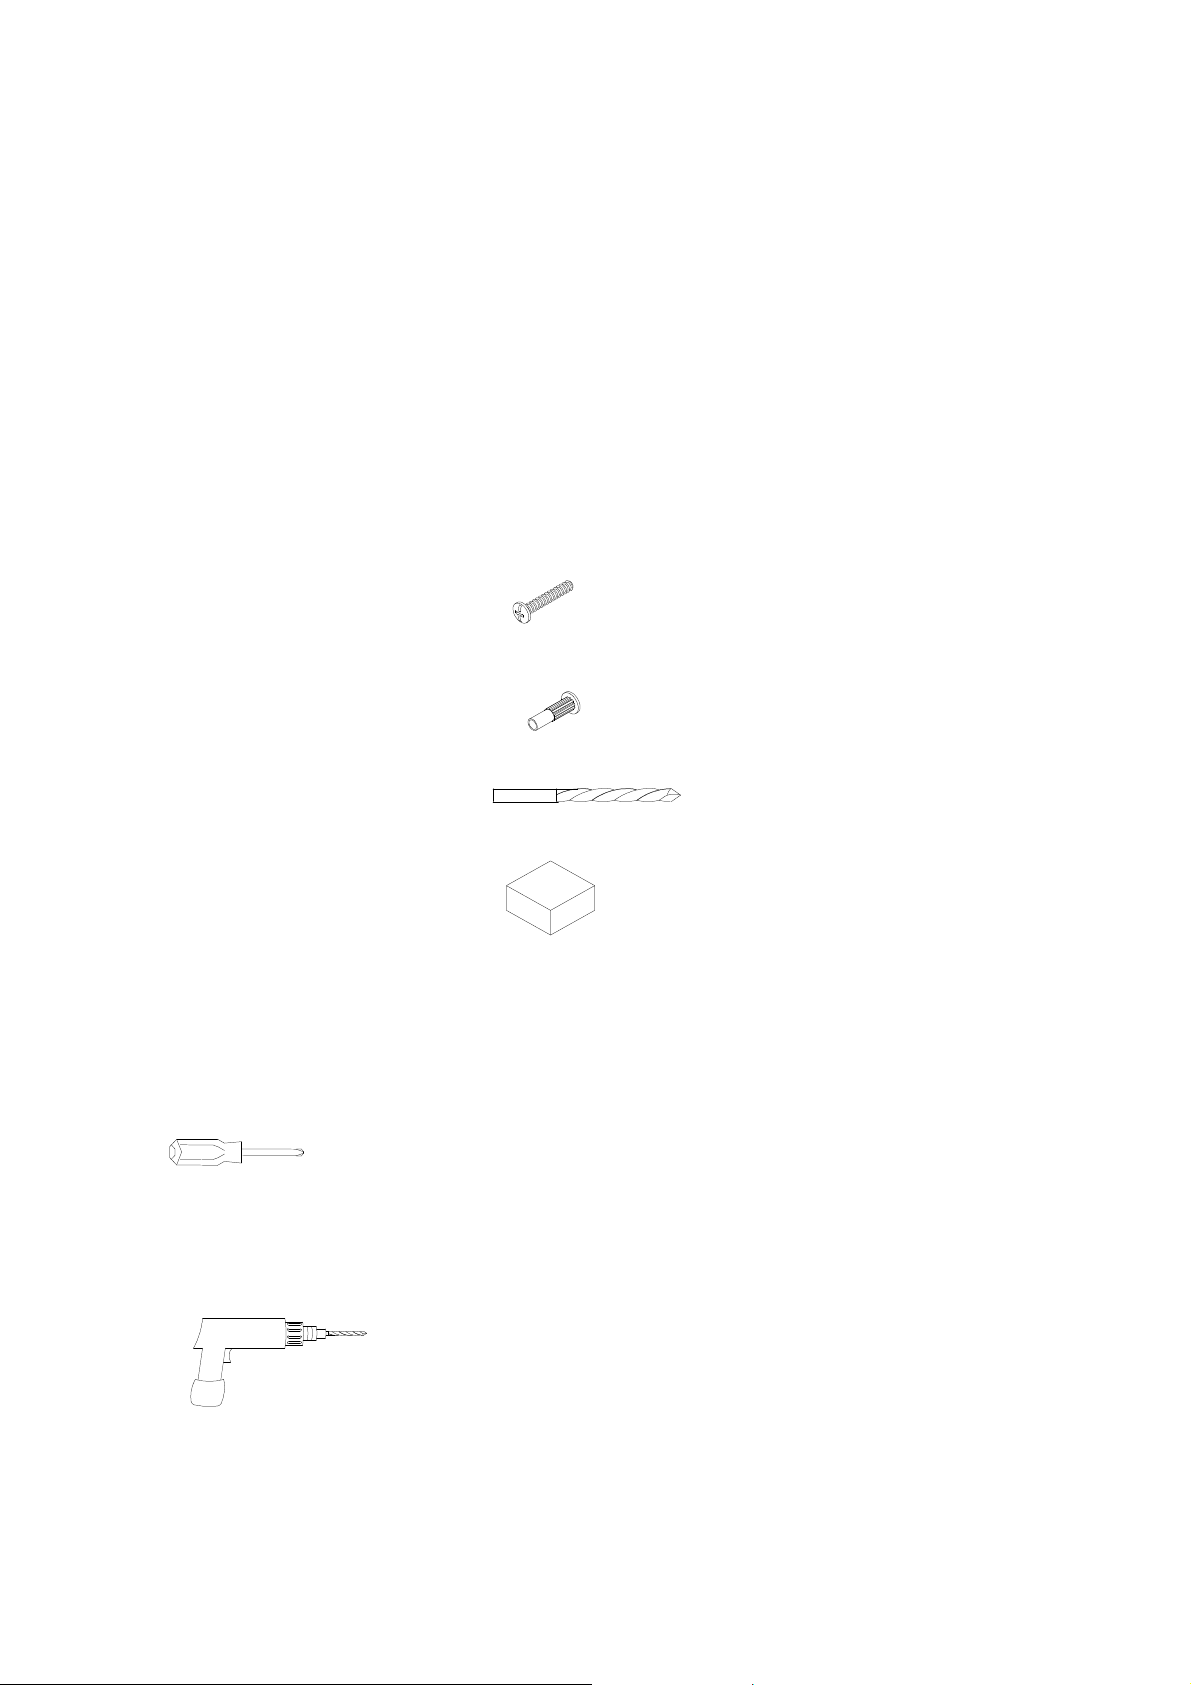
1.
Unscrew
the screw for the
S
helf support
,
and then
pull
out the
A
djustable shelf as shown.
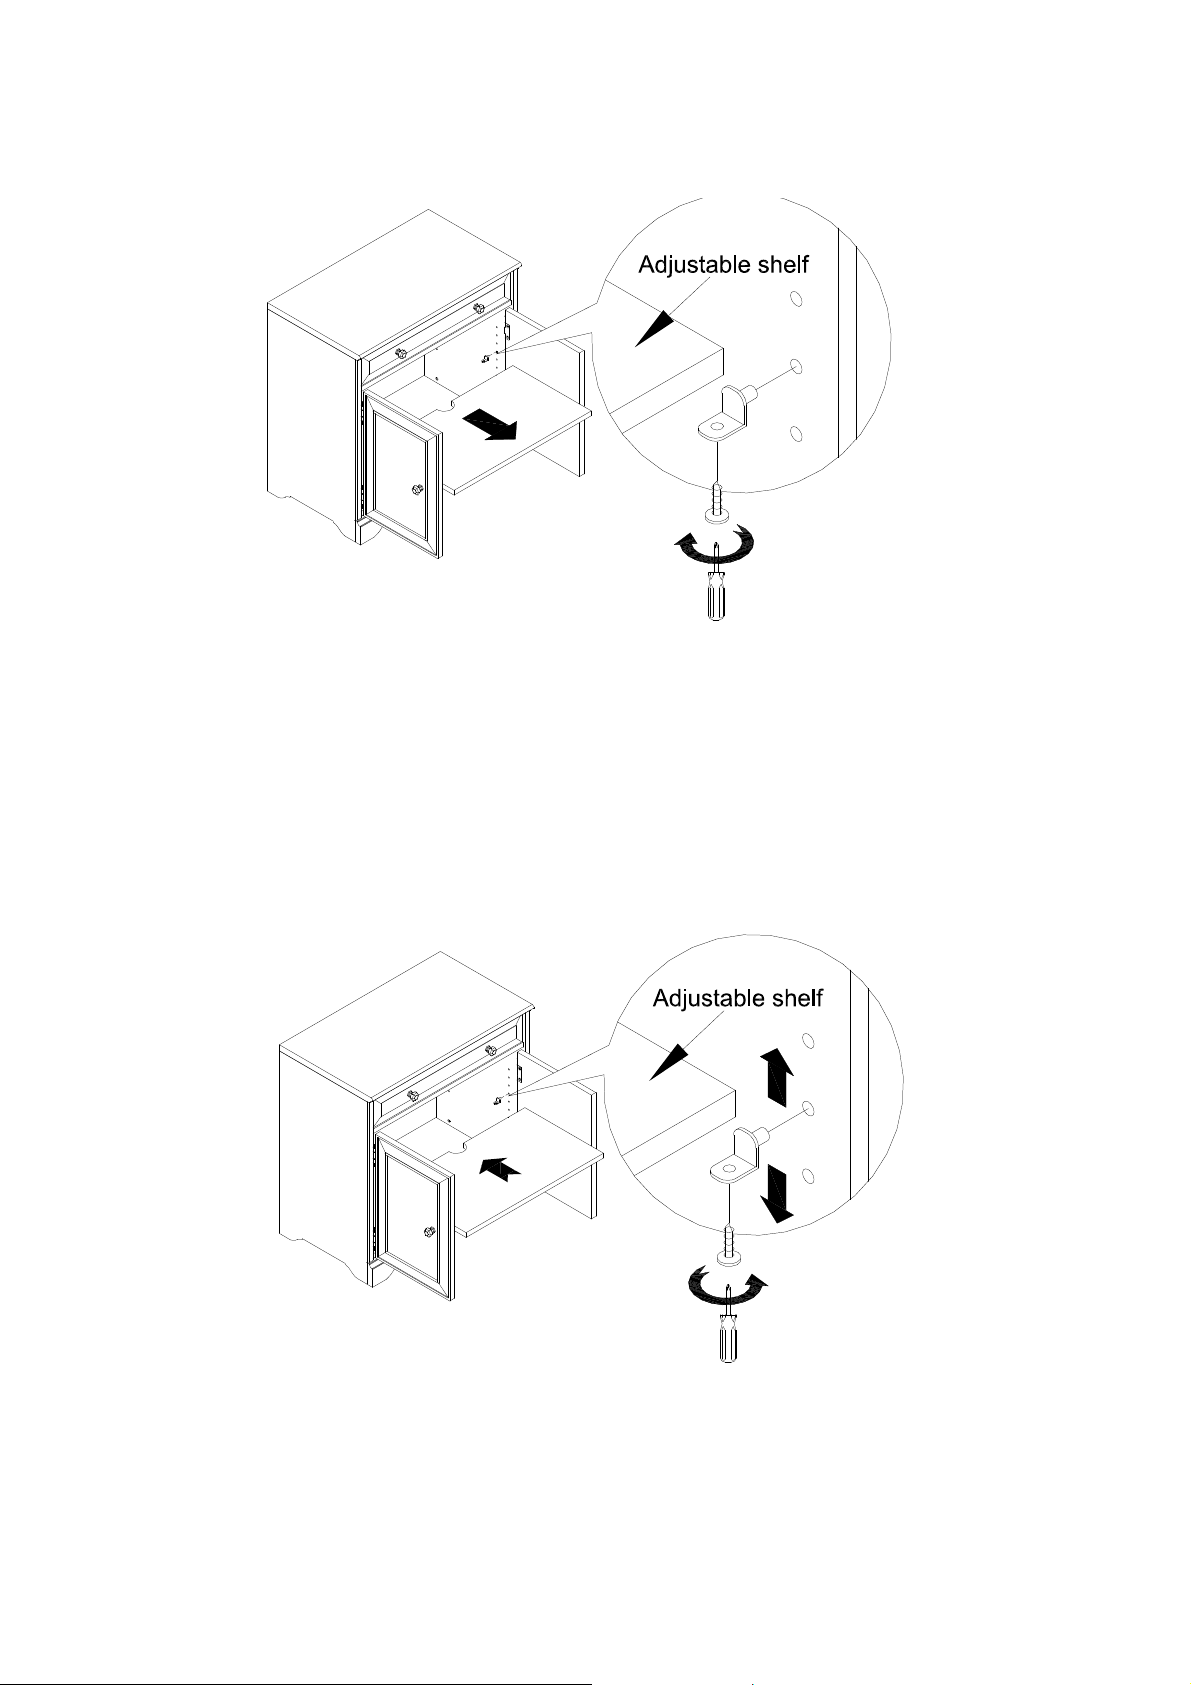
2.
Determ
ine the desired height for the
s
hel
f support. Insert the
s
helf support
into the pre
-
drilled holes as shown.
Carefully insert the
shelf
into the cabinet and gently re
st the shelf onto the shelf support.
M
ake sure shelf is
settled and set prior to setting items upon it.
A
nd then tighten the shelf support using the original screws.
Page 3

3
3.Adjust leve
lerson the
bottom
of the unit
in or out to ensure
tha
t it
stand
s
secure and
does not
rock.
4
.
Open the door of Base
cabinet. Attach
the Drill Bit (
S
) to the Power Drill (not included). Drill tobore through the
partially
-
drilled holes on the
side panels of the
Base cabinet
from the insides of
thepieces.
Hold and press the
W
oodBlock (
T
) on the opposite side of the hole being drilled to prevent
any breakage or damage when
drilling. Keep hands away from moving drill bit.
Drill (
4
) pre
-
drilled holes in the
Base cabinet
.45. Bring all the pieces together
Page 4

. Align the pre
-
drilled holes on each piece.
F
ix the base using
Sleeve
Screw
4x9.5x32mm
(Q)
and
Sleeve
Nut
4x9.5x28mm
(R
) as shown. T
ighten the two pieces together.
A
ssembly is
complete.
Thank you for your purchase
stores | catalog |
www.potterybarnkids.com
 Loading...