

Page 1

pottery barn kids
MADELINE STORAGE DESK
PRE-ASSEMBLY:
• Please read all instructions before beginning assembly.
• For your safety and ease, assembly by two adults is recommended.
• Remove all parts and hardware from box and lay out on a carpeted or scratch-free work surface, as this will avoid
damaging any parts during assembly. The shipping box provides an ideal work surface.
• Do not dispose of any contents until assembly is completed to avoid accidentally discarding small parts or hardware.
• Use the parts and hardware lists to identify and separate each of the pieces included.
• Note: Do not fully tighten all bolts until all parts are in place. Failure to follow these instructions may cause the bolts
to misalign during assembly.
• The use of power tools for assembly is not recommended. Power tools can damage hardware or split wood.
PARTS INCLUDED :
(A) Table Top With Drawer - 1pc
(B) Left End Panel- 1pc
(C) Right End Panel- 1pc
B
A
C
HARDWARE ENCLOSED:
(D) 4mm Allen key - 1pc
(E) 6mm Allen key -1pc
(F) 1/4”x1-1/4” Allen Bolt - 8pcs
(G) Washer - 8pcs
(H) Spring Washer - 8pcs
(I) Cam – 2pcs
(J) Cam Screw – 2pcs
(K) Wooden Dowel – 4pcs
Page 2
(L) Knob – 3pcs
J
B
C
(
M) Screw 5/32”x1” – 3pcs
TOOLS REQUIRED:
Phillips head screwdriver (not included)
ASSEMBLY INSTRUCTIONS:
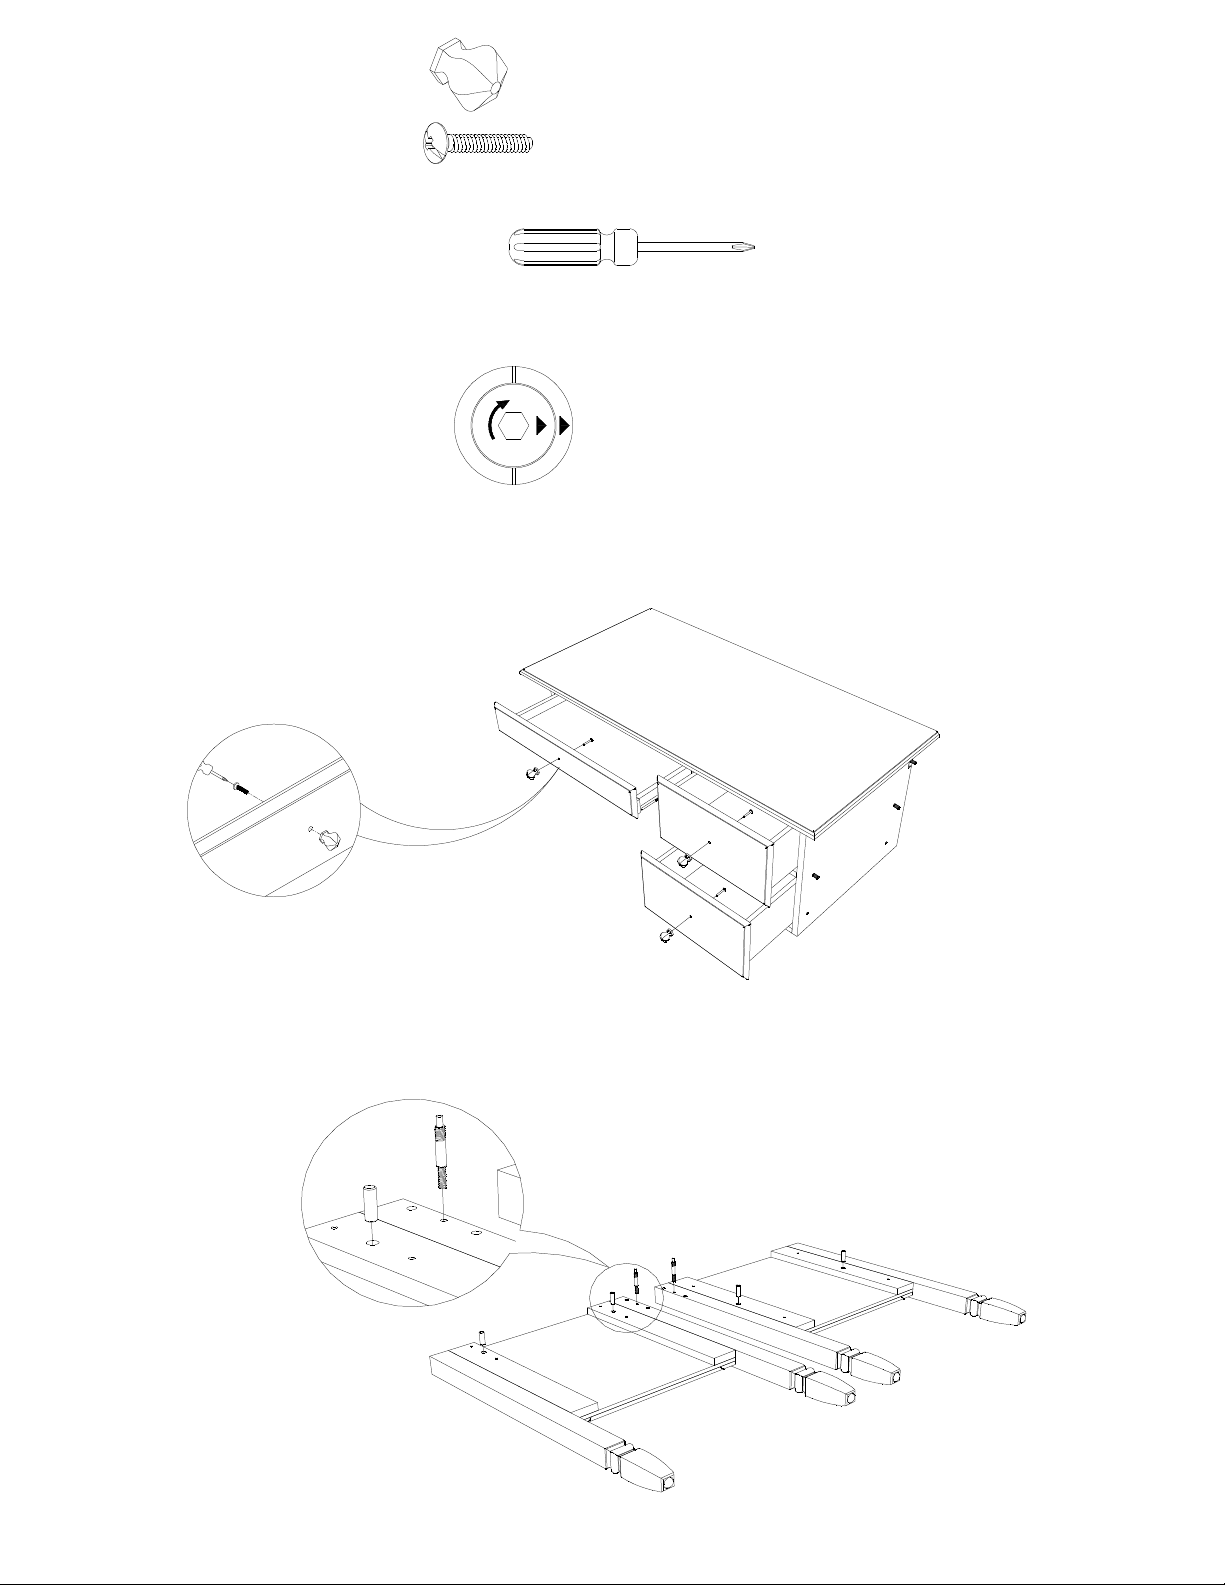
Note:
align outer arrow on cam with inner arrow at center of cam prior to insertion into the countersunk.
1. Put all desk parts on a soft, carpeted scratch free surface. Fasten (3) Knobs (L) to drawers using (3) 5/32”x1”
screw (M) , tighten with a Philips Head Screwdriver. Then pull out all drawers from Table Top with Drawers (A)
as shown below.
A
M
L
2. Screw threaded end of (2) Cam Screws (J) into insert nuts at back of Left/Right End Panels (B&C) then tighten
securely. Insert (4) Wooden Dowels (K) into pre-drilled holes in the back of Left/Right End Panels (B&C) as shown
below.
K
Page 3
3. Insert (1) Cam (I) into pre-drilled holes in the one end of back rail of Table Top with Drawers (A) as shown below .
I
A
4. Attach Left End Panel (B) to Table Top with Drawers (A) . Align arrow mark on Cam (I) with cross pre-drilled hole
at end of back rail of Table Top with Drawers (A) by loosely tighten Cam (I) with 6mm Allen Key (E) as shown
below.
B
A
E
Page 4

5. Insert (4) 1/4”x1-1/4” Allen Bolts (F)
panel
of Table Top with Drawer (A) into
with 4mm Allen Key (D) when they are all in place, Tighten Cam (I) with 6mm Allen Key (E).
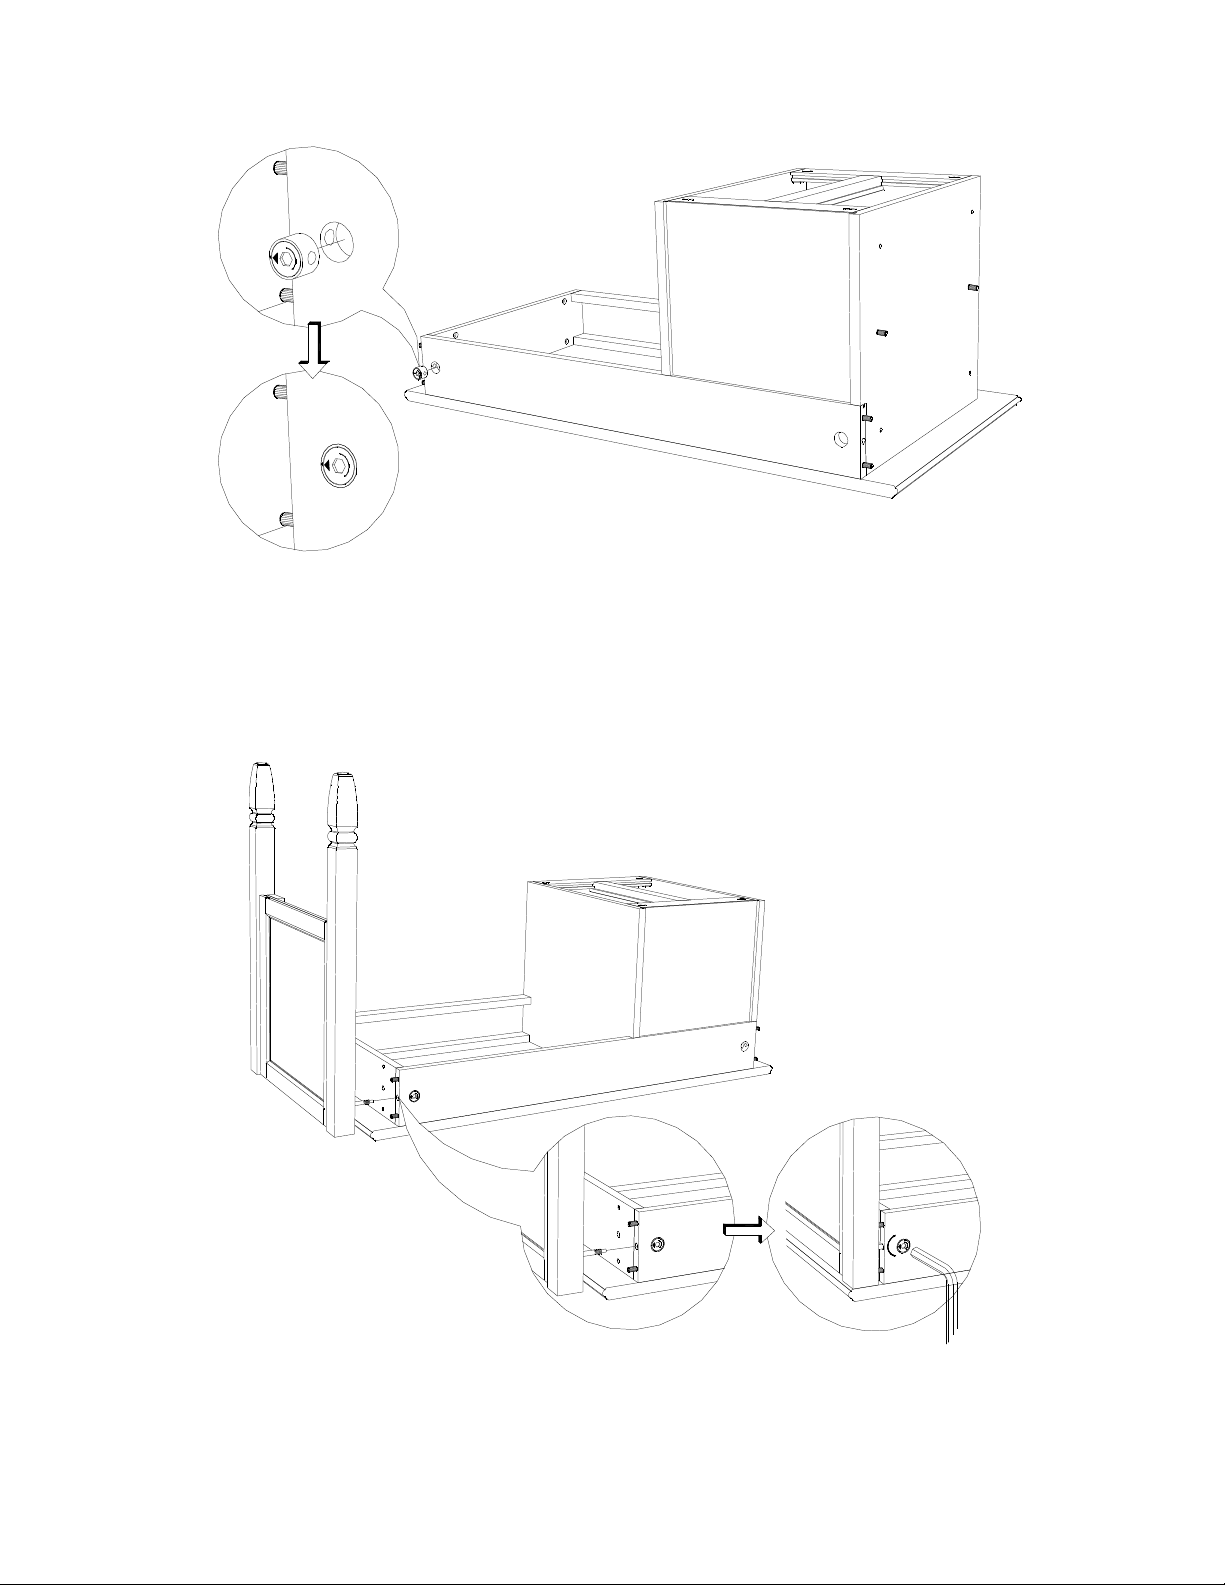
6. Insert (1) Cam (I) into pre-drilled holes in the another end of back rail of Table Top with Drawers (A) as shown
below .
B
B
through Spring washer (H), washer (G) and pre-drilled holes from inside of end
metal inserts in
Left End Panel (B) as shown below. Tighten Allen Bolts (F)
G
F
H
D
A
A
I
Page 5

7. Attach Right End Panel (C) to Table Top with Drawers (A) . Align arrow mark on Cam (I) with cross pre-drilled hole
G
HF DG
at end of back rail of Table Top with Drawers (A) by loosely tighten Cam (I) with 6mm Allen Key (E) as shown
below.
B
A
C
E
8. Insert (4) 1/4”x1-1/4” Allen Bolts (F)
panel
of Table Top with Drawer (A) into
with 4mm Allen Key (D) when they are all in place, Tighten Cam (I) with 6mm Allen Key (E).
through Spring washer (H), washer (G) and pre-drilled holes from inside of end
metal inserts in
Right End Panel (C) as shown below. Tighten Allen Bolts (F)
Page 6

9. Turn the desk into upright position. Insert 2 drawers on the right back into Table Top with Drawers (A) by inserting
pre-mounted Drawer’s glides, on both sides of the drawer, into runners which are pre-assembled on Table Top
with Drawers (A). Push drawers in completely.
10. Adjust pre-mounted Drawer’s glides on inside frame of Table Top with Drawers (A) .
Page 7

11. Push Left drawer into Table Top in as shown below.
12. Adjust levelers at the bottom of legs to balance the desk if necessary.
CARE INSTRUCTIONS:
• Dust often using a clean, soft, dry lint-free cloth.
• Blot spills immediately, and wipe with a clean, damp, cloth.
• We do not recommend the use of chemical cleansers, abrasives or furniture polish.
Thank you for your purchase
stores | catalog | www.potterybarnkids.com
USA 1.800.290.8181
 Loading...