

Page 1
pottery barn kids
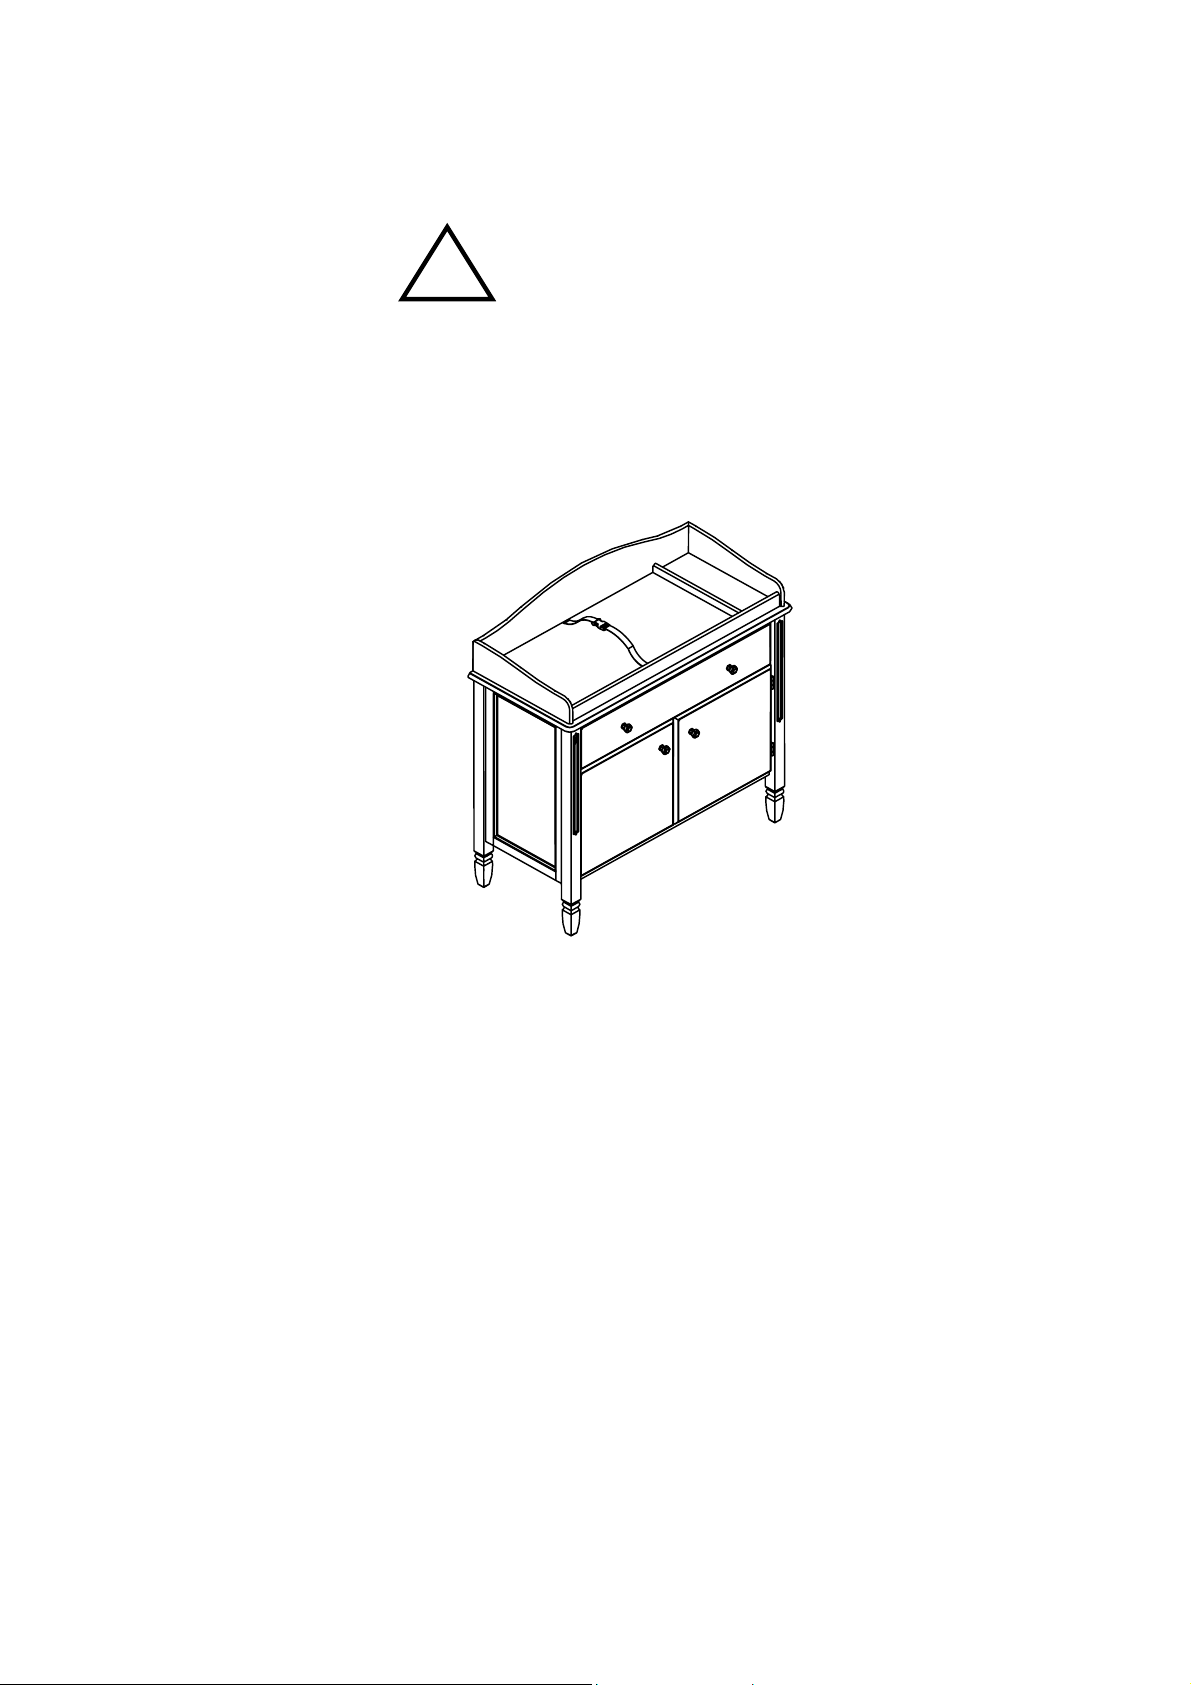
MADELINE CHANGING TABLE AND TOPPER
! WARNING
FALL HAZARD - To prevent death or serious injury from falls, always keep child within
arm’s reach. NEVER LEAVE CHILD UNATTENDED and always use restraining system.
This changing table is intended for use with children weighing up to 50 pounds.
Do not use the changing table if it is damaged or broken.
PRE-ASSEMBLY:
• Remove all parts and hardware from the box and lay out on a clear carpeted or
scratch-free work surface as this will avoid damaging parts during assembly . The shipping
box provides an ideal work surface.
• Do not dispose of any packaging or contents of the shipping carton until assembly is
completed to avoid accidentally discarding small parts or hardware.
• Use the parts and hardware lists above to identify and separate each of the pieces
included.
• The illustrations provided allow for easier assembly when used in conjunction with the
assembly instructions.
• If using power tools to aid in assembly please use caution. Power tools can damage
hardware or split wood.
1
Page 2
IMPORTANT SAFETY INSTRUCTIONS:
Please read all instructions carefully before assembling.
For your safety, assembly by two or more adults is recommended.
Keep instructions for future use.
PA RTS INCLUDED:
(A) Table Base – 1 pc
(B) Shelf – 1 pc
(C) Table Topper – 1 pc
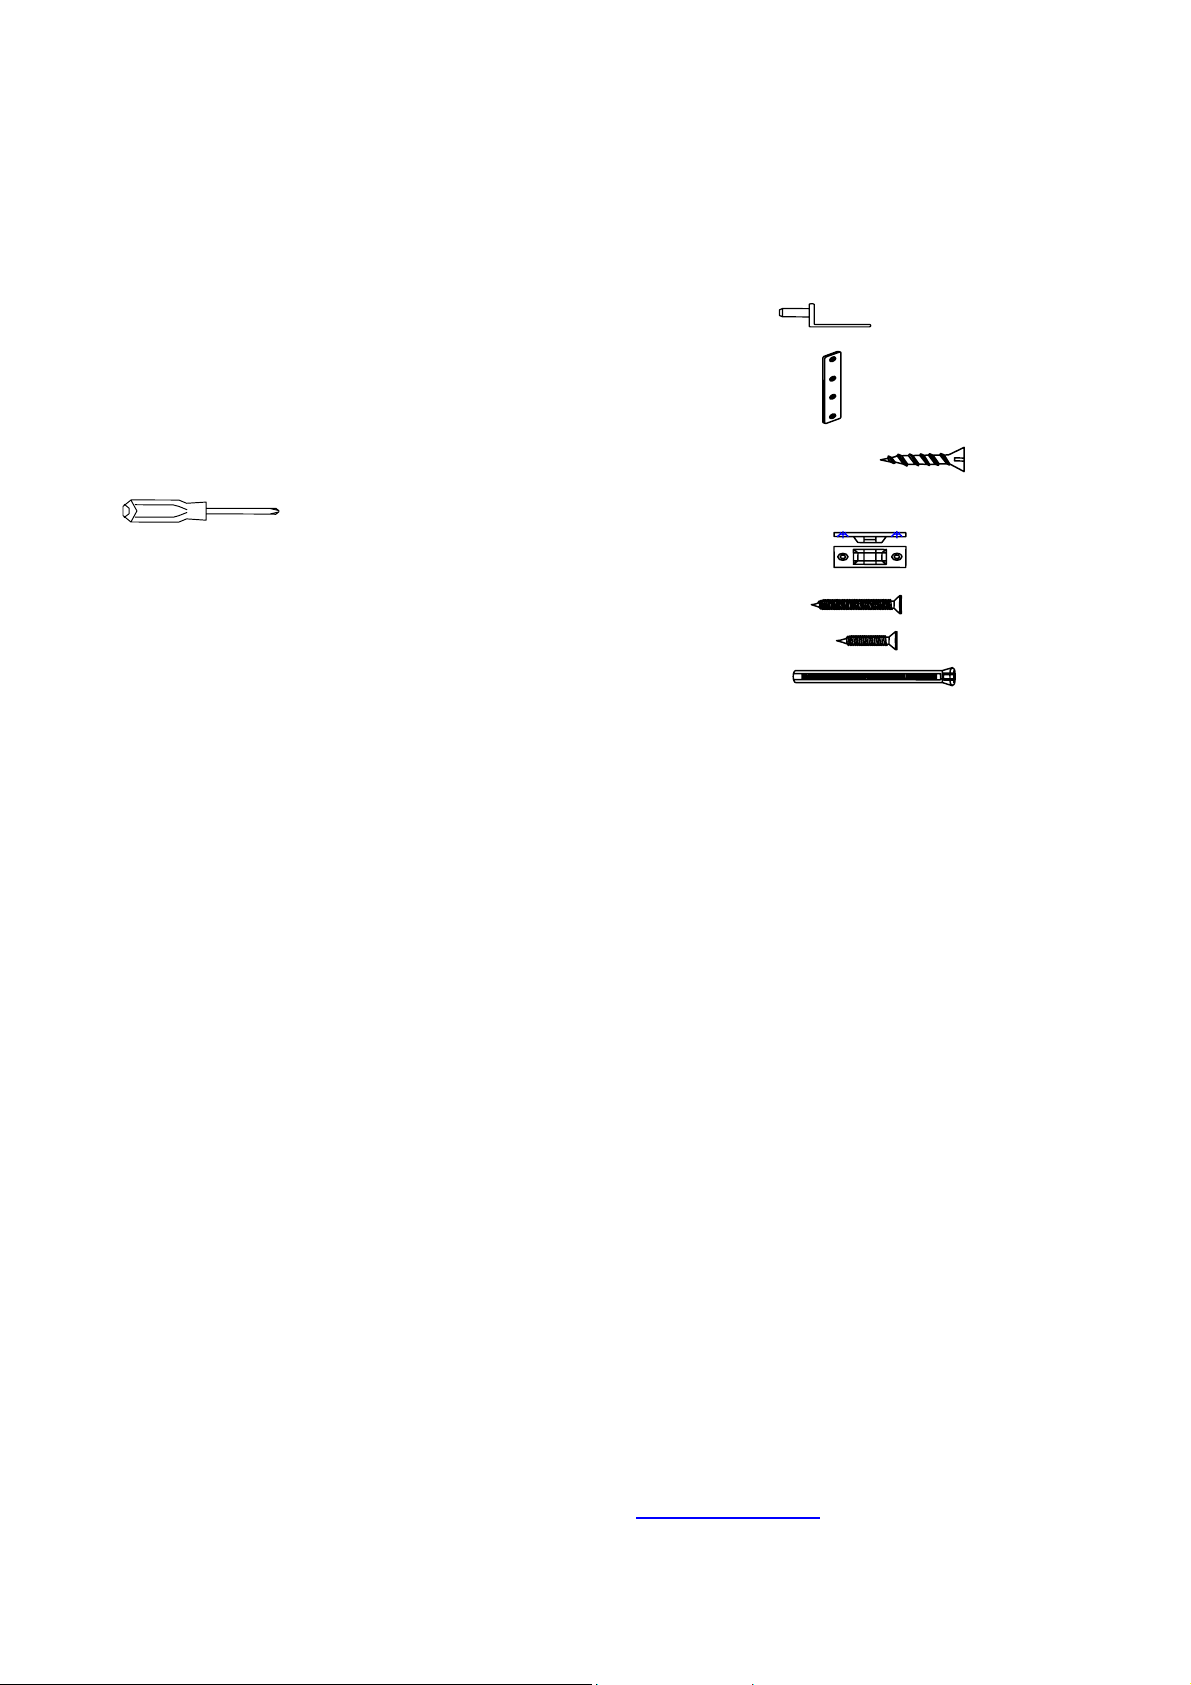
TOOLS REQUIRED:
Phillips head screwdriver
(not included)
HARDWARE ENCLOSED:
(D) Shelf support pegs – 4 pcs
(E) Metal plate 112x19x3mm – 2 pcs
(F) Phillips head screw 6x15mm –8
pcs
(G) Bracket 48x21x10mm – 2 pcs
(H) Long screw 6x32mm – 2 pcs
(I) Short screw 6x19mm – 2 pcs
(J) Nylon strap 300x12x8mm – 2 pcs
CARE INSTRUCTIONS
• Dust often using a clean, soft, dry lint-free cloth.
• Blot spills immediately, and wipe with a clean, damp, cloth.
We do not recommend the use of chemical cleansers, abrasives, or furniture polish on our
lacquered finish.
Thank you for your purchase
stores | catalog | www.potterybarnkids.com
1.800.290.8181
2
Page 3

ASSEMBLY INSTRUCTIONS:
1. Determine the desired height for the shelf using the corresponding peg holes on the Table Base (A)
interior. (Fig. 1)
2. Insert the Shelf Support Pegs (D) into the pre-drilled holes of the Table Base (A) until fully secure.
Place Shelf (B) onto the support pegs, ensuring the shelf is completely balanced and stable. (Fig. 1)
D
(Fig. 1)
3. Place the Changing T able Topper (C) on the Table Base (A) in an upright po sition, as shown. (Fig. 2)
4. Using the Philips head screwdriver, attach the Metal plates (E) to the back edge of the Changing
Table Topper (C) by inserting the Small Phillips head screw (F). (Fig. 2)
5. Hardware should be checked periodically for tightness.
(Fig. 2)
F
E
3
Page 4

RESTRAINING SYSTEM INSTRUCTION:
1. Gently place baby onto table across restraining strap.
2. Adjust the strap through single bar slide so that it fit’s baby’s body.
3. To fasten insert male buckle to female buckle as shown.
4. To release press male side lock inward as shown.
4
Page 5

FURNITURE TIPPING RESTRAINT
Young children may be injured by tipping furniture. The use of a tipping restraint is highly recommended.
When properly installed, this restraint could provide protection a gainst the unexpected tipping of furniture
due to small tremors, bumping or climbing. We recommend mounting this re straint to a wall stud.
WARNING: This product is only a deterrent. It is not a substitute for proper adult supervision.
Hardware Included:
G – Brackets (x2)
H - Long screws (x2)
I - Short screws (x2)
J - Nylon strap (x1)
INSTALLATION INSTRUCTIONS:
1. Locate a wall stud behind your furniture, Position a Bracket (G) on the stud approximately 1”
below the top of the furniture. Mark and drill pilot hole into the center of the stud with a 3/32” drill bit.
Attach a Bracket (G) to the stud with the Long screws (H) provided.
2. On the back of the furniture, a Bracket (G) will need to be attached to the furniture frame at the top.
To do this, temporarily move the furniture into its final position and mark the location of the wall
bracket on the furniture frame. Move the furniture away from the wall and place a bracket on the
mark. Mark and drill holes for screws with a 3/32” drill bit. Attach the bracket to the furniture with
the Short screws (I) provided.
3. Move the furniture into its final position, taking care to line up the wall bracket with the furniture
bracket. Thread strap through the bracket as shown in the illustration. Tighten S trap (J) until snug.
Do not over tighten.
5
 Loading...