

Page 1

pottery barn kids
LOGAN QUEEN BED
• Remove all parts and hardware from the box and lay out on a clear carpeted or scratch-free work
surface. (The shipping box provides an ideal work surface), this will avoid damaging any parts
during assembly . Do not dispose of any contents until assembly is completed to avoid accidentally
discarding small parts or hardware.
• Two people recommended for ease of assembly.
• Use the parts and hardware lists to identify and separate each of the pieces included prior to
starting assembly.
• The illustrations provided allow for easier assembly when used in conjunction with the assembly
instructions.
• Note: Do not fully tighten all bolts until all parts are in place. Failure to follow these instructions
may cause the bolts to misalign during assembly.
• If using power tools to aid in assembly please use cau tion. Power tools can damage ha rdware or
split wood.
NOTE: Side rails have (2) settings:
Use the higher setting if not using a box spring mattress and/of if a trundle will be used with the bed.
Use the lower setting if using a mattress & box spring. We recommend a box spring if you want to use a
bed skirt/box spring cover or add height to the bed.
Our beds do not require a box spring at either setting since they include a slat roll foundation system, but
one may be used.
PARTS REQUIRED:
A - Headboard (1)
B - Footboard (1)
C - Side rail (2)
D - Slat Support (1)
E – Support Leg (3)
F – Slat Roll (1)
1
Page 2
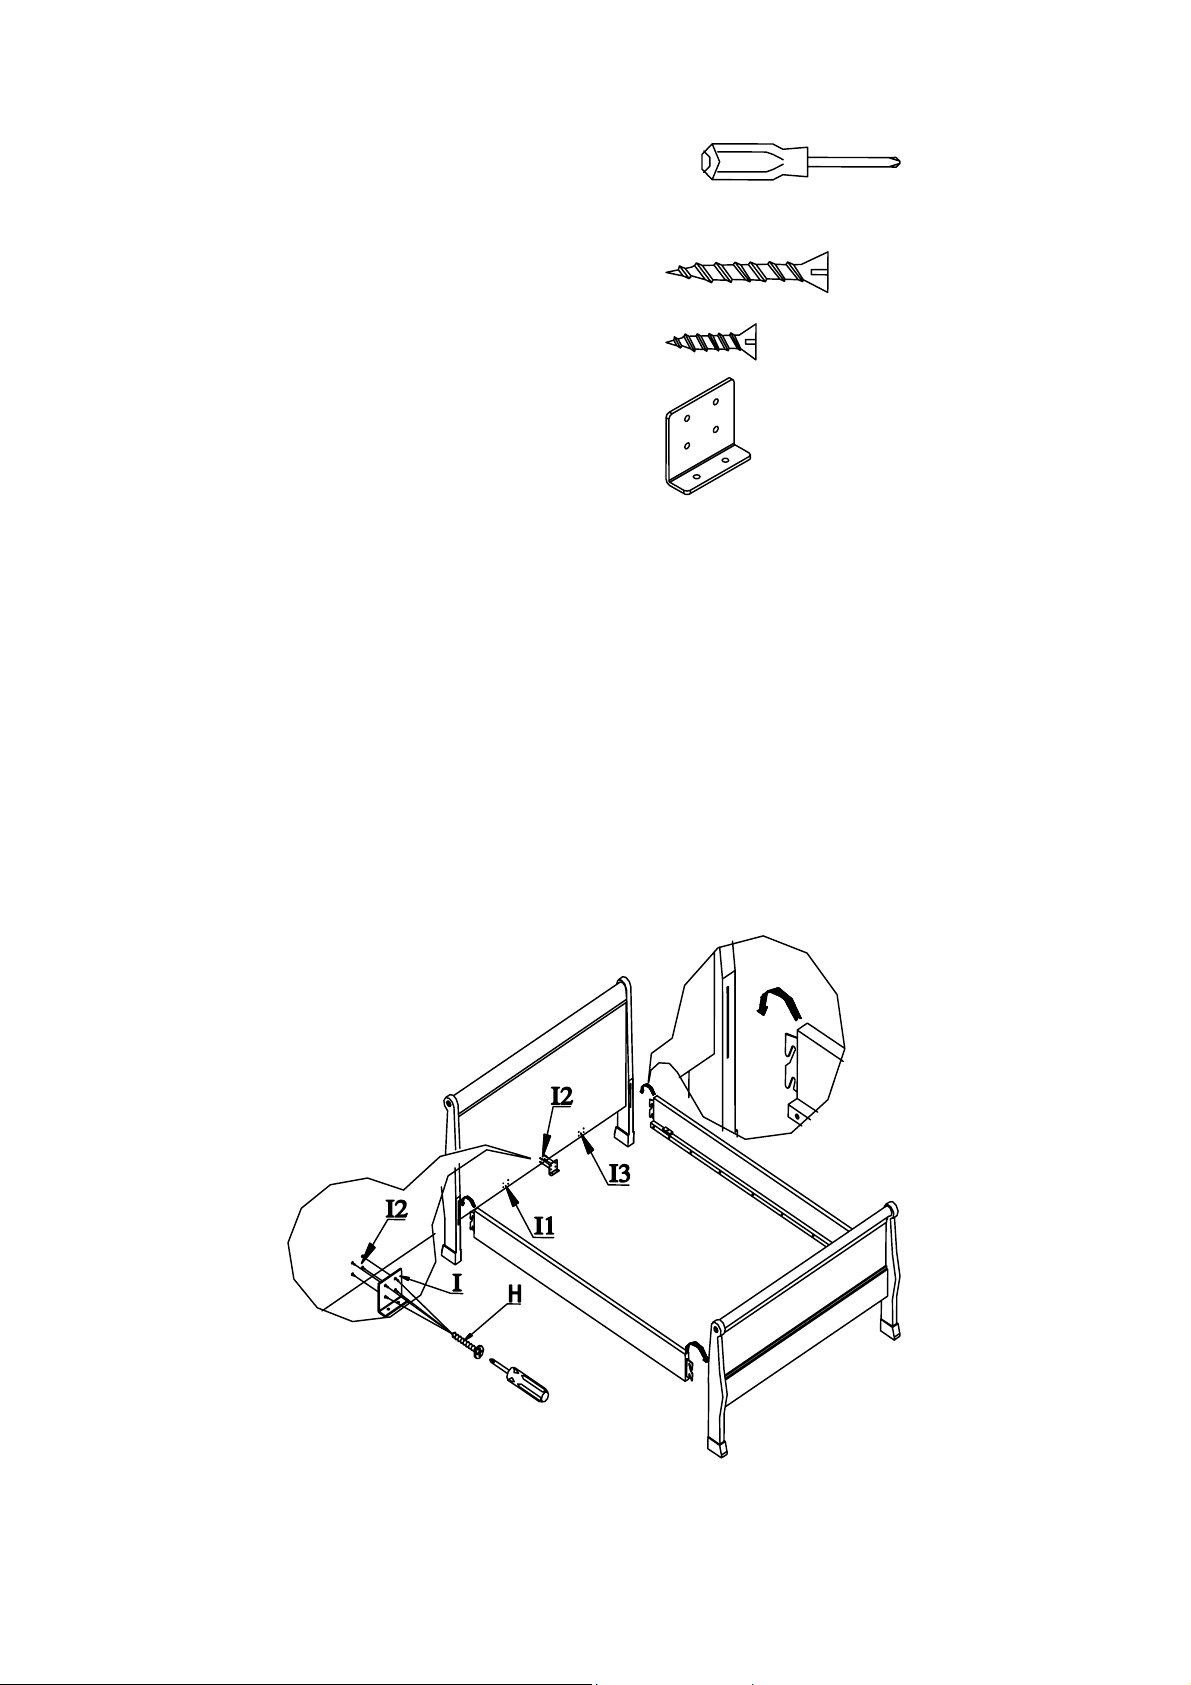
TOOLS INCLUDED:
Phillips Head Screw driver (not included)
HARDWARE INCLUED:
G –Large Phillips Head Screws (x28)
H – Small Phillips Head Screws (x12)
I – “L” Shape Slat Bracket (x2)
ASSEMBLY:
1. Hold side rail (C) up to slots on the legs of the headboard (A) and insert the hooks
of each side rail into the slots. Push down firmly on the top of side rails until they slot
themselves over the pins inside the leg as shown.
2. Repeat the same procedure with the footboard (B).
3. Install the (I) “L” Shape Slat Bracket into the headboard and footboard by inserting
the (H) small Phillips head screw as shown.
4. The Shape Slat Bracket (I) is adjustable to 3 locations, location I1 & I3 is for trundle
(depending on which side you will use the trundle on) and location I2 is for use
without trundle.
2
Page 3

5. Screw (E) Support Legs into the (D) Slat support and sure all are tight.
6. Align (D) Slat support on (I) “L” Shape Slat bracket using the (H) Small Phillips head
screw. Place slat support onto the slat bracket away from the side the trundle will
roll out towards.
7. Lay the (F) slat roll in between the (C) side rails and use (G) Large Phillips head
screws to fasten slats to the side rails with the Phillips head screwdriver.
8. Retighten all bolts and screws to make sure all are tight and bed structure is rigid. It
is recommended all bolts and screws be checked from time to time for safety.
Thank you for your purchase
stores | catalog | www.potterybarnkids.com
3
 Loading...