

Page 1
pottery barn kids
LARKIN DESK
PRE-ASSEMBLY:
• Please read all instructions before beginning assembly. The illustrations provided allow for easier assembly
when used in conjunction with the assembly instructions.
• For your safety and ease, assembly by two adults is recommended.
• Remove all parts and hardware from box and lay out on a carpeted or scratch-fee work surface, as this will
avoid damaging any parts during assembly. The shipping box provides an ideal work surface. Do not dispose
of any contents until assembly is completed to avoid accidentally discarding small parts or hardware.
• Use the parts and hardware lists to identify and separate each of the pieces included.
• Note: Do not fully tighten all bolts until all parts are in place. Failure to follow these instructions may cause the
bolts to misalign during assembly.
• The use of power tools for assembly is not recommended. Power tools can damage hardware or split wood.
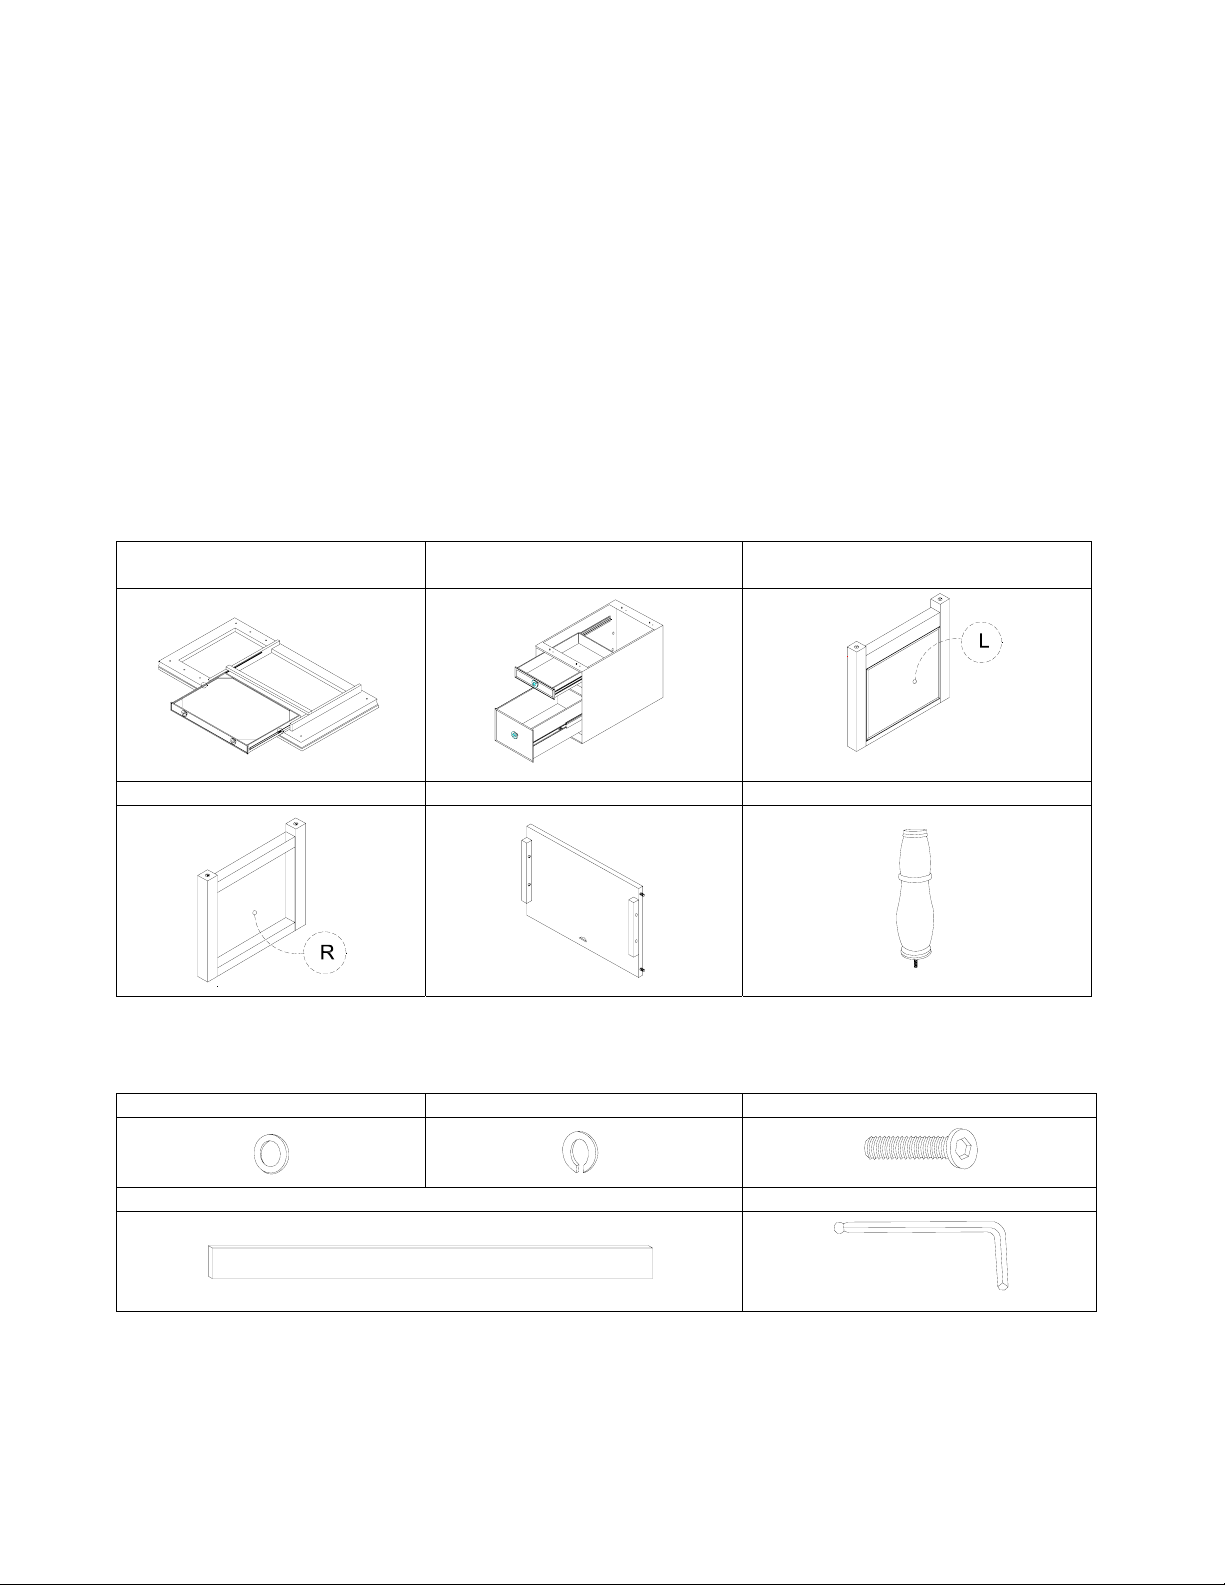
PARTS INCLUDED:
(A) Desk Top - 1 pcs
(With keyboard tray)
(B) Drawer Box - 1 pcs (C) Left Side Panel - 1 pcs
L
(D) Right Side Panel - 1 pcs (E) Back Panel - 1 pcs (G) Leg - 4 pcs
R
HARDWARE INCLUDED:
(H) Flat Washer - 16 pcs (I) Lock Washer - 16 pcs (J) Allen Bolt (M6 x 30 mm) - 16 pcs
(K) File Bar - 2 pcs (L) Allen Key - 1 pcs
TOOLS REQUIRED:
Phillips Head Screwdriver (Not Included)
Page 1/6
Page 2
ASSEMBLY INSTRUCTIONS:
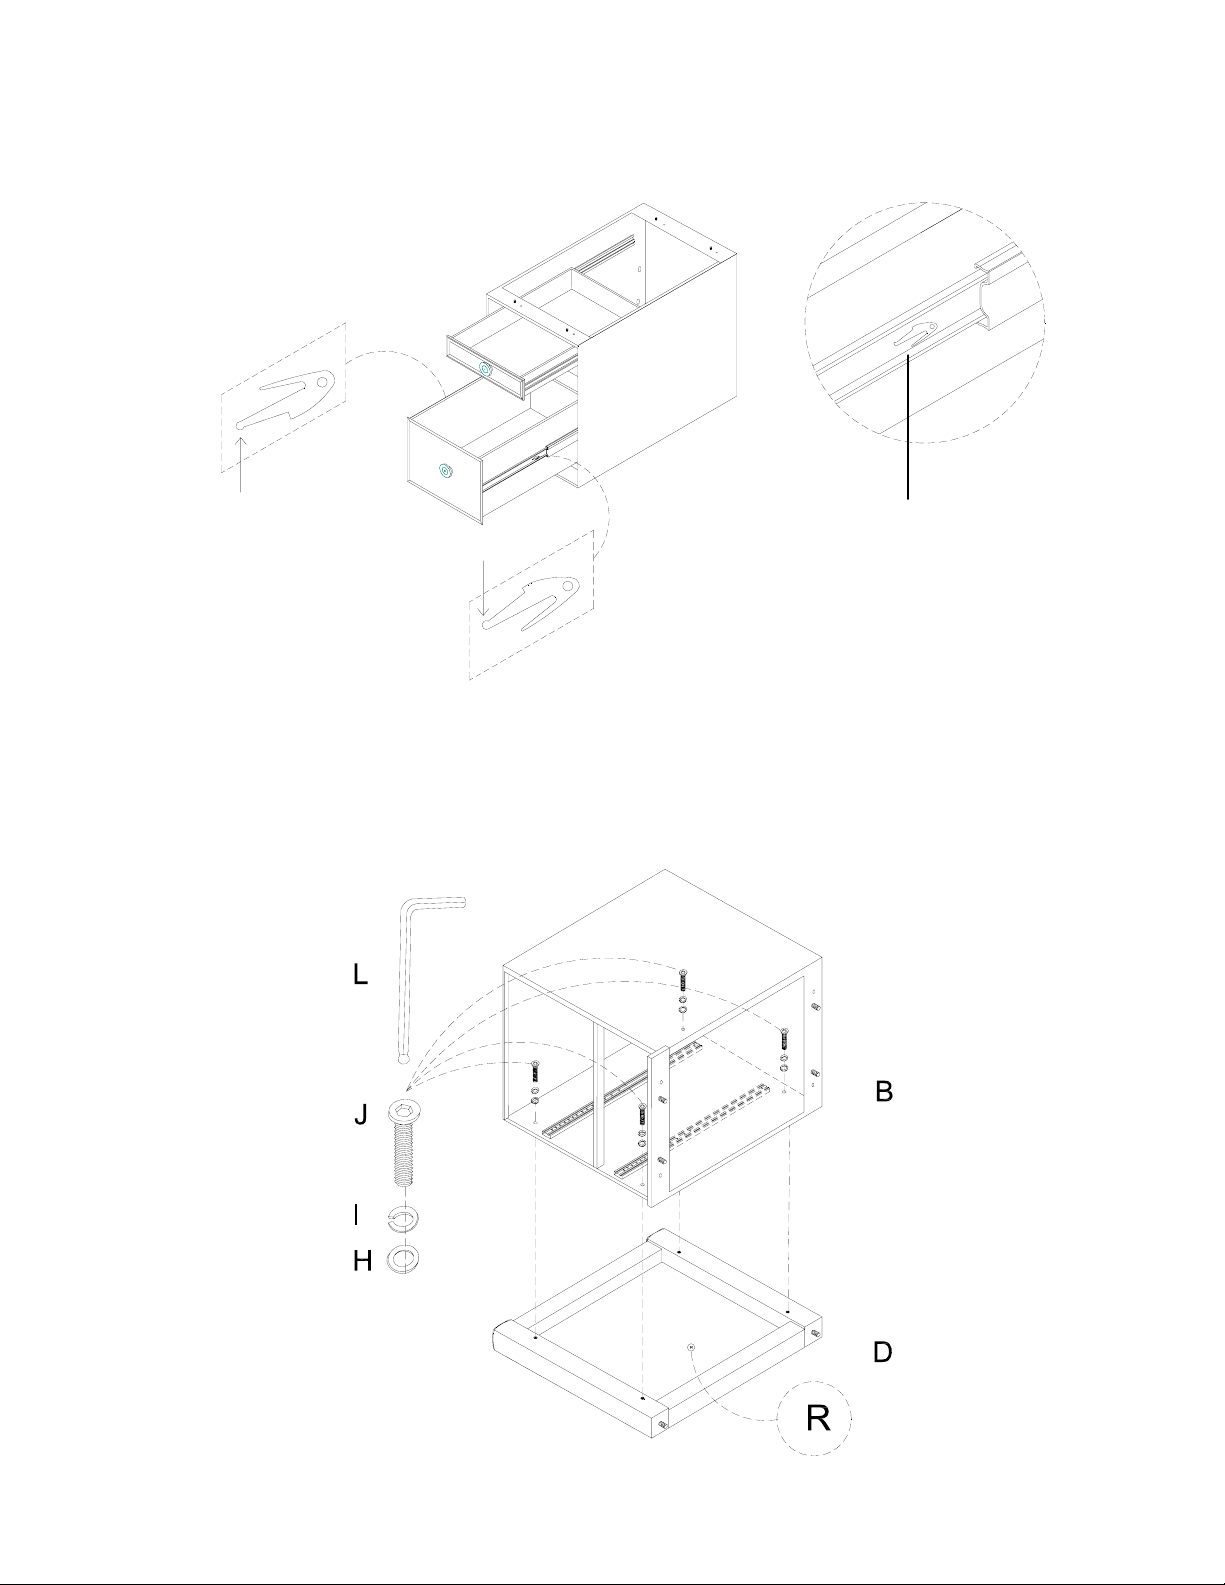
1. Remove the two Drawers from the Drawer Box (B) by pressing down and lifting up the lock stick on the
runner on both sides of the drawer box, as shown (Fig. 1)
Figure 1
Lift up at left side
Press down at right side
2. Attach the Drawer Box (B) to the Right Side Panel (D), as shown by aligning wood dowels on the side of
Drawer Box (B) with the pre-drilled holes on the inner side of panel (D). Secure with Flat Washer (H), Lock
Washer (I) and Allen Bolt (J) using Allen Key (L). (Fig 2)
B
Lock stick on the
runner at sides
of drawer box
Figure 2
Page 2/6
Page 3

3. Lay the Desk Top (A) face down and remove the key board tray by pressing the lock stick on runners at two
sides of the tray. (Fig. 3)
Figure 3
A
Press in
4. Carefully attach the Drawer Box (B) and Right Side Panel (D) assembly to Desk Top (A) by aligning the
wood dowels on panel with pre-drilled holes on the desk top. Secure with Flat Washer (H), Lock Washer (I)
and Allen Bolt (J) using the Allen Key (L). (Fig 4.1 & 4.2)
Figure 4.1
Page 3/6
Page 4

Figure 4.2
L
B
I
A
H
5. Attach the Back Panel (E) to the Drawer Box (B) on Desk Top (A) by aligning the wood dowels on the back
panel with pre-drilled holes on the drawer box. Secure with Flat Washer (H), Lock Washer (I) and Allen Bolt
(J) using the Allen Key (L). (Fig 5)
Figure 5
B
E
A
Inserted Nut
for securing
Page 4/6
Page 5

6. Attach the Left Side Panel (C) to the Back Panel (E) and Desk Top (A) by aligning the wood dowels and
pre-drill holes on these parts. Secure with Flat Washer (H), Lock Washer (I) and Allen Bolt (J) using the
Allen Key (L). (Fig 6)
Figure 6
E
A
L
C
7. Attach the Legs (G) to the posts of Left Side Panel (C) and Right Side Panel (D) by inserting the hanger bolt
on each leg into the pre-inserted nut on the post of side panels then turning clock-wise to secure. (Fig. 7)
Figure 7
G
D
C
Page 5/6
Page 6

8. Turn the desk upright. Align the runner at side of the Keyboard Tray and Drawers with pre-attached glides
on the desk, and insert drawer until the lock stick is inserted into the glides. (Fig. 8)
Figure 8
Push in
Glide on Desk
Push in
9. Insert the File Bars ((K) into the grooves on the two sides of the bottom drawer. (Fig. 9)
Figure 9
K
If your floor is not perfectly even, the furniture may not sit level. Determine which corner does not touch the
ground correctly. With two people follow these steps:
• Carefully elevate the item slightly to provide access to the levelers attached to the bottom.
• Turn the levelers in an counter-clockwise direction.
• Gently set down the piece and check stability.
• Repeat steps until the furniture sits firmly on the ground.
CARE INSTRUCTIONS:
z Dust often using a clean, soft, dry lint-free cloth.
z Blot spills immediately, and wipe with a clean, damp cloth.
z We do not recommend the use of chemical cleansers, abrasives or furniture polish.
Thank you for your purchase
stores | catalog | www.potterybarnkids.com
USA 1.800.290.8181
Page 6/6
 Loading...