

Page 1
pottery barn kids
LARKIN DESK HUTCH
PRE-ASSEMBLY:
• Please read all instructions before beginning assembly. The illustrations provided allow for easier assembly
when used in conjunction with the assembly instructions.
• For your safety and ease, assembly by two adults is recommended.
• Remove all parts and hardware from box and lay out on a carpeted or scratch-free work surface, as this will
avoid damaging any parts during assembly. The shipping box provides an ideal work surface. Do not dispose
of any contents until assembly is completed to avoid accidentally discarding small parts or hardware.
• Use the parts and hardware lists to identify and separate each of the pieces included.
• Note: Do not fully tighten all bolts until all parts are in place. Failure to follow these instructions may cause the
bolts to misalign during assembly.
• The use of power tools for assembly is not recommended. Power tools can damage hardware or split wood.
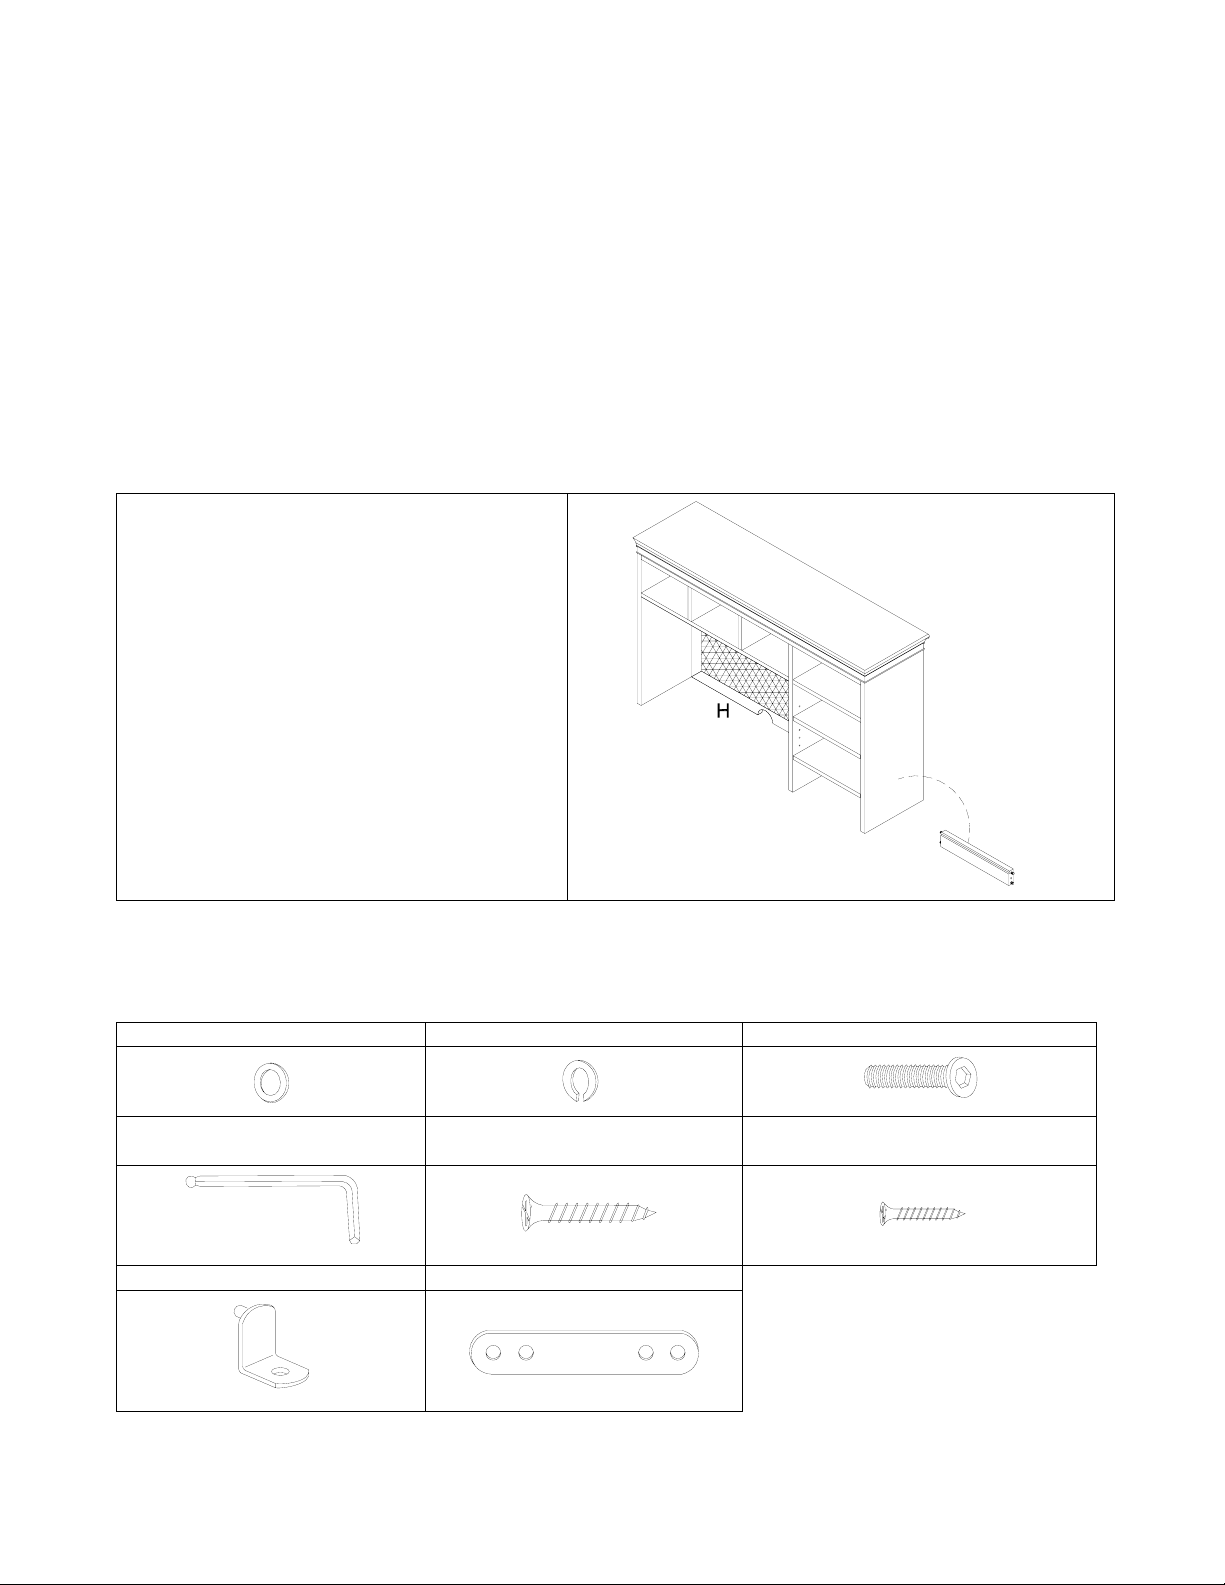
PARTS INCLUDED:
(A) Top Panel - 1 pcs
(B) Horizontal Shelf - 1 pcs
(C) Left Side Panel - 1 pcs
(D) Right Side Panel - 1 pcs
(E) Partition Panel - 1 pcs
(F) Vertical Shelf - 2 pcs
(G) Back Rail - 1 pcs
(H) Back Panel with Cork Board - 1 pcs
(I) Removable Shelf - 2 pcs
B
F
C
A
F
I
I
E
D
G
PARTS NEEDED FOR ASSEMBLY:
(1) Desk (Not included)
HARDWARE INCLUDED:
(J) Flat Washer - 6 pcs (K) Lock Washer - 6 pcs (L) Allen Bolt (M6 x 30 mm) - 6 pcs
(M) Allen Key - 1 pcs
(N) Large Wood Screw - 2 pcs
(4 x 25 mm)
(P) Shelf Pin - 8 pcs (Q) Meding Plate - 2 pcs
(O) Small Wood Screw - 21 pcs
(3 x 20 mm)
TOOLS REQUIRED:
Phillips Head Screwdriver (Not Included)
Page 1/5
Page 2
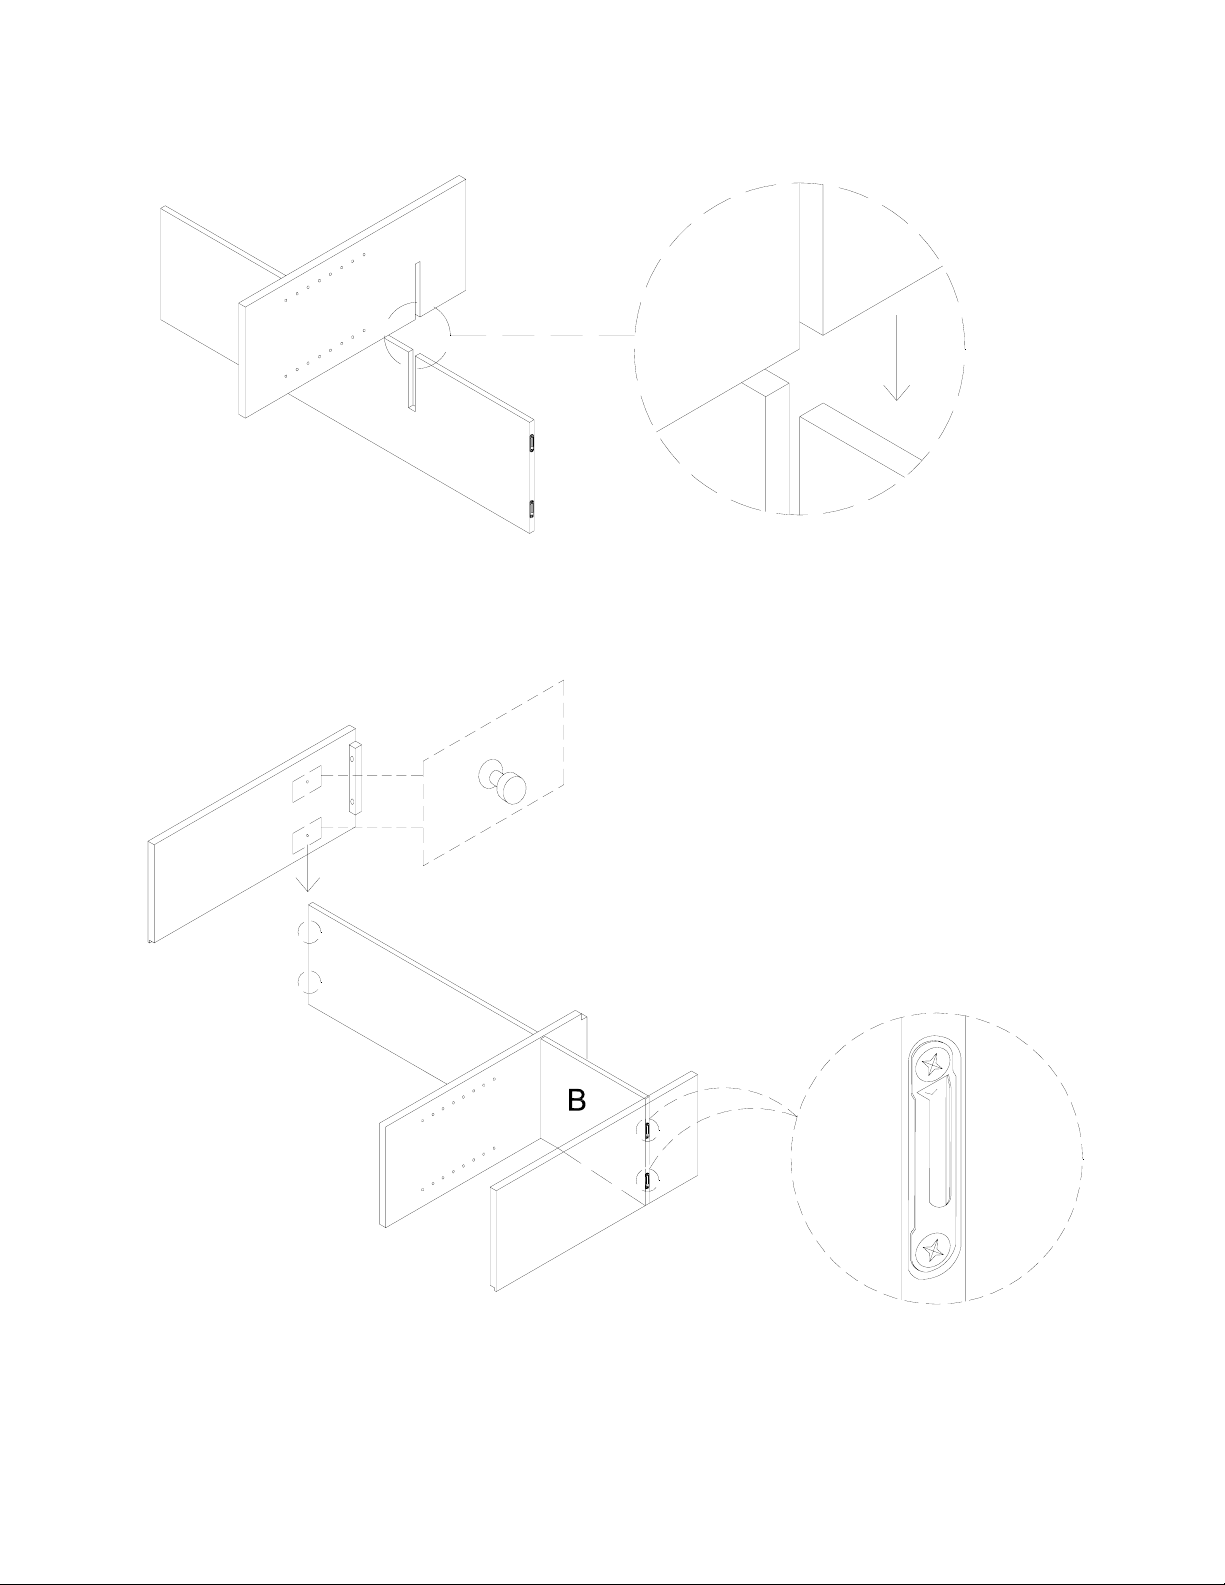
ASSEMBLY INSTRUCTIONS:
1. Attach the Partition Panel (E) to the Horizontal Shelf(B) by sliding the cut out on panel into the cut out
on shelf. (Fig. 1)
E
B
Figure 1
2. Attach the Left Side Panel (C) and Right Side Panel (D) to two ends of Horizontal Shelf (B) by inserting
the pins on side panels into the groove on pre-attached plates at two end of Horizontal Shelf (B). Press
down to secure. (Fig. 2)
Pin
C
E
D
Page 2/5
Groove on pre-attached plate
Figure 2
Page 3

3. Attach the Back Rail (G) to the Partition Panel (E) and Right Side Panel (D) from behind by aligning the
wood dowel into pre-drilled holes of panels (E & D). Secure with Large Wood Screw (N) using a
Phillips Head Screwdriver. (Fig. 3)
E
D
G
4. Place the Vertical Shelves (F) onto the Horizontal Shelf (B), so that the deeper cut-out corner of
Vertical Shelf (F) faces the back of the Hutch. Align the wood dowel into the pre-drilled holes of
Horizontal Shelf (B). (Fig. 4)
N
Figure 3
F
B
Deeper cut-out face back
F
Page 3/5
B
Figure 4
Page 4

5. Lay the Top Panel (A) onto the assembly parts. Align the pre-drilled holes of Top Panel (A) with wood
dowel on the side panels and shelves. Secure with Flat Washer (J), Lock Washer (K) and Allen Bolt
using the Allen Key (M). (Fig. 5)
A
C
J
E
K
D
L
M
Figure 5
6. Attach the Back Panel with Cork Board (H) from the back of the Hutch. Insert Small Wood Screws (O)
into pre-drilled holes and tighten with Phillips Head Screwdriver. (Fig. 6)
H
H
O
Figure 6
Page 4/5
Page 5

7. Insert the Shelf Pins (P) into pre-drilled holes at desired height and insert the Removable Shelves (I).
(Fig. 7)
I
P
I
Figure 7
8. Carefully lay the Hutch on the Desk. Secure Desk and Hutch by screwing Mending Plate (Q) with
Small Wood Screw (O) as figure 8 shown below. Use the Phillips Head Screwdriver and tighten fully.
(Fig. 8)
Q
O
Figure 8
CARE INSTRUCTIONS:
z Dust often using a clean, soft, dry lint-free cloth.
z Blot spills immediately, and wipe with a clean, damp, cloth.
z We do not recommend the use of chemical cleansers, abrasives or furniture polish on our lacquered.
Thank you for your purchase
stores | catalog |
USA 1.800.290.8181
www.potterybarnkids.com
Page 5/5
 Loading...