

Page 1
pottery barn kids
KENDALL
MEDIA BASE
! CAUTION
The top shelf of this cart/stand is intended for use with:
Plasma/LCD/DLP/HD televisions having a maximum screen size of
50
inches and weight of
135
lbs; or
Tube televisions having a max
imum screen size of
27
inches and weight of
95
lbs.
All other support shelves should not be loaded more than 25 lbs.
DO NOT EXCEED RECOMMENDED LOAD. Use with products heavier than the maximum sizes and weights
indicated may result in instability caus
ing possible injury.
This unit contains a permanent sticker located either beneath media support shelf or inside drawer.
Do not allow children under 16 years to move cart.
PRE
-
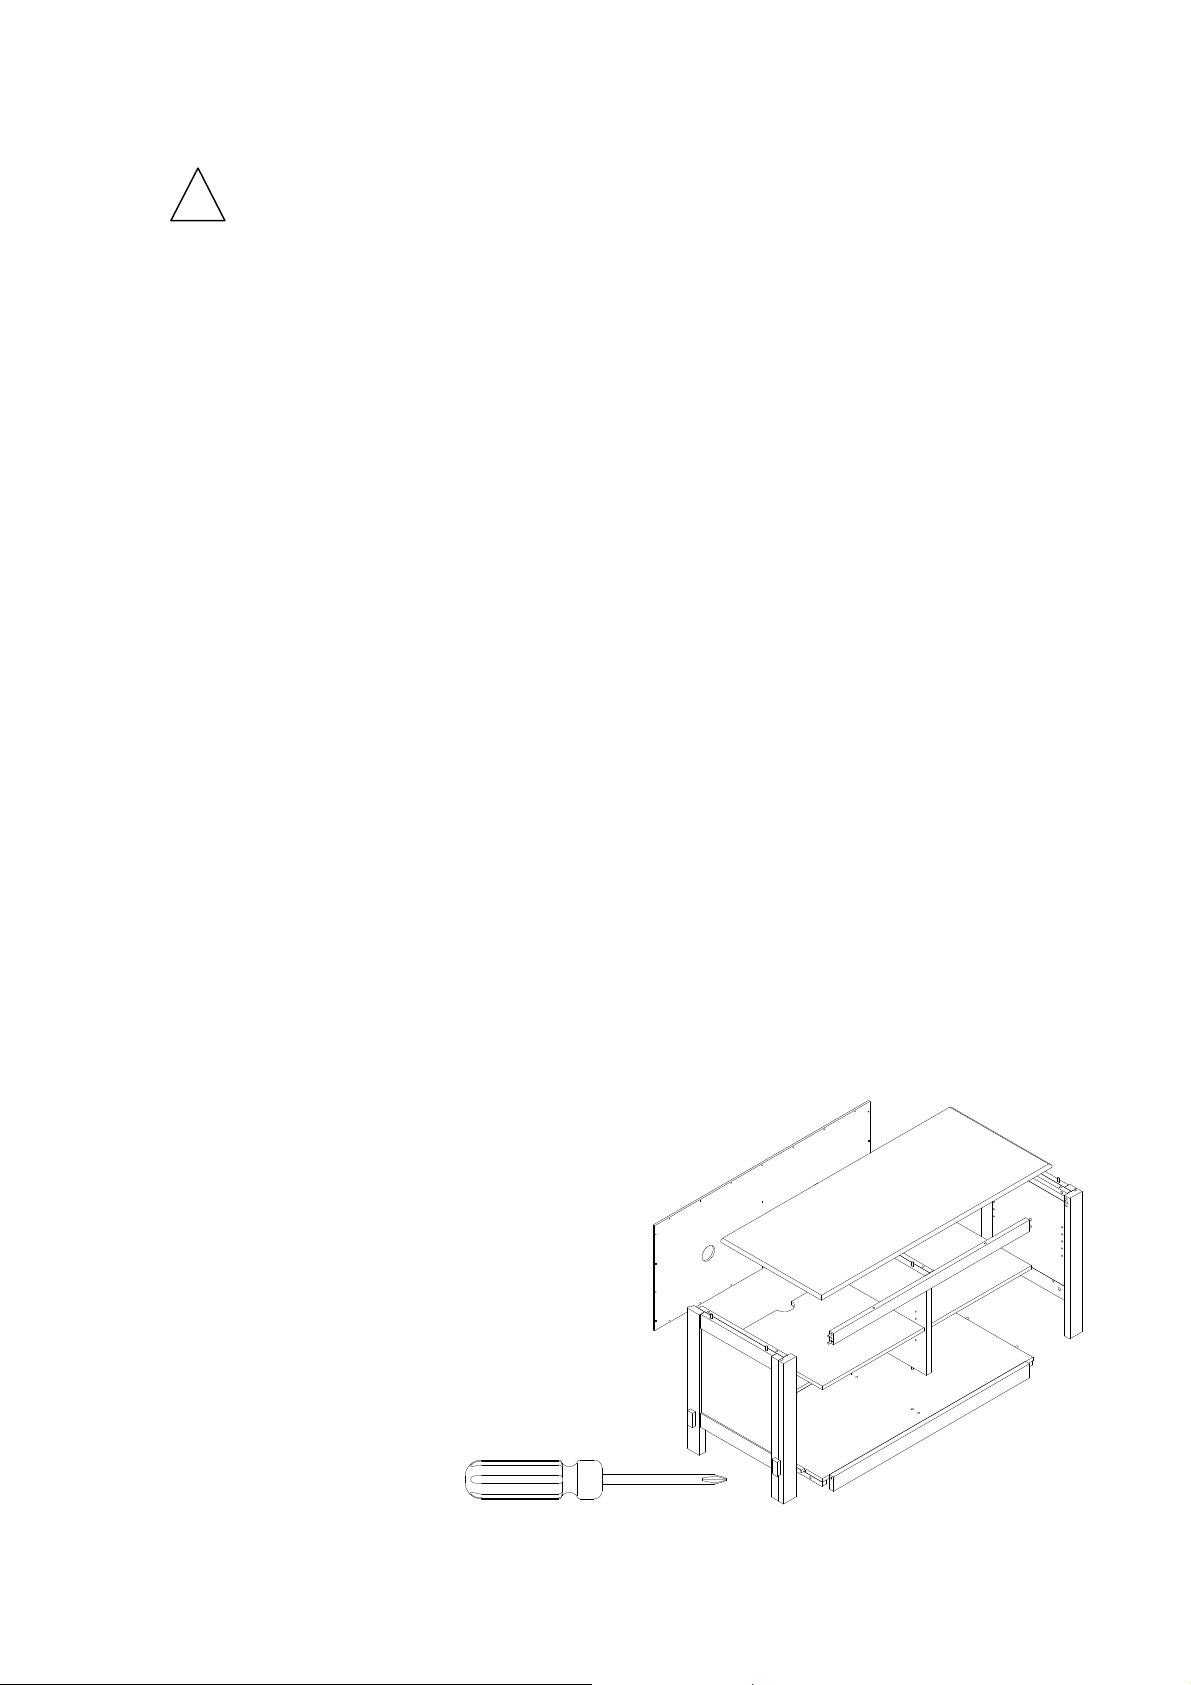
ASSEMBLY:
Please read all instruction before beginning assembly.
The illustr
ations provided allow for easier assembly
when used in conjunction with the assembly instructions.
Remove all parts and hardware from box and lay out on a carpeted or scratch
-
free work
surface,
as t
his will
avoid damaging any parts during assembly. The shi
pping box provides and ideal work surface
.
Do not dispose
of any contents until assembly is completed to avoid accidentally discarding small parts or hardware.
For your safety and
ease, adult assembly
by t
wo people is recommended.
Save all packing materia
ls until assembly is complete to avoid accidentally discarding smaller parts or
hardware.
Use the parts and hardware lists to identify and separate each of the pieces included prior to starting
assembly.
Note: Do not fully tighten all bolts until all part
s are in place. Failure to follow these instructions may cause the
bolts to misalign during assembly.
If using power tools to aid in assembly please use caution. Power tools can damage hardware or split wood.
PARTS INCLUDED:
(A)
Top-1pc(B)
Left pa
nel-1pc(C)
Right panel
-1pc(D)Front rail
-1pc(E)Adjustable shelf
-2pcs(F)
Fixed shelf
-1pc(G)Back panel
-1pc(H)Middle panel
-1pc
TOOLS
REQUIR
ED:
Phillips head screwdriver (not included)
ABCDEFG
H
Page 2
HARDWARE
ENCLOSED
:(I)1/4x1-1/4”
Bolts
-14pcs(K)1/4x1-
1/2”
Bolts
-2pcs(L
) Washer 1/4mm
–12pcs(M
) Spring washer 1/4mm
–12pcs(N)#3x20
mm–24pcs(O)Shelf support
–8pcs(P)
Curve washer
–2pcs(Q) 4mm Allen Key
–1pc
ASSEMBLY
INSTRUCTIONS
:
1.
Position the Fixed shelf (F)and the
Middle
panel
(H) exactly as shown (Fig.
1
) Align the pre
-
drilled holes on the
Fixed shelf
(F) with the pre
-
drilled holes on the
dowel
on the
Middle panel
(H). Insert the Washer (
L
), Spr
ing washer (
M
) and
1/4x1-1/4”
Bolt (
I
) through pre
-
drilled holes on the
Fixed shelf
(F) and the pre
-
drilled holes on the the
Middle panel
(H),
tighten with the Allen key (
Q
) provided
(Fig. 1)
FHIML
Page 3

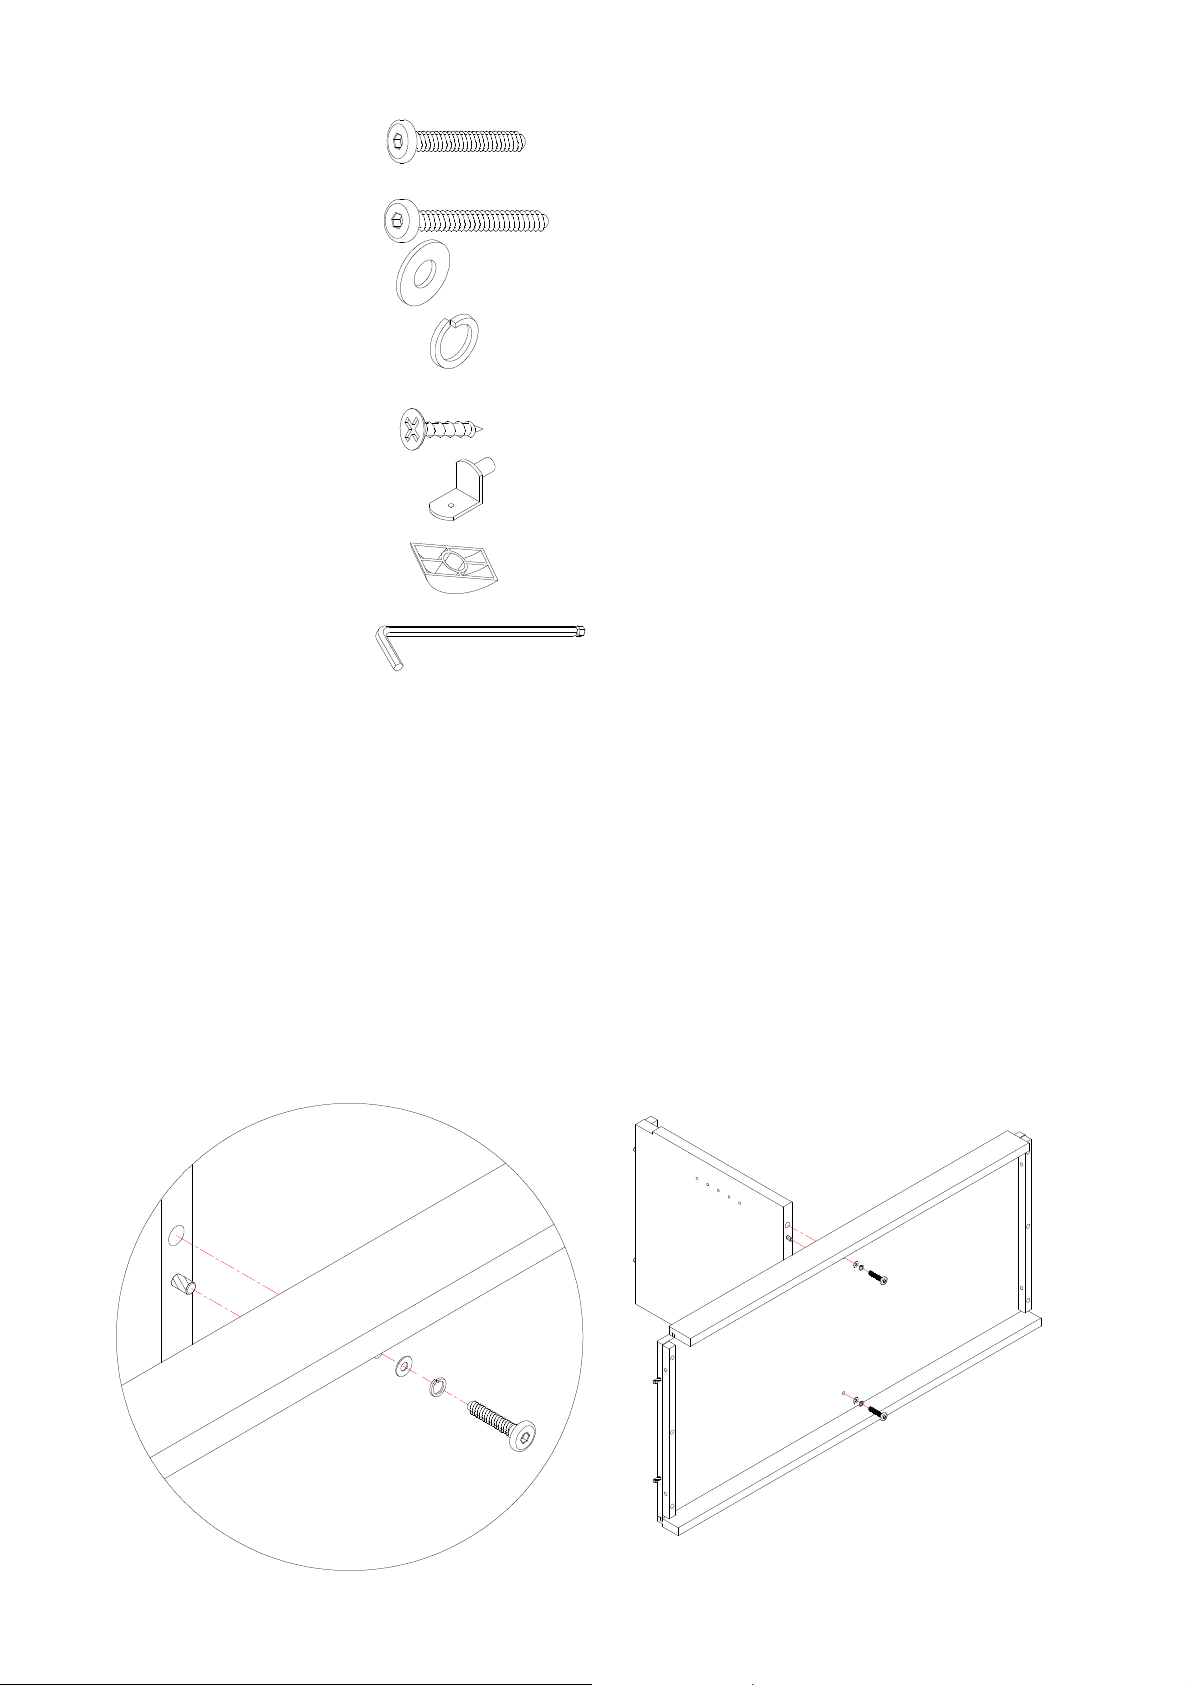
2
. Position the Front rail (D) exactly as shown (Fig.2). Slot the 1/4 x 1
-
1/2” Bolt (K) through Front rail (D) Curve
washer (
P). Attach the Front
rail (D) onto the side panel as shown in the diagram. Slot the 1/4 x 1
-
1/2”Bolt (I) into the
cheat on the Left panel (B) and Right panel (C), tighten with the Allen key (
Q
) provided.
Position the assembled frame (assembled in step 1) exactly as shown.
(Fig.2) Align the pre
-
drilled holes on the
Left
panel
(B)
and Right panel (C)
with the pre
-
drilled holes on the cleat on the Left panel (B). Insert the
Washer (L), Spring
washer (M) and
1/4x1-1/4” Bolt (I) through pre
-
drilled holes on the Left panel (B)
and the pre
-
drilled holes on the
assembled frame, tighten with the Allen key (
Q
) provided.
(Fig. 2)
3
. Attach the Top (A) onto the assembled frame (assembled in step 2) by inserting the pre
-
attached wooden dowel
s on
the top horizontal rails of the side panels into the pre
-
drilled holes on the Top (A). Insert
1/4x1-1/4” Bolt (I)
into the
pre-drilled holess at both ends of the Top. Once all bolts are in place, fully tighten tem using the 4mm Allen key (
Q)provid
ed.
(Fig.3)
BCDFHIMLK
P
AIM
L
Page 4

4
. Attach the Back Panel (G) t
o the back of the unit. Insert
the
3x20mm Screw (N)
through pre
-
drilled holes of the
Back panel(G)
i
nto the unit. Secure with Phillips Head Screwdriver
(Fig.4)5. Insert the Shelf Support
(O)into the pre
-
drilled located on the interior of the Media Base as shown in Figure 5.
Carefully place the Adjustable shelves (E) onto the shelf support as shown in Figure 5.
(Fig.5)
GNEEO
Page 5

6
. Adjust the Adjustable Levelers on the bottom of the Legs by loosening or tightening them so the Media Base sit
sevenly on floor.
(Fig.6)
CARE INSTRUCTIONS:
Dust often using a cle
an, soft, dry lint
-
free cloth.
Blot spills immediately, and wipe with a clean, damp, cloth.
We do not recommend the use of chemical cleansers, abrasives, or furniture polish on our lacquered
finish.
T
hank you for your purchase
stores | catalog | www.potterybarnkids.com
 Loading...