

Page 1
pottery barn kids
KENDALL LARGE DESK HUTCH
PRE-ASSEMBLY:
• Please read all instruction before beginning assembly. The illustrations provided allow for easier assembly when
used in conjunction with the assembly instructions.
• Remove all parts and hardware from box and lay out on a carpeted or scrat ch-free work surface, as this will avoid
damaging any parts during assembly. The shipping box provides and ideal work surface. Do not dispose of any
contents until assembly is completed to avoid accidentally discarding small parts or hardware.
• For your safety and ease, adult assembly by two people is recommended.
• Save all packing materials until assembly is complete to avoid accidentally discar ding smaller parts or hardware.
• Use the parts and hardware lists to identify and sep arate each of the pieces included prior to starting assembly.
• Note: Do not fully tighten all bolts until all parts are in place. Failure to follow these instructions may cause the bolts
to misalign during assembly.
• If using power tools to aid in assembly please use caution. Power tools can damage hardware or split wood.
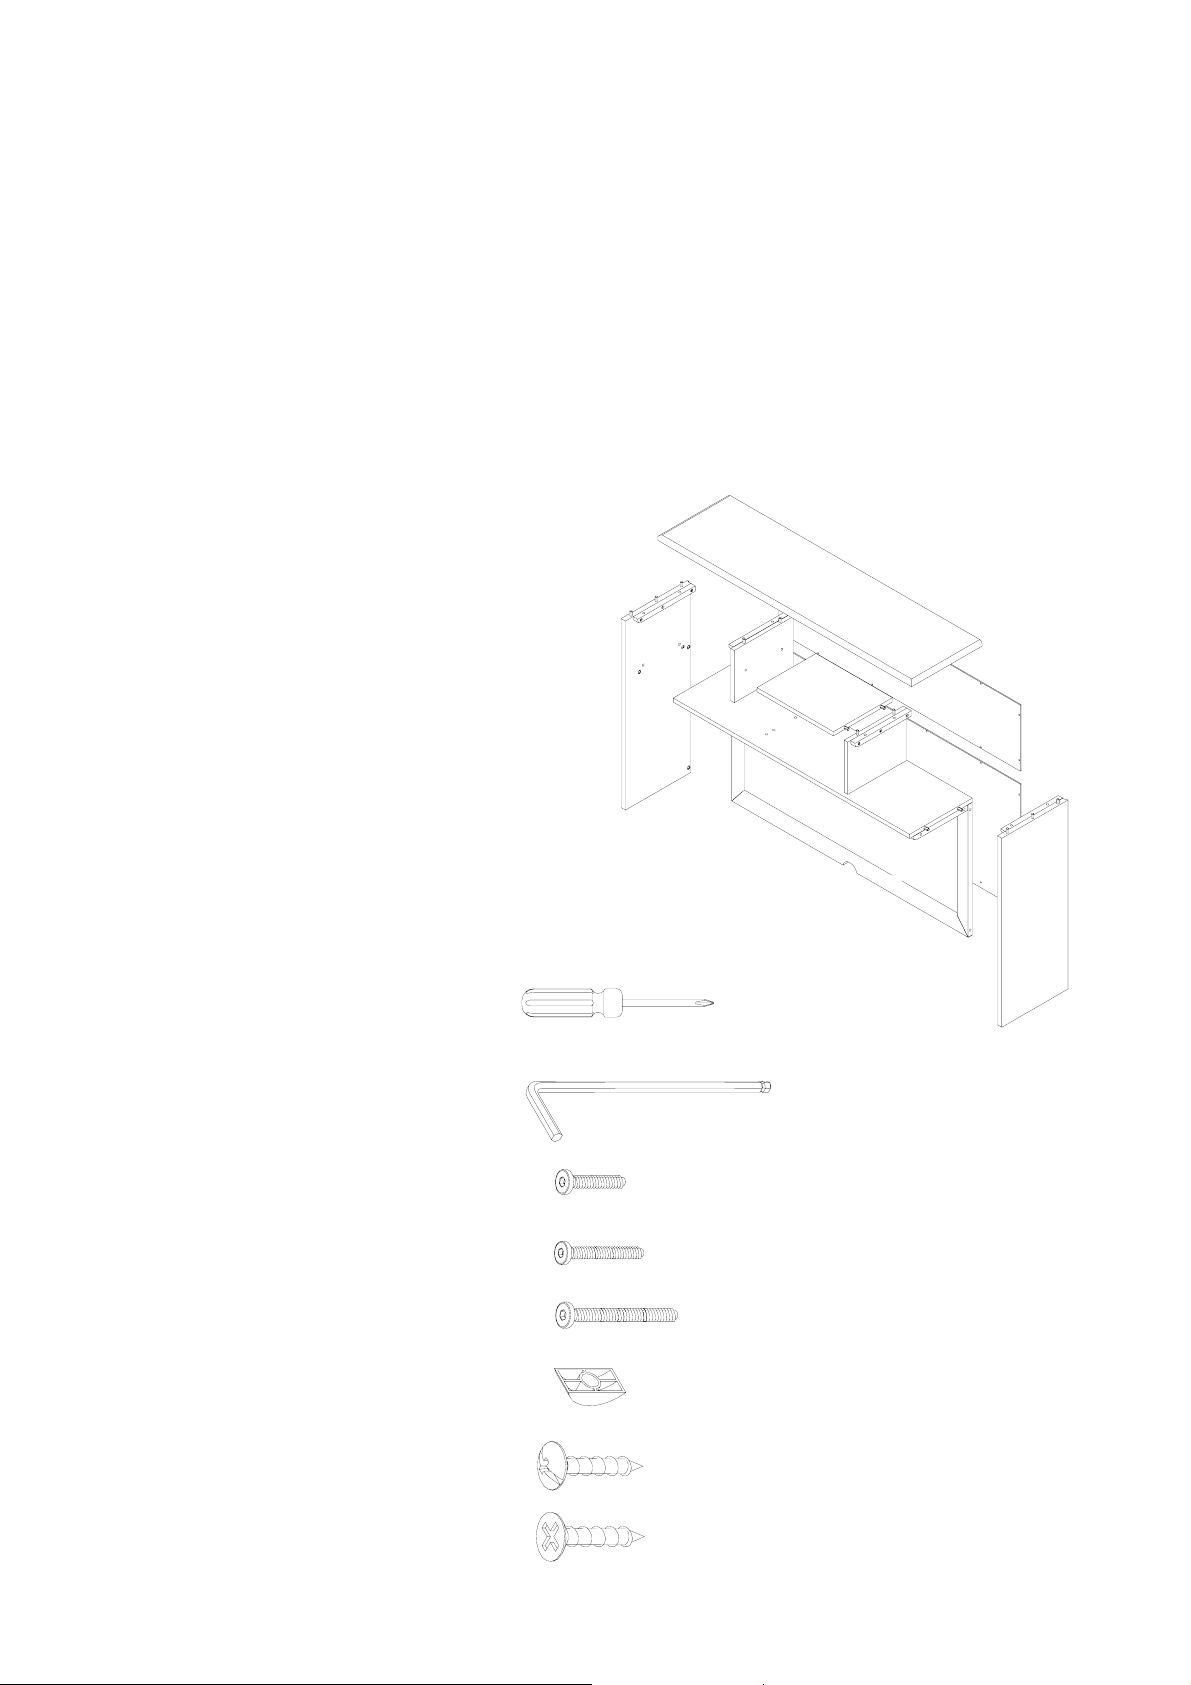
PARTS INCLUDED:
(A) Top Shelf -1pc
(B) Left Side Board -1pc
(C) Right Side Board -1pc
(D) Bottom Shelf -1pc
(E) Back Corkboard -1pc
(F) Right Divider -1pc
(G) Left Divider -1pc
(H) Center Shelf -1pc
(I) Upper Back Panel -1pc
(J) Lower Back Panel -1pc
TOOLS REQUIRED:
Phillips Head Screwdriver (not included)
HARDWARE ENCLOSED:
(K) 4mm Allen Key -1pc
B
G
A
H
E
F
D
I
J
C
(L) 1/4”x1” Allen Bolt -16pcs
(M) 1/4”x1-3/8” Allen Bolt - 2pcs
(N) 1/4”x2” Allen Bolt - 4pcs
(O) Curve Washer - 6pcs
(P) #3.5x15mm Pan Head Screw -26pcs
(Q) #3.5x15mm Flat Head Screw - 4pcs
Page 2
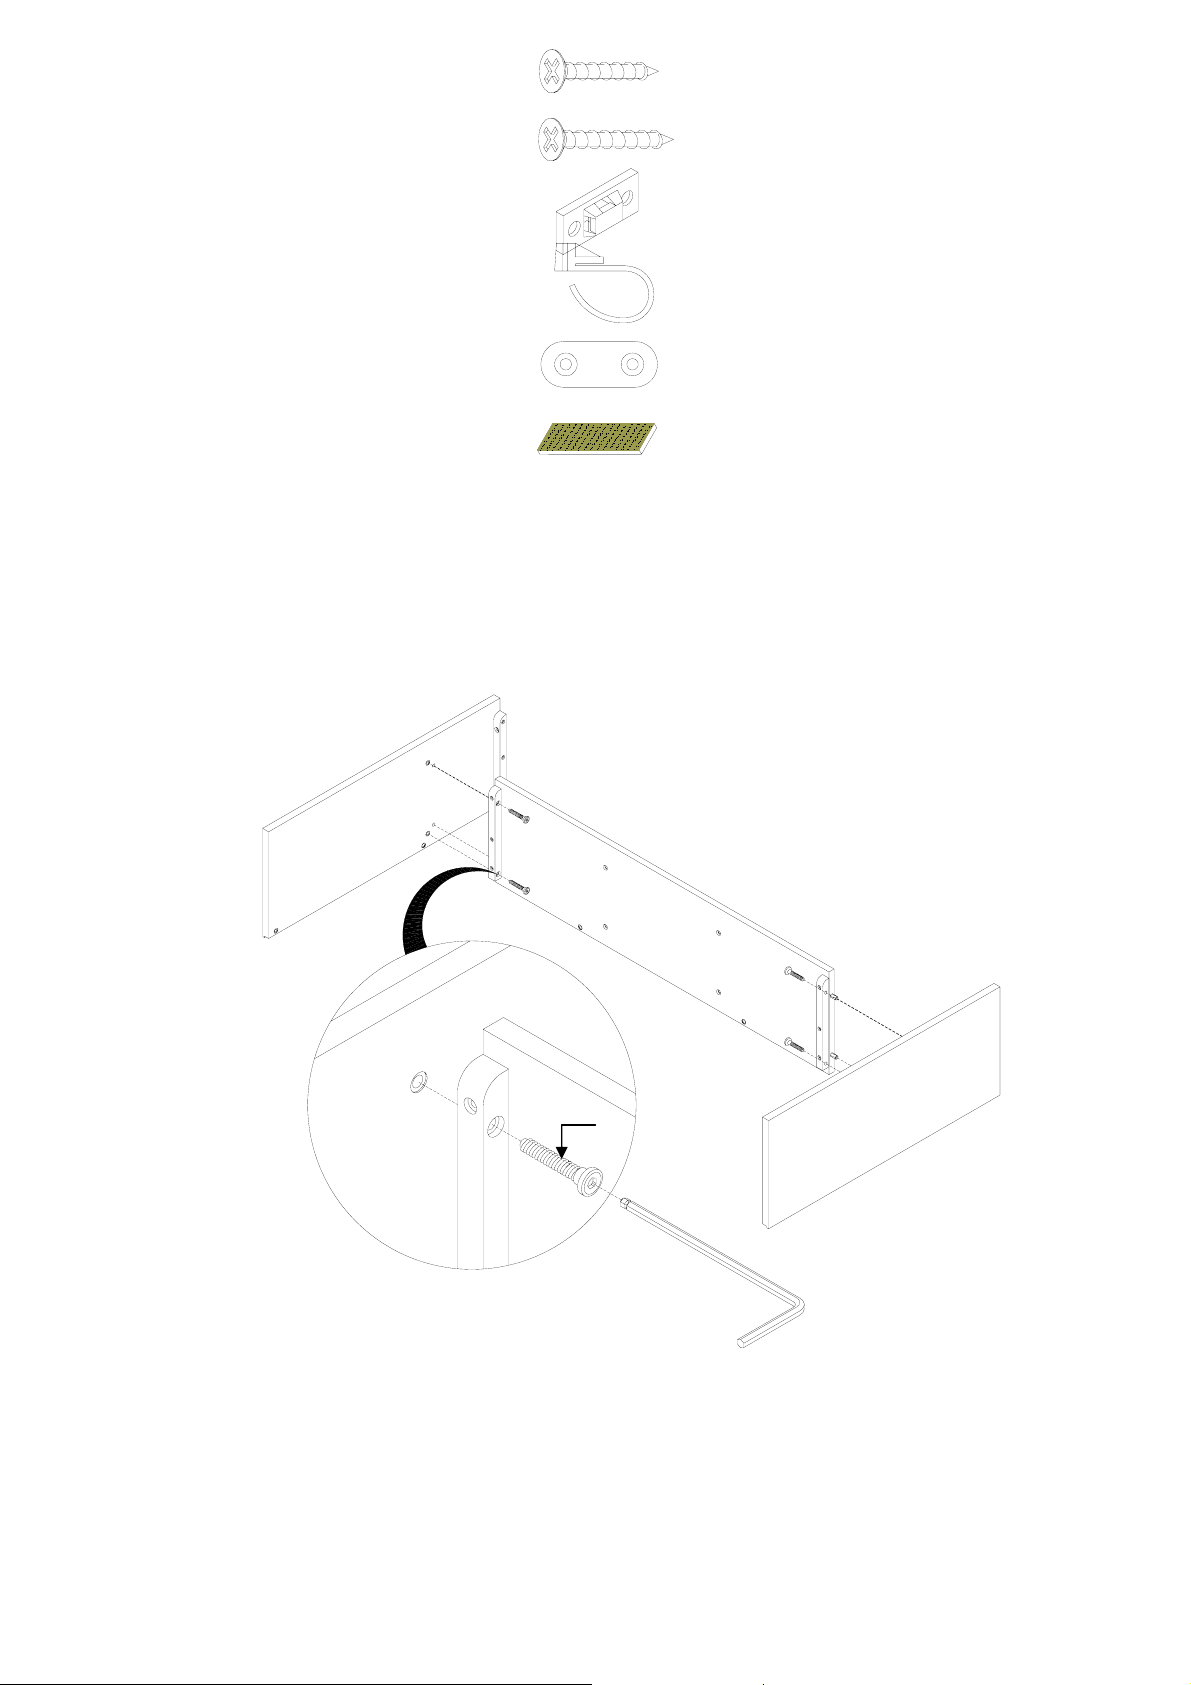
(R) #4x20mm Screw -2pcs
(S) #4x30mm Screw -2pcs
(T) Bracket -2pcs
(U) Nylon Strap -1pc
(V) Mending Plate -2pcs
(W) Felt Pad - 4pcs
ASSEMBLY INSTRUCTIONS:
1. Position the Left side board (B), the Right side board (C), and the bottom shelf (D) exactly as shown below with the
wooden dowels on the sides of the Bottom shelf (D) fully inserted into the pre-drilled holes on the side boards (B)&(C).
Insert the (4) #1/4”x1” Allen Bolt (L) through the pre-drilled holes on the (1) left side board (B) and (1) right side board(C)
and tighten securely with the 4mm Alley Key (K) provided. (Fig. 1)
(Fig. 1)
B
L
D
C
K
Page 3
2. Position the Back Corkboard (E) onto the frame that you assembled in Step 1. Insert the 1/4"x2” Allen Bolt (N) through
the Curve Washer (O) into the pre-drilled holes at 4 corners of the Back Corkboard (E). Screw the Bolts in but do not
tighten securely. Then insert the (2) 1/4”x1-3/8” Allen Bolt (M) through the hole of Curve Washer (O) into the pre-drilled
holes at center of Top Rail of the Back Corkboard (E). Tighten all Allen Bolts securely with the 4mm Alley Key (K) provided.
(Fig. 2)
(Fig. 2)
O
B
D
O
E
N
C
K
M
K
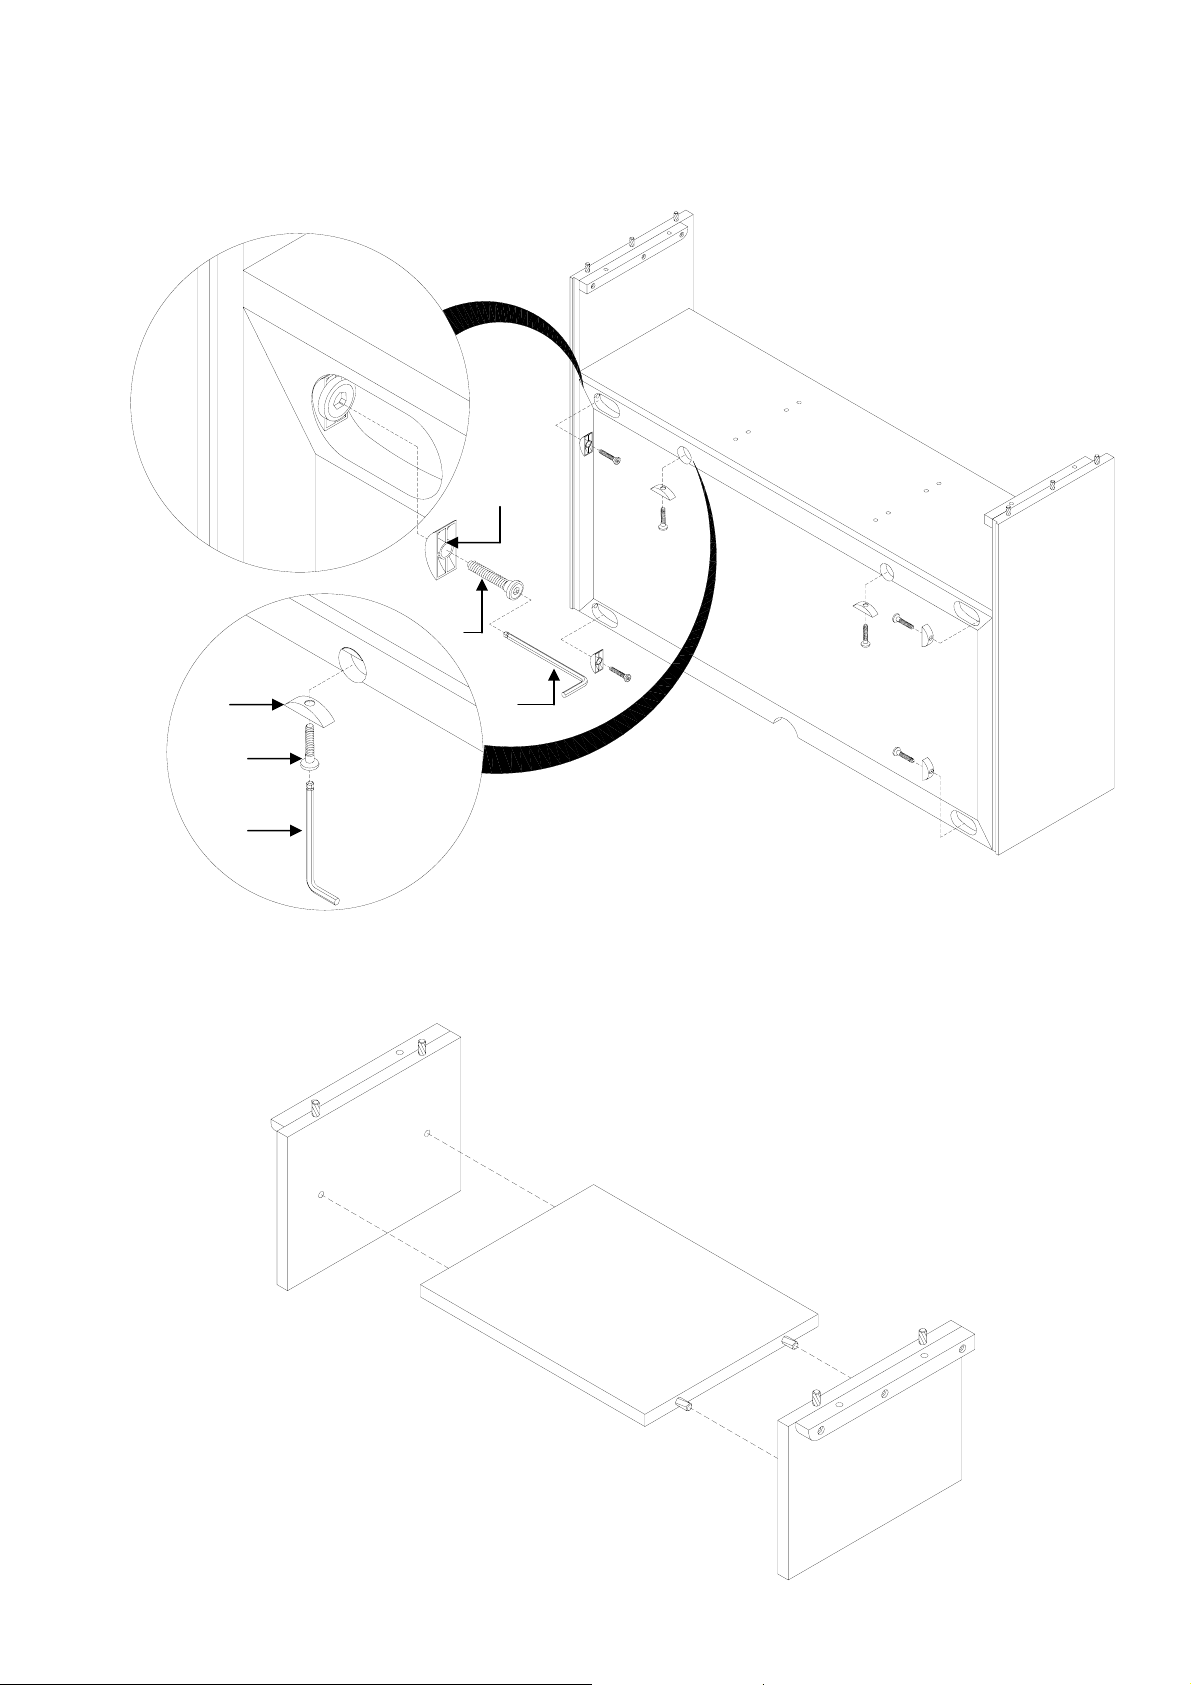
3. Position the Left Divider (G), Right Divider (F) and Center Shelf (H) exactly as shown below with the wooden dowels on
the side of the Center Shelf (H) fully inserted into the pre-drilled holes on the Left Divider (G) and the Right Divider (F). (Fig.
3)
(Fig. 3)
G
H
F
Page 4

4. Position the assembled divider frame (assembled in step 3) on the top of the frame (assembled in step 2) with the
wooden dowels fully inserted into the pre-drilled holes on the top of the Bottom Shelf (D). Insert the (4 ) #1/4”x1” Allen Bolts
(L) into the pre-drilled holes on the Bottom Shelf (D) and tighten securely with the 4mm Allen Key (K) provided. (Fig. 4)
(Fig. 4)
L
G
H
K
B
D
F
E
C
5. Positon the Top Shelf (A) onto the frame (assembled in step 4) exactly as shown belo w with the woode n dowel s on the
frame fully inserted into the pre-drilled holes on the Top Shelf (A). Insert the (8) #1/4”x 1” Allen Bolts (L) into th e pre-dril led
holes on the cleats of frame the Top Shelf (A), and tighten securely with the 4mm Alley Key (K) provided. (Fig. 5)
(Fig. 5)
L
K
A
Page 5

6. Lay the hutch down with the back is facing up. Position the Upper Back Panel (I) and the Lower Back Panel (J) on the
back frame of the Hutch exactly as shown below. Insert the (22) #3.5x15mm Pan Head Screws (P) into the pre-drill ed
holes on the Upper Panel (I) and the Lower Back Panel (J), tightening securely with Phillips Head Screwdriver (not
included). (Fig. 6)
(Fig. 6)
I
J
P
7. Place the (4) Felt Pad (W) on each of the corners of Hutch (assembled in step 6). This will prevent the Hutch from
scratching the Kendall Large Desk as you complete assembly. (Fig. 7)
(Fig. 7)
W
Page 6

8. Attach the Hutch to the Kendall Large Desk by placing a Mending Plate (V) ove r the pre-drilled pilot holes located on the
Hutch/Desk, and inserting the #3.5x15mm Flat Head Screws (Q). Fasten the connections with a screwdriver (not
included). Repeat this step for the other Mending Plate (V). (Fig. 8)
(Fig. 8)
Q
V
Thank you for your purchase.
stores | catalog | www.potterybarnkids.com
USA 1.800.290.8181
Page 7

Anti Tip Kit Assembly Instructions:
Note: For safe mounting it is essential to use the proper hardware for your wall type. The included hardware is for drywall
or stud mounting only. For other wall types (ie: plaster, concrete, brick…) please consult your local hardware store.
Determine the final position of the furniture piece. Mark the location on the wall approximately 1-2” below the top of the
back of the furniture. Mark and drill a pilot hole into the wall using a 3/32” drill bit. Attach the bracket (T) to the wall by
inserting the #4x30mm Screw (S) through the bracket and into the wall.
On the back of the furniture, a bracket will need to be attached to the furniture frame at the top. To do this, temporarily
move the furniture into its final position and mark the location of the wall bracket on the furniture frame
Move the furniture away from the wall and place a bracket on the mark. Mark and drill holes for #4x20mm Screws (R) with
a 3/32” drill bit. Attach the bracket to the furniture. Place the furniture so the bracket on the back edge is in line with the
bracket on the wall.
Lace one end of the nylon restraint strap (U) down through each bracket. Bring both ends together a nd slide the raised end
until it snaps into the keyhole slot. To double-lock, return the raised and back through the keyholes as shown. Ensure th e
strap is securely locked and locked into the brackets. (Fig. 9)
Check to be sure the wall bracket is firmly screwed into wall and the furniture bracket is firmly attached to the frame, and
that the strap is secure. Move the piece of furniture into its final position so that the wall bracket and furniture bracket are
in alignment.
(Fig. 9)
S
T
U
R
CARE INSTRUCTIONS:
Dust often using a clean, soft, dry lint-free cloth.
Blot spills immediately, and wipe with a clean, damp, cloth.
We do not recommend the use of chemical cleansers, abrasives, or furniture polish on our lacquered finish.
Thank you for your purchase.
stores | catalog | www.potterybarnkids.com
USA 1.800.290.8181
 Loading...