

Page 1
pottery barn kids
KENDALL
2 SHELF BOOKCASE
PRE-ASSEMBLY:
Please read all instruction before beginning assembly.
The illustrations provided allow for easier assembly
when used in conjunction with the assembly instructions.
Remove all parts and hardware fro
m box and lay out on a carpeted or scratch
-
free work
surface,
as t
his will
avoid damaging any parts during assembly. The shipping box provides and ideal work surface
.
Do not dispose
of any contents until assembly is completed to avoid accidentally discardi
ng small parts or hardware.
For your safety and
ease, adult assembly
by t
wo people is recommended.
Save all packing materials until assembly is complete to avoid accidentally discarding smaller parts or
hardware.
Use the parts and hardware lists to ident
ify and separate each of the pieces included prior to starting
assembly.
Note: Do not fully tighten all bolts until all parts are in place. Failure to follow these instructions may cause the
bolts to misalign during assembly.
If using power tools to aid in
assembly please use caution. Power tools can damage hardware or split wood.
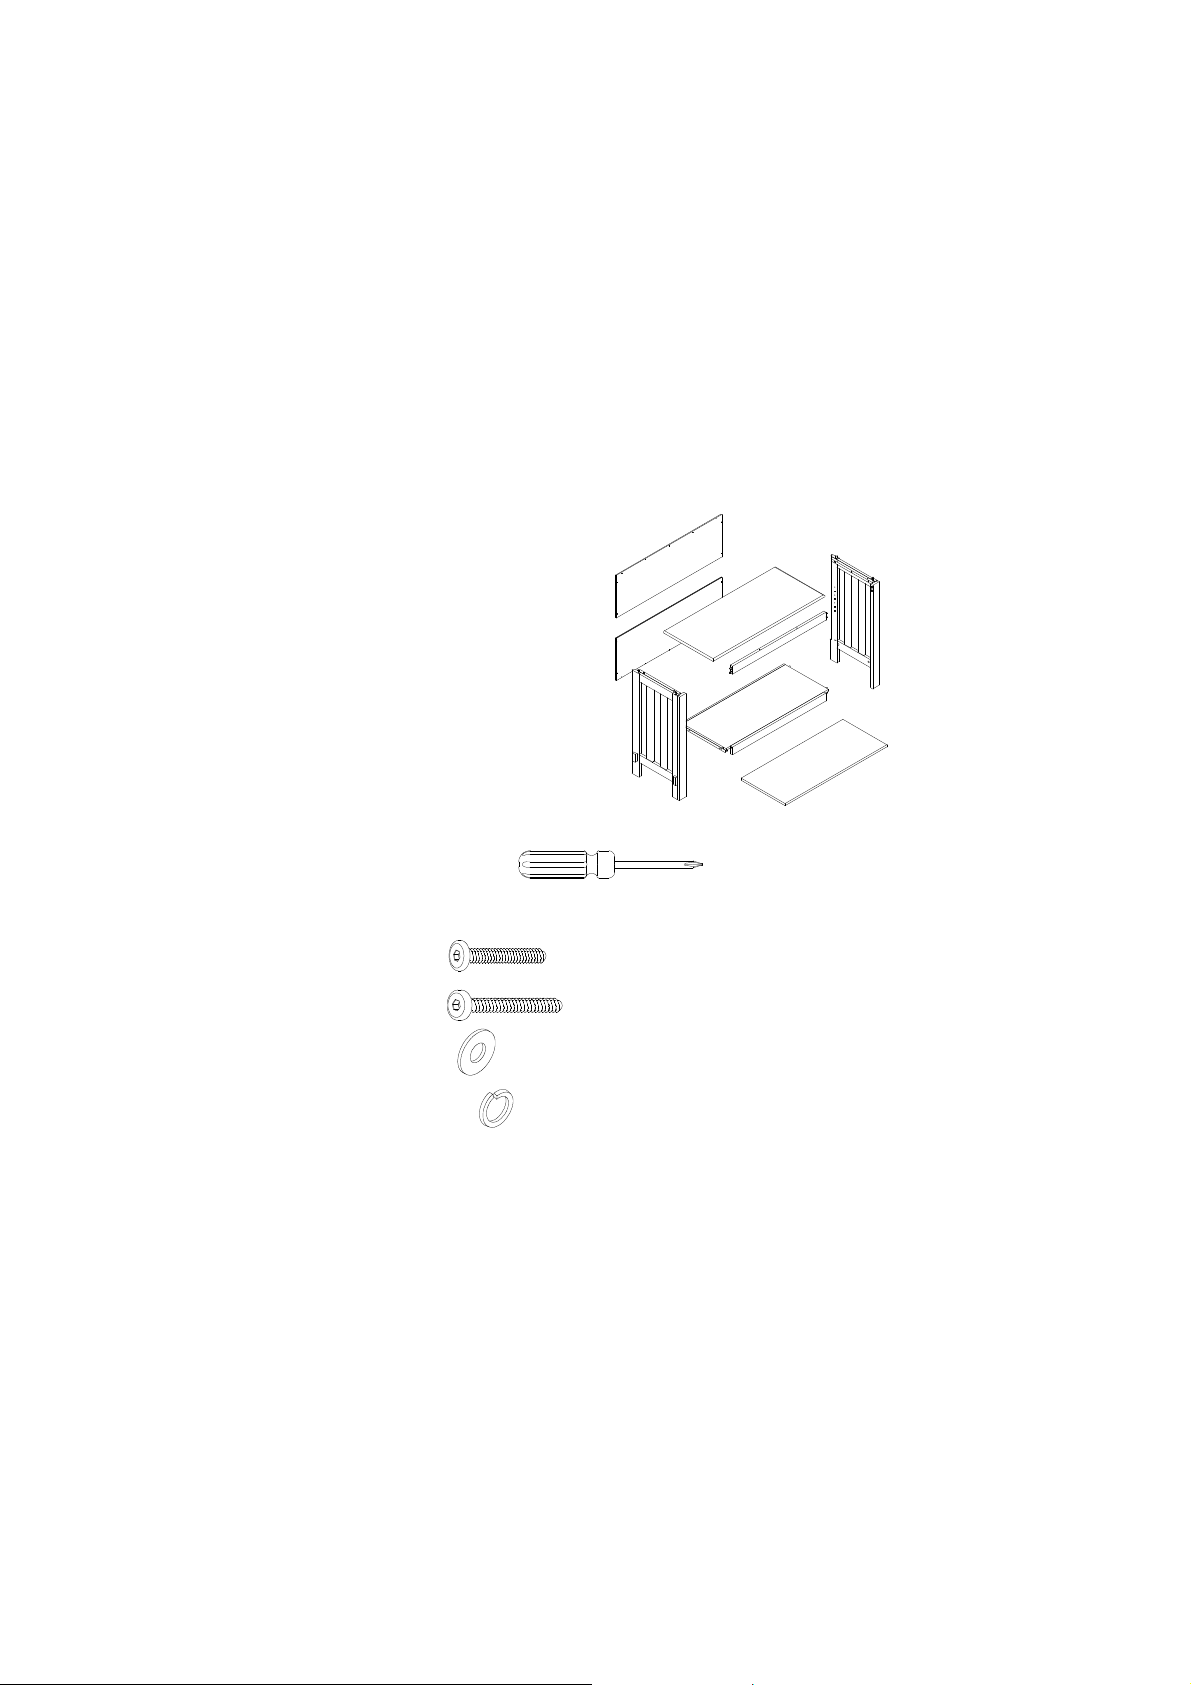
PARTS INCLUDED:
(A)
Top-1pc(B)
Left panel
-1pc(C)Right panel
-1pc(D)Front rail
-1pc(E)Adjustable shelf
-1pc(F)Fixed shelf
-1pc(G)Top b
ack panel
-1pc(H)Bottom back
panel-1pcTOOLS
REQUIR
ED:
Phillips head screwdriver (not included)
HARDWARE
ENCLOSED
:(I)1/4x1-1/4”
Bolts-10
pcs(K)1/4x1-
1/2”
Bolts-2
pcs(L
) Washer 1/4mm
–8pcs(M
) Spring
washer 1/4mm
–8pcs
ABCDEFG
H
Page 2
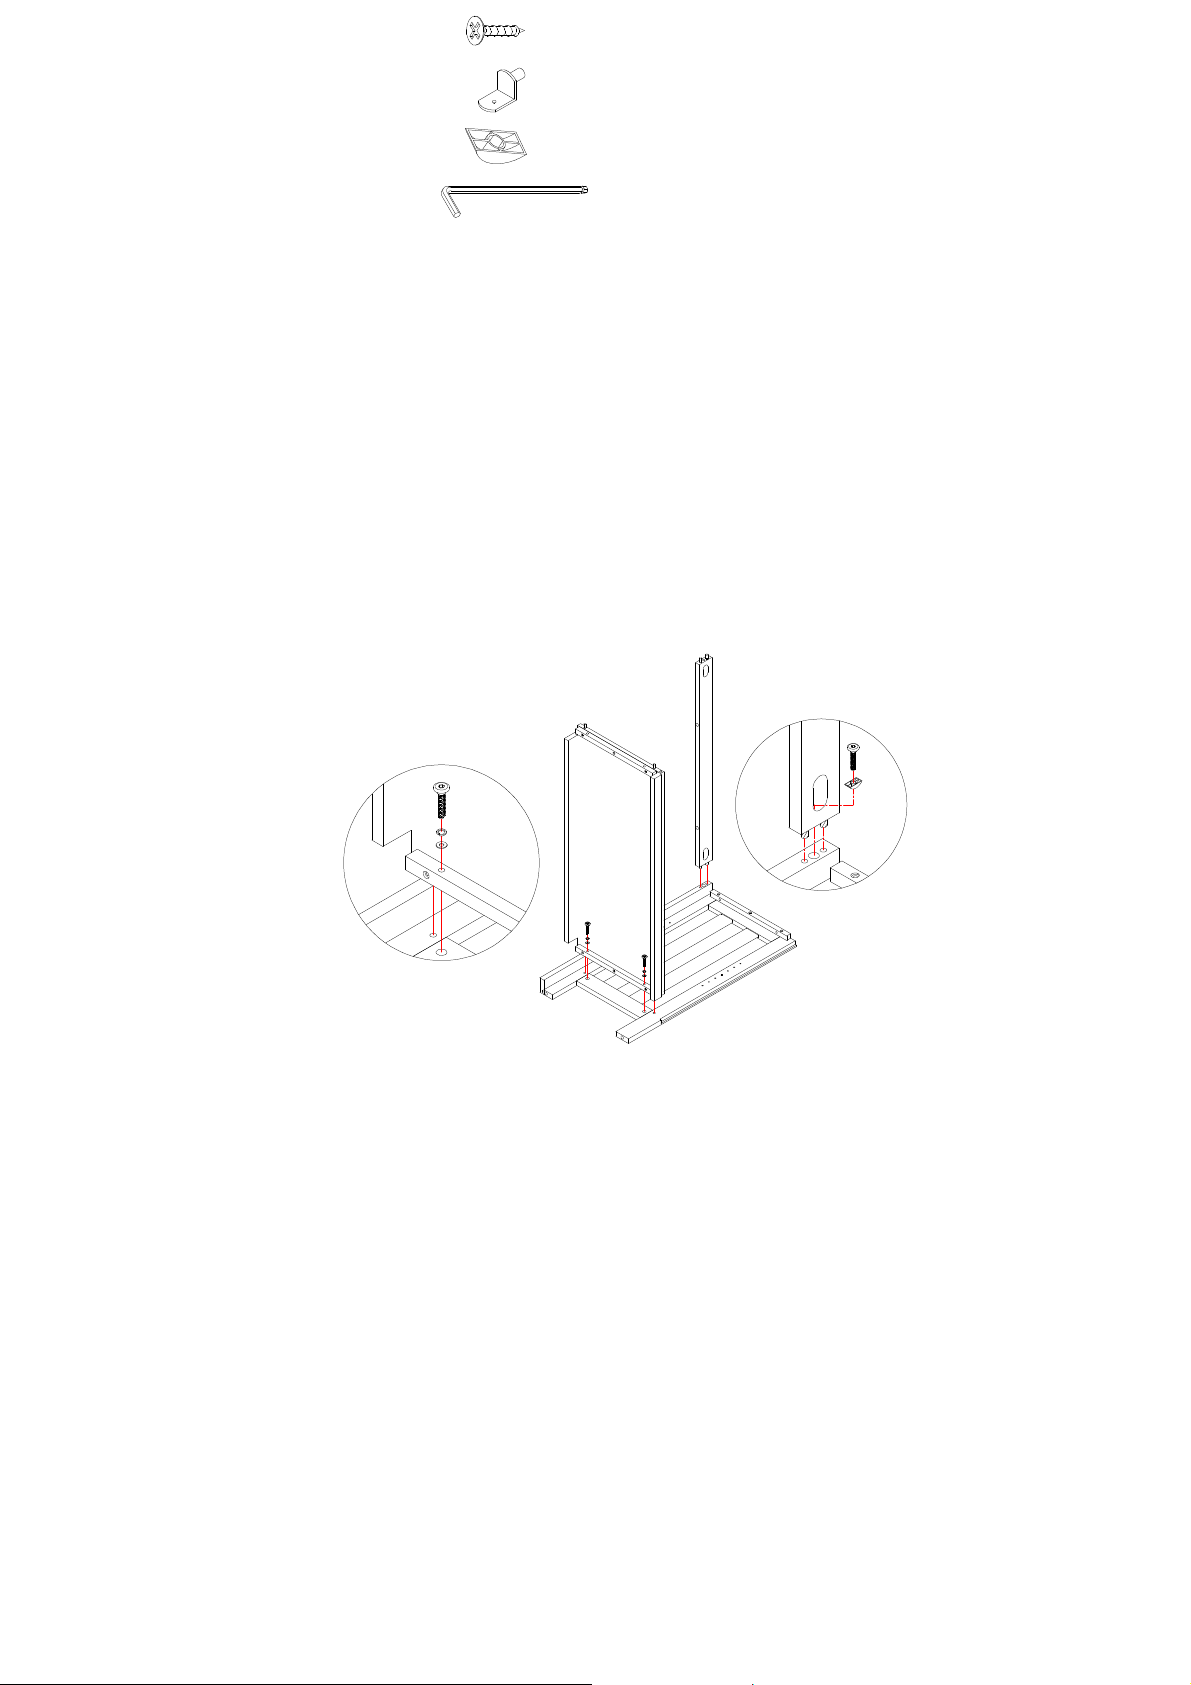
(N)
#3x19mm–26
pcs(O)Shelf support
–4pcs(P)
Curve washer
–2pcs(Q) 4mm Allen Key
–
1pc
ASSEMBLY
INSTRUCTIONS
:
1.
Position the Side panel (B) and the fixed shelf (F) exactly asshown(Fig.
1
) Align the pre
-
drilled holes on the Side panel
(B) with the pre
-
drilled holes on the cleat on the fixed shelf (F). Insert the Washer (
L
), Spring washer (
M
) and
1/4x1-1/4”
Bolt (I) through pre
-
drilled holes on the side panel (B) and the pre
-
drilled holes on the cleat o
n the fixed shelf (F),
tighten with the Allen key (
Q
) provided
Position the Front rail (D) exactly as shown (Fig.1). Attach
the Front rail (D) onto the side panel as shown in the
diagram. Slot the 1/4 x 1
-
1/2”Bott (
K)and Curve washer (P) through Front rail (D)
to the post in the side panel, tighten
with the Allen key (
Q
) provided.
(Fig. 1)
BFDILMK
P
Page 3

2.Position the Panel (C
) and the assembled frame (assembled in step 1) exactly as shown. (Fig.2) Align the pre
-
dri
lled holes on the Side panel (C
) with the pre
-
drilled holes on the assembled frame. Insert the
Washer (L), Spring
washer (M)
and
1/4x1-1/4”
Bolt (I) through pre
-
drilled holes on the side panel, tightening with the Allen key (P)
provided.
(Fig. 2)
3
. Attach the Top (A) onto the assembled frame (assembled in step 2) by inserting the pre
-
attached
wooden dowels on
the top horizontal rails of the side panels into the pre
-
drilled holes on the Top (A). Insert Allen Bolts into the pre
-
drilled
holes at both ends of the Top. Once all bolts are in place, fully tighten t
h
em using the 4mm Allen key (
Q
) pr
ovided.
(Fig.3)
CILMKPAIM
L
Page 4

4. Attach the
top b
ackpanel (G) to the
bottom back panel(H) as shown. (Fig.4).
5
. Attach the Back Panel to the back of the unit. Insert the Screws through pre
-
drilled holes of t
he Back panel
into the unit.
Secure with Phillips Head Screwdriver
(Fig.5)
GHN
Page 5

6
. Insert the Shelf Support (O
) into the pre
-
drilled located on the interior of the
Kendall 2 Shelf Bookcase
as shown in
Figure6. Caref
ully place the Adjustable shel
f
(E) onto the shelf support as shown in Figure
6.(Fig.6)7. Adjust the Adjustable Levelers on the bottom of the Legs by loosening or tightening them so the
Kendall 2 Shelf
Bookcase
si
t evenly on floor.
(Fig.7)
CARE INSTRUCTIONS:
Dust often using a clean, soft, dry lint
-
free cloth.
Blot spills immediately, and wipe with a clean, damp, cloth.
We do not recommend the use of chemical cleansers, abrasives,
or furniture polish on our lacquered
finish.
T
hank you for your purchase
stores | catalog | www.potterybarnkids.com
E
O
 Loading...