

Page 1
pottery barn kids
JANIE DESK
PRE-ASSEMBLY:
• Remove all parts and hardware f r om the box and lay out on a clean, carpeted, or scratch-free work surface, as
this will avoid damaging any parts during assembly. The shipping box provides an ideal work surface.
• Do not dispose of any contents until assembly is completed to avoid acci dentally discarding small parts or
hardware.
• Two adults recommended for ease of assembly.
• Use the parts and hardware lists t o identify and separate each of the pieces included prior to starting
assembly.
• The illustrations provided allow for easier assembly when used in conjunction with the assembly instructions.
• Note: Do not fully tighten all bolts until all parts are in place. Failure to follow these instructions may cause the
bolts to misalign during assembly.
• The use of power tools for ass embly is not recommended. Power tools can damage hardware or split woo d .
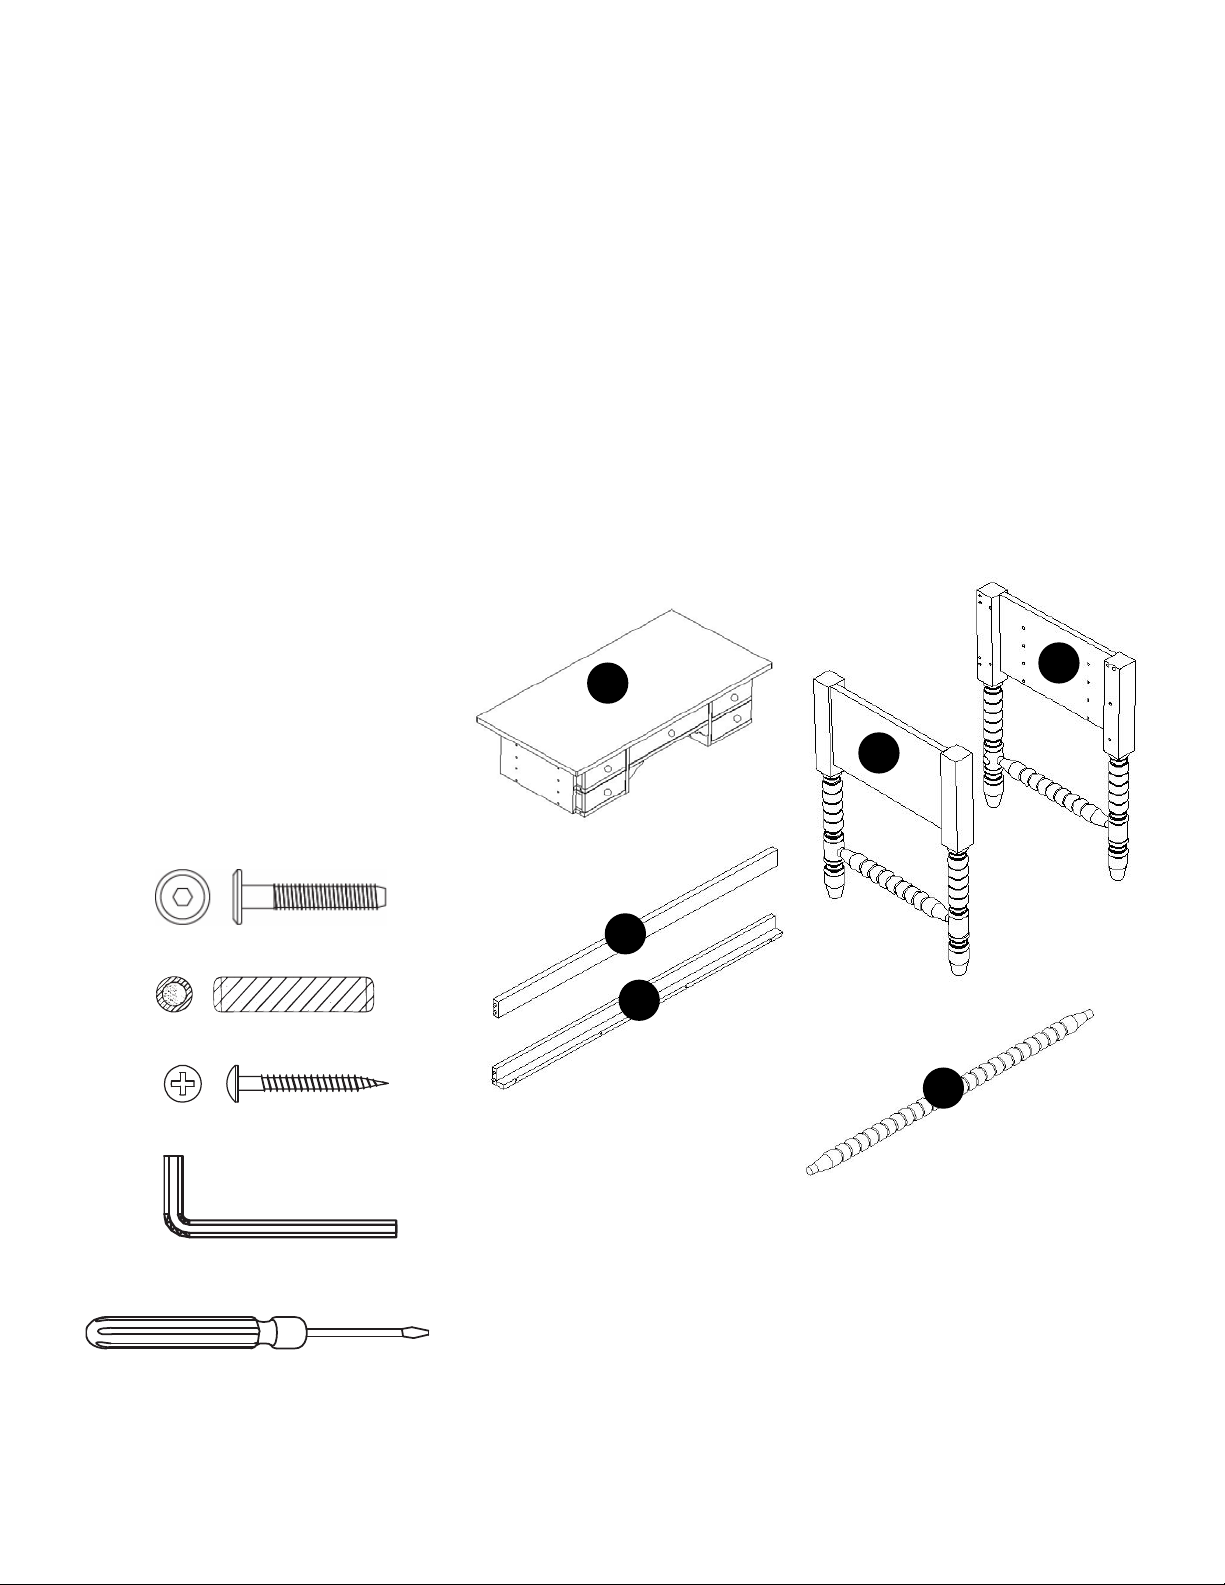
PARTS INCLUDED:
A. Desk box (1)
B. Right Side Panel (1)
C. Left Side Panel (1)
D. Upper Back Bar (1)
E. Lower Back Bar (1)
F. Spindle Bar (1)
HARDWARE INCLUDED :
G. Bolt JCBC Ø6x30 mm (8)
H. Wooden Dowel Ø8x30 mm (8)
I. Screw PCS Ø7x1¼ Inch (3)
J. Allen Key (1)
TOOLS NEEDED:
Phillips screwdriver (not included)
A
B
D
E
F
C
Page 1/4
Page 2
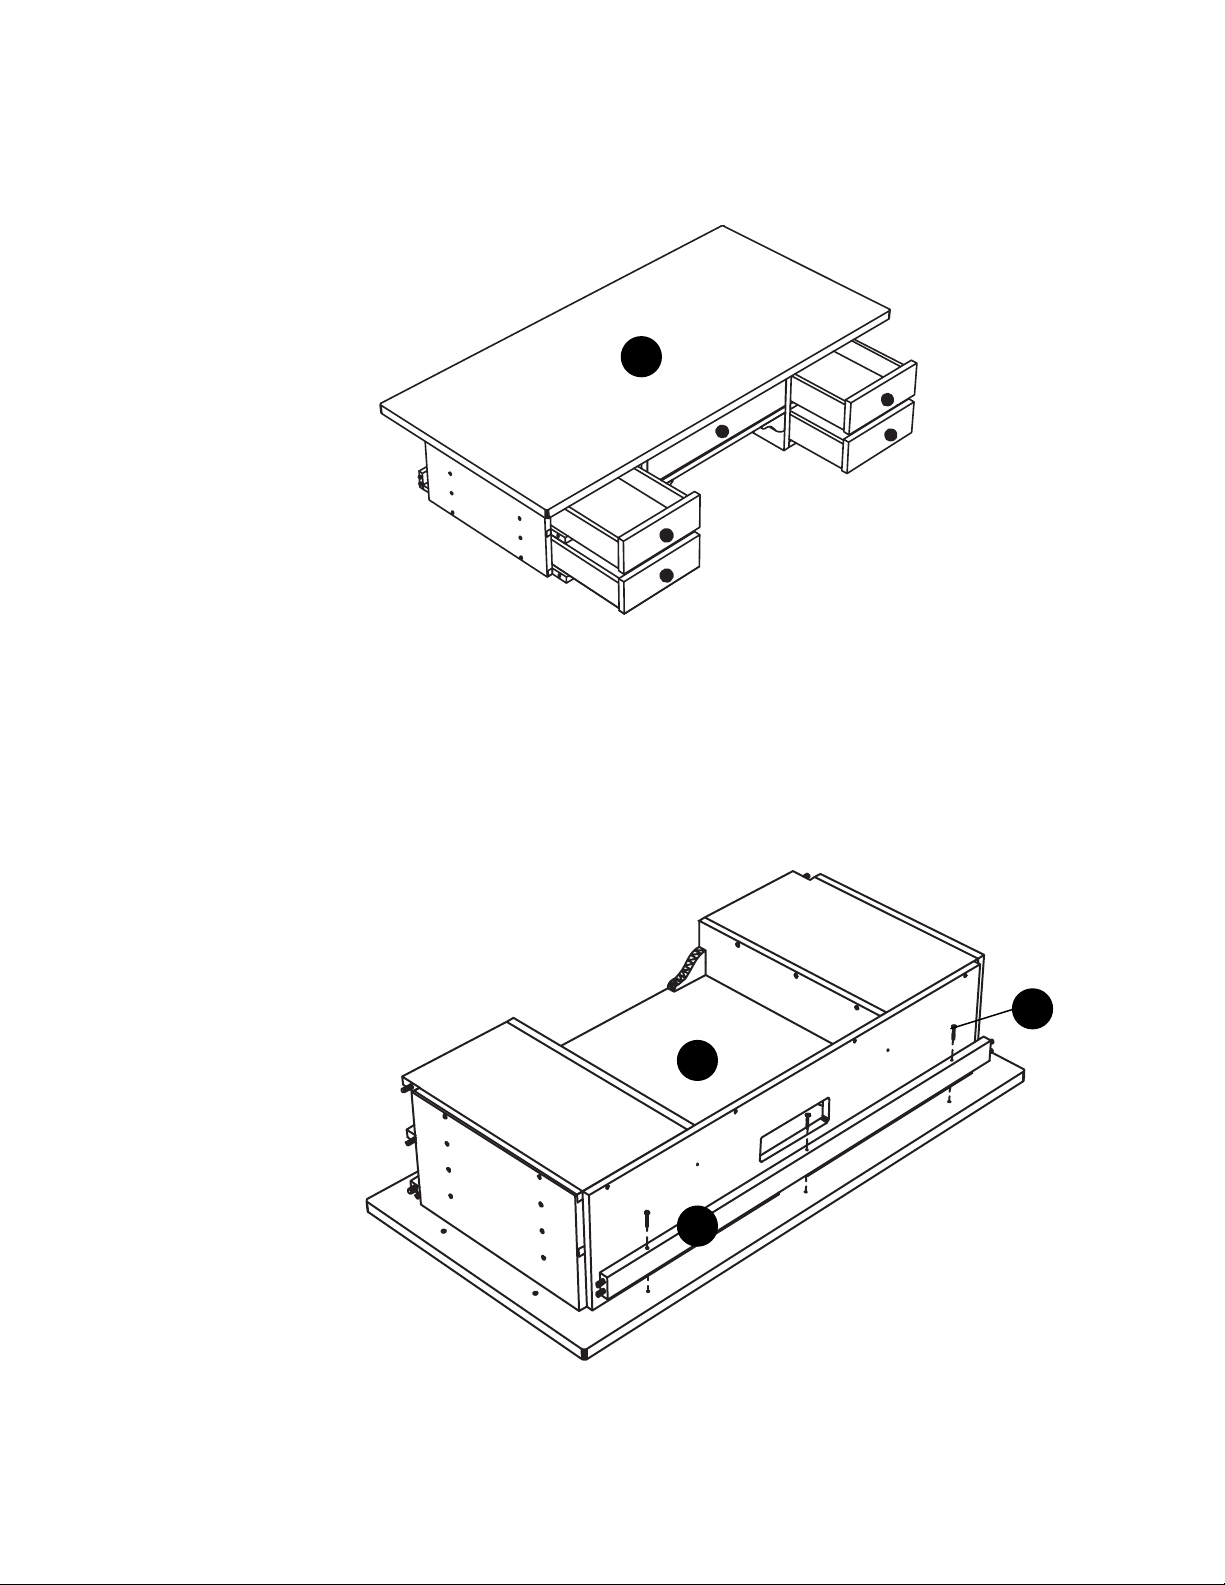
ASSEMBLY INSTRUCTIONS:
1. Remove all four small drawers from Desk Box (A) by pulling firmly. Set Drawers aside (fig.1 ).
(fig.1)
2. Place the Desk Box (A) upside down on a soft clean surface. A ttach Upper Back Bar (D) to Desk Box (A) with
(3) Screws (I), using Phillips Head Screwdriver (not included) (Figure 2).
(fig.2)
Page 2/4
A
I
A
D
Page 3

3. To assemble the Lower Back Bar (E), insert the dowels (pre -attached along the Bar) int o the corresponding
holes in the Desk Box (Figure 3).
(fig.3)
4. Insert 4 Wooden Dowels (H) into the holes in the Right and Left Side P an el (B and C) (Figure 4).
(fig.4)
B
H
E
C
Page 3/4
Page 4

5. Attach the Left Side Panel (C) to the Desk Box (A). Fasten from the inside of the drawer box with 4 Bolts (G)
using Allen Key (J), as shown. Repe at for Right Side Panel (B), while aligni ng and connecting the Spindle Bar
(F) between the two rear legs , as shown in Figure 5.
(fig.5)
6. Turn assembled Desk upright and replace the drawers.
(fig.6)
CARE INSTRUCTIONS:
• Dust often using a clean, soft, dry lint-free cloth.
• Blot spills immediately, and wipe with a cl ean, damp, cloth.
• We do not recommend the use of chemical c l eansers, abrasives, or furniture polish on our lacquered finish.
G
Thank you for your purchase
Store l Catalog l www.potterybarnkids.com
USA 1.800.290.8181
C
B
Page 4/4
 Loading...