

Page 1
pottery barn kids
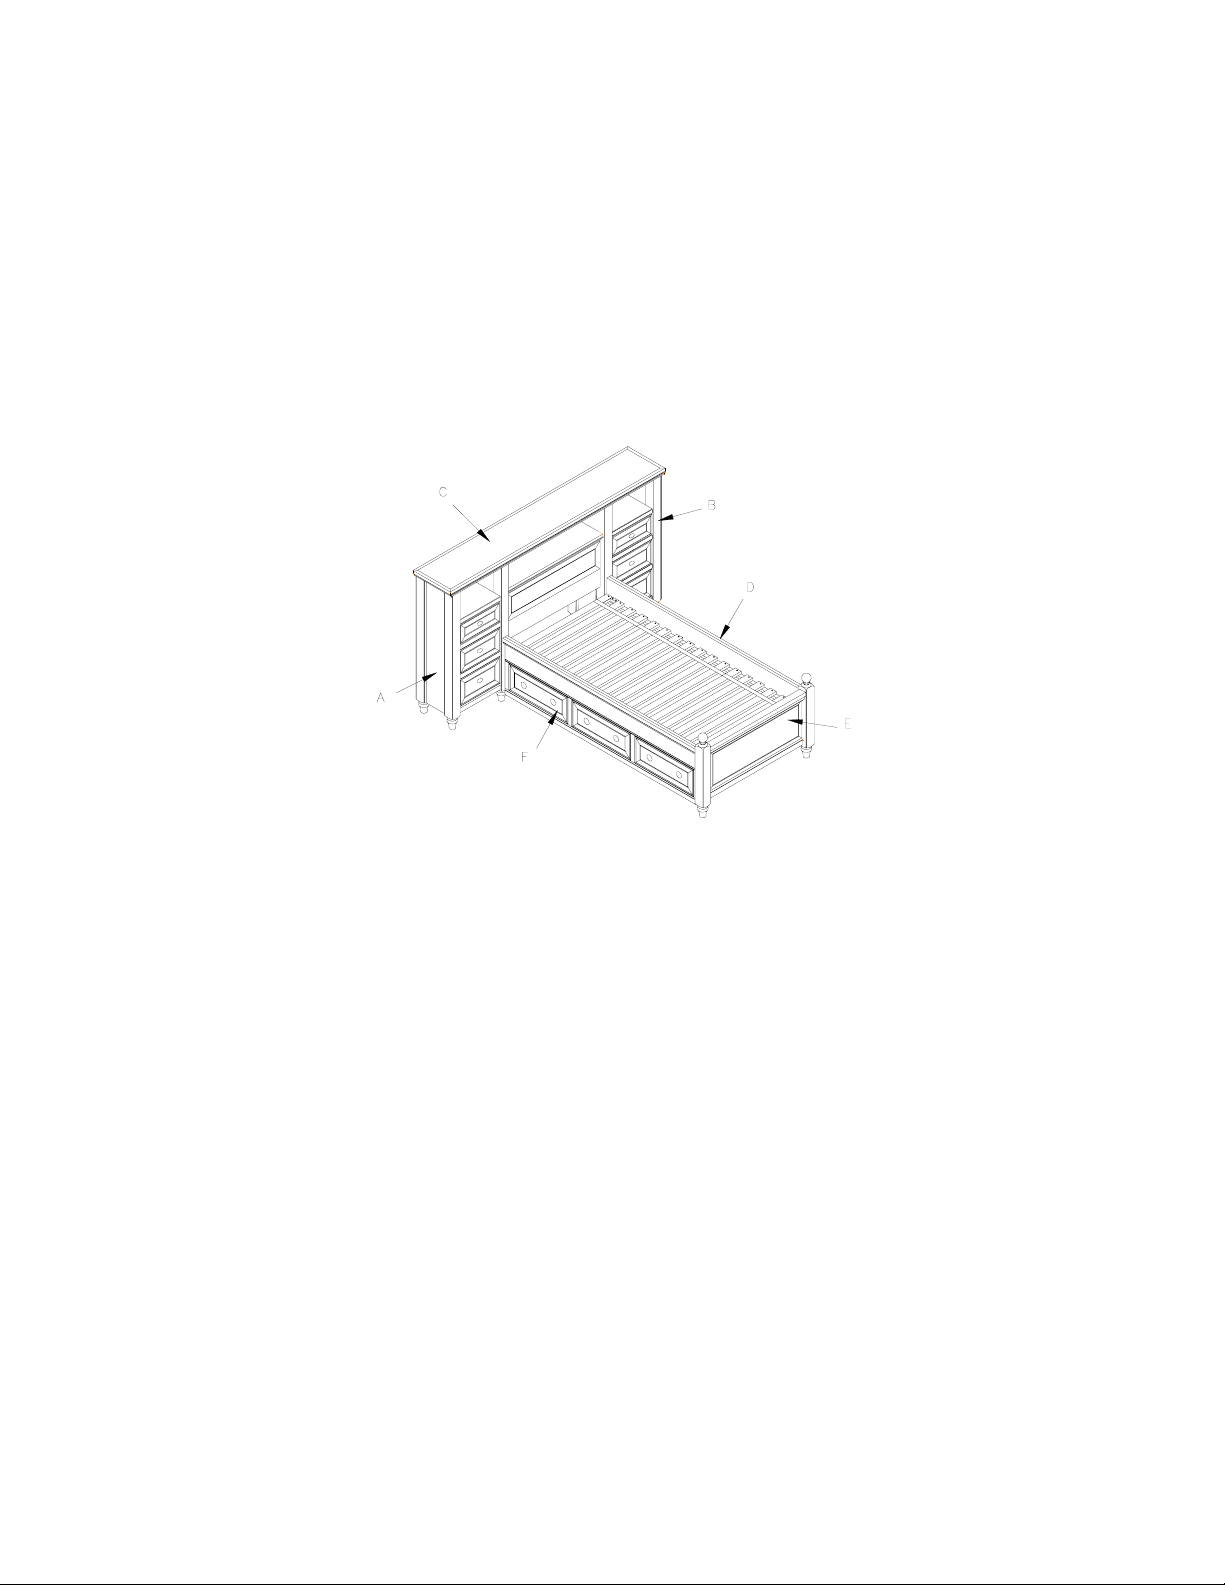
DEVON BED
CAUTION
unassembled state. Adults should take care when unpacking and assembling this item.
PRE-ASSEMBLY:
: Adult assembly required. This item contains small parts that have sharp points and edges in the
• Please read all instructions bef or e b eg inning assembly.
• For ease of assembly two people are reco mmended.
• Save all packing materials until assembly is complete to avoid accidentally discarding smaller parts or
hardware. One extra drawer knob is included for your convenience.
• Use caution when using power tools to aid in assembly. Power tools can split wood or strip hardware
if not used carefully.
P ARTS INCLUDED:
(A) Right Unit – 1pc
(A-1) Feet – 4pcs
(B) Left Unit – 1pc
(B-1) Feet – 4pcs
(C) Center Storage Unit – 1pc
(C-1) Front Panel – 1pc
(C-2) Center shelf – 1pc
(C-3) Back Panel – 1pc
(D) Side Rail s and Slats – 2pcs
(E) Footboard – 1pc
(E-1) Feet – 2pcs
(E-2) Headboard panel – 1pc
(E-3) Slat – 1pc
(F-4) Finial – 2pcs
(F) 3 Drawer Component – 1pc
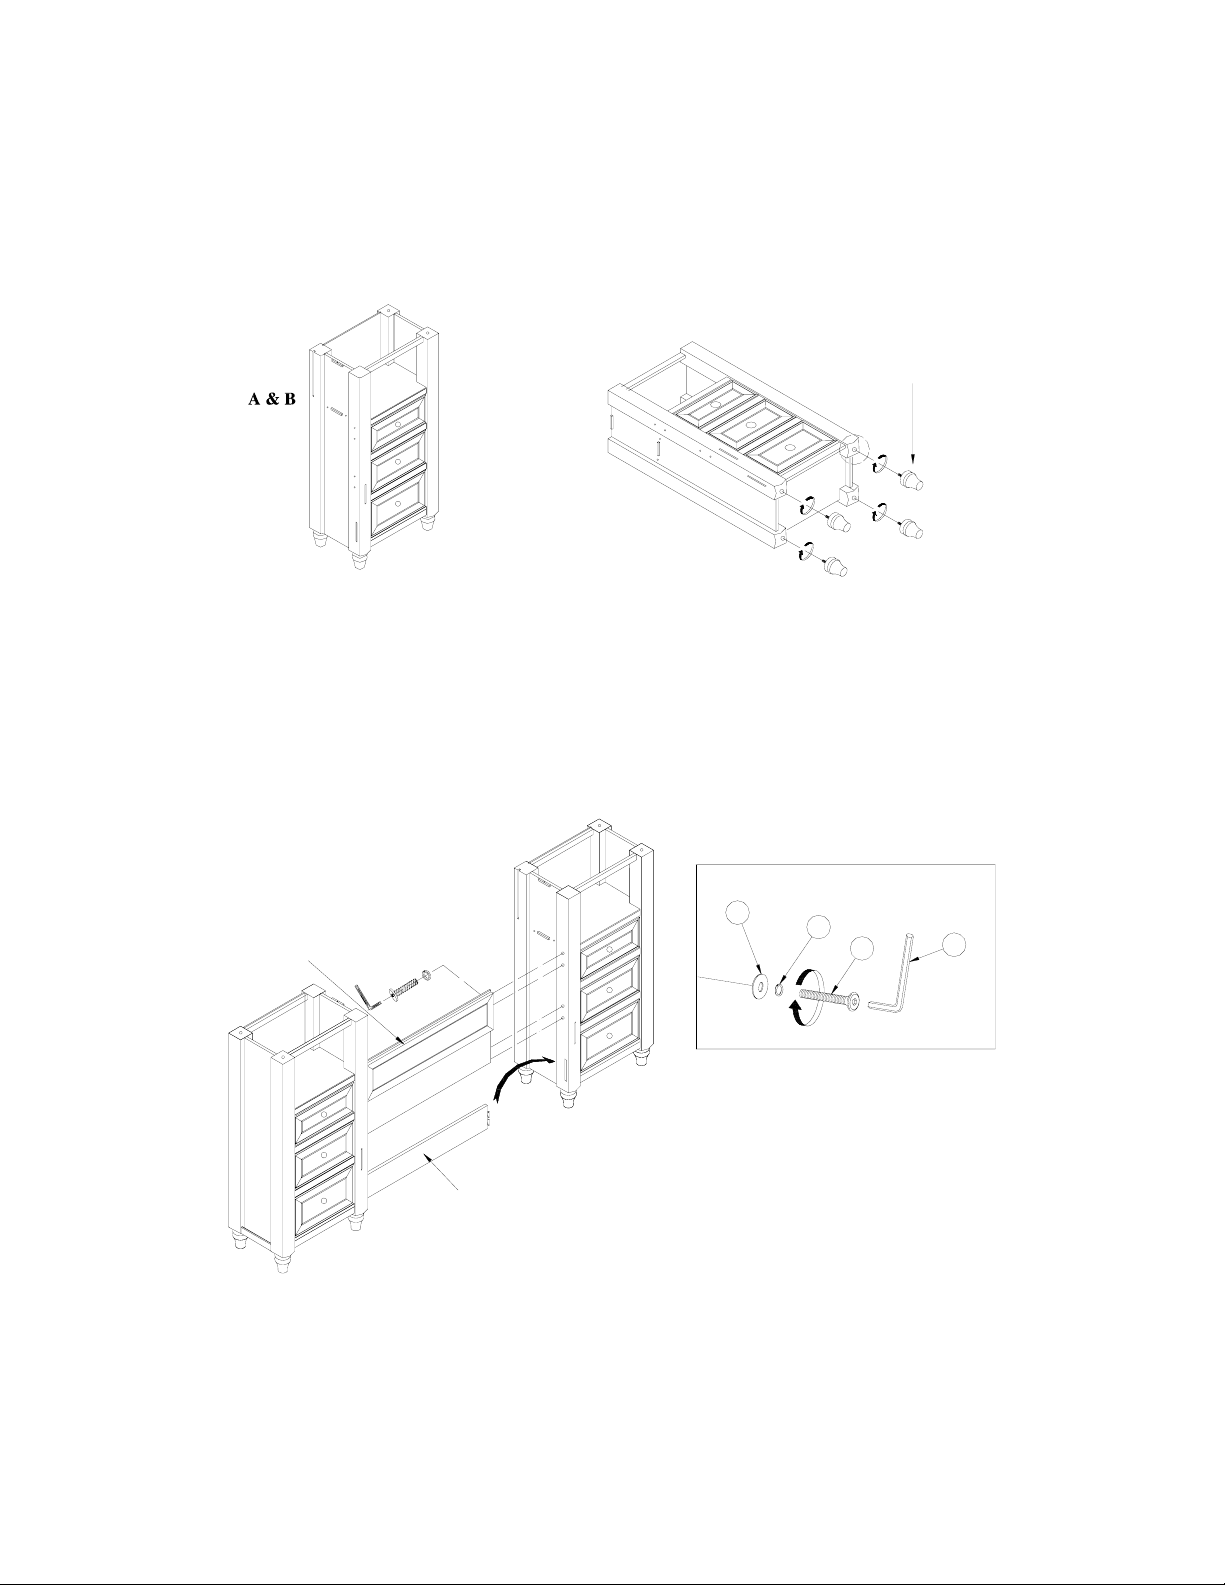
HARDWARE ENCLOSED:
(G) Allen Key – 1pc
(H) 5/16” x 30 mm Allen Bolt – 16pcs
(I) 5/16” Spring Washer – 16pcs
(J) 5/16” Flat Washer – 16pcs
(K) Wood Screws 5/32” x 30mm – 40pcs
Page 2
ASSEMBLY INSTRUCTIONS:
1. Carefully lower Right Unit (A) and Left Unit (B) on a soft, scratch-free surface. Thread the 4 feet (A-1 and
B-1) into pre-drilled holes in the bottom of Right Unit and Left Unit, as shown. Carefully raise both units
upright.
(Fig. 1)
A-1 & B-1
2. Carefully insert the Front panel (C-1) into the Right & Left Units as shown , fa s te n i n g th e c o nnections u s in g
Allen Bolts, Flat Washers, and Spring Washers. Hook the Headboard panel (E-2) into the Left Unit. (Fig. 2)
Note: The correct order for the washers to go on the Allen Bolt is: Spring Washer first, Flat Washer second. (Fig.
3)
(Fig. 3)
(Fig. 2)
C-1
Flat Washer
J
Spring Washer
Bolt
I
H
Allen Ke y
G
E-2
Page 3

3. Carefully place the Center Shelf (C-2) between the
Right & Left Units as shown, and connect using Allen
Bolts, Fla t Washers , and Spring Washers to secure the
center unit. Slide the Back Panel (C-3) into the slots.
(Fig. 4)
4. Carefully place the Center Top panel (C) on the top
of Right & Left Units as shown, and fasten using Wood
Screw (K), Flat Washers, and Spring Washers. (Fig. 5)
(Fig. 4) (Fig. 5)
5. Thread the (2) Feet (E-1) and (2) Finials (E-4)
into pre-drilled holes on Footboard (E), as shown.
(Fig. 6)
C-3
C-2
(Fig. 6)
E
E-4
E-1
C
6. Determine the desired location of bed . One person
should hold the Footboard (E) in a vertical position tilted
slightly forward. Attach each Side rail (D) to the
Headboard by inserting the hooked ends of the side rail
into the corresponding slots in the headboard, as shown.
Be sure the small ledge on each side rail is facing inward.
Repeat with Footboard (E).
(Fig. 7)
E-1
Page 4

7. Carefully place the 3 Drawer Unit (F) on the side of the
side rail as shown. (Fig. 8)
(Fig. 8)
F
Thank you for your purchase
stores | catalog | www.potterybarnkids.com
1.800.290.8181
8. Place Slat roll (E-3) on the side rails, using the stoppers
on the end of ledge to prevent slat roll from moving.
Secure slats with the remaining Wood screws (K) using a
Phillips screwdriver. (Fig. 9)
(Fig. 9)
 Loading...