

Page 1
pottery barn kids
COLLINS HEADBOARD
PRE-ASSEMBLY:
• Read all instructions before beginning assembly. The illustrations provided allow for easier assembly when used in
conjunction with the assembly instructions.
• For your safety and ease, assembly by two adults is recommended.
• Remove all parts and hardware from the box and lay out on a clean, carpeted, or scratch-free work surface. Use care
as some parts or hardware may have sharp points or edges.
• Do not dispose of any contents until assembly is completed to avoid accidentally discarding small parts or hardware.
• Use the parts and hardware lists to identify and separate each of the pieces included.
• Note: Do not fully tighten all bolts until all parts are in place. Failure to follow these instructions may cause the
bolts to misalign during assembly.
• The use of power tools for assembly is not recommended. Power tools can damage hardware or split wood.
PARTS INCLUDED:
y (A) Headboard
HARDWARE ENCLOSED:
y (B) M8x25mm Allen bolt (6)
y (C) M8 Spring Washer (6)
y (D) M8 Flat Washer (6)
y (E) M4 Allen key (1)
PARTS REQUIRED (NOT INCLUDED))
y (F) Pre-assembled bed frame (1)
ASSEMBLY INSTRUCTIONS:
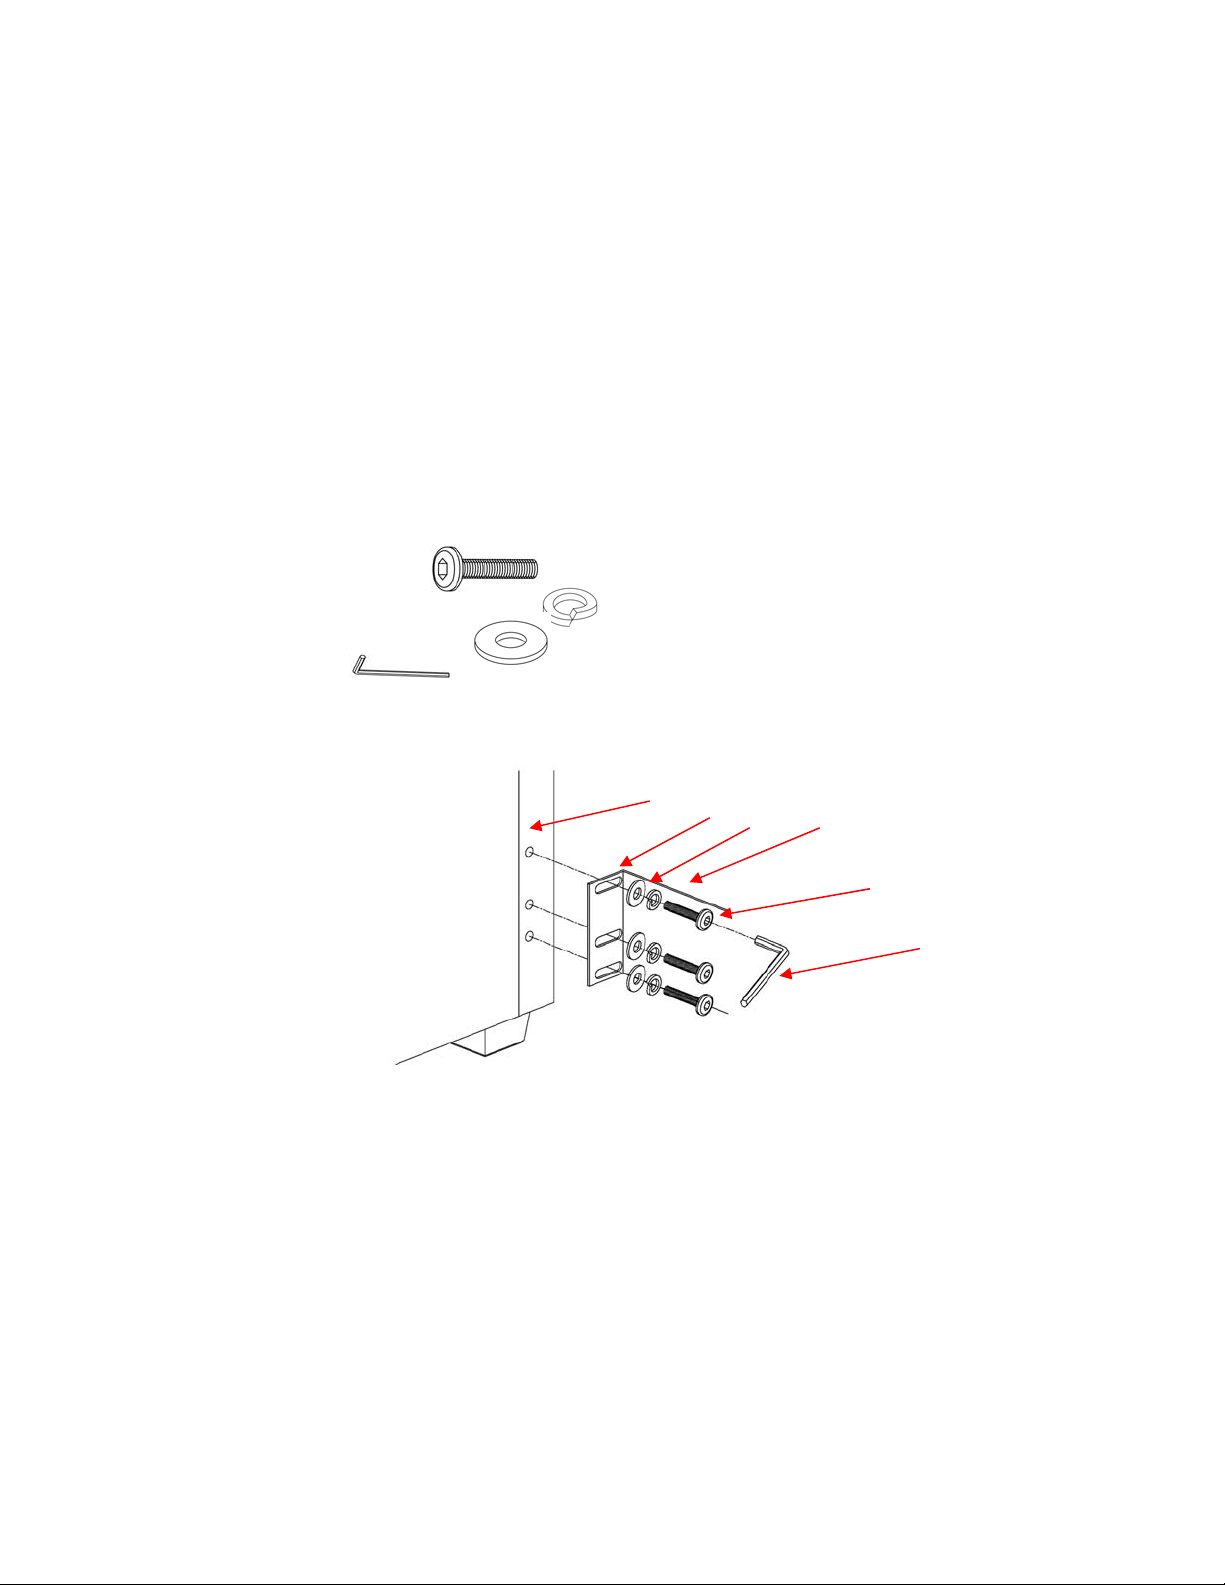
1. Align the holes of the Bed Frame’s faceplates (F) with the pre-drilled holes in the Headboard (A). (Fig 1)
2. Insert the Bolts (B) through the Spring Washers (C), Flat Washers (D), the slots of the Bed Frame’s faceplates (F)
and into the pre-drilled holes in the Headboard (A). Tighten with the Allen Key (E).
3. Assembly is complete. Periodically tighten all connections.
CARE INSTRUCTIONS:
y Vacuum regularly.
y Over the counter cleaning products are not recommended.
y Avoid exposure from sun, direct light and heat sources.
Thank you for your purchase.
stores | catalog | www.potterybarnkids.com
USA 1.800.290.8181
A F
D C
B
E
Fig 1.
Page 1/1
 Loading...