

Page 1
pottery barn kids
CHESAPEAKE STORAGE TOWER
CAUTION :
sharp points and edges in the unassembled state. Adults should tak e care when
unpacking and assembling this item.
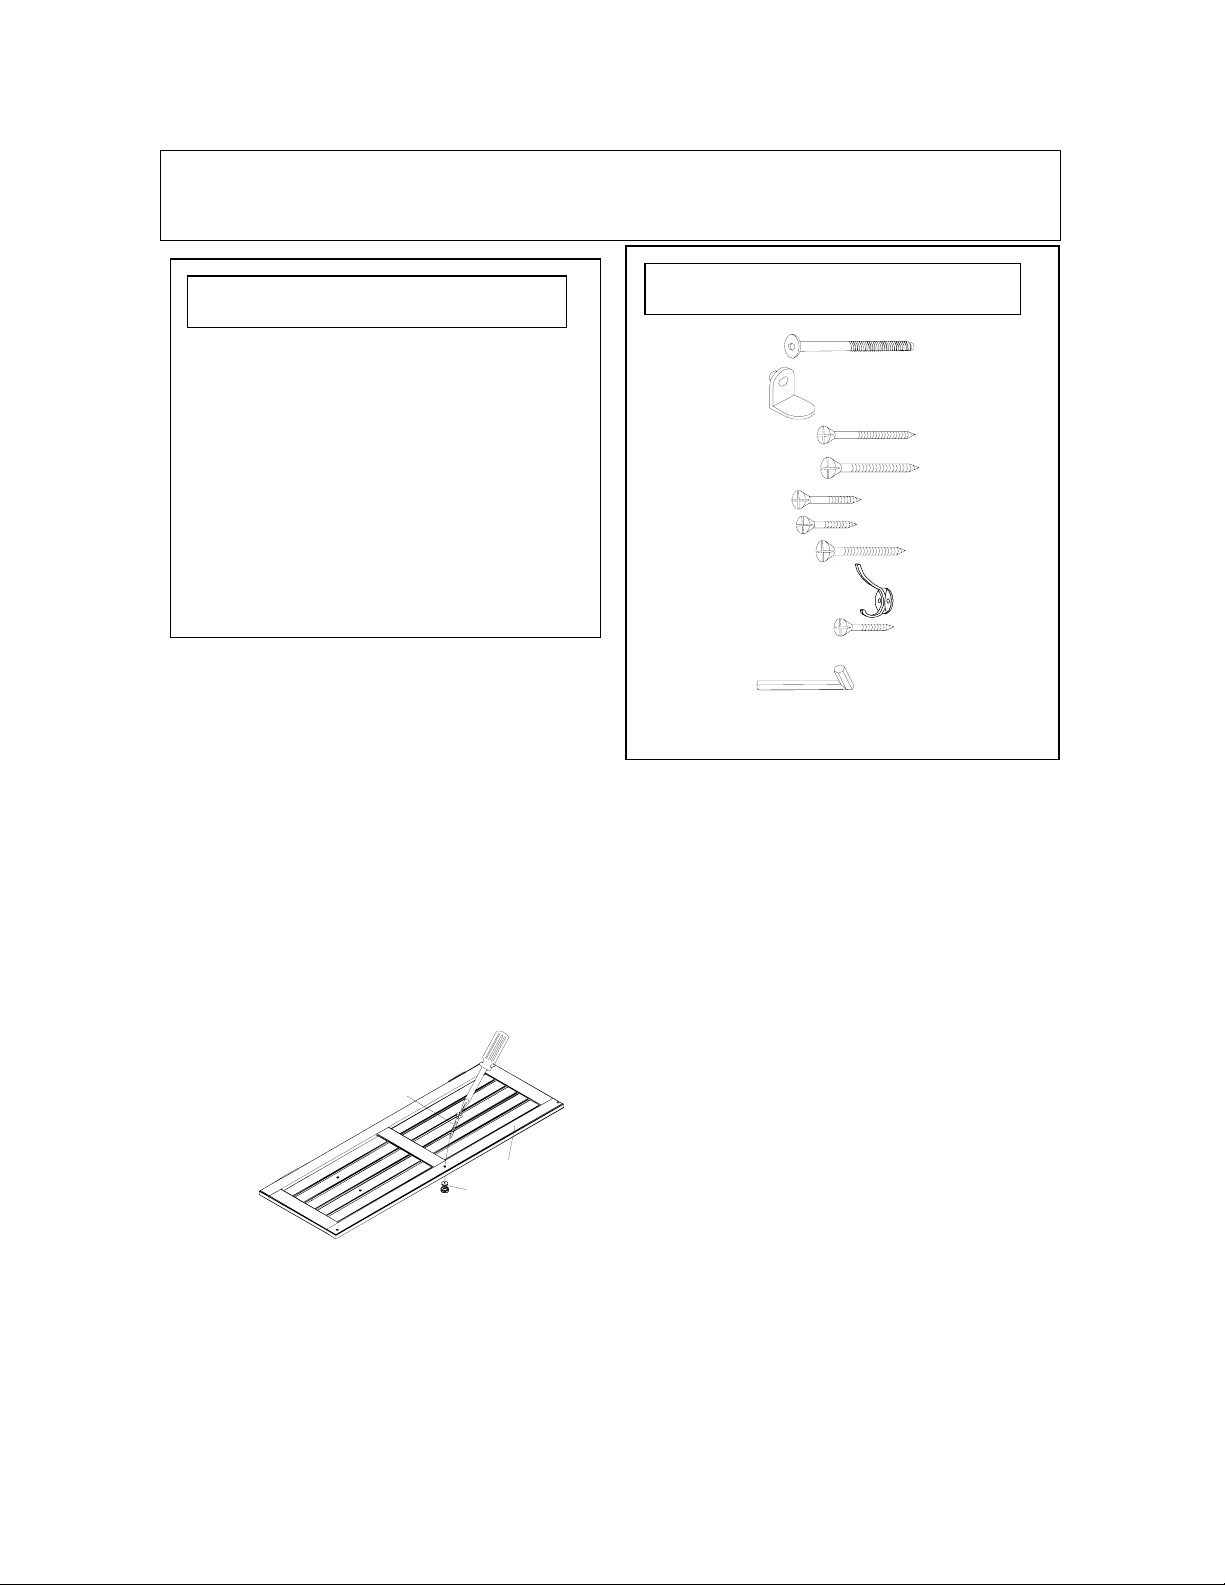
A. Right panel 1 Pc
B. Left panel 1 Pc
C. Back panel 1 Pc
D. Door 1 Pc
E. Horizontal bar 1 Pc
F. Top panel 1 Pc
G. Bottom panel 1 Pc
H. Bottom tray 1 Pc
I. Middle trays 2 Pcs
J. Handle 1 Pc
PRE-ASSEMBLY:
• Carefully l ay pieces on a car peted o r scratc h- free s urface ( the shi pping bo x provid es an ide al work
surface).
• Please do not tighten the hardware fully until the piece is completely assembled. Once the bin is
assembled, tighten all hardware completely making sure all pieces are in alignment.
ASSEMBLY INSTRUCTIONS:
1. Assemble the Handle (J) to Door panel (D) as shown with the 8 x 1 ¼’’ Screw (Q) (Fig. 1). The
handle must be screwed f rom inside o f the door. Take notice of the magnet s on the uppe r left and
bottom left inside the door.
Adult assembly required. This item contains small parts that have
PARTS INCLUDED
HARDWARE ENCLOSED
K. 60 mm Bolts = 8 Pcs
L. Metal Pins
M. 6 x 1 ½” Screw =4 Pcs
N.8x1½” Screw
O. 6 x 1” Screw
P. 6 x ¾” Screw
Q.8x1¼”Screw
R. Metal hook = 1Pc
S. 6 x ½” Screw = 2 Pcs
= 8 Pcs
=2 Pcs
= 15 Pcs
=6 Pcs
= 1Pc
TOOLS REQUIRED
Bolt Key (included) = 1
Phillips Screwdriver (not included) = 1
Q
D
J
(Fig. 1)
Page 2
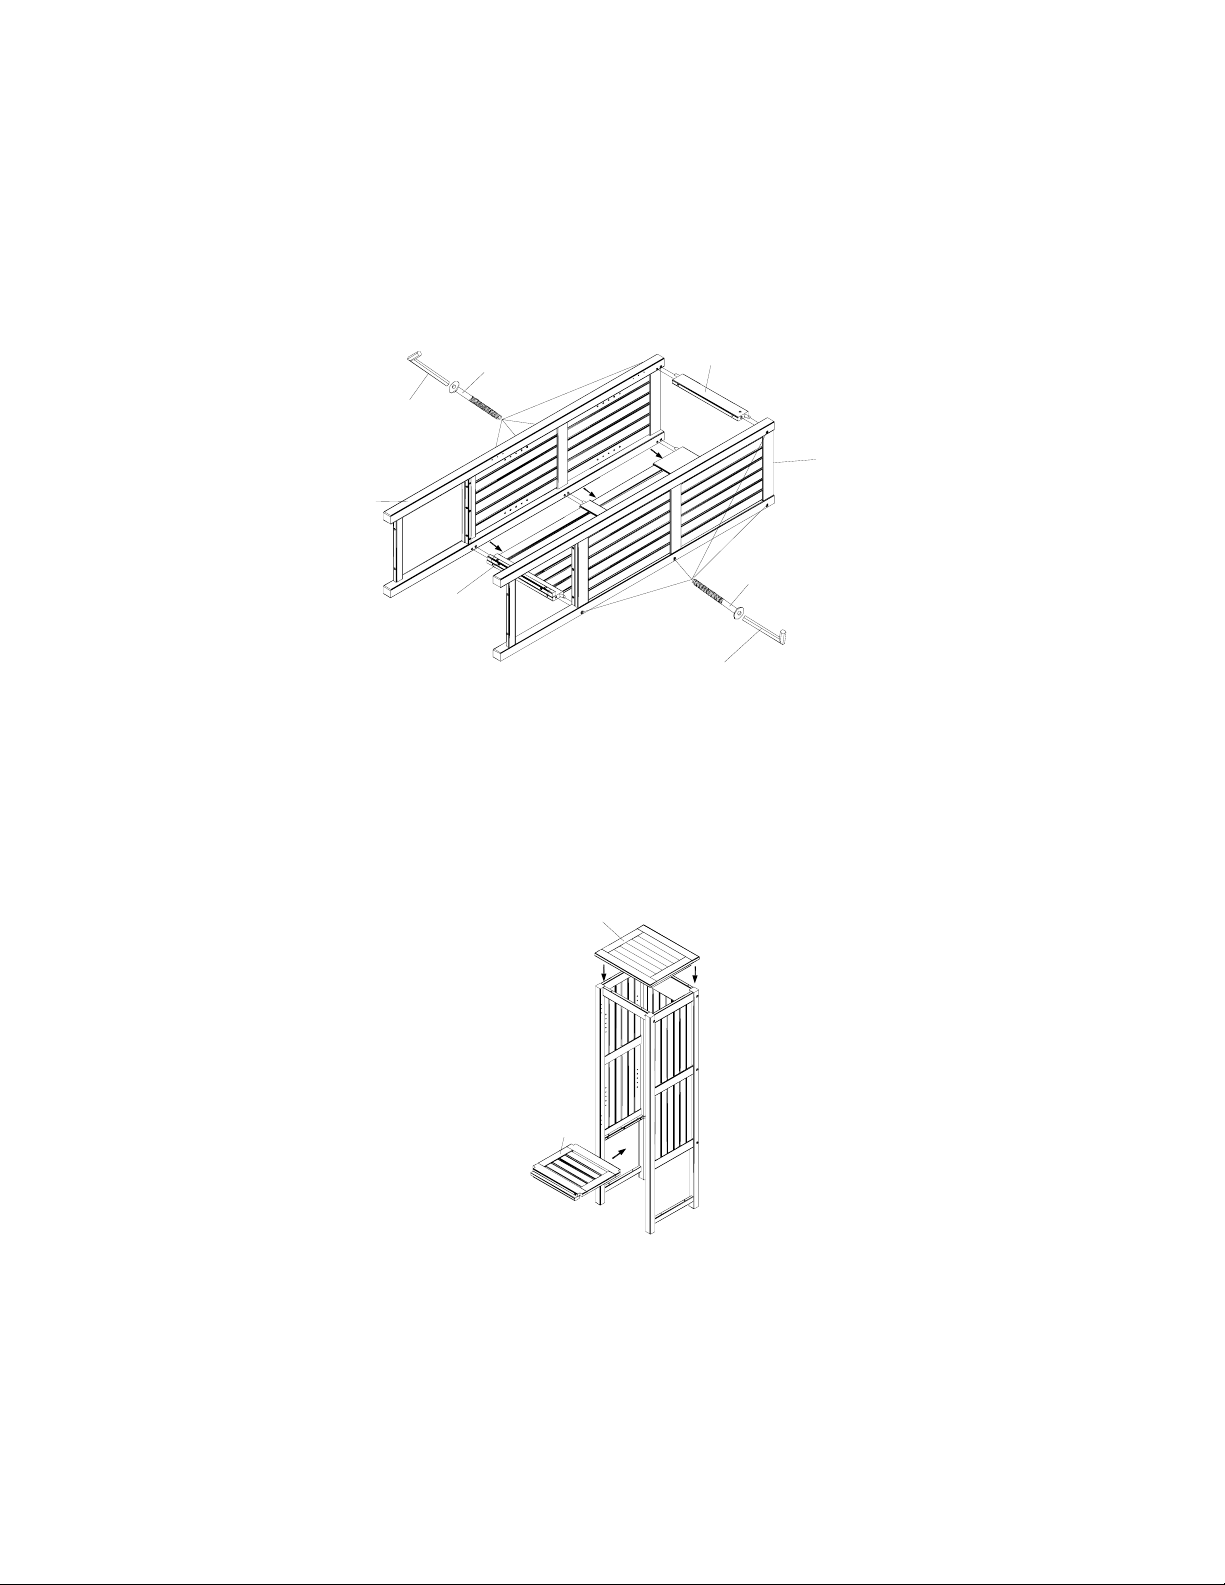
2. Place the B ack Panel (C), Ri ght Panel (A), Left Panel (B), and Horiz ontal Bar (E) as shown, securing
with the 60 mm Bolts (K). Take notice of the magnet on the right upper corner of horizontal bar. This
magnet should be facing out. (Fig. 2)
K
E
R
B
C
R
(Fig. 2)
A
K
3. Place the Top Panel (F), Bott om Panel (G), and Bottom Tray (H) as shown, securing them with 2,
8 x 1 ½’’ Screws (N), Screwing them from the Horizontal Bar (E) to the Top Panel (F).
(Fig. 3)
F
(Fig. 3)
G
Page 3

4. Secure the remaining connections of Top Panel (F) to the Right/Left/Back Panels (A,B,C)with 6 of
the 6 x 1’’ Screws (O). Repeat this step with the Bottom Panel (G) with 9 of the 6 x 1’’ Screws (O),
and with the Bottom Tray (H) with 4 of the 6 x 1 ½’’ Screws (M). Ensure that the magnet on the
Bottom Panel (G) is facing out. Do not fully tighten the screws yet. (Fig. 4)
N
N
(Fig. 4)
O
O
M
M
O
5. Carefully stand the assembled Tower upright and secure the hinges to the frame with 6 of the 6 x ¾’’
Screws (P). Ensure the door is properly aligned before you tighten the screws. (Fig. 5)
(Fig. 5)
P
L
6. Insert the Metal Pins (L) in the desired holes of the interior walls of the assembled tower, and
carefully place the Middle trays (I). (Fig. 6)
(Fig. 6)
I
Page 4

7. Remove the middle shelf and place the Metal Hook (R) at the Back Panel (C), securing with 2 of the
6 x ½’’ Screws (P). (Fig. 7)
(Fig. 7)
R
S
8. Ensure all bolt and screws are aligned properly, and then tighten to secure all the connections.
CARE INSTRUCTIONS:
• For daily care wipe with a soft dry cloth. Wipe spills with clean dry cloth. Avoid the use of
harsh cleane r s an d abrasive.
• Do not use oil. For maintaining the finish, wash using a mild soap and cleanser to remove
accumulated dirt. Cover during storage or when not in use using a proper outdoor cover
allowing adequate ventilation without trapping moisture. Do not cover with plastic or similar
materials that will trap moisture.
• Store in a dry, covered area when not in use.
Thank you for your purchase
stores l catalog l www.potterybarnkids.com
USA 1.800.290.8181
 Loading...