

Page 1
pottery barn kids
CHESAPEAKE DIRECTOR’S CHAIR
PRE-ASSEMBLY:
• Read all instructions before beginning assembly. The illustrations provided allow for easier
assembly when used in conjunction with the assembly instructions.
• For your safety and ease, assembly by two adults is recommended.
• Remove all part and hardware from the box and lay out on a clean, carpeted, or scratch- free
work surface. Use care as some parts or hardware may have sharp points or edges.
• Do not dispose of any contents until assembly is completed to avoid accidentally discarding small
parts and hardware.
• Use the parts and hardware lists to identify and separate each of the pieces included.
• Note: Do not fully tighten all bolts until all parts are in place. Failure to follow these instructions
may cause the bolts misalign during assembly.
• The use of power tools for assembly is not recommended. Power tools can damage hardware or
split wood.
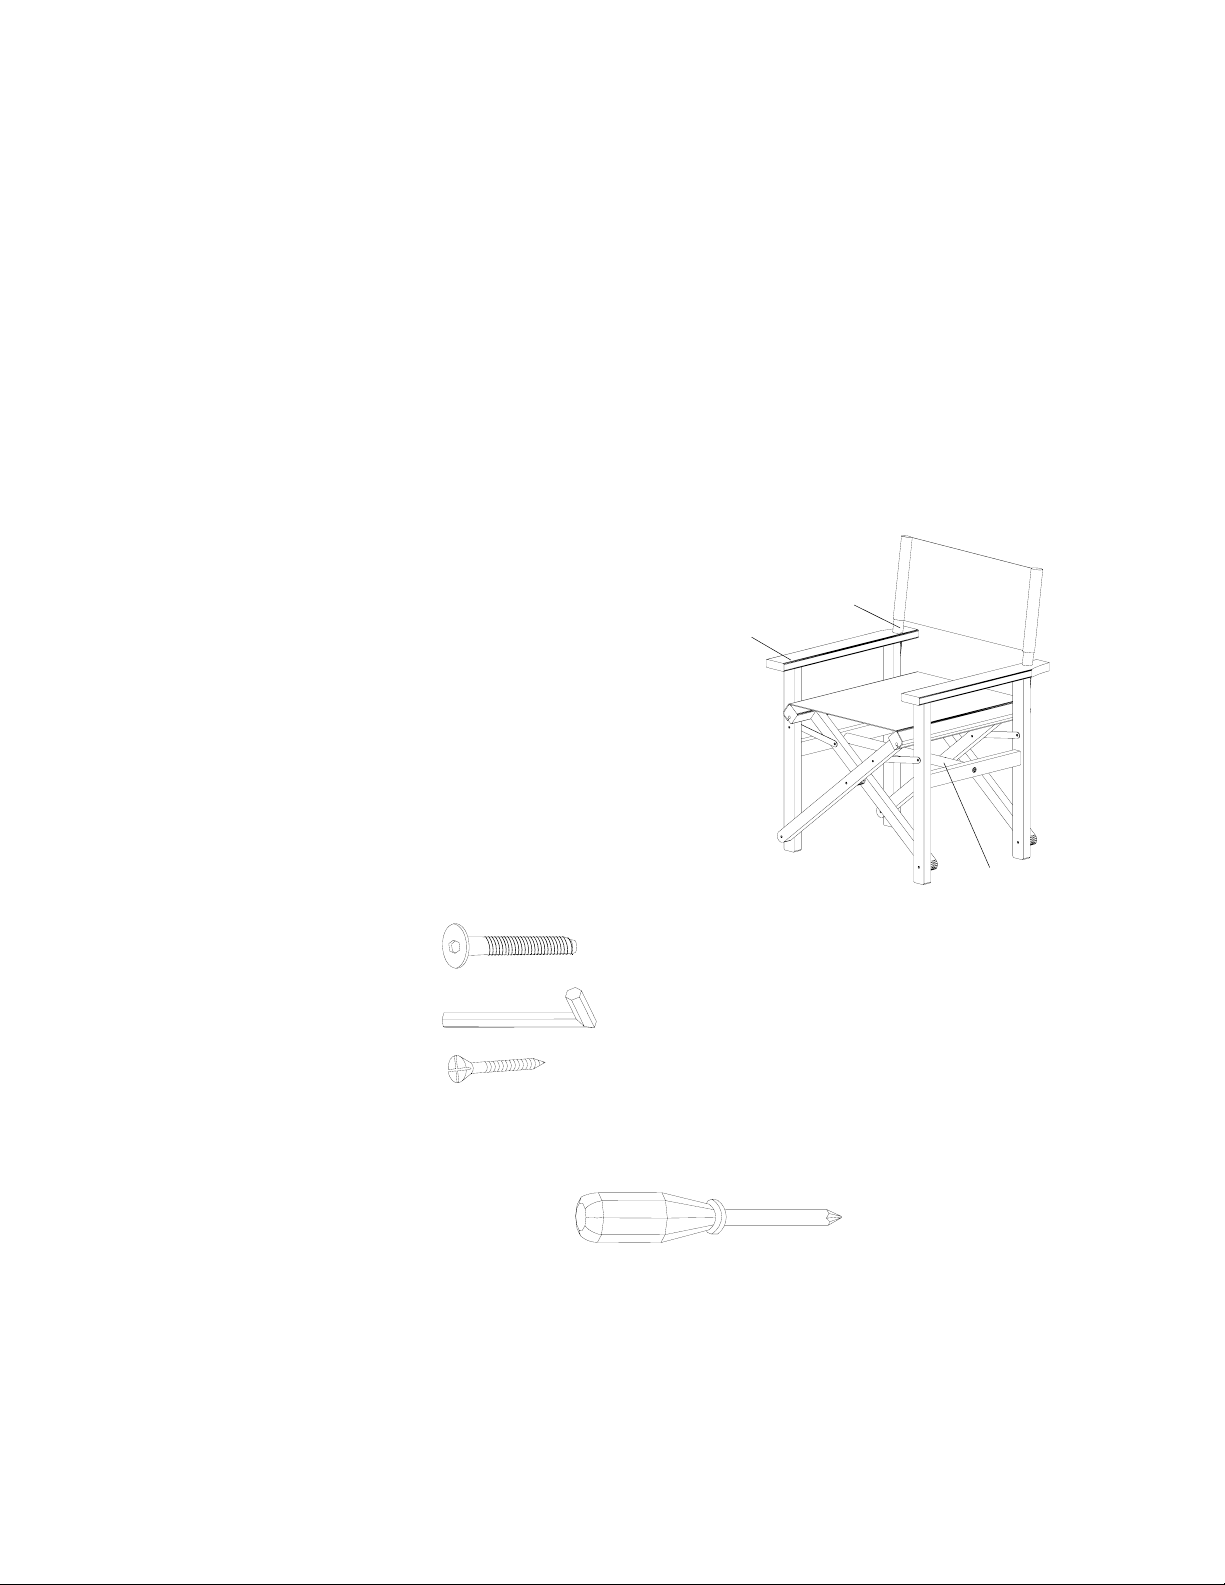
PARTS INCLUDED:
(A) Chair Frame (1)
(B) Back Rest Support (2)
(C) Center Rail Bars (1)
(D) Back Rest Canvas (1)
(E) Seat Canvas (1)
HARDWARE INCLUDED:
(F) Bolt 35mm (2)
(G) 4mm Allen Key (1)
(H) Screws 1 ¼’’ (4)
TOOLS REQUIRED:
Phillips head screwdriver (Not Included )
B
A
E
D
C
Page 1/3
Page 2
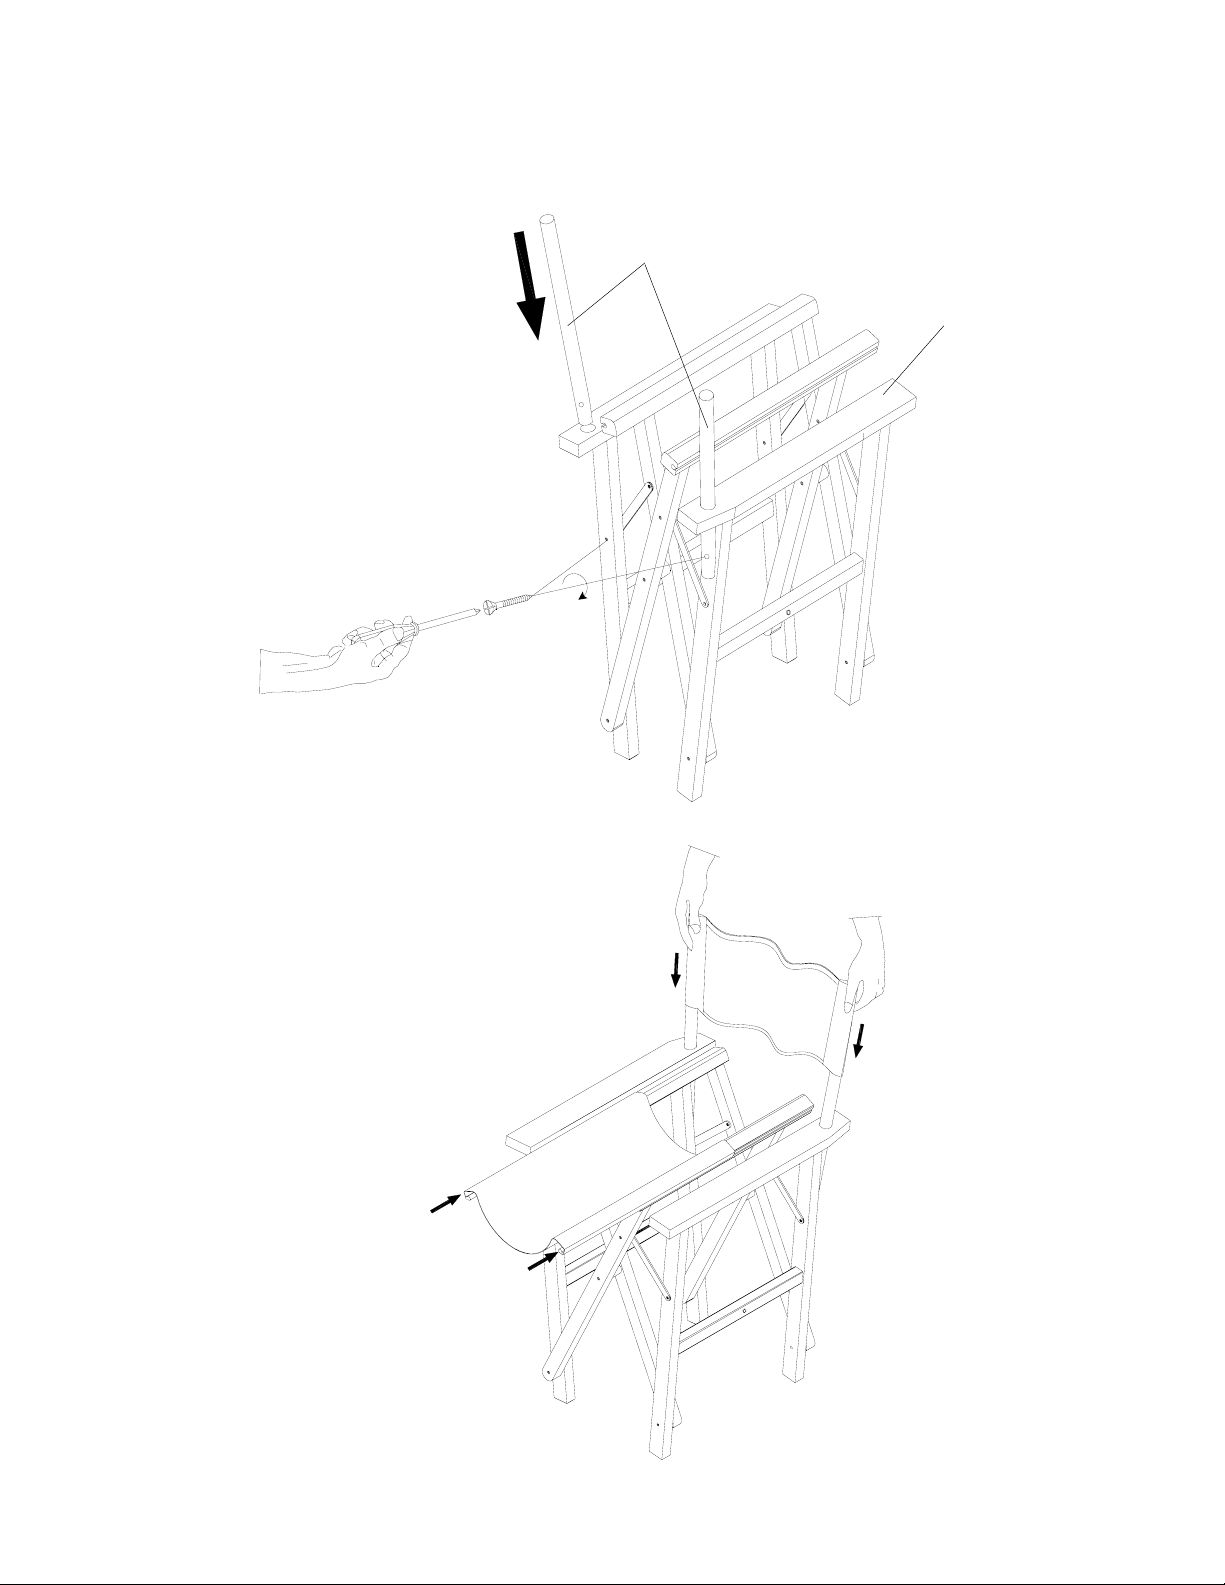
ASSEMBLY INSTRUCTIONS:
1. Part chair frame (A) on the flat surface. Attach the back rest support (B) into the arm rest.
Secure to the frame with (2) Screws (H), using Philips Head Screwdriver, (Fig. 1).
(Fig.1)
2. Insert the seat canvas (E) to the frame by sliding in the hole in the seat frame. Attach the back
rest canvas (D) to the back rest supports, (Fig. 2).
(Fig. 2)
H
B
A
D
E
Page 2/3
Page 3

3. Open the chair by pushing down the seat frame, (Fig. 3)
(Fig. 3)
4. Attach the central bar (C) to the frame under the seat and secure it with 2 bolts (F), (Fig. 4).
(Fig. 4)
CARE INSTRUCTIONS:
• For daily care wipe with a soft dry cloth. Blot Spills immediately and wipe with a clean dry cloth.
• Store in a dry, covered area when not in use.
• We do not recommend the use of chemical cleansers, abrasives, or furniture polish.
• Over time, the product may begin to gray. To nourish the wood, wash with soap and water.
When dry, apply a coating of teak oil with a clean cloth. Remove excess oil by blotting with a
soft, clean cloth.
C
F
Thank you for your purchase
Stores l catalog l www.potterybarnkids.com
USA 1.800.290.8181
G
Page 3/3
 Loading...