

Page 1
PRE-ASSEMBLY :
Please read all instructions before beginning assembly.
For your safety, assembly by two adults is recommended.
The illustrations provided allow for easier assembly when used in conjunction with the
assembly instructions.
Remove all parts and hardware from box and lay out on a carpeted or scratch-free work
surface, as this will avoid damaging any parts during assembly. The shipping box
provides an ideal work surface. Do not dispose of any contents until assembly is
completed to avoid accidentally discarding small parts or hardware.
Save all packing materials until assembly is complete to avoid accidentally discarding
smaller parts or hardware.
Use the parts and hardware lists to identify and separate each of the pieces included
prior to starting assembly.
Note: DO not fully tighten all bolts until all parts are in place. Failure to follow these
instructions may cause the bolts to misalign during assembly.
If using power tools to aid in assembly please use caution. Power tools can damage
hardware of split wood.
Pottery Barn Kids Manual Instruction
CATALINA TALL BOOKCASE
1/5
Thank you for your purchase
stores | catalog | www.potterybarnkids.com
Page 2

PARTS INCLUDED:
(A) Top Panel
(B) Side Panel
(C) Front Frame
(D) Back Frame
(E) Assembling Base
(F) Legs
(G) Back Panel
(H) Adjustable Shelves
- 1 pcs
- 2 pcs ( R & L )
- 1 pcs
- 1 pcs
- 1 pcs
- 4 pcs
- 1pcs
- 2 pcs
HARDWARE INCLUDED:
(J) Pen layers - 8 pcs
(K) M6 x 45 JCBC Bolts – 4 pcs
(L) M6 x 30 JCBC Bolts - 4 pcs
(M) M6 Lock washers - 12 pcs
(N) Half moons washer- 4 pcs
(O) Allen Ball key – 1 pc
(P) M6 x 3/4" JF Screw - 28 pcs
(Q) M6 x 70 JCBC Bolts – 4 pcs
(R) M8 x 1 1/2" Pan Head Screw - 2 pcs
TOOL REQUIRED :
(S) Phillip screw driver ( not include)
Thank you for your purchase
stores | catalog | www.potterybarnkids.com
2/5
B
A
D
G
H
H
E
F
F
F
C
B
F
Page 3

1. Assembly (B) side panel L & R, with (C), Front frame using half moon washer (N), Bolts
(K), Lock washer (M) and Allen ball key (O) for tighten, as shown picture
2. Lay down the assembled side panel with front and back
crossbar (step 1) (the back side into the bottom side), than assembly top panel (A),
assembled side panel with front and back crossbar (step 1), bottom base (E) and legs (F) on
Catalina Tall Bookcase top panel (A) as shown on next pictures. Use Allen key to tight up
M6 x 70 JCBC Bolt (Q) and M6 x 30 JCBC Bolt (L).
3/5
Thank you for your purchase
stores | catalog | www.potterybarnkids.com
Page 4

3. Put the screw (R) to the Front Frame (C) and Back Frame (D) hole (at the center).
P
Tighten the screws using Phillip screw driver ( not include) (S).
4. Assembly back panel (G) at the back side of Catalina Tall Bookcase with M6 x ¾”
screw (P). Use Phillip screw driver (S) to tight up the screw.
4/5
Thank you for your purchase
stores | catalog | www.potterybarnkids.com
Page 5

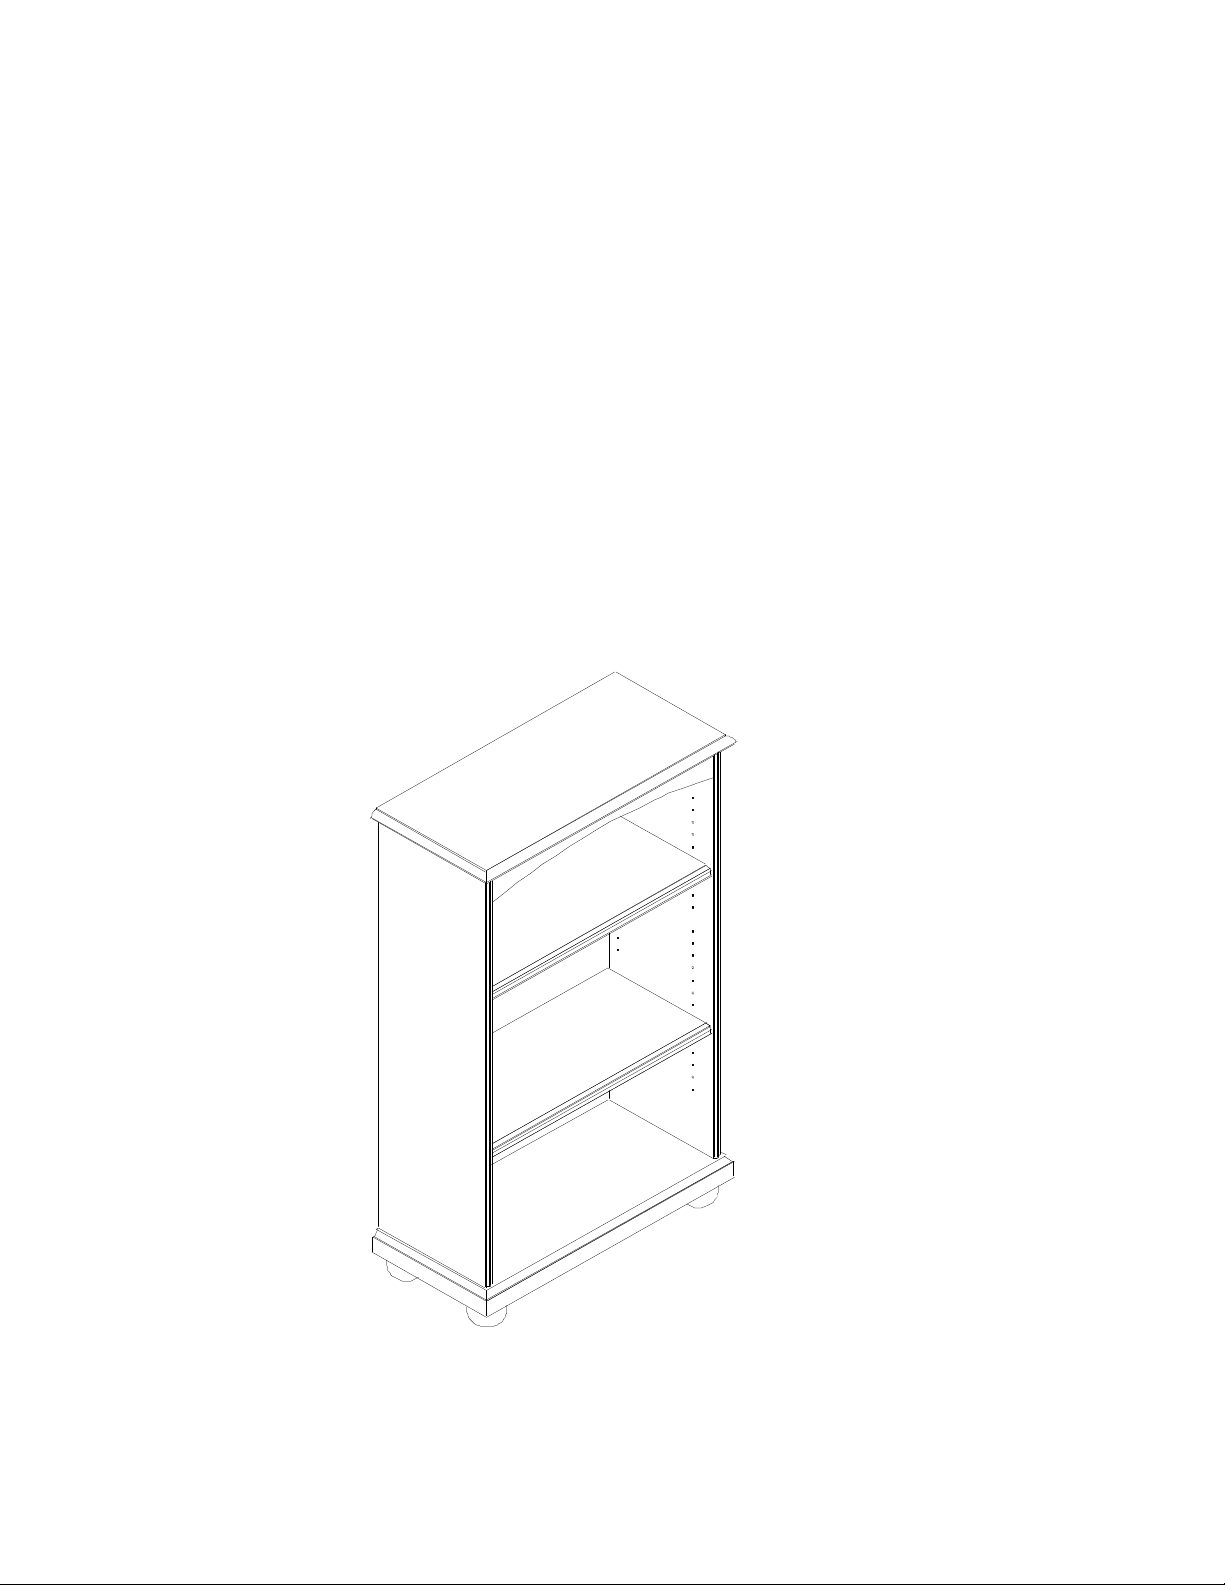
5. Turn the Catalina Tall Bookcase stand-up position. Assembly the adjustable shelf into
Catalina Tall Bookshelf by lay it on pen layer (J) after plug on pen layer (J) into built in
hole in side panel.
(J)
CARE INSTRUCTIONS :
·
·
·
For daily cleaning, wipe with a soft damp cloth. Wipe dry immediately
Do not use glass cleaner, abrasives, wax or household cleaners on wood.
Check fasteners periodically for tightness. Do not over tighten ; this may cause
distortion or breakage.
5/5
Thank you for your purchase
stores | catalog | www.potterybarnkids.com
 Loading...