

Page 1
pottery barn kids
CAMP STORAGE BED
PRE-ASSEMBLY:
• Please read all instruction before beginning assembly. The illustrations provided allow for easier
assembly when used in conjunction with the assembly instructions.
• Remove all parts and hardware from box and lay out on a carpeted or scratch-fre e work surface, as
this will avoid damaging any parts during assembly. The shipping box provides and ideal work
surface. Do not dispose of any contents until assembly is completed to avoid accidentally
discarding small parts or hardware.
• For your safety and ease, adult assembly by two people is recommended.
• Save all packing materials until assembly is complete to avoid accidentally discarding small er parts
or hardware.
• Use the parts and hardware lists to identify and separate each of the pieces in cluded prior to
starting assembly.
• Note: DO not fully tighten all bolts until all parts are in place. Failure to follow these instructions may
cause the bolts to misalign during assembly.
• If using power tools to aid in assembly please use caution. Power tools can damage hardware of
split wood.
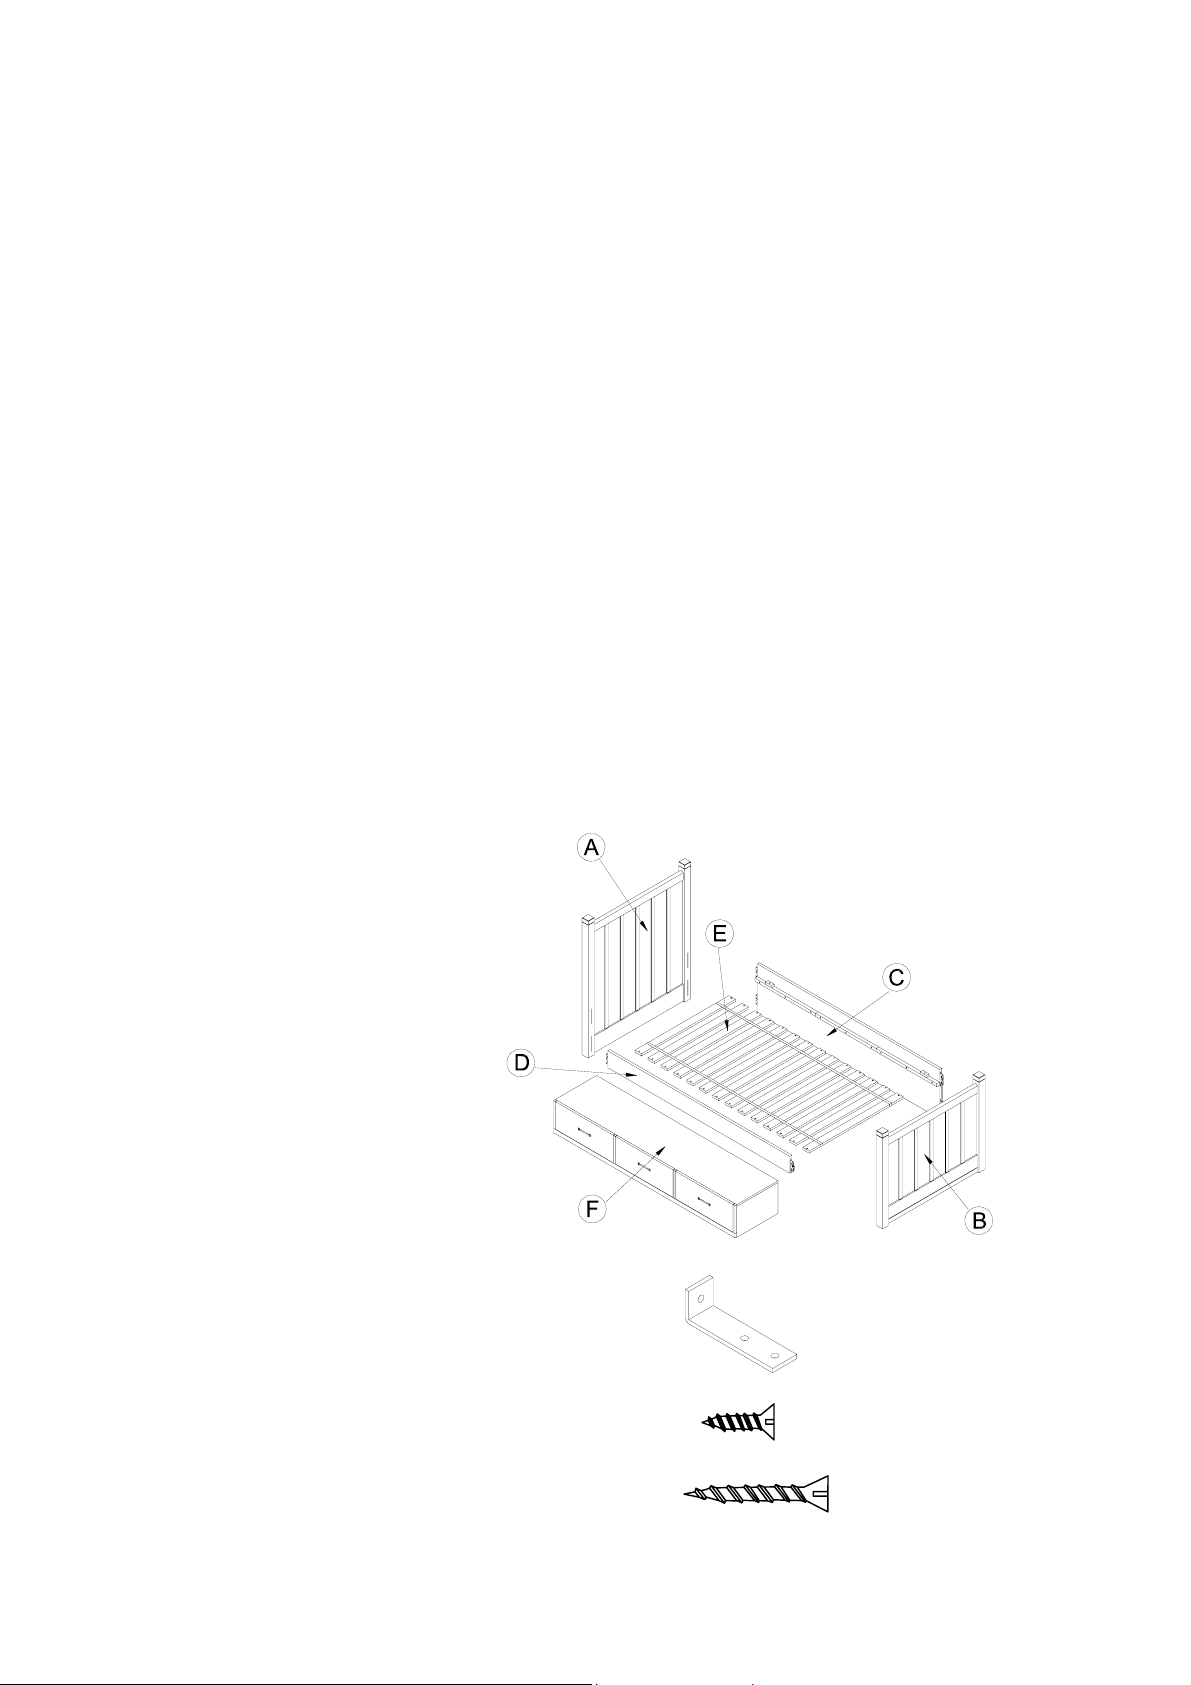
PARTS INCLUDED:
(A) Headboard – 1pc
(B) Footboard – 1pc
(C) Back rail – 1pc
(D) Side rail – 1pc
(E) Slat roll – 1pc
(F) Storage box – 1pc
(with 3 drawers)
HARDWARE ENCLOSED:
(G) Mending plate72x23x20mm – 2pcs
(H) Small Phillips head screw8x15mm – 6pcs
(I) Large Phillips head screw 8x30mm – 28pcs
Page 2
TOOLS REQUIRED:
Phillips Head Screw Driver (not included)
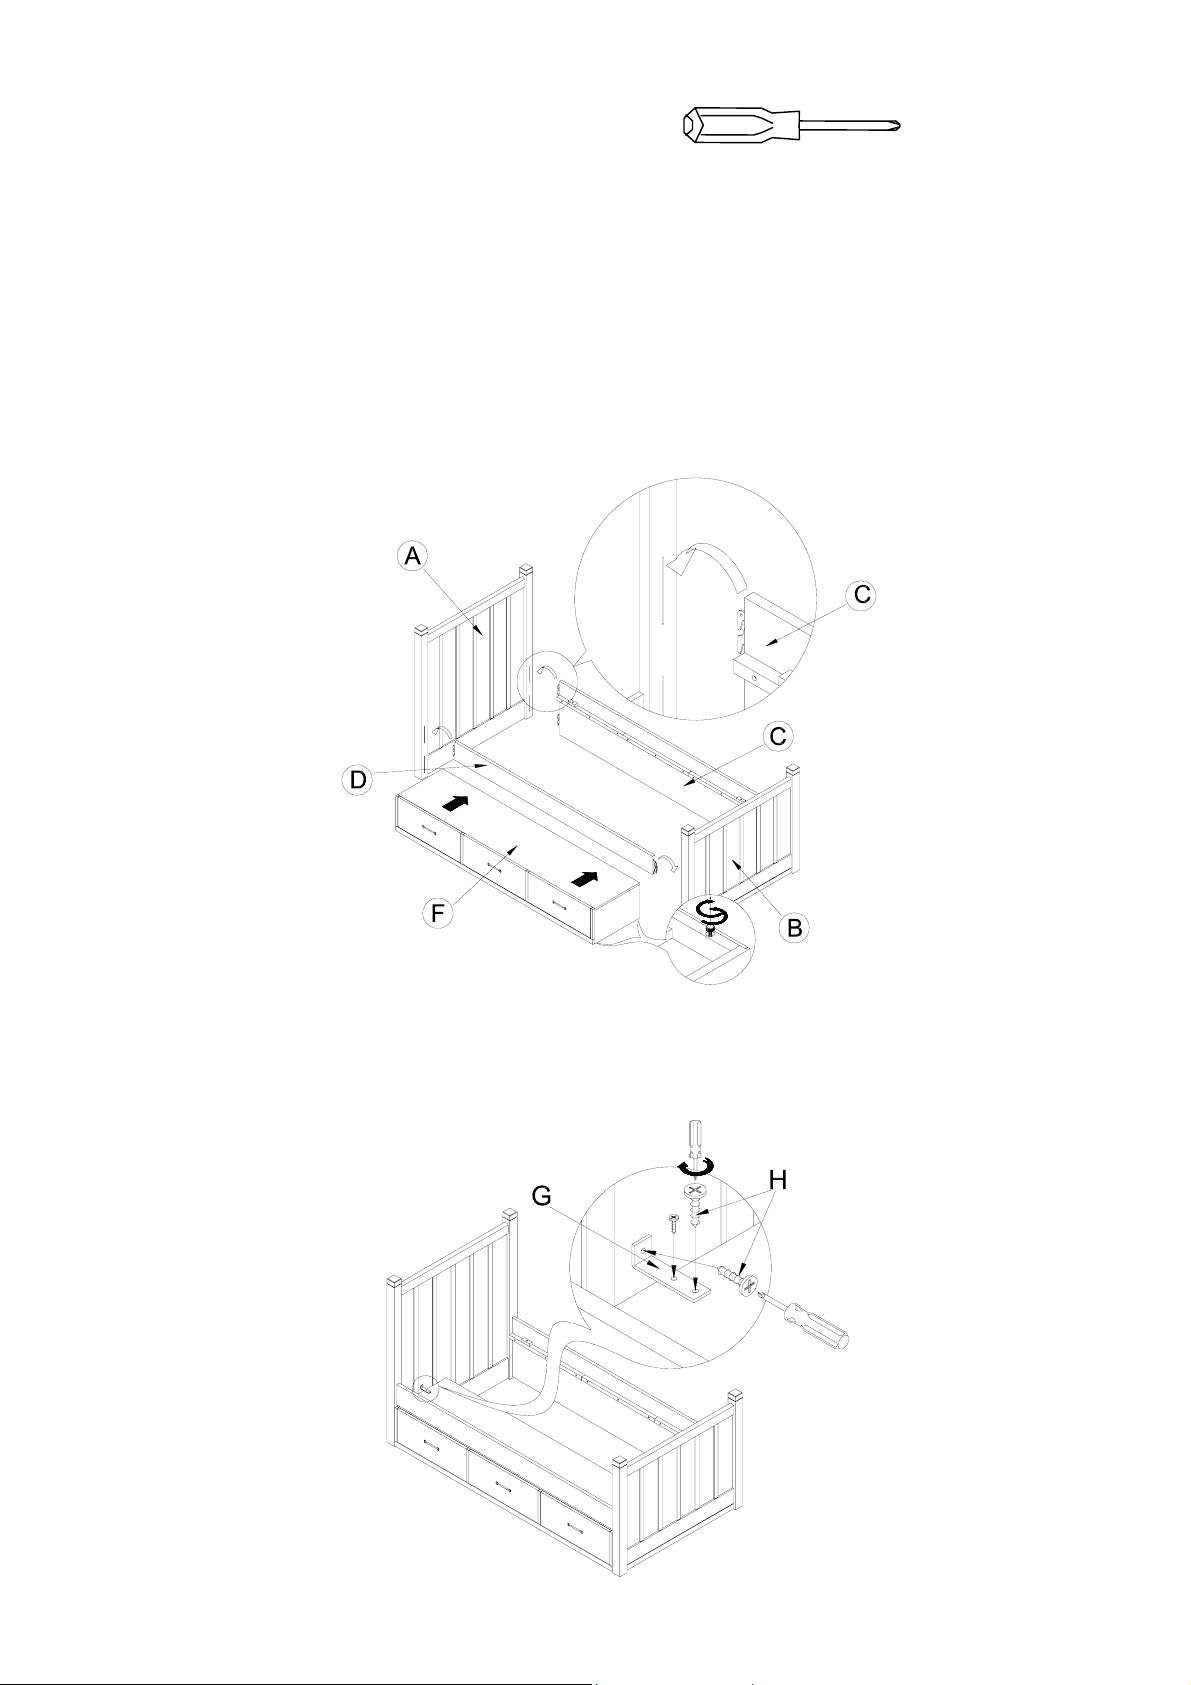
ASSEMBLY INSTRUCTIONS:
1. Hold the Back rail (C) and Side rail (D) up to slots on the legs of the Headboard (A) and insert the
hooks of each side rail into the slots. Push down firmly on the top of side rails until they seat
themselves over the pins inside the legs slots as shown.
2. Repeat Step 1 with the Footboard (B).
3. Carefully lay the Storage box (F) under the Side rail (D) as shown, ensuring the drawer front and the
side rail are flush. Adjust the leveler underneath the Storage drawer to level the drawer section.
4. Attach the Metal bracket (G) to the pre-drilled holes to the Footboard (B) and Headboard (A) with the
small Phillips head screws (H). Insert the Small Phillips head screws to the metal bracket to the
predrilled h not included).
oles of the storage box and fasten with a Phillips head screwdriver (
Page 3

5
. Lay the Slat roll (E) in between the side rail and use all of the Large Phillips Head screws (I) to fasten
slats to the side rail with the Phillips head screwdriver (not included).
6. Retighten all bolts and screws to make sure all are tight and bed structure is rigid. Adjust the levelers
under the bedpost as shown to level the bed on your floors. We recom
for safety.
mend all screws be periodically
ARE INSTRUCTIONS:
C
• Dust often using a clean, soft, dry lint-free cloth.
• Blot spills immedi
ately, and wipe with a clean, damp, cloth.
• We do not recommend the use of chemical clean
lacquered finish.
Thank you for your purchase.
stores | catalog | www.potterybarnkids.com
USA 1.800.290.8181
sers, abrasives, or furniture polish on our
Page 4

 Loading...