

Page 1
pottery barn kids
CAMP QUEEN BED
CAUTION: Assembly required. Please read all instructions before beginning assembly .
Two people are recommended to ease assembly.
These items contain small parts that have sharp points and edges in the unassembled
state. Care should be taken when unpacking and assembling this item.
Save all packing material until assembly is complete to avoid accidentally discarding
smaller parts or hardware.
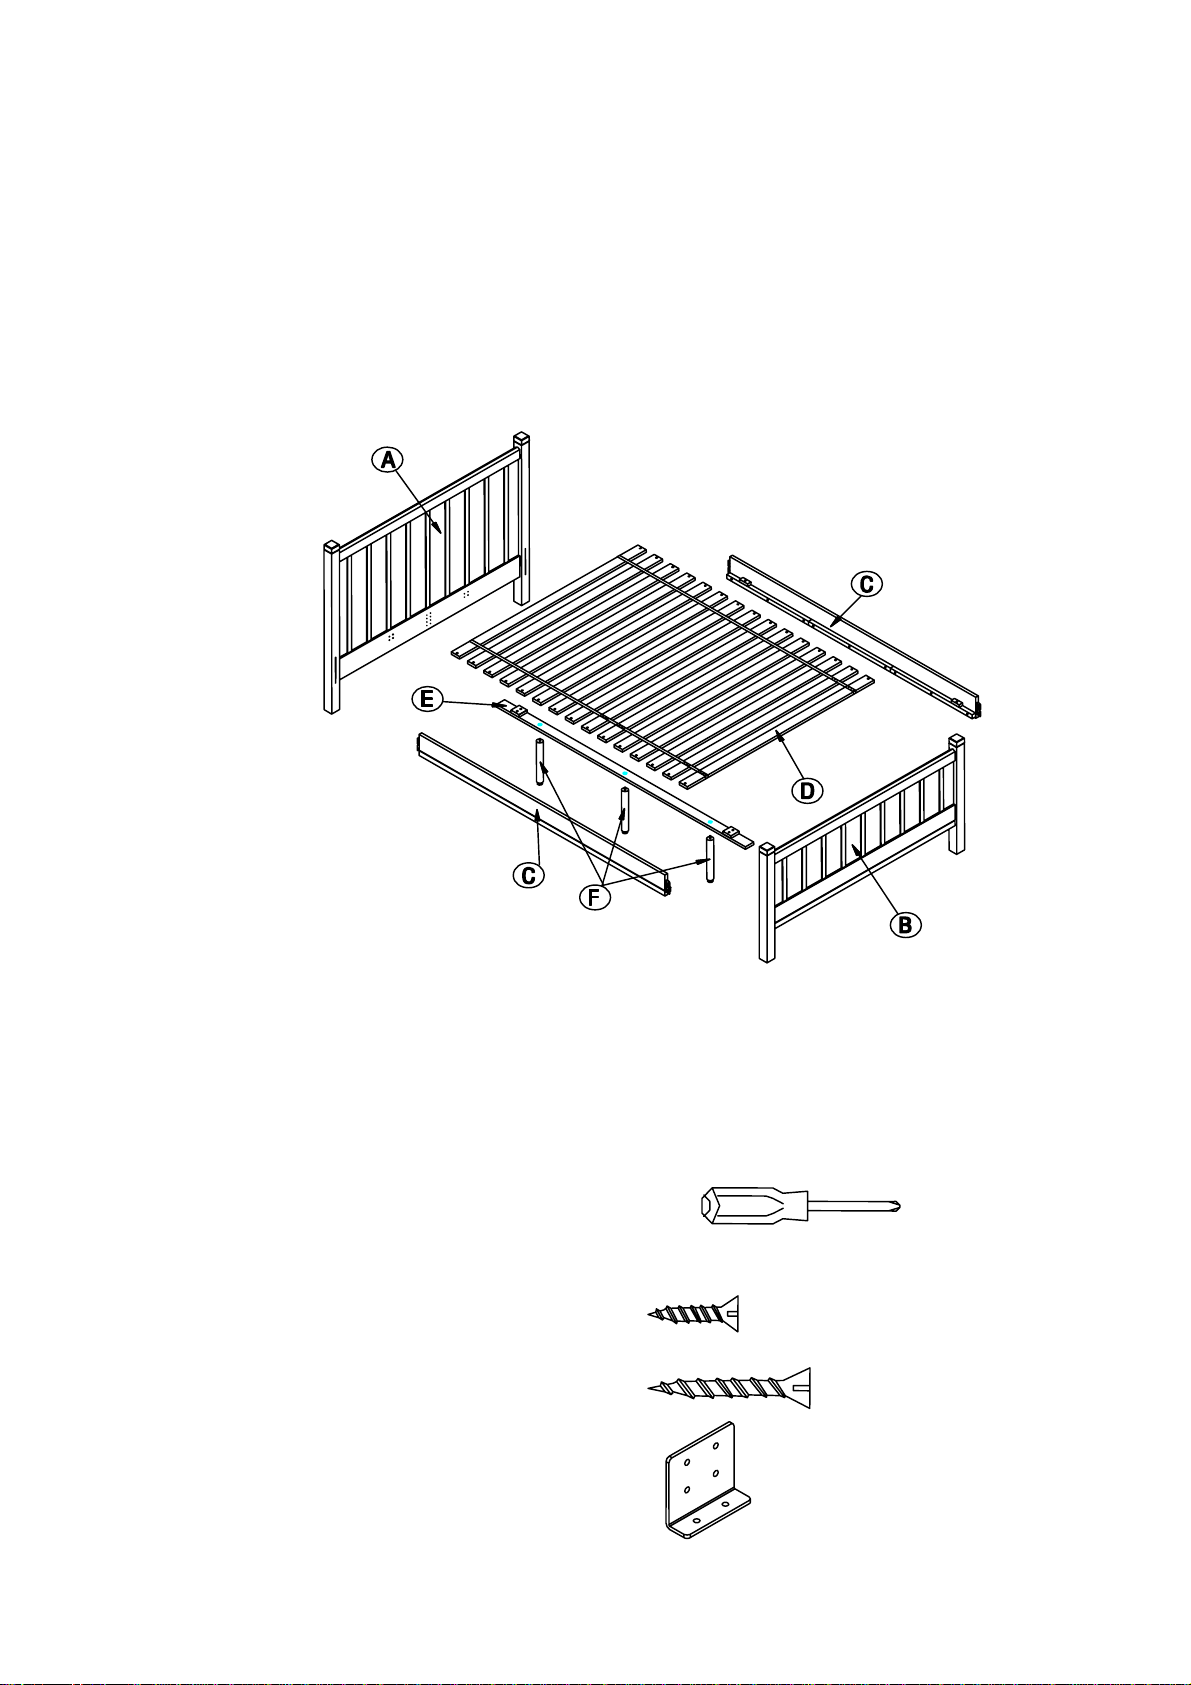
PARTS INCLUDED:
A - Headboard (1)
B - Footboard (1)
C - Side rail (2)
D - Slat Roll (1)
E – Slat Support (1)
F – Support Leg (3)
TOOLS INCLUDED:
Phillips Head Screw driver (not included)
HARDWARE INCLUED:
G – Small Phillips Head Screws (x12)
H – Large Phillips Head Screws (x28)
I – “L” Shape Slate Bracket (x2)
Page 2
ASSEMBLY:
Step1 through 2:
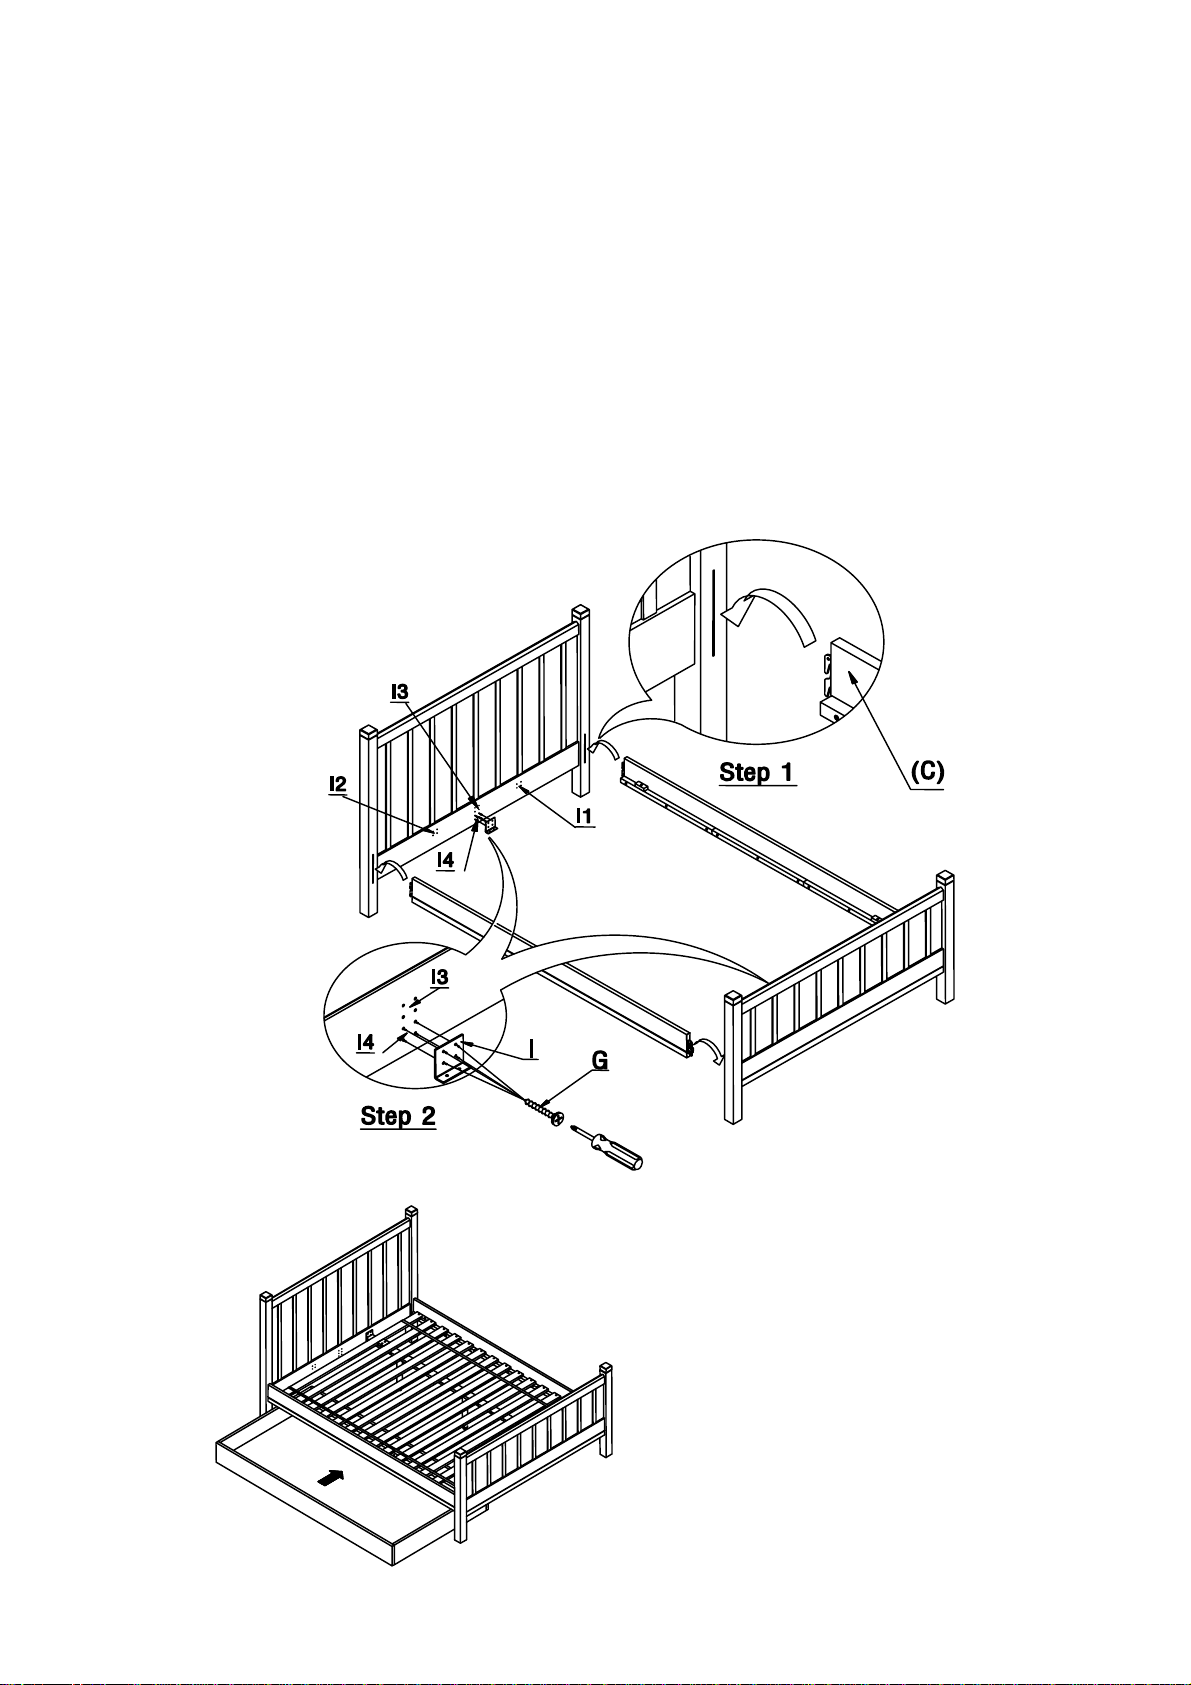
1. Hold side rail (C) up to slots on the legs of the headboard (A) and insert the hooks
of each side rail into the slots. Push down firmly on the top of side rails until they slot
themselves over the pins inside the leg as shown. If you will use trundle please use
the highest setting.
2. Repeat the same procedure with the footboard (B).
3. Install the (I) “L” Shape Slat Bracket into the headboard and footboard by inserting
the (G) small Phillips head screw as shown.
4. Queen bed has two bed rail heights for use with or without trundle. (I) Bed slat
support is adjustable to 4 locations, location 11 & 12 is for trundle (depending on
which side you will use the trundle on) and location 13 & 14 is for use without
trundle.
Page 3

Step 3 through 4:
5. Screw (F) Support Legs into the (E) Slat support and sure all are tight.
6. Align (E) Slat support on (I) “L” Shape Slat bracket using the (G) Small Phillips head
screw . Place slat support onto the slat bracket away from side trundle will roll out of
making the slat support is stable.
Step 5:
7. Lay the (D) slat roll in between the (C) side rails and use (H) Large Phillips head
screws to fasten slats to the side rails with the Phillips head screwdriver.
8. Retighten all bolts and screws to make sure all are tight and bed structure is rigid. It
is recommended all bolts and screws be checked from time to time for safety.
Thank you for your purchase
stores | catalog | www.potterybarnkids.com
USA 1.800.290.8181
Page 4

 Loading...