

Page 1
pottery barn kids
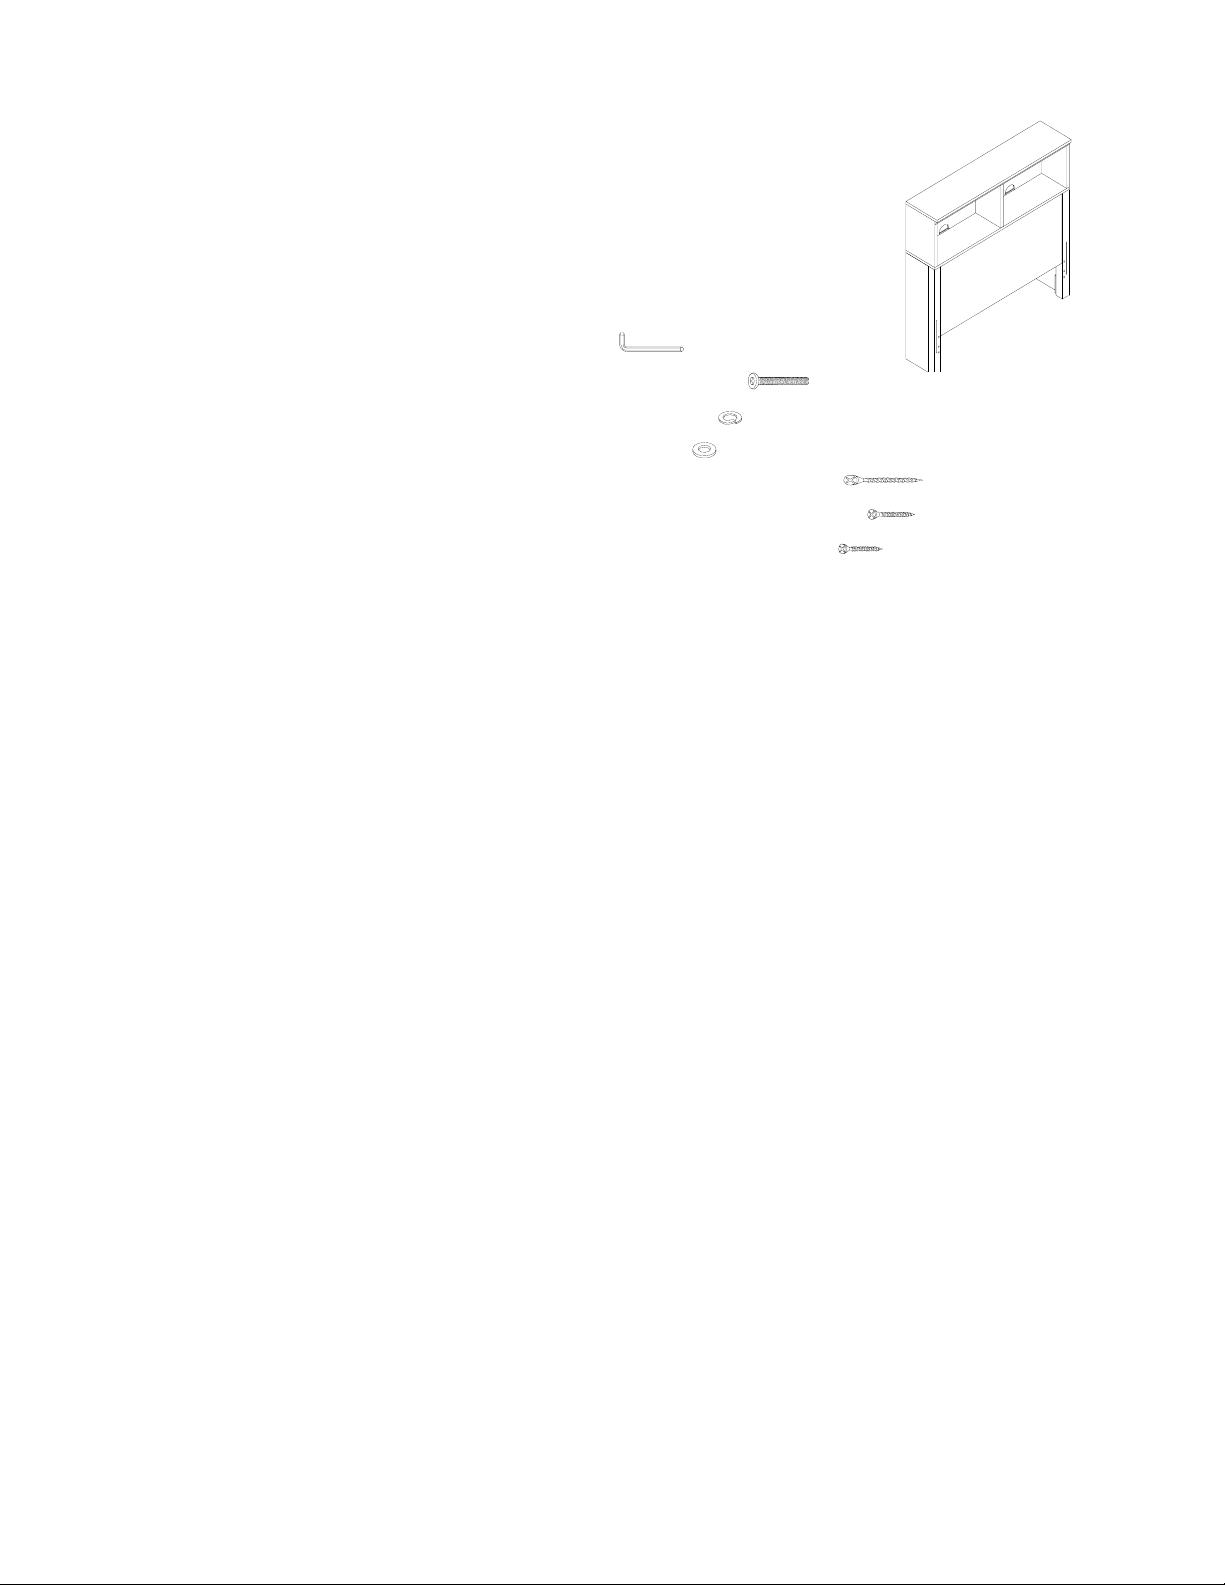
CAMERON STORAGE HEADBOARD TWIN
IMPORTANT SAFETY INSTRUCTIONS:
Please read all instructions carefully before assembling.
For your safety, assembly by two adults is recommended.
PARTS INCLUDED:
(1) Top Panel (A)
(2) Top side panel (Left-Right) (B)
(1) Divider (C)
(1) Shelf (D)
(1) Back panel (E)
(1) Bottom front Panel (F)
(2) Bottom side panel (Left –Right) (G)
(1) Stretcher at back (Top) (H)
(1) Stretcher at back (Bottom) (I)
PRE-ASSEMBLY:
• Remove all parts and hardware from the box and lay out on a clear, carpeted or scratch-free work surface,
as this will avoid damaging any parts during assembly. The shipping box provides an ideal work surface.
• Do not dispose of any contents until assembly is completed to avoid accidentally discarding small parts or
hardware.
• Use the parts and hardware lists above to identify and separate each of the pieces included.
• The illustrations provided allow for easier assembly when used in conjunction with the assembly instructions.
• Note: Do not fully tighten all bolts until all parts are in place. Failure to follow these instructions may cause
the bolts to misalign during assembly.
• If using power tools to aid in assembly please use caution. Power tools can damage hardware or split
wood.
CARE INSTRUCTIONS:
• Dust with a clean, soft cloth.
• We do not recommend the use of chemical cleansers, abrasives, or waxing of our lacquered finishes.
• Do not climb on the Cubby.
HARDWARE ENCLOSED:
(1) Allen Key (J)
(22) ¼” x 28mm Allen Bolt (K)
(22) ¼” Spring Washer (L)
(22) ¼” Flat Washer (M)
(8) 4 x 30mm Long Wooden Screws (N)
(2) 4 x 25mm Medium Wooden Screws (T)
(4) 3 x 12mm Small Wooden Screw (U)
(4) Connecting bracket square (O)
Thank you for your purchase.
stores | catalog | www.potterybarnkids.com
USA 1.800.290.8181
Page 2
ASSEMBLY INSTRUCTIONS:
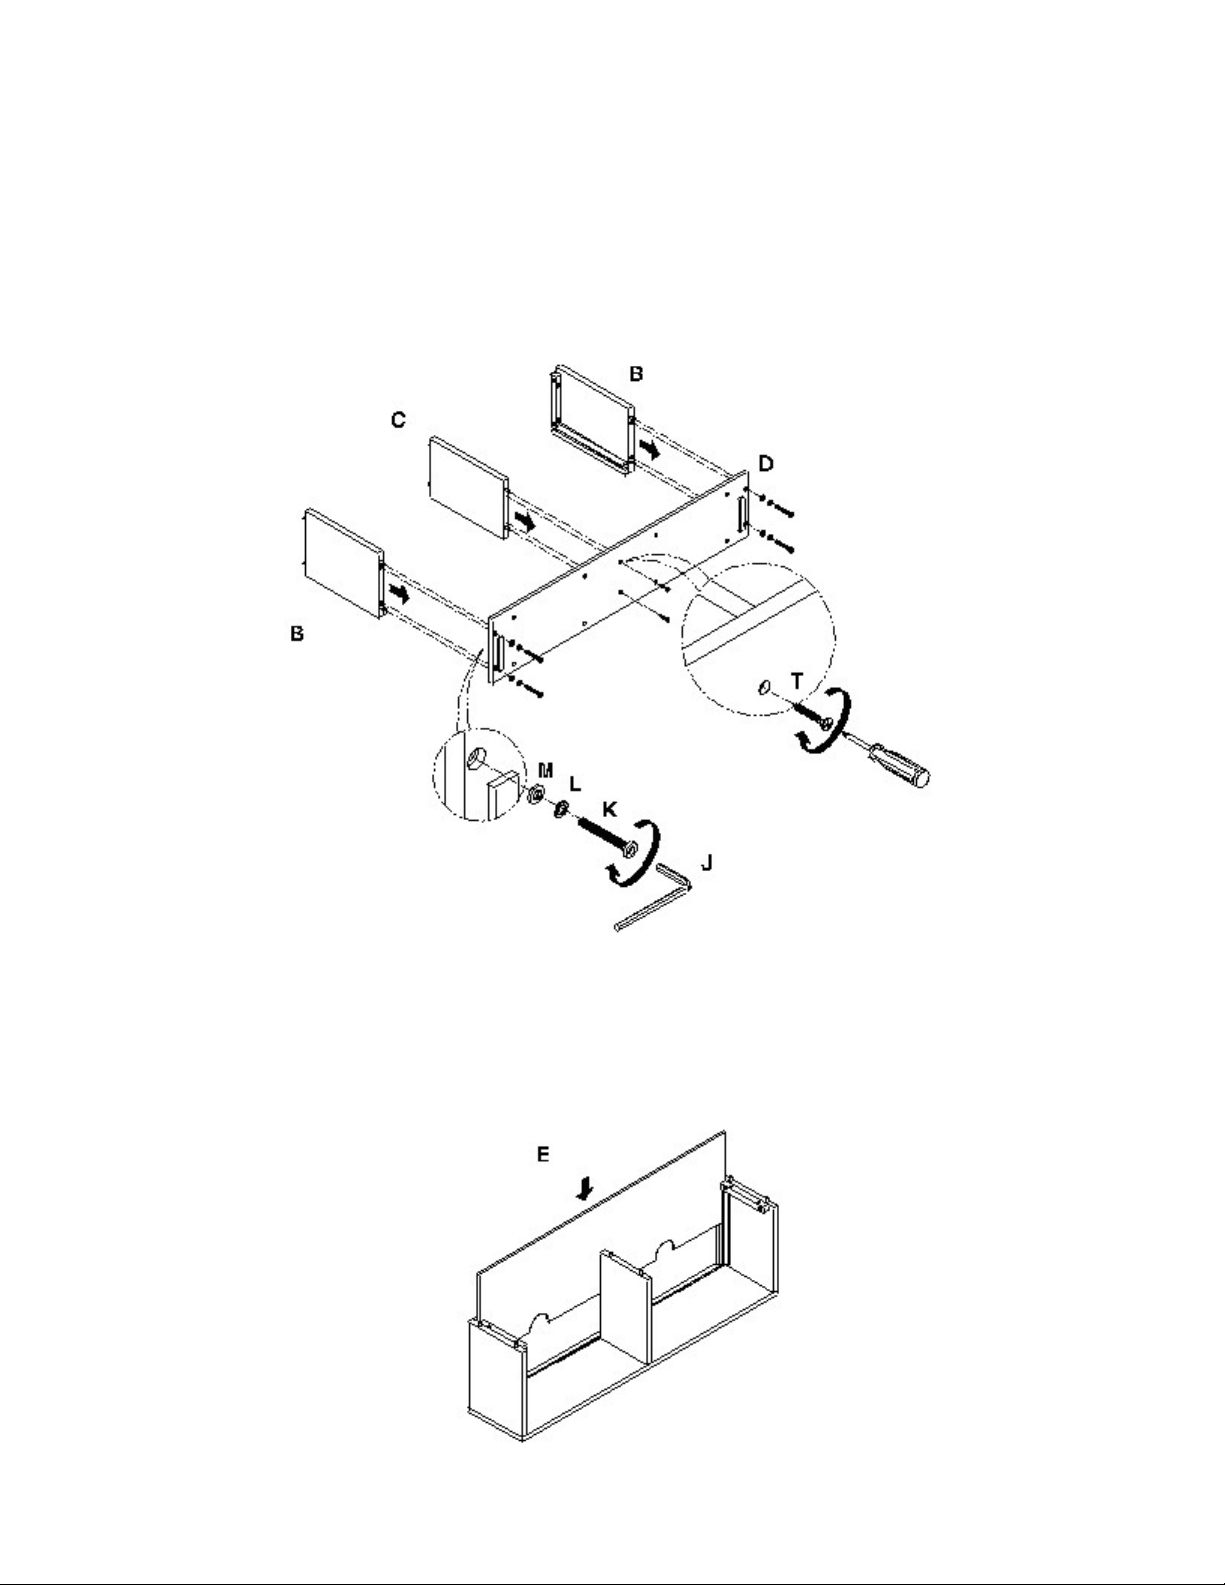
1. Attach one of the Top side panels (B) to the pre-drilled holes on the end of the Shelf (D), ensuring that the
grooves located on the Top side panel (B) align with those located on the Shelf (D). Use 1 ¼” x 28mm Allen
Bolt (K), 1 ¼” Spring Washer (L), and 1 ¼” Flat Washer (M) in each pre-drilled hole of the Top side panel (B),
tightening the connection using the Allen Key (J). Repeat this step with the second Top side panel (B) on the
opposite end of the Shelf. (Fig. 1)
Note: The correct order for the washers to go on the Allen Bolt is: Spring Washer first, Flat Washer second.
2. Secure the Divider (C) to the pre-drilled holes in the center of the Shelf (D), using (2) 4 x 25mm Medium
Wooden Screws (T). (Fig. 1)
(Fig. 1)
3. Upright the assembly from Steps 1 and 2 so that the Shelf (D) is resting flat on your work surface. Carefully
insert the Back Panel (E) in the grooves of the two Top side panels (B). Ensure that the Back Panel (E) rests
securely in the slot grooved into the Shelf (D). (Fig. 2)
(Fig. 2)
Page 3

4. Place the Top Panel (A) onto the assembled piece and secure using (4) 1 ¼” x 28mm Allen Bolt (K), ¼”
Spring Washers (L), and ¼” Flat Washers (M). Place thi s p o r ti o n of t h e a s s em b l y t o t h e s i d e o f yo u r w or k ar e a .
(Fig. 3)
(Fig. 3)
5. Attach the Back stretcher top (H) and Back stretcher bottom (I) with (8) 4 x 30mm Long Wooden Screws (N)
through the left and right Bottom side panel (G). (Fig. 4)
6. Secure the left and Bottom side panel (G) with Bottom front panel (F) using (6) 1 ¼” x 28mm Allen Bolt (K), ¼”
Spring Washers (L), and ¼” Flat Washers (M) on each side. (Fig. 4)
(Fig. 4)
Page 4

7. Connect the top portion of the assembly completed in Step 4 with the bottom portion of the assembly
completed in Step 6, using (8) 1 ¼” x 28mm Allen Bolt (K), ¼” Spring Washers (L), and ¼” Flat Washers (M).
(Fig. 5)
(Fig. 5)
8. If connecting with Cameron Wall Cubby piece, use the Square Brackets (O) provided with (4) 3 x 12mm Small
Wooden Screws (U) to s e cu r e a s sh o w n . (F i g . 6 )
(Fig. 6)
Front View
Back View
Page 5

pottery barn kids
CAMERON STORAGE BED TWIN
IMPORTANT SAFETY INSTRUCTIONS:
Please read all instructions carefully before assembling.
For your safety, assembly by two people is recommended.
PARTS INCLUDED:
(1) Storage headboard (A)
(1) Platform bed FB (B)
(2) Side rail (C)
(1) Slat (D)
** Hardware is packed in Platform Bed Twin Footboard/Siderail/Slat package.
PRE-ASSEMBLY:
• Remove all parts and hardware from the box and lay out on a clear, carpeted or scratch-free work surface,
as this will avoid damaging any parts during assembly. The shipping box provides an ideal work surface.
• Do not dispose of any contents until assembly is completed to avoid accidentally discarding small parts or
hardware.
• Use the parts and hardware lists above to identify and separate each of the pieces included.
• The illustrations provided allow for easier assembly when used in conjunction with the assembly instructions.
• Note: Do not fully tighten all bolts until all parts are in place. Failure to follow these instructions may cause
the bolts to misalign during assembly.
• If using power tools to aid in assembly please use caution. Power tools can damage hardware or split
wood.
ASSEMBLY INSTRUCTIONS:
1. Determine the desired location of bed. One person should hold the Headboard (A) in a vertical position, tilted
slightly forward. Attach each Side rail (C) to the Headboard (A) by inserting the hooked ends of the Side rail
(C) into the corresponding slots in the headboard. Ensure the small ledge on each side rail is facing inward.
Repeat with footboard (B). (Fig. 1)
HARDWARE ENCLOSED:
(28) 4 x 30mm Wooden Screws (N)
(Fig. 1)
Page 6

2. Place the Slat roll (D) and secure with (28) 4 x 30mm Wooden Screws (N). (Fig. 2)
(Fig. 2)
CARE INSTRUCTIONS:
• Dust with a clean, soft cloth.
• We do not recommend the use of chemical cleansers, abrasives, or waxing of our lacquered finishes.
• Do not climb on the Cubby.
Thank you for your purchase.
stores | catalog | www.potterybarnkids.com
USA 1.800.290.8181
 Loading...