

POS-X EVO HiSpeed User Manual
EVO HiSpeed
::: Receipt Print er User’s Manual :::
All specifications are subject to change without notice
1
5-Year Limited Warranty
POS-X Inc. provides this five (5)-Year Warranty for this product.
For terms and conditions please go to:
WWW.POS-X.COM
All specifications are subject to change without notice

2
TABLE OF CONTENTS
1. Parts Identifications
3
2. Setting up the printer
4
2.1 Unpacking 4
2.2 Connecting the cables 5
2.3 Loading the roll paper 9
2.4 Dip switch sett ing 11
3. Control panel and other functions
14
4. Self Test
15
5. Hexadecimal Dump
16
6. Specifications
17
6.1. General Specifications 17
6.2. Auto Cutter Specific ations 19
6.3. Interfa c e 19
6.4. Electrical Ch aract e ristics 19
6.5. Environmental Requirements
20
6.6. Reliability 20
6.7. Certification 20
7. Command List
21
3
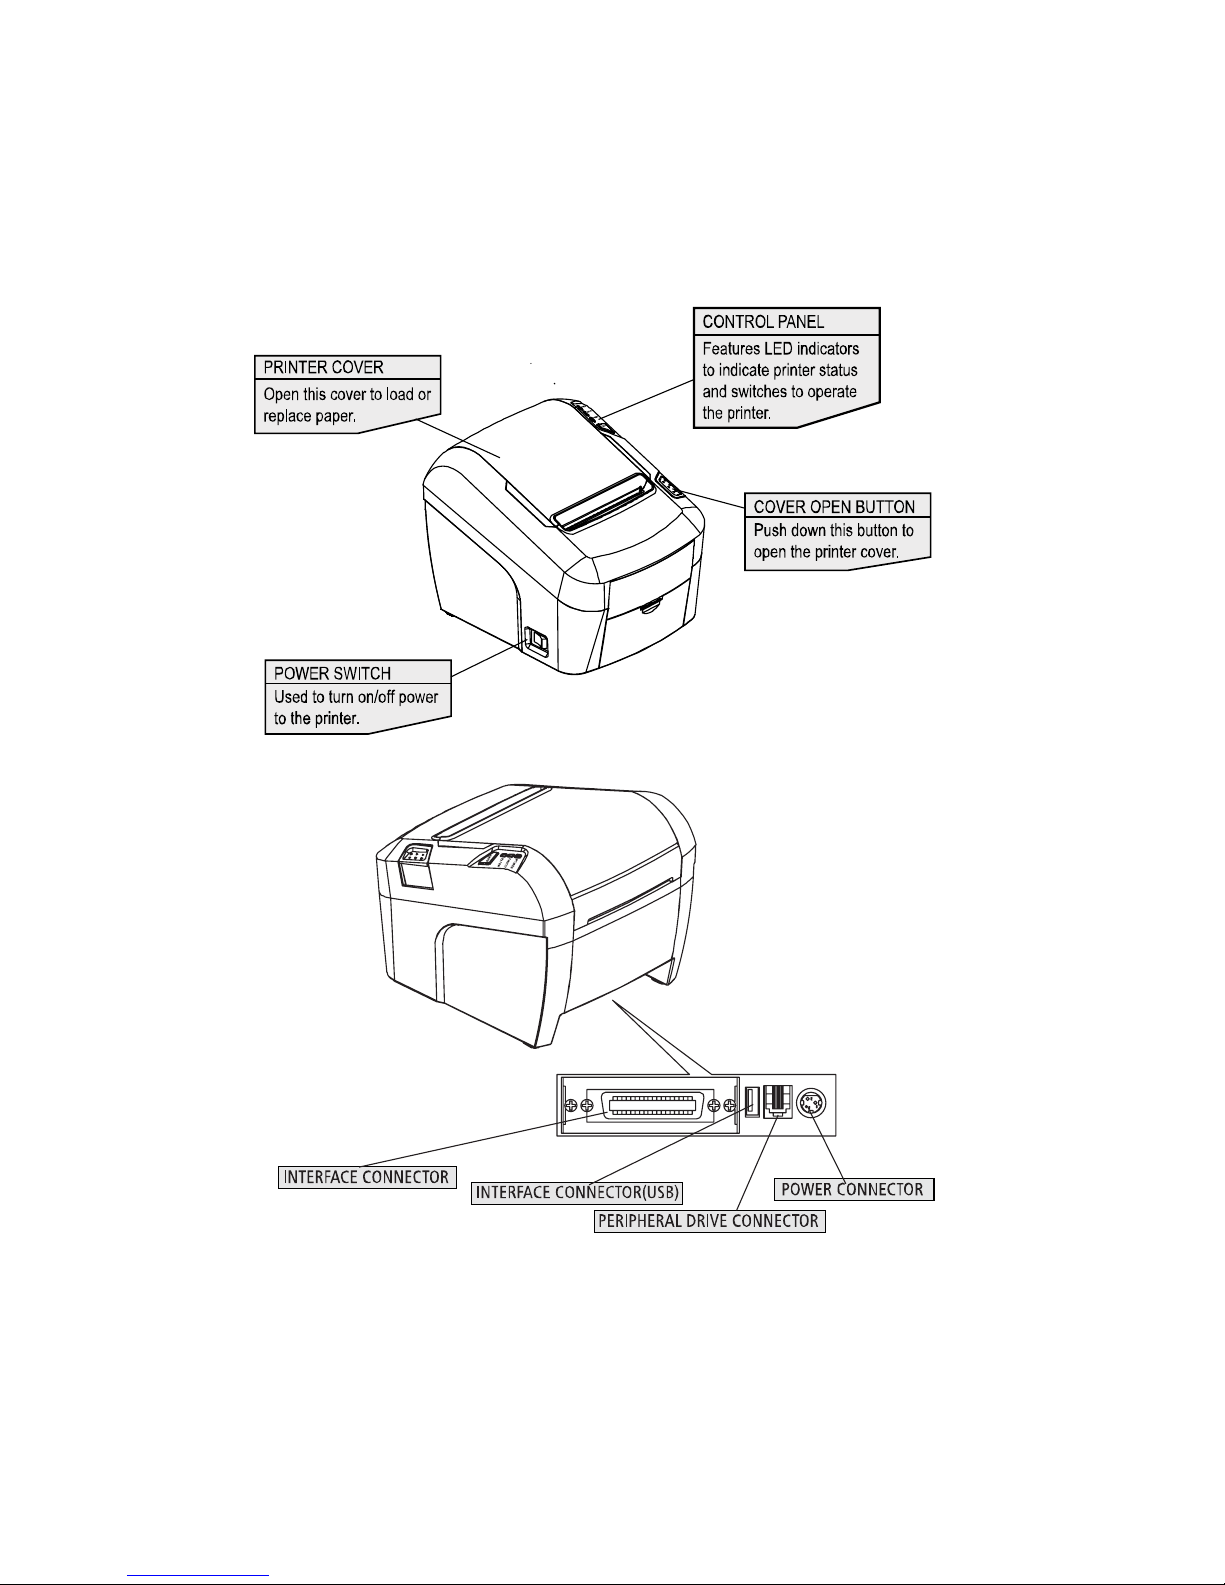
1. Parts Identifications
4
2. Setting Up the Printer
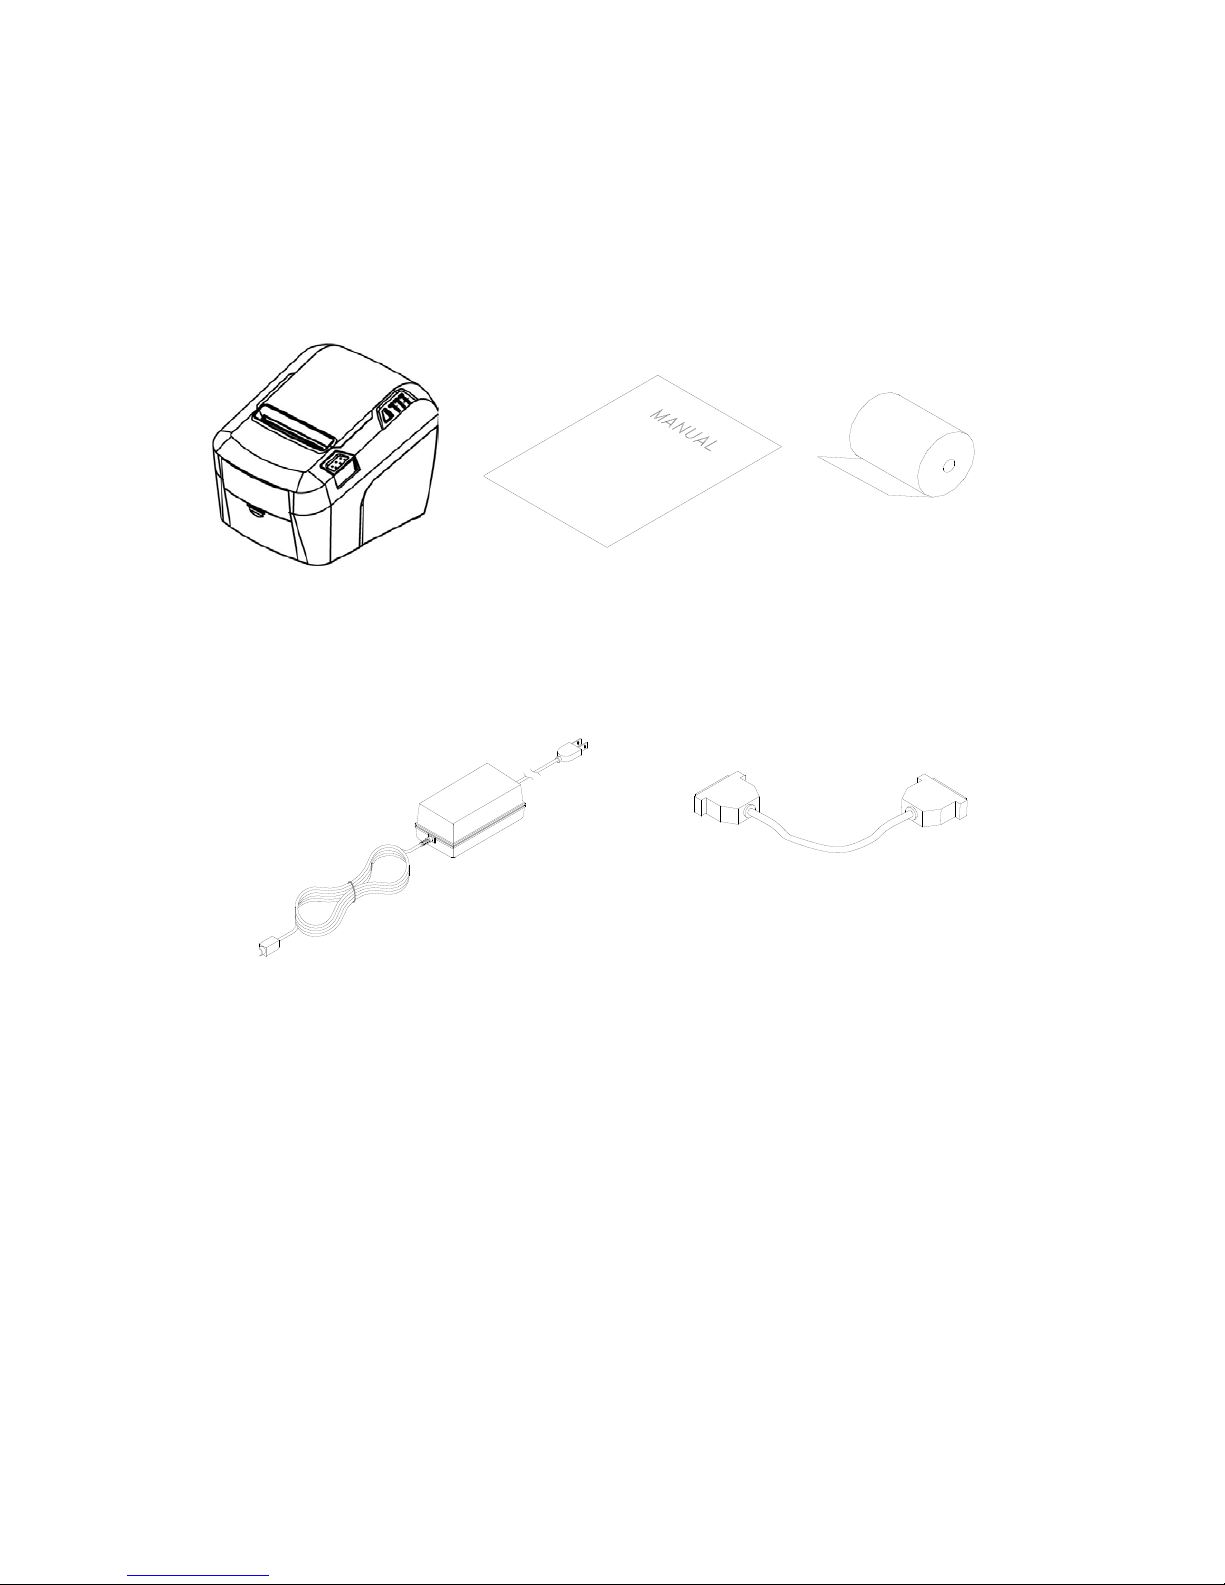
2-1. Unpacking
Your printer box should include these items. If any items are damaged or missing, please
contact your dealer for assistance.
The Printer User’s Manual Roll Paper
Adaptor (Option) Interface Cable (Option)
5
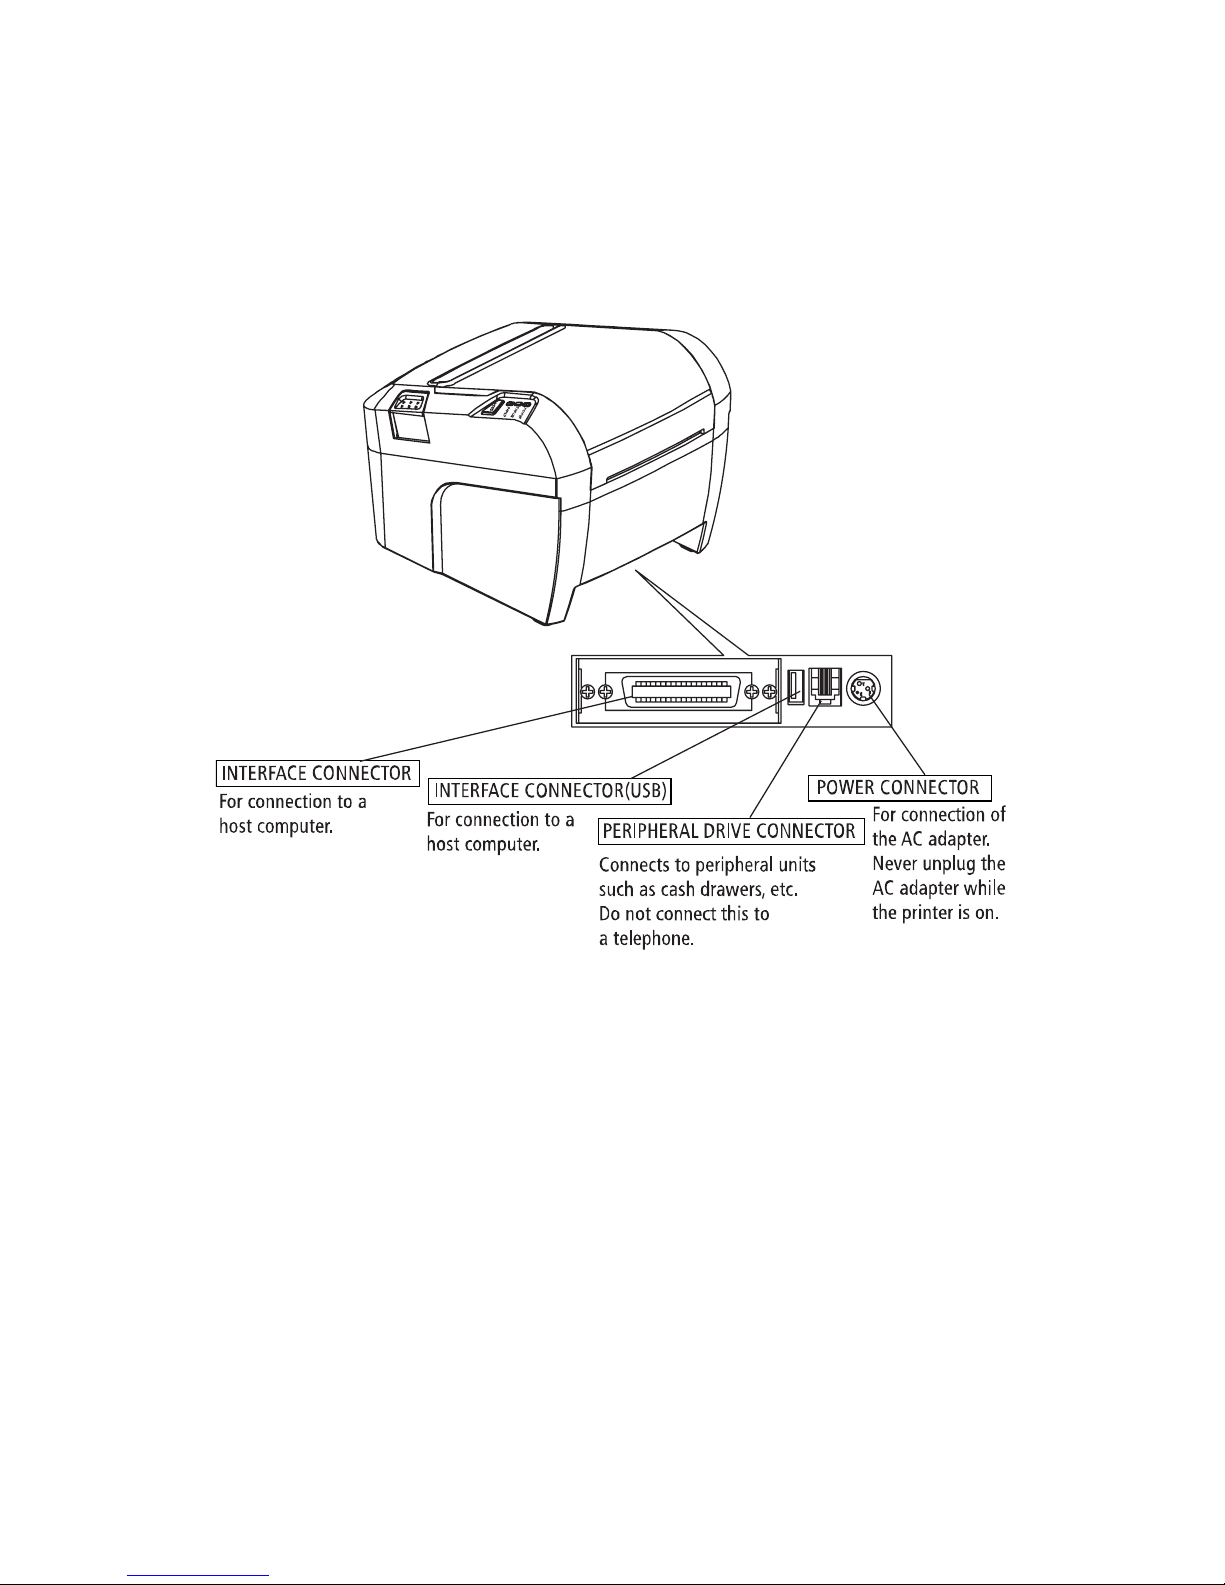
2-2. Connecting the Cables
You can connect up the cables required for printing to the printer. They all connect to the
connector panel on the back of the printer, which is shown below :
Before connecting any of the cables, make sure that both the printer and the computer are
turned off.
6
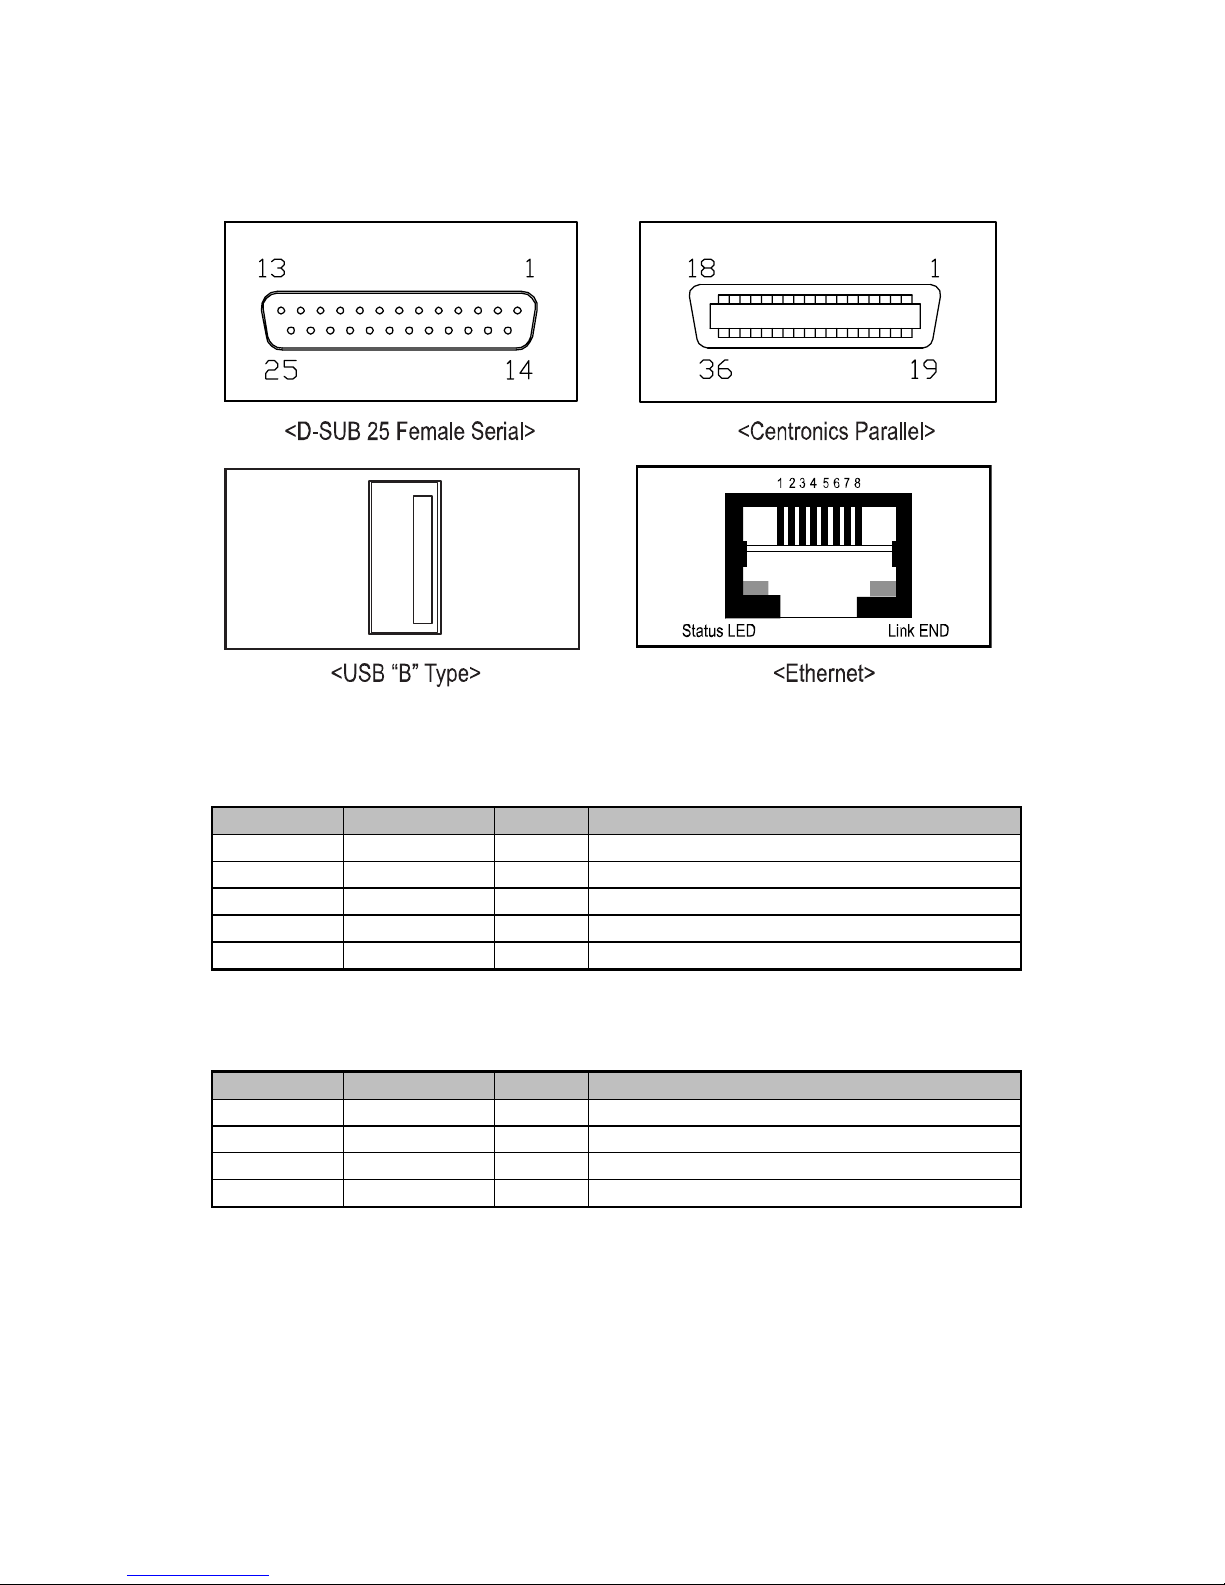
2-2-1. Interface Connector
- Serial interface
PIN SIGNAL I/O DESCRIPTION
2
TxD
Output
Printer transmit data line RS-232C level
3
RxD
Input
Printer receive data line RS-232C level
4, 20 DTR Output Printer handshake to host line RS-232C level
6 DSR Input Data Send Ready
1, 7
GND
-
System Ground
- USB interface
PIN
SIGNAL
I/O
DESCRIPTION
1 +5V - +5V
2
DATA-
-
Printer transmit data line
3
DATA+
-
Printer transmit data line
4 GND - System Ground
 Loading...