

Page 1
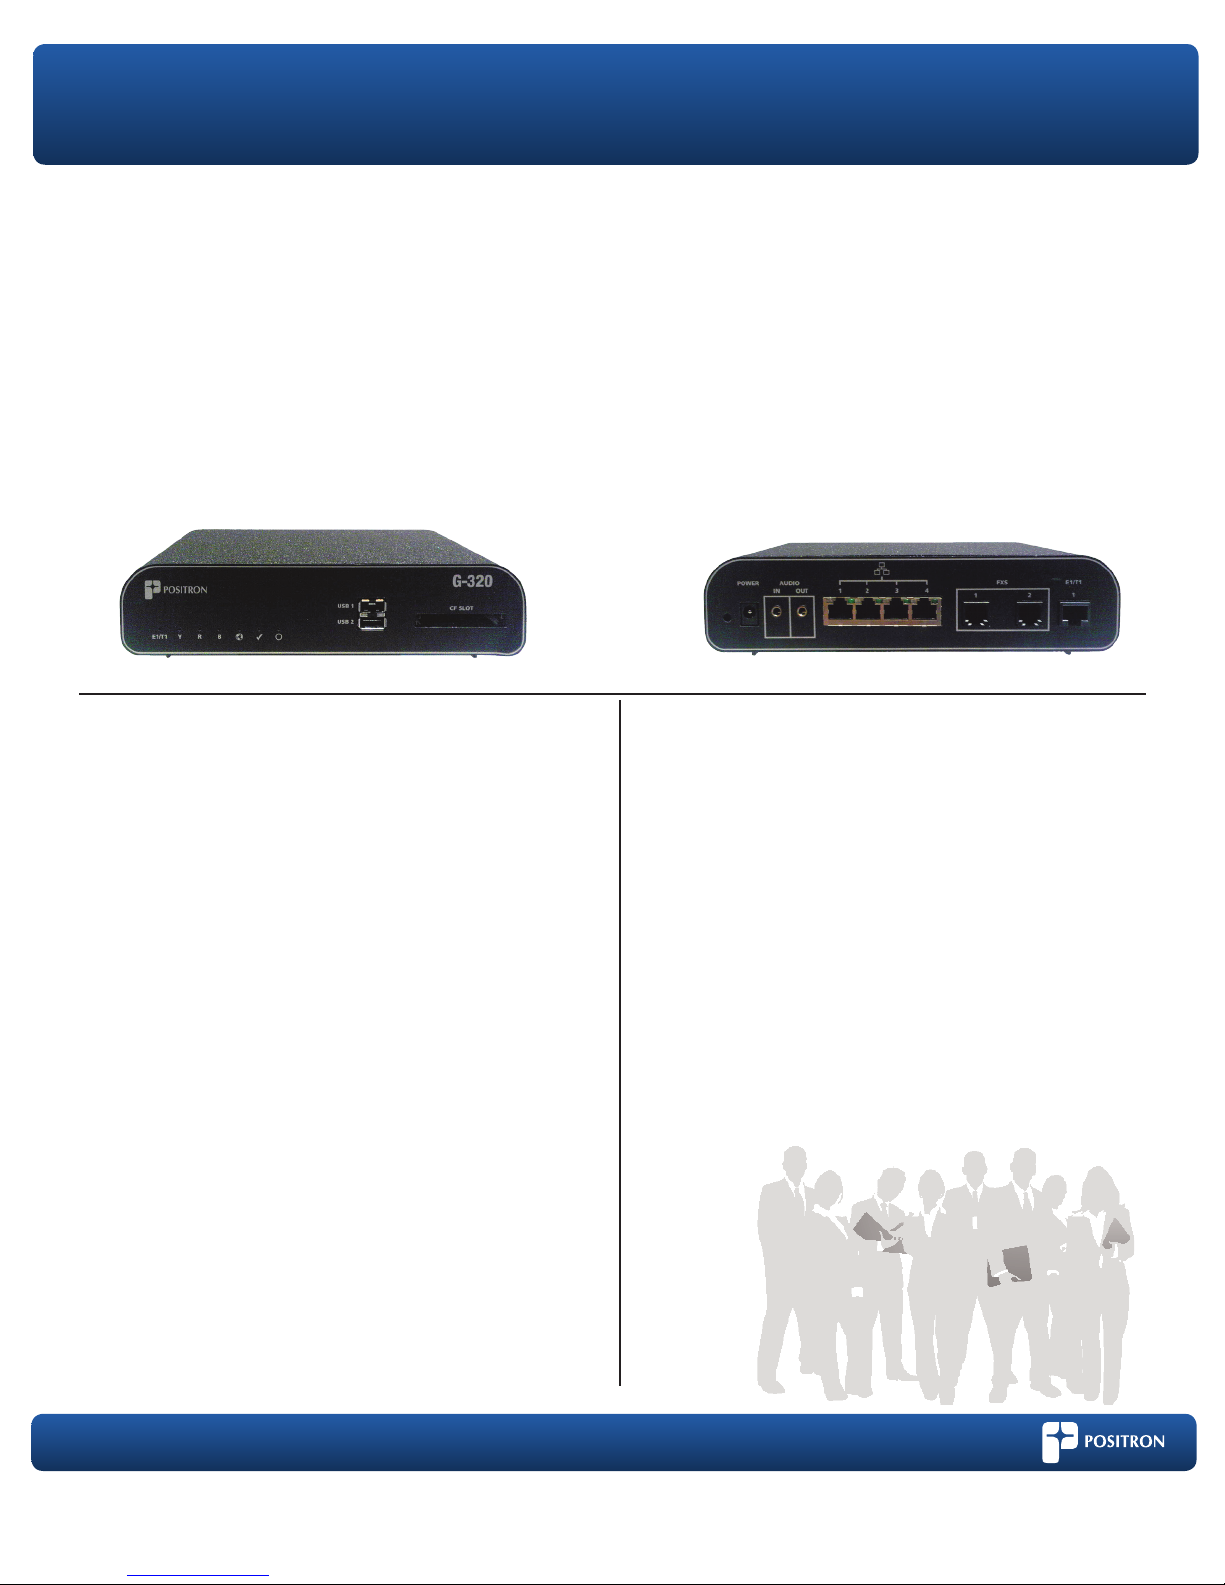
G-320 Gateway Quickstart
Features
• Single E1/T1 PRI for connection to the telephone network
• Dual Foreign Exchange Station (FXS) port for connecting a phone or fax machine
• Hardware based G.168 echo cancellation chip up to 128 ms tail length
• Four port Ethernet Switch 10/100Mbps auto MDIX Ethernet port
• Dual USB ports
• Audio Input (mono) jack
• Audio Output (mono) jack
• Single Compact Flash port
• Real Time Clock (battery)
Contents of Box
• G-320 Gateway
• External Power Supply
• Two RJ-45 Cat5e Ethernet Cable (orange)
Installation Steps
1. Insert the external power supply cable to provide power to the
device
2. Connect the RJ-45 Ethernet cable provided (orange) to one of the
four available Ethernet ports on the G-320
- The default IP address of G-320 is 192.168.1.2
3. Connect the other end of the RJ-45 to your laptop / PC
- The IP address of the laptop / PC must be on the same
subnet of the G-320 (192.168.1.X)
4. Connect to the browser based configurator by opening the
browser to the IP address. The following is the default
connection credentials:
Username: admin
Password: password
Support
To ensure your PBX is working, try the following:
• Check the LED on the front panel, the LED with the circle mark
should be solid RED
• Plug an analog telephone into the FXS port – is there a dial tone?
• At the dial tone, press 6000 and you will hear the operator’s voice
These steps do not require user configuration. If you are unable to
complete them, please contact Positron Telecommunication Systems.
Compact Flash
Sandisk Compact Flash is recommended supported media brand
Page 2
Think Inside the Box
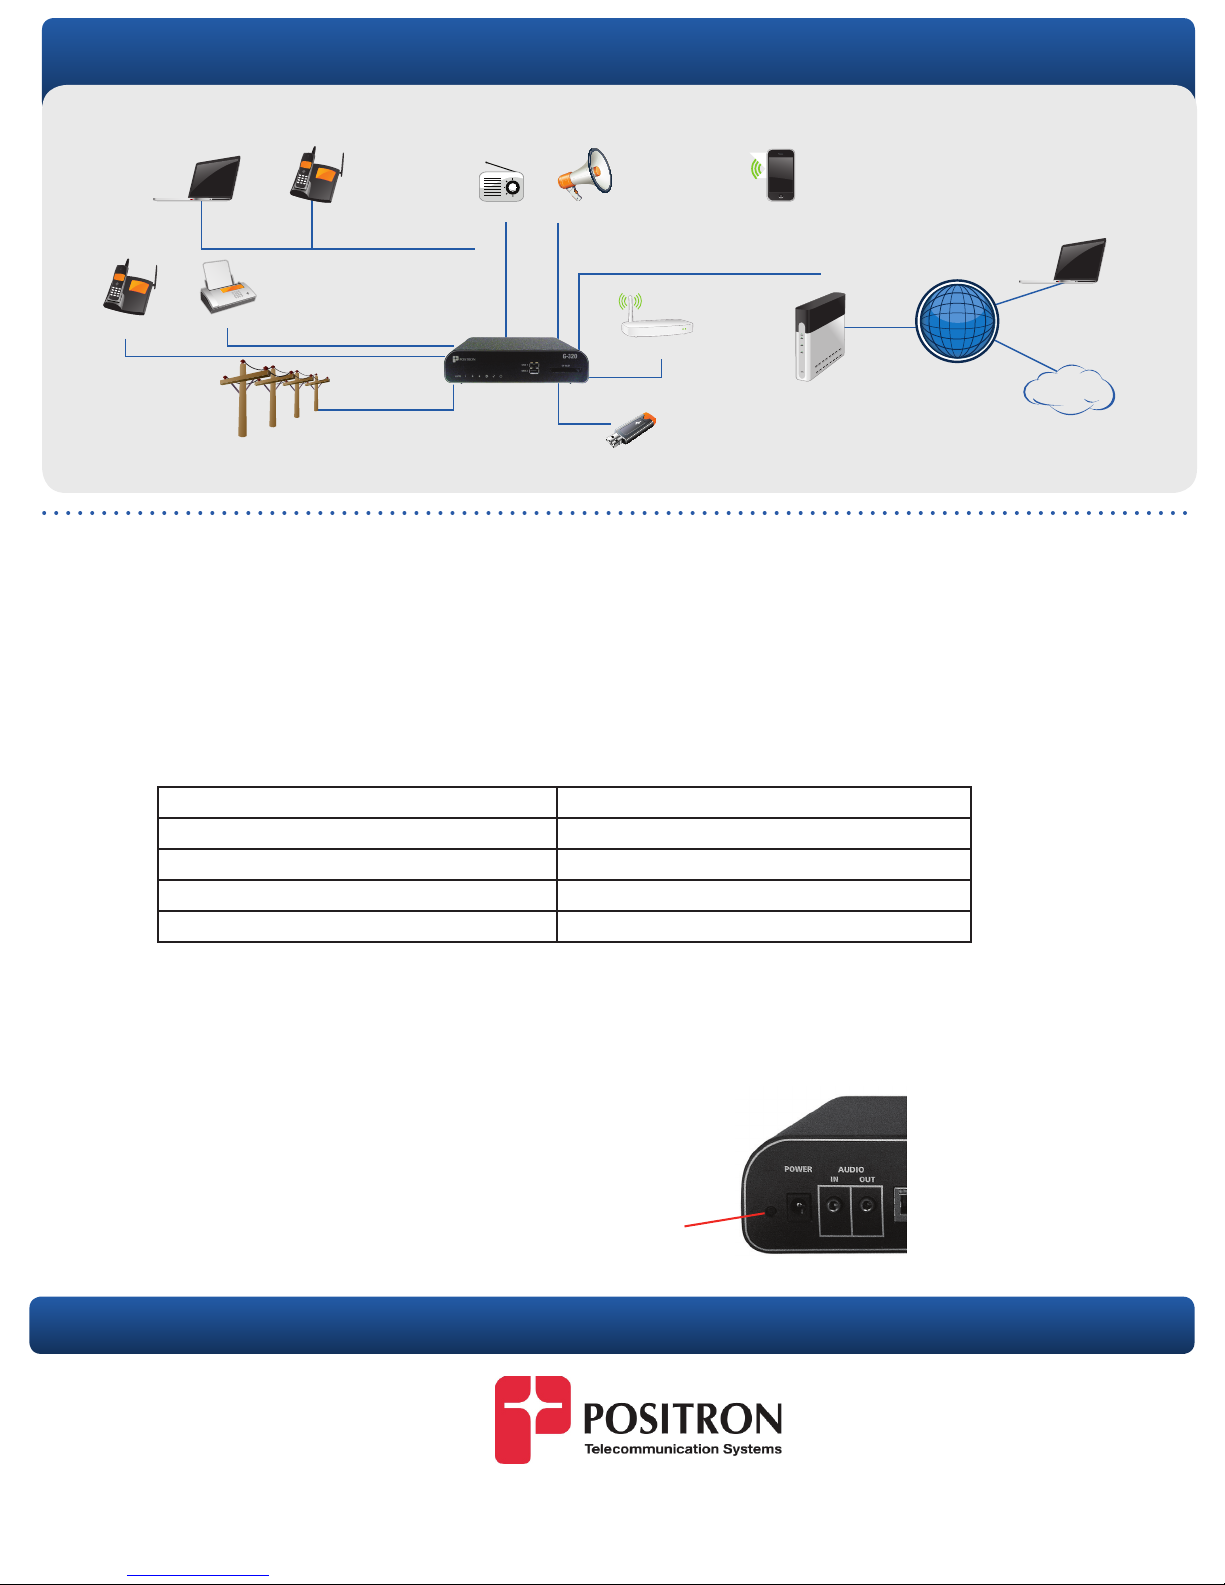
Phone
SIP
Fax
E1/T1 PRI
SIP
Music on hold
G-320
Paging system
Wireless Access Point*
USB Storage*
SIP
Cable/DSL
SIP
Internet
VoIP
The default IP address of the card is 192.168.1.2 – the Ethernet interface on the four port switch is auto speed detect and auto cable cross
over. For configuration you may connect directly to the Ethernet interface or through a switch, no special cable is required.
LED Functionality
The LED on the front of the device will provide some state / diagnostic information. The table below describes each state:
Event
Card is booting All lights blinking
Operating system loading RED LED flashing
System fully loaded and operational RED LED solid
Telephone line plugged in and configured E1/T1 LED GREEN
Compact Flash or USB enabled “Tick” LED GREEN solid
LED
Factory Reset
In the event that a configuration does not allow connectivity to the system, a user may perform a factory reset that will put all the IP
addresses and passwords back to the default settings. Instructions: Push and hold the reset button for approximately 20 seconds.
NOTE: To perform a factory reset, push and hold the reset button until
the first two LEDs are Orange. Once they are Orange, release the reset
button and the factory reset will be initiated.
Positron Telecom • 5101 Buchan Street, Suite 200, Montreal, Quebec, Canada H4P 2R9 • Tel: (514)-345-2220 • Email: [email protected] • www.positrontelecom.com
Reset Button
Document Code: 44-00038-01
 Loading...