


1
Package Contents
HS-3510W-E/3512W-E/3514W-E desktop
POS with Epson TM-m30 POS receipt printer
(x 1)
24V/60W Power Adaptor (x 1)
Power cord (x 1)
3-inch wide thermal paper roll (x 1)
Desktop mounting kit pack (x 1)
(including 1 desktop mounting bracket,
4 fixing screws, 4 plastic anchors)
User manual (x 1)
Product Feature
Innovative All-in-one Terminal
This compact all-in-one 10”/12”/14” touch POS now comes with a
detachable receipt printer for easy maintenance. Add an optional 2D
barcode scanner while the printer is on board, making HS-3510WE/3512W-E/3514W-E the most well-rounded all-in-one POS terminal in
the market.
Integrated Design with Advanced Manageability
HS-series integrates the most widely used peripherals including 3”
thermal printer, MSR, fingerprint sensor, 2D barcode scanner and 2nd
customer display to support your daily POS operation. The detachable
modularized design allows quick access to the components, enabling fast
and easy service and upgrades.
Aesthetics
Dressed from head to toe in timeless black or white color, the only trend
that never goes out of style, and with stylish touches added throughout,
HS-series is not just a piece of machinery, it is an elegantly crafted piece
of art that looks right at home in any store decoration.
Built-in Epson TM-m30 POS Receipt Printer
HS-3510W-E/3512W-E/3514W-E series specially incorporate Epson
TM-m30 POS receipt printer with existing all-in-one POS system to
offer users alternative solution for receipt printing.
15650902020 Ver. A0
http://www.posiflex.com
HS-3510W-E/3512W-E/3514W-E
JIVA Desktop POS
User Manual
2
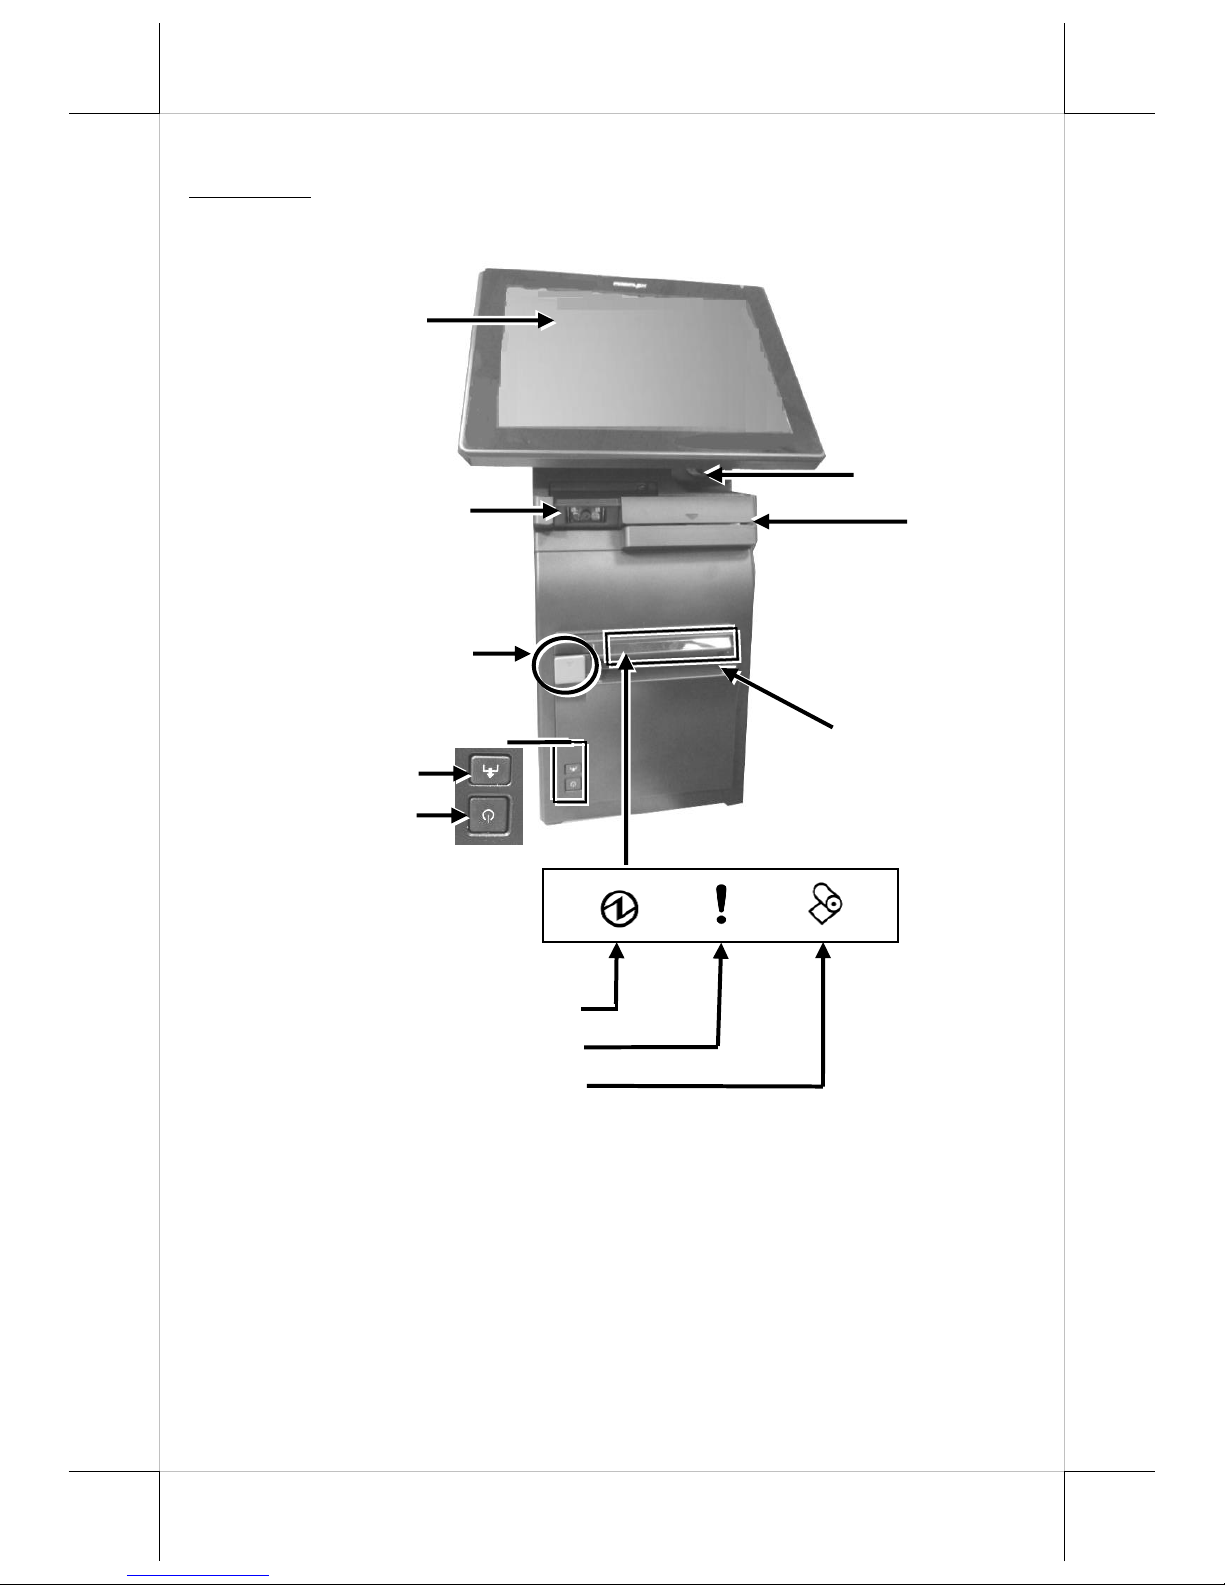
Views of the HS-3510W-E/3512W-E/3514W-E
Front View
Power LED Indicator
Error LED Indicator
Paper LED Indicator
3-Track Magnetic
Stripe Reader
(Optional)
Printed Paper Exit
HS-3510W-E/3512W-E/3514W-E
P-CAP Touch & LCD Panel
Paper Roll Cover
Release Lever
Fingerprint or iButton
Sensors (Optional)
Posiflex 2D Scanner
(Optional)
Printer Power Button
Form Feed Button

3
Cable Exit
Rear View
Left Side View
Right Side View
Power Button
RFID Card Reader
(Optional)
Top I/O Interface
Cable Cover
Bottom I/O Interface
Cable Cover

4
Bottom View
Views of I/O Interface of HS-3510W-E/3512W-E/3514W-E
Top I/O Interface
Bottom I/O Interface
Bottom I/O Interface
DB-9 COM Ports
Rubber Pad
DB-25 Parallel Port
PS/2 Port
USB 2.0 Port
RJ-50 COM Port
VGA Port
USB Ports
RJ-10 Cash Drawer Port
24V DC-IN Power Jack
RJ-45 LAN Port
Line Out
Rubber Pad
Mounting holes
5
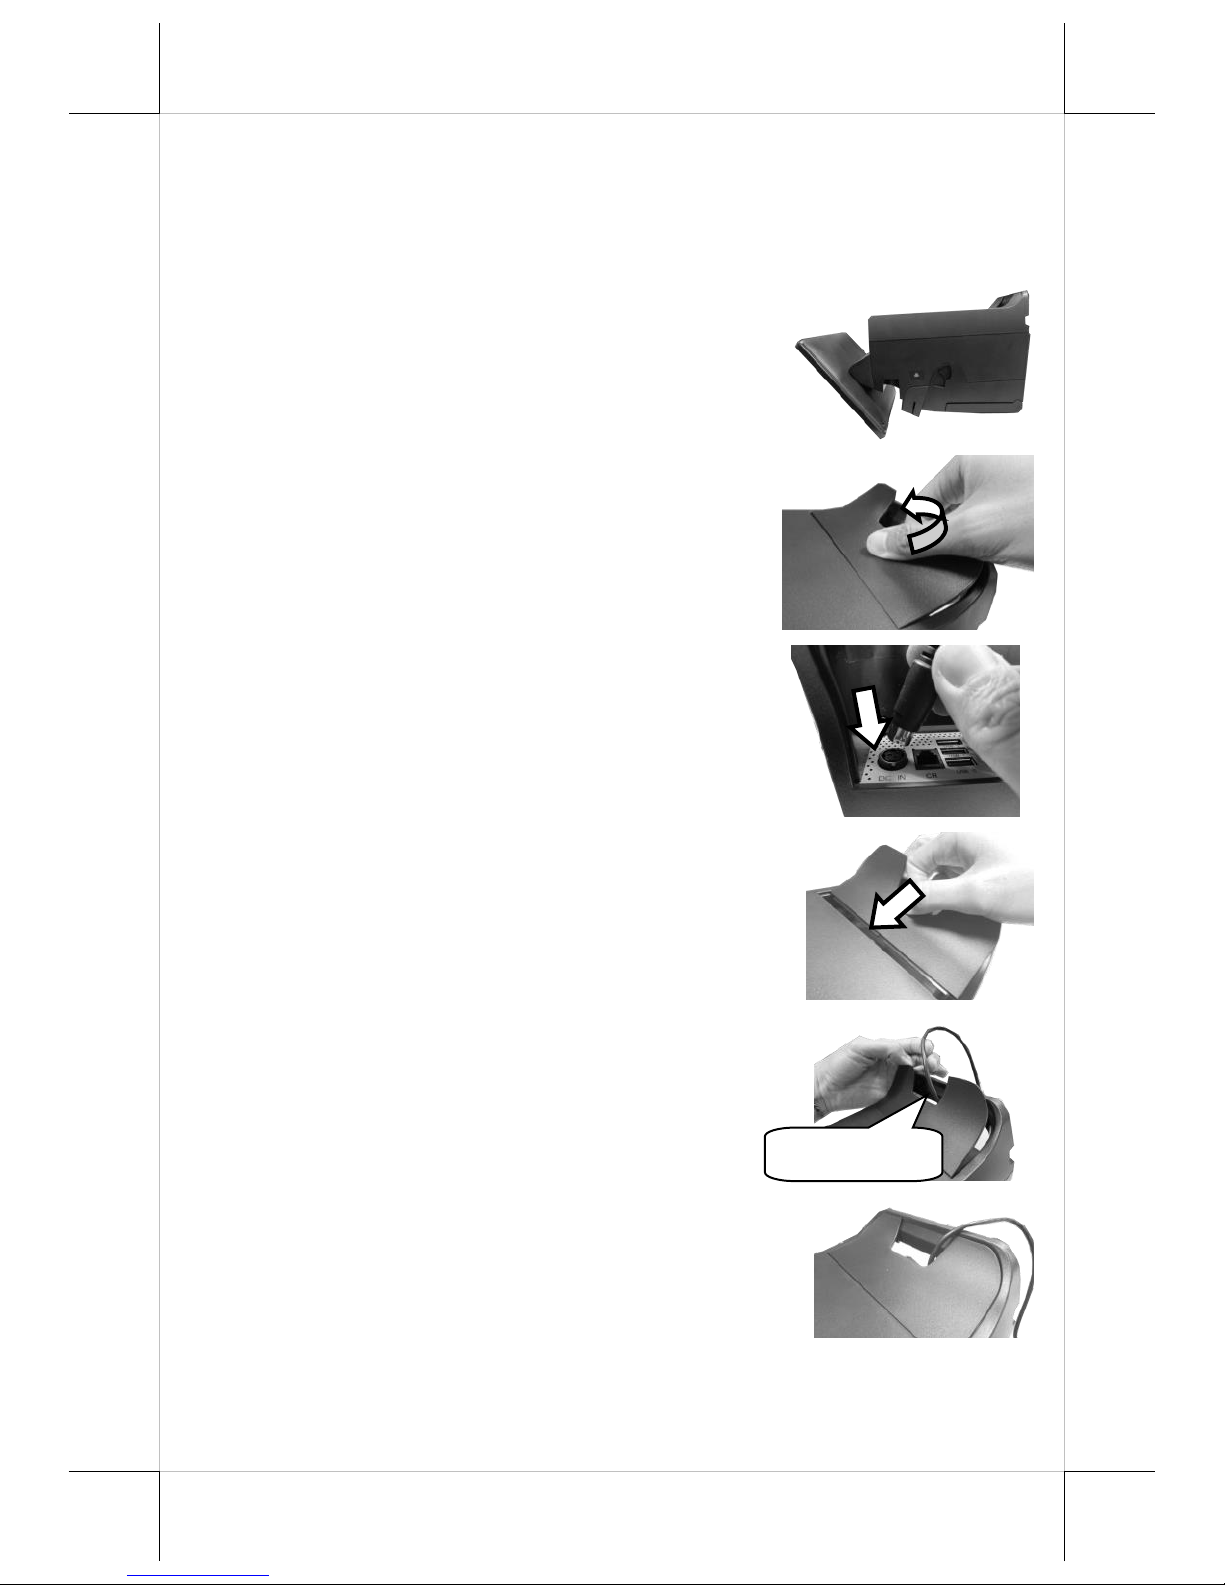
Connecting Power Adapter
Please refer to the following instructions on how to connect power
adapter to HS-3510W-E/3512W-E/3514W-E and to organize your
cables.
1. Lay your desktop POS on a level
surface with its touch screen facing
down as shown in the figure.
2. Hold the bottom I/O interface cover
with your thumb and forefinger, and
then gently pull the cover outwards to
remove the cover.
3. Connect power adapter and I/O cables
to the bottom I/O interface.
4. Have the cover join to the wedge
portions of the bottom I/O interface.
5. Before pushing the cover back into
place, neatly thread the cables through
the cable exit.
6. Press down the cover to close the
bottom I/O interface chamber.
Cable Exit
 Loading...