

Page 1

1
Read and fully understand the
instructions before operating
the Portek Flexisharp
portek.co.uk
Li-ion Battery Powered
Chainsaw Sharpener
Operators Handbook
Page 2
2
Before you start
READ AND UNDERSTAND THIS MANUAL
FULLY BEFORE OPERATING THE FLEXISHARP
This user manual accompanies this chainsaw Sharpener and contains important information
on setup and handling.
Before using the equipment, read the user manual carefully. This particularly applies to the
safety notes. Failure to do so may result in personal injury or damage to the equipment.
Store the user manual for further use.
This graphic accompanied by the words WARNING and DANGER
highlights an act or a condition which can lead to SERIOUS INJURY
ALWAYS WEAR EYE PROTECTION.
Residual risks
This machine is only designed for sharpening chainsaws. Before commissioning, the device
must be fixed to a workbench or another similar surface. Use the chain - saw sharpener only
if you fully understand all the functions and can perform without restrictions or have received
appropriate instructions. Respect technical data and safety precautions.
!
Do not use this product in any other way as stated for normal use. Not observing general
regulations in force and instructions from this manual does not make the manufacturer liable
for damages.
Please note that our equipment has not been designed for commercial, trade or industrial
use. If the equipment is used in commercial, trade or industrial operation or for similar
activities, we cannot assume any liability.
Specifications, descriptions and illustrative material in this manual are as accurate as known
at the time of publication, but are subject to change without notice. Illustrations may include
optional equipment and accessories, and may not include all standard equipment.
ALWAYS WEAR SAFETY CLOTHING IN CONJUNCTION WITH HAND, EYE, HEARING
AND FOOT PROTECTION TO HSE/EN SPECIFICATIONS
Page 3
Important safety information
Residual risks
Even when the device is used properly and all safety regulations are complied with, there still
may be some residual risks.
3
• Noise emissions
• Dust emissions
• Vibrations to hand and arms
• Danger of burns
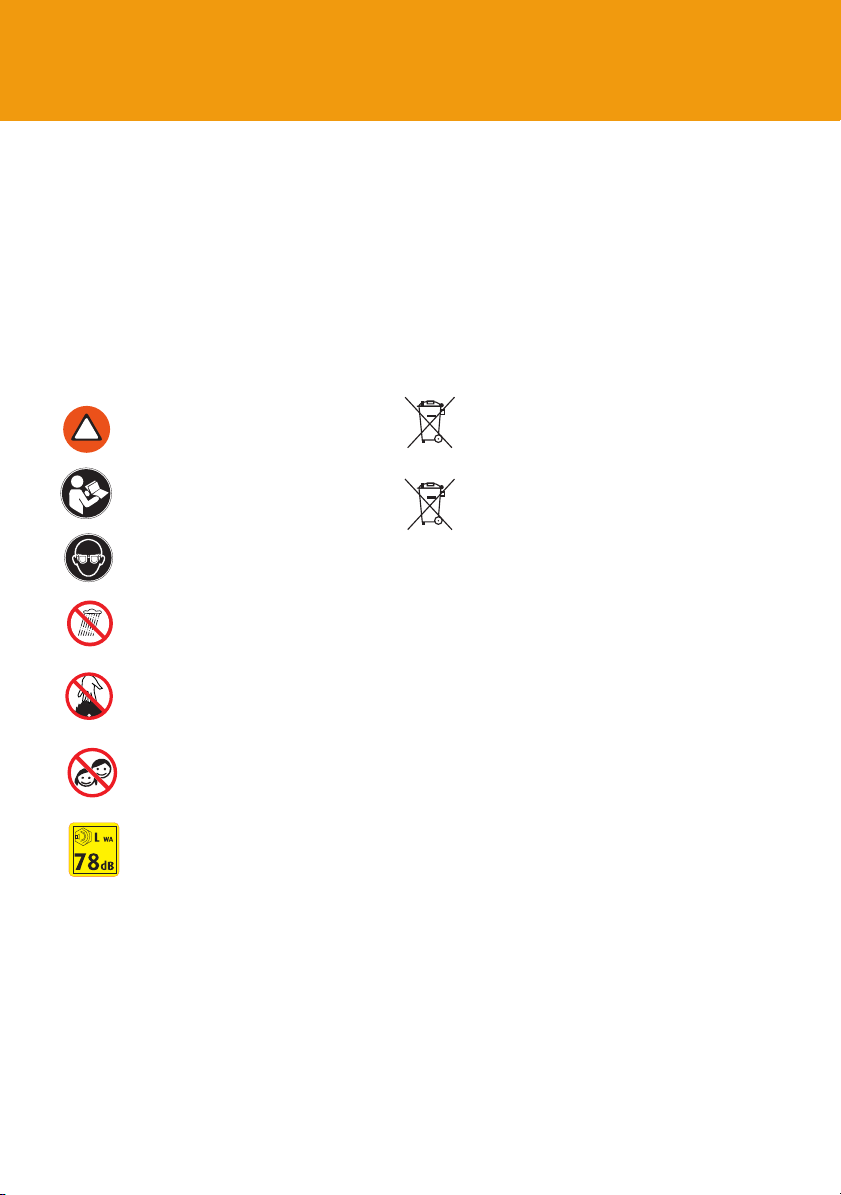
Symbols
Denotes risk of personal injury or
!
damage to the tool.
Read instruction manual before use.
Wear eye protection.
Do not use the appliance in the rain
or in wet places.
Danger! Do not touch the
grinding wheel
Children shall not play with
the appliance.
• Tool and workpiece heat up during operation.
• Risk of injury
• Sharp tools and workpiece edges
Dispose appliances according to the regulation
and requirement of local council.
Do not dispose of batteries in household
waste, fire (risk of explosion) or water.
Damaged batteries may damage the
environment and your health if toxic fumes or
liquids leak out.
Li-ion
Dispose of batteries in discharged condition.
Dispose of batteries in accordance with the
local regulations. Take batteries to an old
battery collection point where they will
be recycled in an environmentally friendly
manner.
Information of the acoustic
power level.
Page 4

4
Flexisharp
14
2
10
8
1
5
9
13
7
3
4
6
Page 5
1. Chain stopper
2. Chain stopper setting screw
3. Scale for setting grinding angle
4. Locking screw for grinding angle setting
5. Chain carrier
6. Chain setting wheel
7. Setting screw for limiting depth
8. Grinding wheel
9. On/Off switch
10. LED working light
11. Battery
12. Charger
13. Grinding wheel cover
14. Grinding wheel shield
5
Contents
11
12
CONTENTS
Before you start 2
Safety introduction 3
Flexisharp main features 4 - 5
General safety information 6 - 7
Sharpener, battery and charging safety 8 - 11
Charging the battery 12
Assembly 13
Operation 14 - 15
Parts listing 16 - 17
Technical data and disposal 18
Troubleshooting 19
Declaration of Conformity 20
Page 6

6
General Safety Information
Read all safety warnings. Failure to follow the warnings may result in serious
!
injury or even death.
1. Keep children and bystanders away while operating a power tool. Distractions cause a
loss of control.
2. Check for signs of wear or damage, before using the tool and after any impact, and
repair as necessary.
3. The tool is designed for use by adults. Young people over 16 years may use the tool
under supervision only.
4. The manufacturer is not liable for damage which is caused through inappropriate use or
incorrect operation.
1. Work area safety
• Keep work area clean and well lit. Cluttered or dark areas invite accidents.
• Do not operate power tools in explosive atmospheres, such as in the presence of
flammable liquids, gases or dust. Power tools create sparks which may ignite the dust
or fumes.
2. Electrical safety
• Do not expose power tools to rain or wet conditions. Water entering a power tool will
increase the risk of electric shock.
• Do not abuse the charger cord. Keep cord away from heat, oil, sharp edges or moving
parts. Damaged or entangled cords increase the risk of electric shock.
• The use of a RCD (residual current device) with a rated residual current of 30 mA or less
is advised for additional safety when using the charging unit.
Page 7

General Safety Information
3. Personal Safety
!
• Stay alert, watch what you are doing and use common sense when operating a
power tool. Do not use a power tool while you are tired or under the influence of
drugs, alcohol or medication. A moment of inattention while operating power tools
may result in serious personal injury.
WARNING! Wear ear protectors. Exposure to noise can cause hearing loss.
!
WARNING! Use protective equipment. Always wear safety glasses when
working with the machine.
• The use of protective clothing is recommended, such as dust mask, protective
gloves, sturdy non-slip footwear, helmet and ear defenders. Wear a hairnet if you
have long hair. It is recommended to wear gloves, sturdy non slipping shoes and
apron.
• Prevent unintentional starting. Ensure the switch is in the off- before connecting to
battery pack, picking up, adjusting or carrying the tool. Carrying power tools with
your finger on the switch or energising power tools that have the switch on invites
accidents.
7
• Never reach into the danger area of the machine when it is running. Chips and
splinters must not be removed while the machine is running.
• WARNING! Always allow the cut-off wheel to come to a stop
!
4. Service
• Have your power tool serviced by a qualified repair person using only identical
replacement parts. This will ensure that the safety of the power tool is maintained.
Page 8

8
Sharpener Unit Safety
!
Safety Warnings for Chainsaw Sharpener
• Do not force the power tool. Use the correct power tool for your application. The correct
power tool will do the job better and safer at the rate for which it was designed.
Do not use the power tool if the switch does not turn it on and off. Any power
tool that cannot be controlled with the switch is dangerous and must
be repaired.
• Disconnect the plug from the power source and/or the battery pack from the power
tool before making any adjustments, changing accessories, or storing power tools. Such
preventive safety measures reduce the risk of starting the power tool accidentally.
• WARNING! The adjusting nut must be tightened before starting to work with the
machine.
• Maintain power tools. Check for misalignment or binding of moving parts, breakage of
parts and any other condition that may affect the power tool’s operation. If damaged,
have the power tool repaired before use. Many accidents are caused by poorly
maintained power tools.
• WARNING! Always use the protective shields on the machine. Do not remove the
transparent front guard. If the transparent front guard is damaged or missing, re-turn
tool to authorized service station for replacement.
• Do not use a damaged grinding wheel. Before each use inspect the wheel for chips
and cracks or excess wear. The grinding wheel must be properly mounted and turn
freely. Perform a test run for at least 30 seconds without load. Do not use damaged,
out of round or vibrating grinding wheels.
• Immediately switch off the machine in case of considerable vibrations or if other
malfunctions occur. Check the machine in order to find out the cause.
• The outside diameter and the thickness of your accessory must be within the capacity
rating of your power tool.
Page 9

Battery Safety
!
Safety Warnings for Battery
• Charge a rechargeable battery unit using only the charger supplied by the
manufacturer. There is the danger of fire if other types of rechargeable battery
units are used.
• When they are not being used, store rechargeable battery units away from paperclips,
coins, keys, nails, screws or other small metal objects that could cause the contacts to
be bridged. Short circuiting the contacts of a rechargeable battery unit may result in
heat damage or fire.
Fluids may leak out of rechargeable battery units if they are misused. If this
happens, avoid contact with the fluid. If contact occurs, flush the affected area
with water. Seek additional medical help if any of the fluid gets into your
eyes. Escaping battery fluid may cause skin irritation or burns.
• The battery pack supplied with your cordless tool is not charged. The battery pack has
to be charged before you use the tool for the first time.
• For optimum battery performance avoid low discharge cycles. Charge the battery pack
frequently.
• Store the battery pack in a cool place, ideally at 15°C. The battery must be charged for
storage until the second led is lit. Charging needs to be done when the light gets down
to 1 led.
9
Store battery with at least 2 leds lit
Page 10

10
Battery Safety
Safety Warnings for Battery
!
• Lithium-ion batteries are subject to a natural ageing process. The battery pack must
be replaced at the latest when its capacity falls to just 80% of its capacity when new.
Weakened cells in an aged battery pack are no longer capable of meeting the high
power requirements and therefore pose a safety risk.
• Do not throw battery packs into an open fire. There is a risk of explosion!
• Do not ignite the battery pack or expose it to fire.
• Do not exhaustively discharge batteries. Exhaustive discharge will damage the battery
cells. The most common cause of exhaustive discharge is lengthy storage or non-use
of partly discharged batteries. Stop working as soon as the performance of the battery
falls noticeably or the electronic protection system triggers. Place the battery pack in
storage only after it has been fully charged.
• Protect batteries and the tool from overloads. Overloads will quickly result in overheating and cell damage inside the battery housing without this overheating actually
being apparent externally.• Avoid damage and shocks. Replace batteries which have
been dropped from a height of more than one metre or which have been exposed to
violent shocks without delay, even if the housing of the battery pack appears to be
undamaged. The battery cells inside the battery may have suffered serious damage. In
this respect, please also read the waste disposal information.
• If the battery pack suffers overloading and overheating, the integrated protective cutoff will switch off the equipment for safety reasons.
Important. Do not press the ON/OFF switch any more if the protective cut-off has
actuated. This may damage the battery pack.
• Use only original battery packs. The use of other batteries may result in injuries,
explosion and a fire risk.
Page 11

Charging Safety
Safety instructions for charge and charging process
!
• Please check the data marked on the rating plate of the battery charger. Be sure to
connect the battery charger to a power supply with the voltage marked on the rating
plate. Never connect it to a different mains voltage.
• Protect the battery charger and its cable from damage and sharp edges. Have
damaged cables repaired without delay by a qualified electrician.
• Do not use damaged battery chargers.
• In heavy use the battery pack will become warm. Allow the battery pack to cool to
room temperature before commencing with the charging.
• Do not over-charge batteries. Do not exceed the maximum charging times. These
charging times only apply to discharged batteries. Frequent insertion of a charged or
partly charged battery pack will result in over-charging and cell damage. Do not leave
batteries in the charger for days on end.
• Never use or charge batteries if you suspect that the last time they were charged was
more than 12 months previously. There is a high probability that the battery
pack has already suffered dangerous damage (exhaustive discharge).
• Charging batteries at a temperature below 10°C will cause chemical damage to the cell
and may cause a fire.
• Do not use batteries which have heated during the charging process, as the battery
cells may have suffered dangerous damage.
• Do not use batteries which have suffered curvature or deformation during the charging
process or which show other non-typical symptoms (gassing, hissing, cracking…).
• Never fully discharge the battery pack (recommended depth of discharge max. 80%)
A complete discharge of the battery pack will lead to premature ageing of
the battery cells.
11
Page 12

12
Charging the Battery
Identify all the parts packaged in the carton against the parts list. Remove all protective
materials and place parts on a non-abrasive surface to avoid scratching. Please contact
your dealer if anything is missing. Improper handling or assembly may result in damage
to the chainsaw sharpener or serious injury through faulty assembly.
Assemble the chainsaw sharpener on a stable, non-abrasive surface such as worktable to
avoid damaging the item.
Charging the battery pack
The battery is protected from exhaustive discharge. An integrated protective circuit
automatically switches off the equipment when the battery is flat.
Warning! Do not actuate the On/Off switch any more if the protective circuit has tripped.
This may damage the battery.
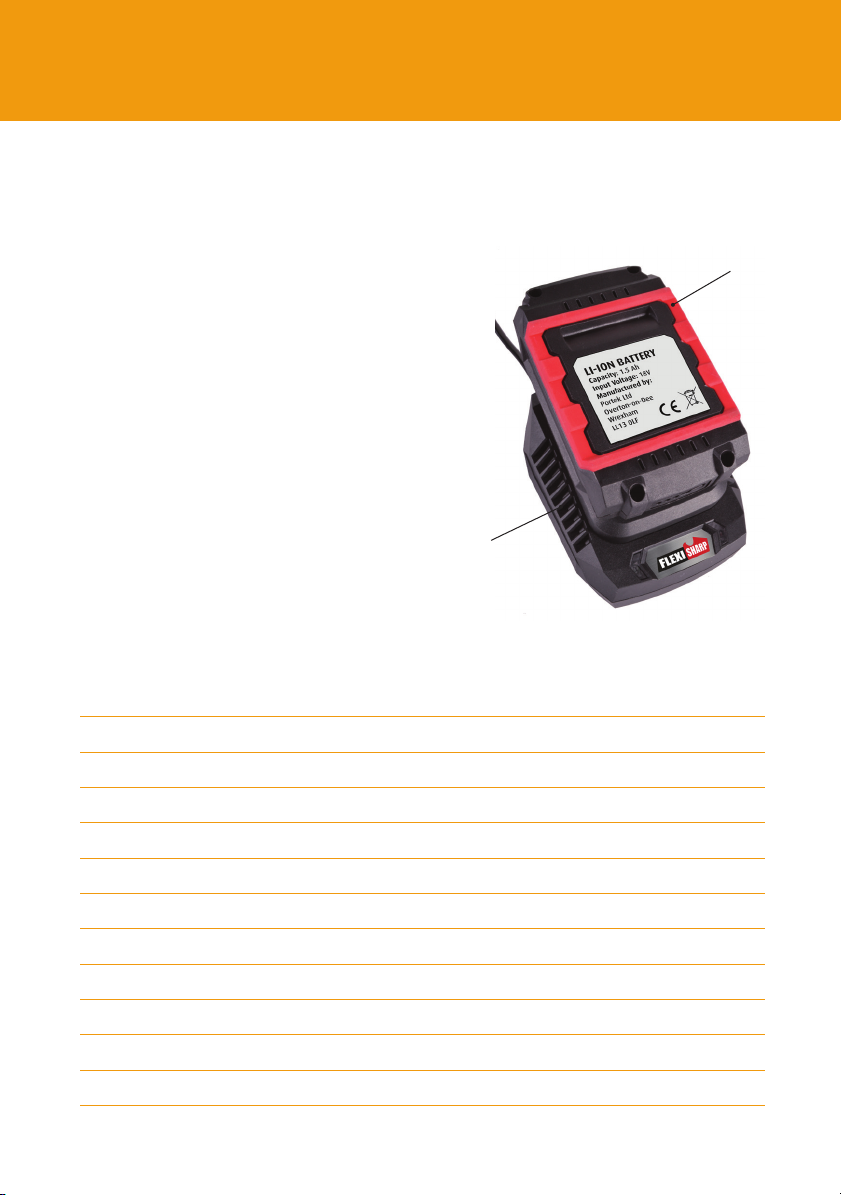
1. Remove the battery pack from the equipment, pressing the
pushlock button downwards to do so.
2. Check that your mains voltage is the same as that marked on the
rating plate of the battery charger. To ensure that the battery pack
provides long service you should take care to recharge it promptly.
You must recharge the battery pack when you notice that the power of the chain
sharpener drops. You can additionally see the level of charge by looking at the battery.
Battery release
Press button for battery
charging condition
It has a battery check function activated by pressing as shown in picture below. Three bar
led advises power level. It is advised to recharge the battery when it reaches 1 led only.
Never fully discharge the battery pack. Never fully discharge the battery pack by leaving
a used battery for extended time without a small amount of charging. This may cause
the battery pack to develop a defect. Always store with 1 or 2 led’s worth of charge for
optimum life of battery.
Page 13

Assembly
The Flexisharp is supplied partly assembled, please assemble the machine
as follows:
1. Remove the large locking wheel from the chain guide assembly and place the bolt end
through the hole in the unit base. Replace the locking wheel on to the bolt and adjust to the
required angle before fully tightening. When installing the Flexisharp on to a work bench,
make sure that the locking screw is easily accessible.
Chain clamp
assemby
Locking wheel
Tension nut
13
2. Remove the plastic tension nut from
the end of the tension cable. Pull the cable
through the chain guide clamping piece and
replace the plastic tension nut.
Work Surface Mounting
3. Place the unit base on to a solid, level work surface. Ensure the base extends out far enough
over the edge so that the chain can hang freely and you have easy access to the vice angle
adjustment screw underneath. Mount the base to the work surface through the two 9mm
(1/4") mounting holes (bolts not included).
4. The Flexisharp is assembled and ready for use. The pre-installed grinding wheel is for
universal use. To replace a grinding wheel see “Grinding Wheel Replacement” section
Page 14

14
Operation
WARNING: Before installing the battery, make sure the
!
machine is switched ‘OFF’ to avoid unintended starting.
1. Clean the chain before sharpening. Inspect the chain for
the most worn-out cutter tooth and start sharpening with
this tooth. The most worn-out tooth is important in order
to sharpen all other teeth to the same depth!
2. Lift up the chain stop, position the chain and secure the chain between the clamping piece of the
chain guide assembly. Fold down the chain stop and pull back the first cutter tooth against the
chain stop. Make sure the chain is between both guide boards so that the chain can not tilt
to the side.
3. Check the necessary filing angle according to the specifications for the chain. Adjust the filing
angle on the chain guide assembly to 25° - 30° or to the required angle and tighten the
locking screw.
4. Lower the motor housing so that the grinding
wheel skims the chain tooth. Hold it in this
position while you tighten the screw so that
the grinding wheel will only go down to that
point, fix this position with the locking screw.
5. Switch ‘ON’ the Flexisharp by pressing firmly.
Use the handle to bring the grinding wheel
down towards the chain tooth. As you bring
down the motor housing the tension cable
will automatically clamp the chain between
the metal chain boards.
6. After sharpening one tooth, turn off
the machine. Lift the motor housing,
to release the clamp boards, and move
the chain so that the next link is positioned against the chain
stop. Mark the first cutter tooth with chalk, then sharpen every
second tooth in one direction. Repeat this process until you have
sharpened all of the links set up for this angle.
7. Change the cutting angle to 30° or to the required angle of
the opposite direction of the remaining chain cutter teeth.
ON/OFF switch
Page 15

Changing Grinding Wheels
To avoid malfunction, damage or injury always use a suitable grinding wheel that is in good
condition. Do not use a grinding wheel that is chipped, cracked, or worn. You can check if the
wheel has cracks not visible to the human eye by hanging it up by the central hole and tapping
it with a non-metal object (ie: screwdriver handle). If it is in good condition it will produce a
metallic sound. A dull sound indicates a crack or break. Make sure before carrying out any work
on the Flexisharp that the battery is removed.
Replacement Portek Grinding Wheels are available:
4.5mm thick wheel part number 092/01 and 3.2mm thick wheel part number 092/02
Changing the Grinding Wheel
1. Switch off the machine and remove battery.
2. Remove the grinding wheel protective cover by
unscrewing the 3 retaining screws.
3. Hold the grinding wheel firmly with one hand and
loosen the locking nut.
4. Remove the old grinding wheel and replace with
a new one. Tighten the fixing nut but do not over
tighten - over tightening may cause the wheel
to crack or break. Only use grinding wheels with
an outer diameter of 108mm and inner diameter
of 23mm. The grinding speed of replacement
grinding wheel must meet or exceed the RPM
rating of the machine.
5. Remount the grinding wheel protective cover
onto the machine. Never operate the Flexisharp
without the grinding wheel cover in place. Keep
away from the wheel when it is turning, and
make sure no one is standing close, in the line
of the wheel rotation trajectory. If the grinding
wheel vibrates on start up, turn off the machine
immediately and check that the grinding wheel is
mounted securely!
6 Never try to stop the grinding wheel with your
hands, even if you are wearing safety gloves. The
grinding wheel will cut through gloves and your
hand, causing serious injury. Replace the grinding
wheel when it grinds down to a diameter
of 95mm.
Remove cover
Release wheel by loosening locking nut
Replace with new wheel and ensure
protective shield is in place.
15
Page 16

16
Parts List
PART NO. DESCRIPTION QTY
1 Screw ST4.2 × 14 10
2 Motor cover 1
3 Motor 1
4 Power cord 2
5 Cord Pressing Plate 2
6 Grinding Wheel Base 1
7 Switch Plate 1
8 Switch 1
9 Screw 1
10 Nut 1
11 Housimg 1
12 LED Light 1
13 LED Cover 1
14 LED Clamp 1
15 Screw ST4.2 × 8 2
16 Grinding Wheel 1
17 Grinding Lock Cap 1
18 Grinding Wheel Cover 1
19 Screw ST4.2 × 14 3
20 PCB 1
21 Nut M8 1
22 Gauge Cover 1
23 Torsion Spring 1
24 Pull Rod 1
25 Cable 1
26 Screw ST4.2 × 12 2
27 Baffle 1
28 Screw ST5.5 × 20 3
29 Wash 1
30 Steel Bushing 1
PART NO. DESCRIPTION QTY
31 Swing Arm 1
32 Chain Stop 1
33 Washer φ4 1
34 Screw M8 x45 1
35 Chain Saw Frame 1
36 Screw ST4.8×10 2
37 Inner Clamping Piece 1
38 Chain Wheel 2
39 Outer Clamping Piece 1
40 Pad 2
41 Transmission Shaft 2
42 Nut M5 1
43 Nut 1
44 Nut M6 1
45 Screw M6 1
46 Nut 1
47 Base 1
48 Washer φ9 2
49 Pivot Pin φ9 1
50 Right Battery Pack Interface 1
51 Contact Stand 1
52 Baffle 1
53 Discharge Protection Plate 1
54 Battery Pack 1
55 Left Battery Pack Interface 1
56 Cable 1
57 Chain Stop 1
58 Spring 1
59 Clamp 1
60 Screw ST4.2 × 12 4
Page 17

Parts List
17
Walking forward,
take slow sweeping
movements to clear long
grass and brush with ease
WEAR SAFETY
PROTECTION AT
ALL TIMES!
Page 18

18
Technical data
Technical data
Battery voltage 20 V
Input power: 50W
No-load speed 6500 min-1
Grinding disk diameter 108 mm
Grinding disk thickness max. 3.2 mm
hole diameter 23 mm
Weight without battery/Charging 1.7 kg
equipment
Sound pressure level LpA 54.1 dB (A)
Sound power level LWA 67.1 dB (A)
Uncertainty K = 3 dB (A)
The sound levels have been determined in accordance with noise measuring process
Li-ion
Main Unit
Do not dispose of electrical appliances as unsorted municipal waste, use
separate collection facilities. Contact your local government for information
regarding the collection systems available. If electrical appliances are disposed of in
landfills or dumps, hazardous substances can leak into the groundwater and get into
the food chain, damaging your health and well-being.
Li-ion Battery
Do not dispose of batteries in household waste, fire (risk of explosion) or
water. Damaged batteries may damage the environment and your health
if toxic fumes or liquids leak out. Dispose of batteries in discharged condition.
Dispose of batteries in accordance with the local regulations. Take batteries to an
old battery collection point where they will be recycled in an environmentally
friendly manner.
Page 19

Troubleshooting
PROBLEM POSSIBLE CAUSES POSSIBLE SOLUTIONS
LED light isn’t bright, 1.Battery not charged 1.Charge the battery
machine cannot work 2.Battery pack not 2.Remove and insert
installed properly the battery pack again
3.Switch damaged 3.Replace with new
switch
LED light is bright, 1.Connection terminal 1.Replace the
machine cannot work loose connection terminal
2.Motor damaged 2.Replace a new motor
LED light isn’t brightφ 1.Connection terminal 1.Replace the terminal
machine is working loose connection
2.Motor damaged 2.Replace a new motor
Machine shaking 1.Wheel shaking or 1.Replace the wheel
damaged
2.Wheel nut loose or 2.Replace the nut
slipping
19
Page 20

20
Declaration of Conformity
EC Declaration of Conformity
Portek Ltd, Bryn Hall, Knolton Bryn, Overton on Dee,Wrexham, LL13 0LF
declare that the machinery named below conforms to the requirements of
EC Council Machinery Directive, Annex II
Designation of Machinery: Portek Chainsaw Sharpener
Relevant EC Council Directives:
2006/42/EC (Machinery Directive)
2014/30/EU (Electromagnetic Compatibility Directive)
Applied Harmonised Standards:
BS EN ISO 12100:2010
BS EN 62841-3-4:2016
The unit complies with all applicable Essential Requirements of the Directives.
Signature of Manufacturer's Representative:
Portek Ltd.
Bryn Hall, Knolton Bryn
Overton-on-Dee
Wrexham, LL13 0LF
Tel: 01234 889 454
Fax: 01234 889 464
General enquiries
Email: info@portek.co.uk
Declaration made by Steve Morris
Design Engineer on 02/07/2018.
0718 ©2018 Portek Ltd
 Loading...