

Pool Systems Avenger Instruction Manual

Instruction
Manual &
Warranty

SECTION 1. INTRODUCTION
SECTION 2. ASSEMBLY COMPONENTS
SECTION 3. INSTALLATION INSTRUCTIONS
SECTION 4. IMPORTANT ADJUSTMENTS
SECTION 5. CARING FOR YOUR AVENGER
SECTION 6. AVENGER
®
SPARE PARTS
SECTION 7. REPLACING THE DIAPHRAGM
SECTION 8. TROUBLESHOOTING GUIDE
SECTION 9. AVENGER® TWO-YEAR WARRANTY
SECTION 10. PURCHASE DETAILS
SECTION 11. OWNER REGISTRATION
This product is protected by one or more of the following:
AUST. PATENT APP. 2008902923
AUST. DESIGN APP. 11325/2008
AUST. DESIGN APP. 11326/2008
AUST. INNOVATION PAT. 2006100934
INTERNATIONAL PATENTS PENDING
www.avengerpoolcleaner.com
Avenger
®
and AutoPilot® are registered trademarks
Warranty claims valid only with proof of purchase receipt.
POOL SYSTEMS - AVENGER® INSTRUCTIONS
1. INTRODUCTION
Congratulations on your purchase of the Avenger
®
High Performance Pool Cleaner.
The Avenger® has been designed to be user friendly and low maintenance providing
years of trouble free service.
Dependable - contains just one internal moving part.
Quiet Operation - proven diaphragm technology.
Efficient - cleans the walls as well as the floor.
Economical - no additional running cost powered by suction from your filtration system.
Durable - no nuts, bolts, screws or gears.
Performance - AutoPilot® revolutionary steering and buoyancy control.
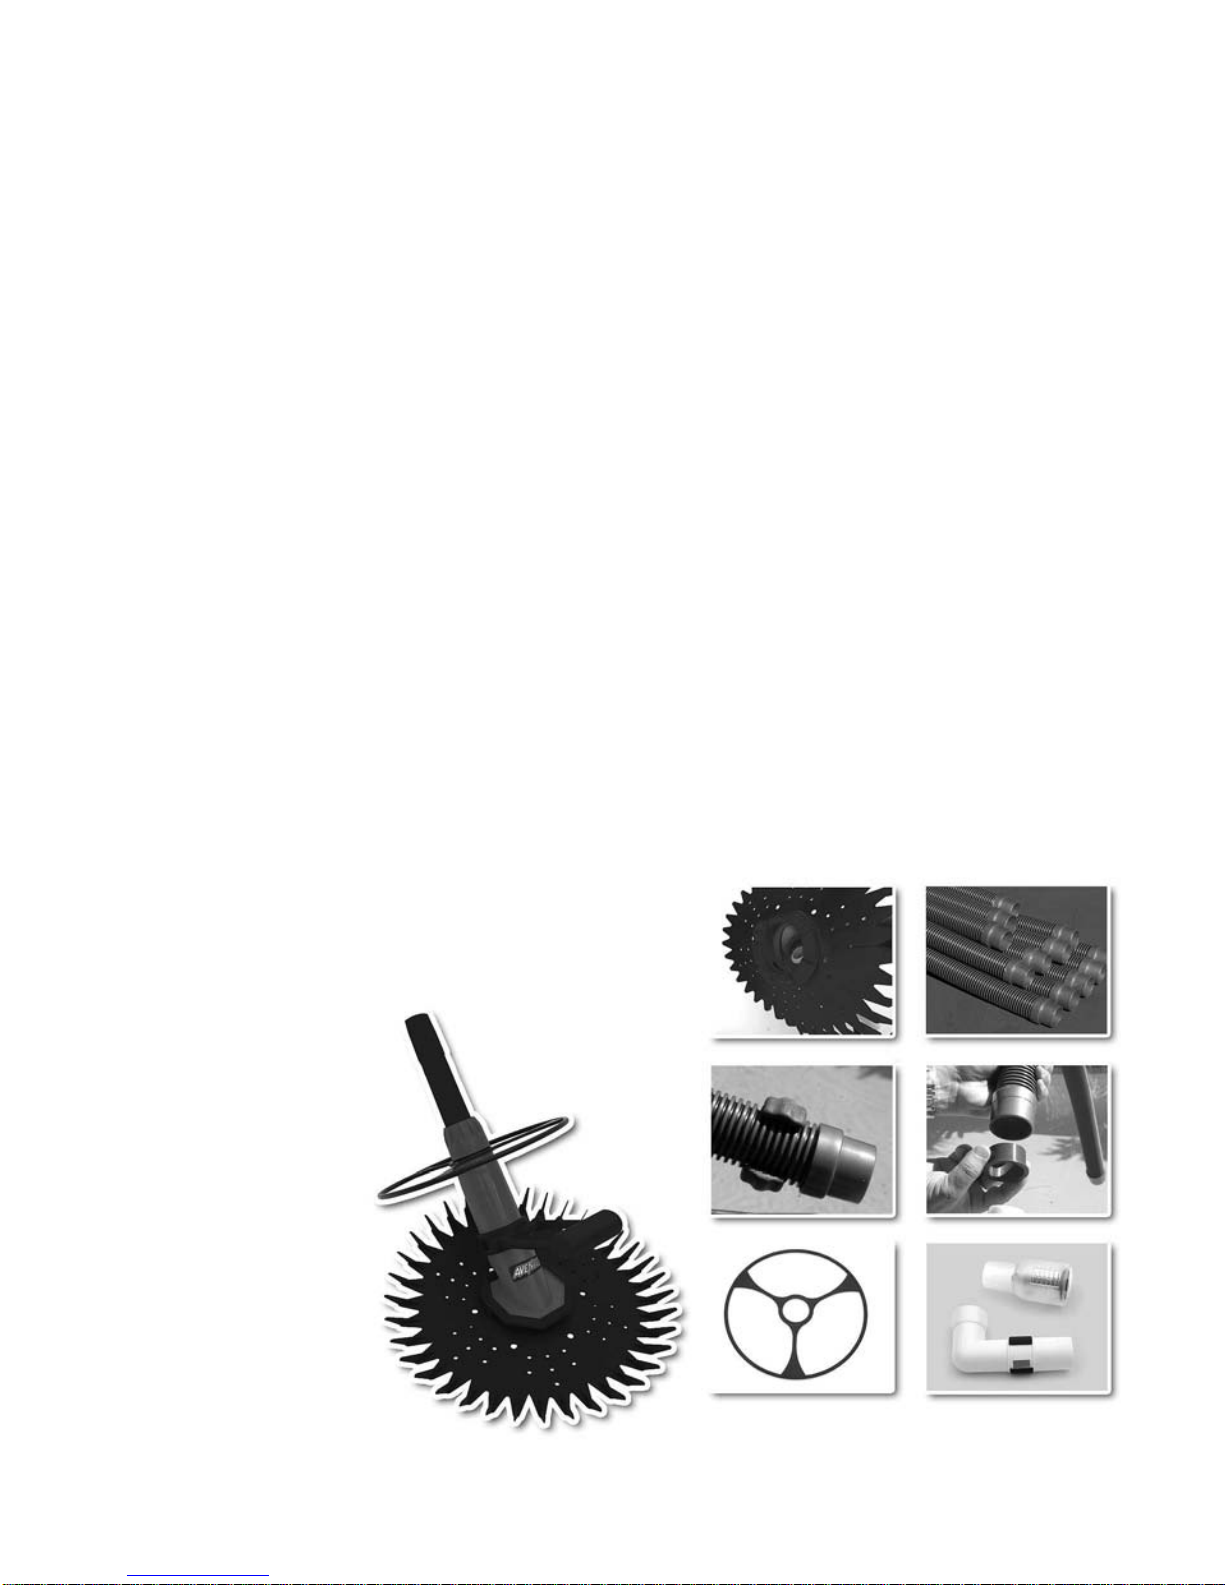
2. ASSEMBLY COMPONENTS
Please check the following items have been provided:
a. Avenger® Head Assembly (inc. Disc & Foot)
b. Hose (Twelve Lengths Total)
c. Hose Weight
d. Leader Hose Adaptor
e. Deflector Wheel
f. Weir Cuff Elbow/
Speed Controller
g. Suction Tester
h. Instructions
If any items are missing please contact your place of purchase.
a.
c.
e.
b.
d.
f.
g.
3.
3. INSTALLATION INSTRUCTIONS
Your Avenger
®
has been designed for simple installation and low maintenance.
Step 1. Clean or backwash your filter and empty the skimmer basket.
Step 2. Turn off all ancillary equipment such as waterfalls, spa seats and spillover
spas while the Avenger® is operating to ensure maximum performance.
Check the main drain opening is plugged (vacuum position) in the skimmer
box and, if applicable, secondary skimmers are closed. Your Avenger® needs
good suction to work correctly. Contact your place of purchase if you have
questions or require advice about ancillary equipment.
Step 3. Unpack your Avenger® near the skimmer box of the pool.
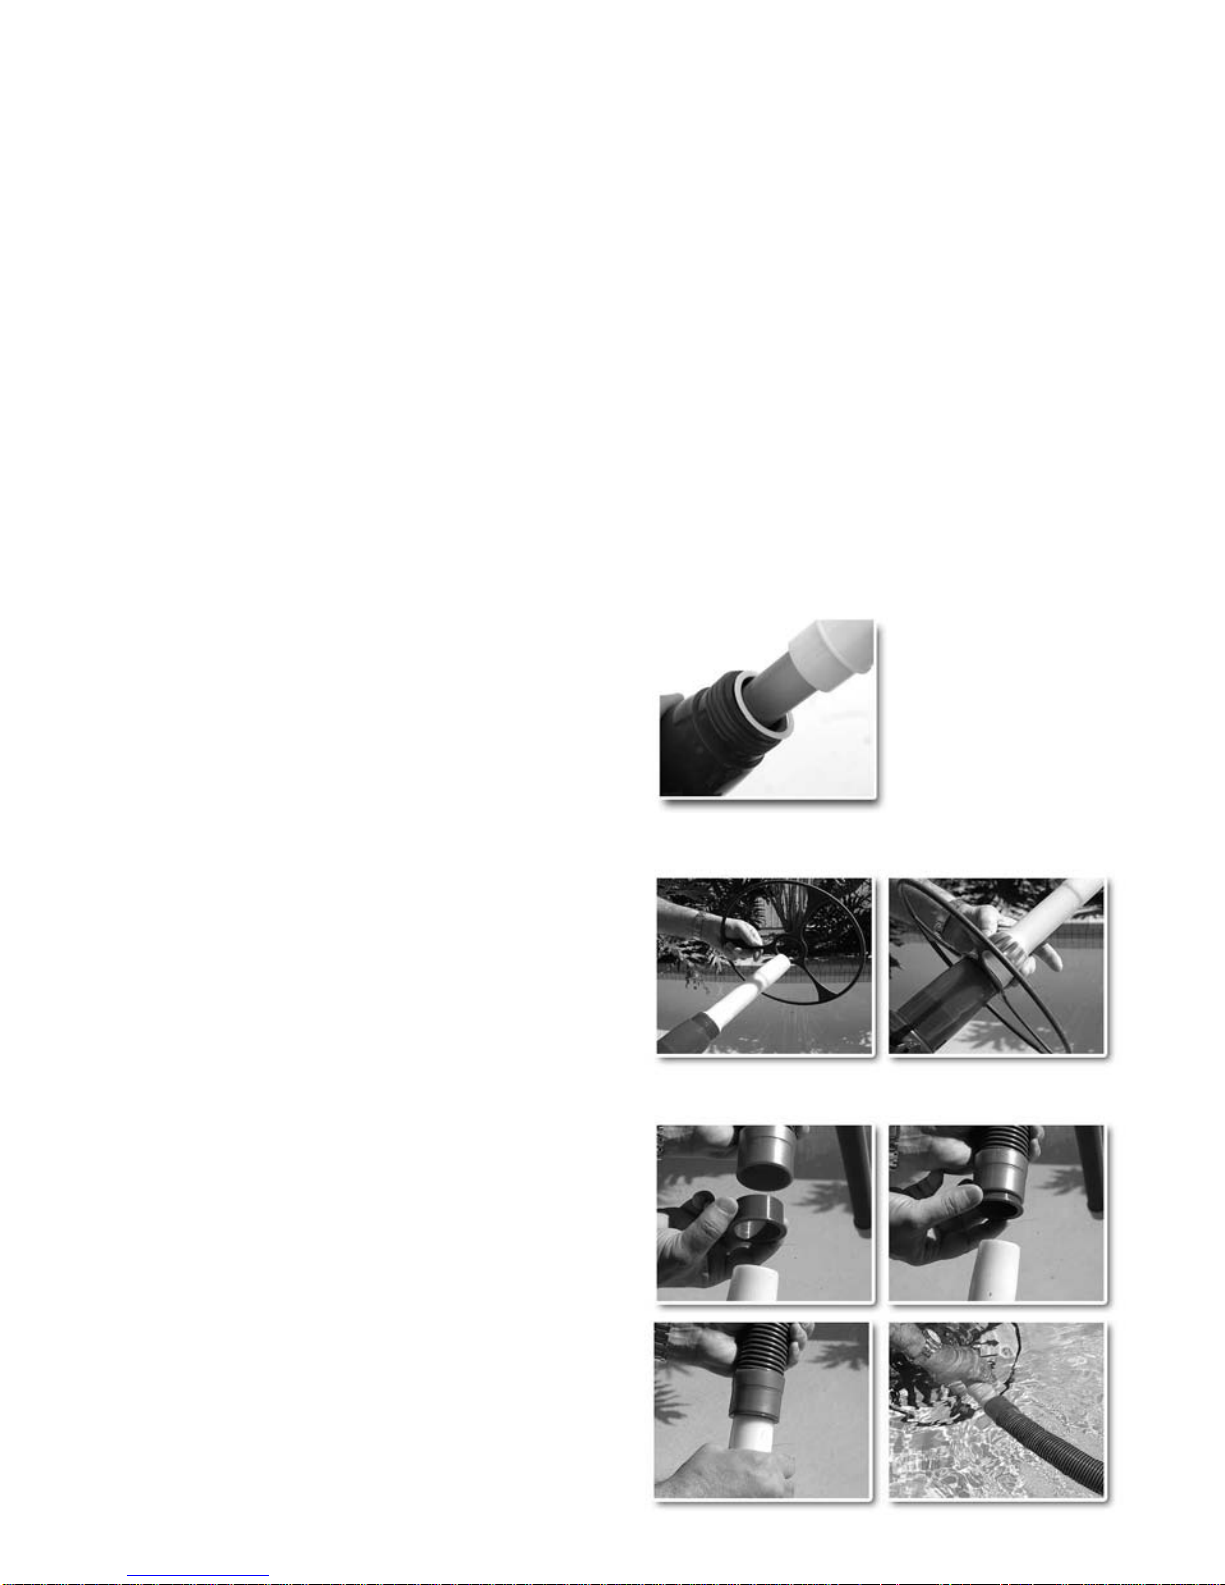
Step 4. Check the Teflon slip ring is placed
between the top of the Upper Body
and the Outer Extension Pipe.
Step 5. Place the Deflector Wheel onto the
main body of the Avenger Head
Assembly and screw the hand nut
tight to hold in place.
Step 6. Push the Leader Hose Adaptor into
the end of one of the hose lengths
and attach to the Avenger® Head.
Join together and attach the
remaining hose needed from the
skimmer to the furthest point plus
one additional hose length.
4.
 Loading...