

Page 1

Warranty Card
EQUI
P
M
ENT
EQUI
P
M
ENT
o wner s
manu
al
Titan Series
Diatomaceous Earth
Filtration Systems
Poolrite Equipment Pty. Ltd.
A.B.N. 11 001 674 004
Poolrite Equipment Pty. Ltd. Poolrite Equipment Pty. Ltd.
415 Creek Road, 6 Forsyth Close,
P.O. Box 520, P.O. Box 7055,
Mt. Gravatt. QLD. 4122 Australia
Wetherill Park. N.S.W. 2164 Australia
Telephone: (07) 3323 6555 Telephone: (02) 9729 0166
Facsimile: (07) 3323 6500 Facsimile: (02) 9729 2759
Poolrite Equipment Pty. Ltd. Poolrite Equipment Pty. Ltd.
15 Yiannis Court, Unit 10/16 Ledgar Road,
Springvale. VIC. 3171 Australia Balcatta. W.A. 6021 Australia
Telephone: (03) 9547 4188 Telephone: (08) 9344 3871
Facsimile: (03) 9547 1023 Facsimile: (08) 9345 3923
Poolrite Equipment Pty. Ltd. Poolrite Equipment Pty. Ltd.
36 Hugh Ryan Street, Unit 22, 761 Great South Road,
Garbutt. QLD. 4814 Australia Penrose. Auckland
Telephone (07) 4779 4880 New Zealand.
Facsimile (07) 4779 6714 Telephone: (09) 571 0210
Facsimile: 0800 766 574
Item No. 22510 (08/04)
Stella Print
Page 2

Warranty Card
Titan Series Filtration Systems
Poolrite Equipment Pty. Limited
Your Poolrite Filtration Equipment is
manufactured to the highest possible
standards and most up-to-date technology.
Accordingly the equipment carries the
following Warranty, should a fault occur
due to faulty manufacture or materials.
Important
In the event of a fault covered by
Warranty occurring, the Purchaser must,
in the first instance, contact Poolrite
Equipment Pty. Ltd. or the closest
authorised Poolrite Distributor.
1. All components in the Filtration
System (with the exception of the tank
part) carry 1 year (12 months) warranty
from the Date of Purchase by the
Owner.
2. (10 year extended warranty effective
from 1-1-93).
The Filter Tank Component is the most
important part of your Filter System. Due
to Poolrite’s Advanced Moulding
Technology the Tank Part carries a
special Extended Warranty of 10 years.
The terms of this Warranty cover Full
replacement of defective Filter Tank Part
for a period of 5 years (60 months) and
additionally for a further 5 years (60
months) the Tank Part will be replaced at
pro-rata cost from the date of purchase
by the owner. No claim in pursuance of
this Warranty will be recognised unless
received by Poolrite during the Warranty
period.
The “Tank Part” is defined as the Filter
Housing Moulding only, without any
attachments such as gauges, clamp
band, internal septums fittings or
plumbing, etc.
3. The Warranty is void if the following
are not adhered to:
• The equipment must be installed and
used in accordance with the instructions
supplied.
• The pump electric motor is not
covered by this Warranty in the case of
the water damage or damage caused
by extension leads.
• The pump motor must have proper
ventilation.
• The equipment is designed to be used
in swimming pool water, balanced in
accordance with the Langlier
Saturation Index with a pH of 6.8 to 8.0
that is regularly treated with a sanitising
system utilising chlorine either added
in compound form or generated in situ
in concentrations as recommended by
the relative State Health Departments.
Should other chemical treatment
systems or parameters be used,
Poolrite will not be responsible for
damage done by corrosion, scaling
or stress cracking of equipment or
for shortened filter cycles resulting
therefrom.
• The Pressure Gauge will not be
covered by Warranty if damaged by
water, if the gauge cover is not firmly
affixed.
• If, in the opinion of Poolrite, the
equipment has been subjected to
other than nor mal pool use, or
improperly serviced/maintained, the
Warranty will be void.
This Warranty is applicable to workmanship and materials. Poolrite will replace at
no charge, all parts returned freight paid,
which display faulty workmanship or
materials.
Poolrite Equipment Pty. Ltd. accepts no
responsibility for loss, damage or injury to
person or property arising from Warranty
failure of equipment, or installation of that
equipment, unless with the express
authority of Poolrite. Any repair or
replacement shall be provided by Poolrite
or its Authorised Distributors and this
Warranty shall not extend to any
expenditure otherwise incurred.
Operational Check Points
Weatherproof gauge cover is in position.
Filter pump should not be connected via extension leads.
At least 150mm clearance be provided at fan cowl end (rear) of motor for efficient
ventilation.
Should filter system be housed in an enclosure, provision must be made for
adequate ventilation.
Filter system must be installed in a position with effective drainage to guard against
potential flooding in heavy rain or malfunctions in plumbing.
A Diatomaceous Earth Filter system must not be run for any period without the
correct charge of Diatomaceous Earth or approved filter powder.
The pool water level must be at least half way up the skimmer box opening.
Make sure both skimmer box basket and pump basket are in place.
Do not operate the filter system in FILTER position unless the free chlorine level is
between 0.5 and 2.0ppm and the pH level is between 7.2 and 7.6 for concrete
pools and 6.8 and 7.2 for other types of pools.
Do not vacuum clean the pool when the valve is in BACKWASH position.
Important
Read the following instructions carefully to ensure trouble free efficient operation
of your filtration system for many years.
Failure to adhere to the above directions will void the Warranty.
Warranty Card
Name of Purchaser
Address
Purchased From
Date
Equipment and Model
IMPORTANT: This card must be filled in and
returned to Poolrite Equipment Pty. Limited
within 14 days of purchase to render the
Warranty effective.
Queensland Head Office
Sales & Export Brisbane
415 Creek Road,
P.O. Box 520,
Mt. Gravatt. QLD 4122
Telephone: (07) 3323 6555
Facsimile: (07) 3323 6500
Poolrite Equipment Pty. Ltd.
Unit 22, 761 Great South Road,
Penrose. Auckland
New Zealand.
Telephone: (09) 571 0210
Facsimile: 0800 766 574
Page 3

CONTENTS
Introduction 2
How a Diatomaceous Earth Filter Works 2
Delivery of your Diatomaceous Earth Filter 2
Filter Carton 2
Pump Carton 2
Installation Instructions 3
Starting Up Procedure 4
Priming the Pump 4
Starting the Filter 4
Filter By-Pass 5
Recirculate 5
Valve Closed 5
BackWashing 5
Diatomaceous Earth Quantity 5
Vacuum Cleaning 6
Maintenance Procedure 6
Clean Internal Septums 6
Trouble Shooting 7 & 8
1
Page 4
Introduction
The Poolrite Titan XL Range is designed for
a greater flow volume to the pool - where it
matters.
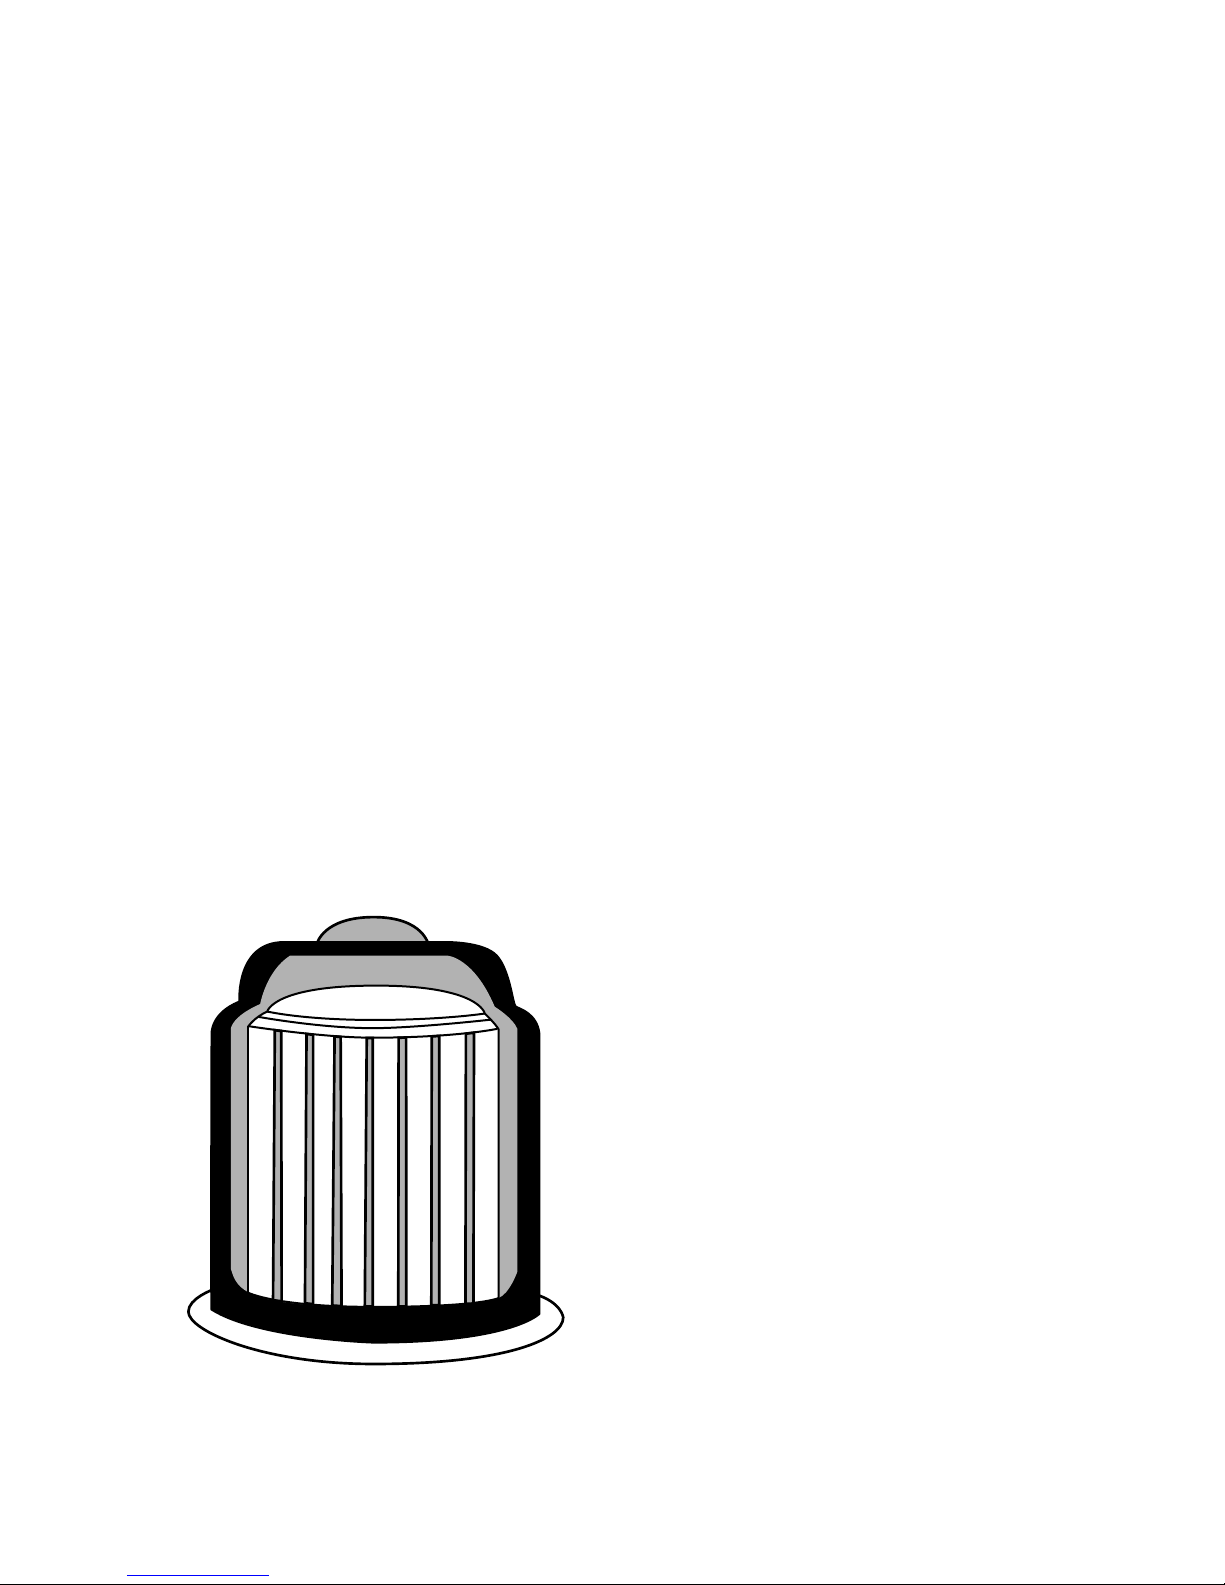
The filter tanks are made from a new
advanced “Engineering Polymer” material
enabling the Poolrite exclusive 5 year
Warranty on filter tanks. Poolrite’s
exclusive square “candlestick” septum
construction covered with “rapid flow”
tubular terylene material provides extra
long filter cycles and efficient backwashing.
The newly designed “multifunction”
control valve is extremely easy to operate
and is totally maintenance free.
The inbuilt sight glass gives positive
indication when backwashing is complete eliminates guess work and waste of pool
water.
All systems are fitted with the proven high
performance Poolrite Quietline pump,
featuring corrosion resistant design. All
equipment is weather proof constructed to
protect your valuable investment.
Australian design and manufacture is your
guarantee of continued after-sales back-up.
How A Diatomaceous Earth
Filter Works
The Diatomaceous Earth filter draws water
from the pool, via the pump and forces it
under pressure through the filter and back
into the pool.
Diatomaceous Earth is a fine white
powder made from skeletal remains of
microscopic organisms. The Earth is
retained in the filter by a special filter
cloth. It is the Diatomaceous Earth which
performs the filter function.
As the water passes through the Earth,
suspended particles are trapped within its
layers. As the quantity of particles
increases the passage of water becomes
restricted and the waterflow must be
reversed. When the cycle is rev ersed the
Earth with the trapped particles are
flushed out of the filter to the drain, in a
process called backwashing.
Delivery of your Diatomaceous
Earth Filter XL-40, 50, 60 & 80
Each Poolrite filter plant is delivered in two
cartons as follows.
Filter Carton
• A factory assembled filter system ready
for immediate installation.
• Two 40 x 40mm flexible couplings.
• Four 40mm stainless steel clamps.
• Poolrite multi-function valve complete
with backnut and ‘O’ Ring seals.
• Moulded baseplate.
• Moulded plumbing from valve to pump
outlet, completely assembled.
• Owners Manual and Warranty Card.
Pump Carton
• Poolrite pump motor set, ready for
immediate installation.
• Two swivel couplings complete with
backnut and ‘O’ Rings.
2
Page 5
Installation Instructions
Connecting the Pump
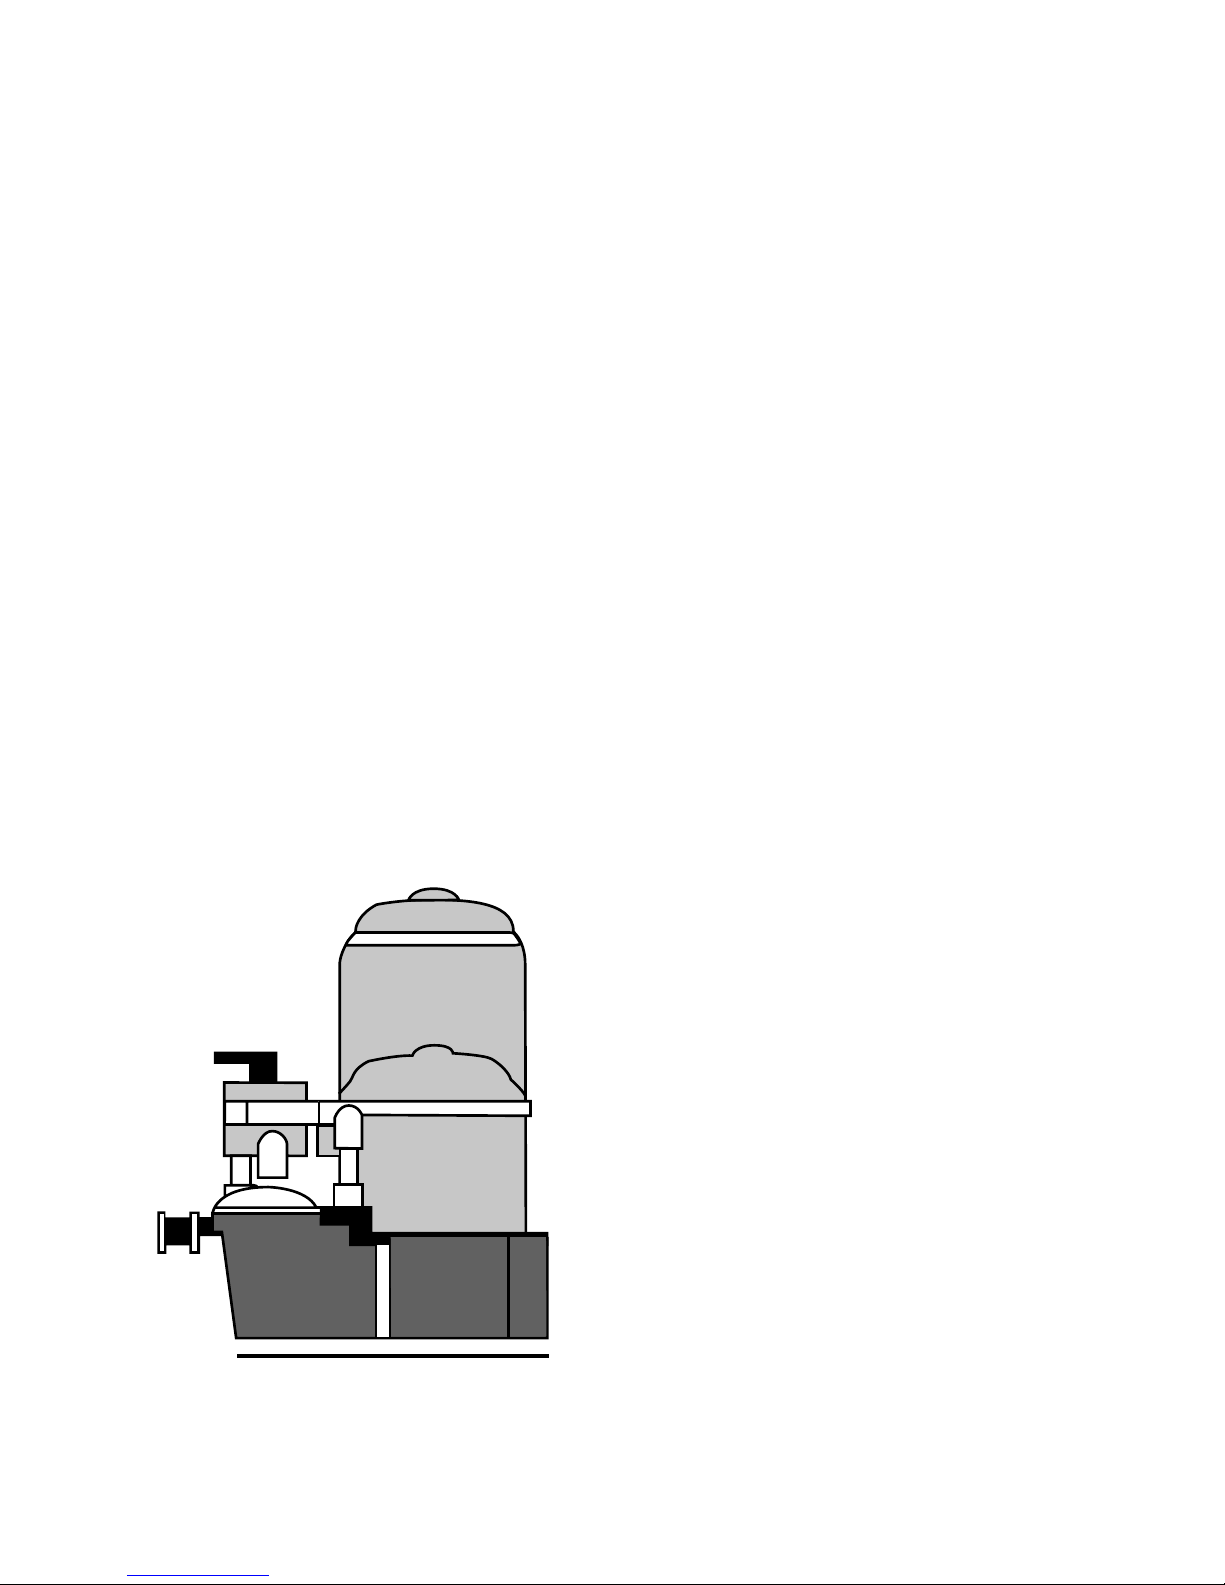
1. Fix baseplate permanently into position
on a concrete slab.
2. Position the slot in the filter tank over
the key, on the baseplate raised section.
3. Place the Poolrite Pump on the baseplate so that the two elongated holes
in the pump mounting skids fit over the
two moulded spigots on the base.
4. Connect the multifunction valve via the
two 50mm backnuts to the filter inlet
and outlet.
5. Connect the plumbing assembly to the
inlet on the valve, and the outlet of the
Poolrite Pump set using the backnuts
on the ends of the plumbing assembly.
Important
Ensure the ‘O’ Rings provided for the
backnuts on the valv e and plumbing are
in position before attaching to each outlet.
Tighten all backnuts by hand only, DO NOT
USE TOOLS.
Connecting the Filter System
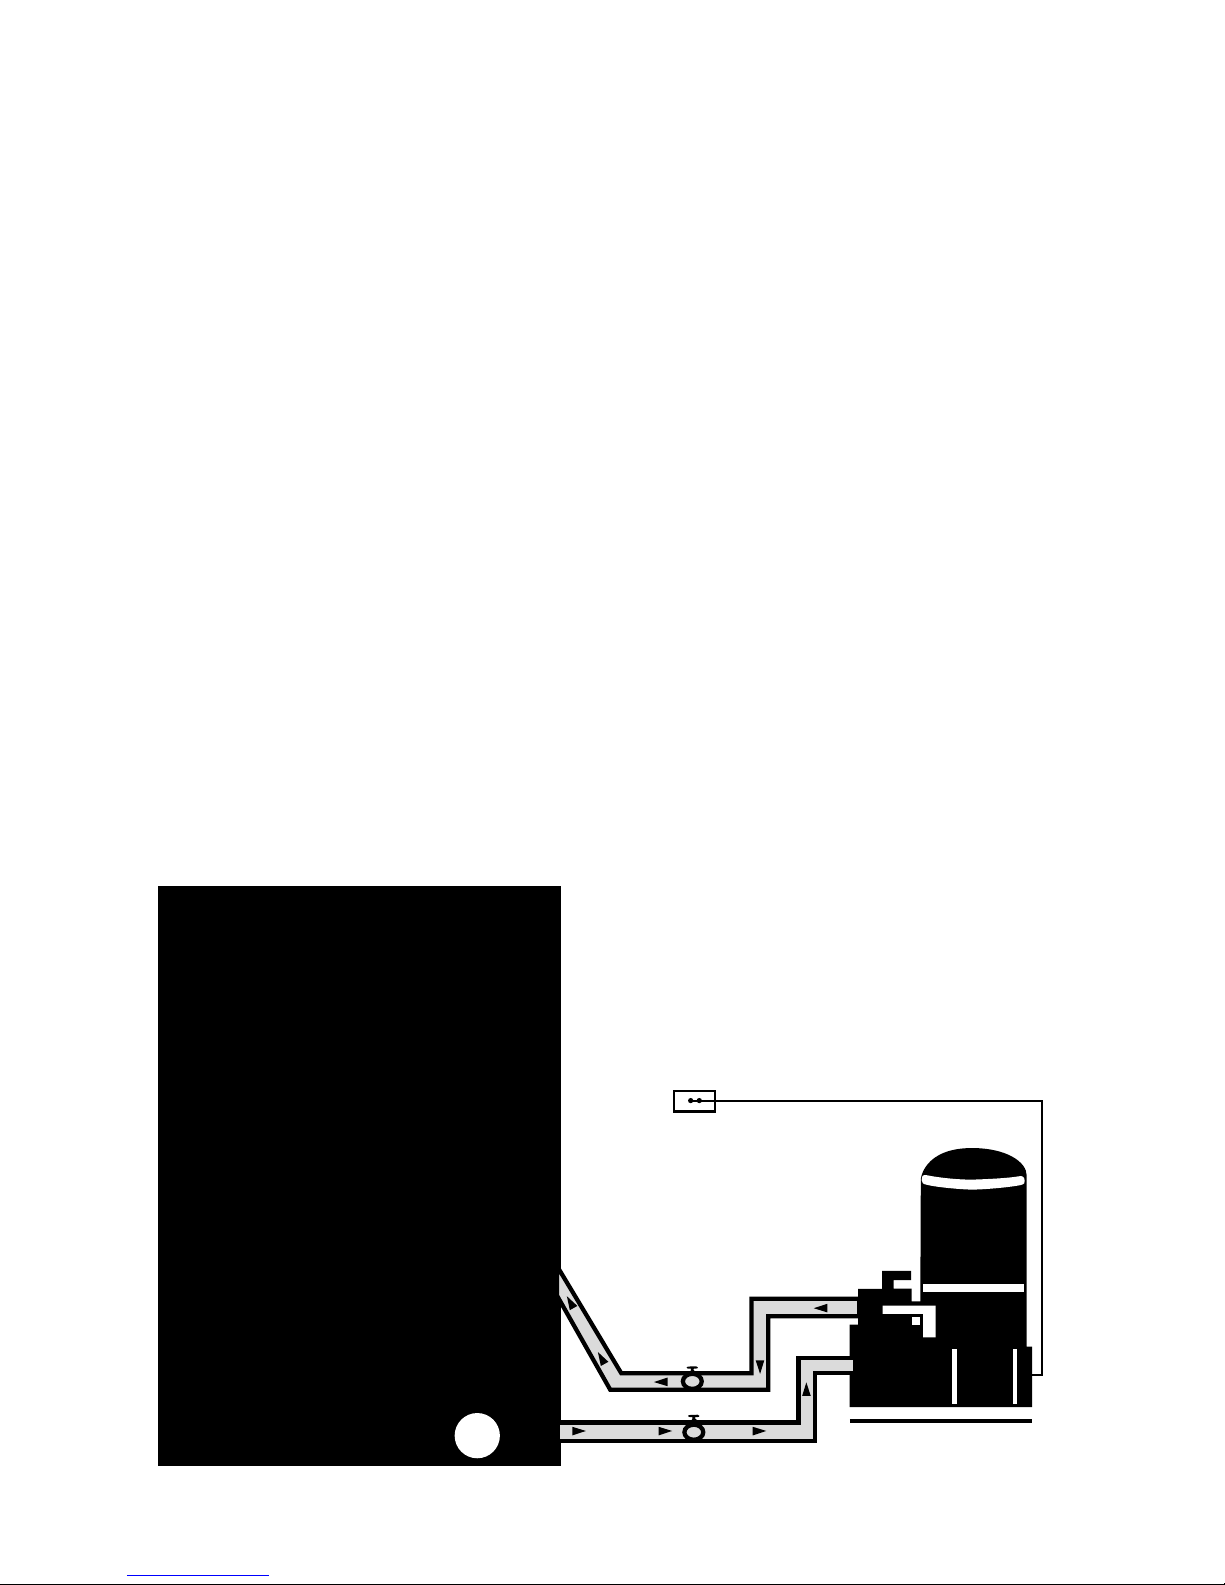
Only three connections are required via
flexible couplings and stainless steel
clamps.
1. Pump to skimmer box.
2. V alv e to waste (drain).
3. V alv e to return-to-pool.
Do not switch on at this stage.
3
Page 6
4
1
3
Starting Up Procedure
Priming the Pump
For pump installation above the water level
only. If the pump is installed below the
water level proceed to “Starting the Filter”.
1. Remove clear pump lid then fill the pump
bowl with water to the suction inlet level.
2. Check the rubber pump lid seal is
clean and in the groove.
3. Replace clear lid.
4. Tighten by hand.
Starting the Filter
1. Set multifunction valve to FILTER
position.
2. Open air release v alv e on top of filter
tank several turns (do not remove).
3. Ensure all plumbing lines to and from
the pool are clear (i.e. shut off v alv es
are OPEN).
4. Switch ON the pump.
5. Observe the reaction through the clear
lid of the pump. The pump will at first
draw the water in surges until all air
within the pump bowl and suction piping
from the pool, has been expelled.
If the air is still present after approximately
3 minutes check the following:
• Ensure clear pump lid is correctly
tightened onto the rubber seal.
• Check the flexible rubber coupling
clamps on the pump suction inlet are
tight.
• Check correct water level is in the pool.
• Check skimmer box weir is free and
not jammed.
• Clear all leaves and debris from
strainer basket in skimmer.
• If air is still present the suction piping
to the pool should be checked.
6. When the filter tank is full (i.e. when the
water escapes through the air release
valve) close the valv e, do not o ver tighten.
7. Switch pump OFF.
8. Mix the specified amount of
Diatomaceous Earth with water in a
bucket forming a slurry. See char t
page 5 for correct quantity.
9. Switch pump ON.
10.
Slowly pour the slurry into the skimmer box
to ensure ev en distribution within the filter .
The filter system is now filtering the
pool and the pressure gauge reading
in FILTER range.
As the process of filtering continues
the unwanted solids build up and the
pressure gauge rises accordingly.
When the pointer reaches the RED
section on the dial, the filter must be
cleaned by BACKWASHING.
4
Page 7

Filter By-Pass
The pool is often overfilled by rain and to
return it to it’s normal level proceed as
follows:
1. Switch pump OFF.
2. Set multifunction valve to WASTE
position.
3. Switch pump ON. The excess water is
discharged to waste.
4. Switch pump OFF.
5. Set multifunction valve to FILTER
position.
6. Switch pump ON. Filter is now operating
normally.
Recirculate
With multifunction valve set in
RECIRCULATE position the pool or spa
water is recirculated via the pump only
without passing through the filter. This
condition can be useful to provide extra flow
for boosting spa jets or providing added
circulation for heating.
Valve Closed
The pump must be switched OFF when
multifunction valve is in CLOSED position.
This setting is used to prevent the filter
contents draining back through the pump
when pump lid is removed to enable
cleaning of the hair and lint pot basket.
Backwashing
1. Switch the pump OFF.
2. Select BACKWASH position on multifunction valve.
3. Switch pump ON - the pool water will
now pass through the filter septums in
the reverse direction which will flush
the unwanted sludge and diatomaceous
earth to waste.
4. Observe water clarity in valve sight
glass and when clear switch pump
OFF.
5. Return valve to FIL TER position and
switch pump ON for approximately
20 seconds.
6. Repeat steps 1, 2, 3, 4 and 5 at least
six times until sight glass remains
clear.
7. Return valve to FIL TER position and
switch pump ON.
8. Open air release valve.
9. Repeat STARTING THE FILTER par
5 to 10.
Important: Before and after backwashing
check that pool water level is correct.
How Much
Diatomaceous Earth
To Use
Range Diatomaceous Earth Weight
XL40 906 Grams/32 Ounces
XL50 1133 Grams/40 Ounces
XL60 1360 Grams/48 Ounces
XL80 1530 Grams/54 Ounces
5
BACKWASH
FILTER
CLOSED
WASTE
RECIRC
Page 8
Vacuum Cleaning
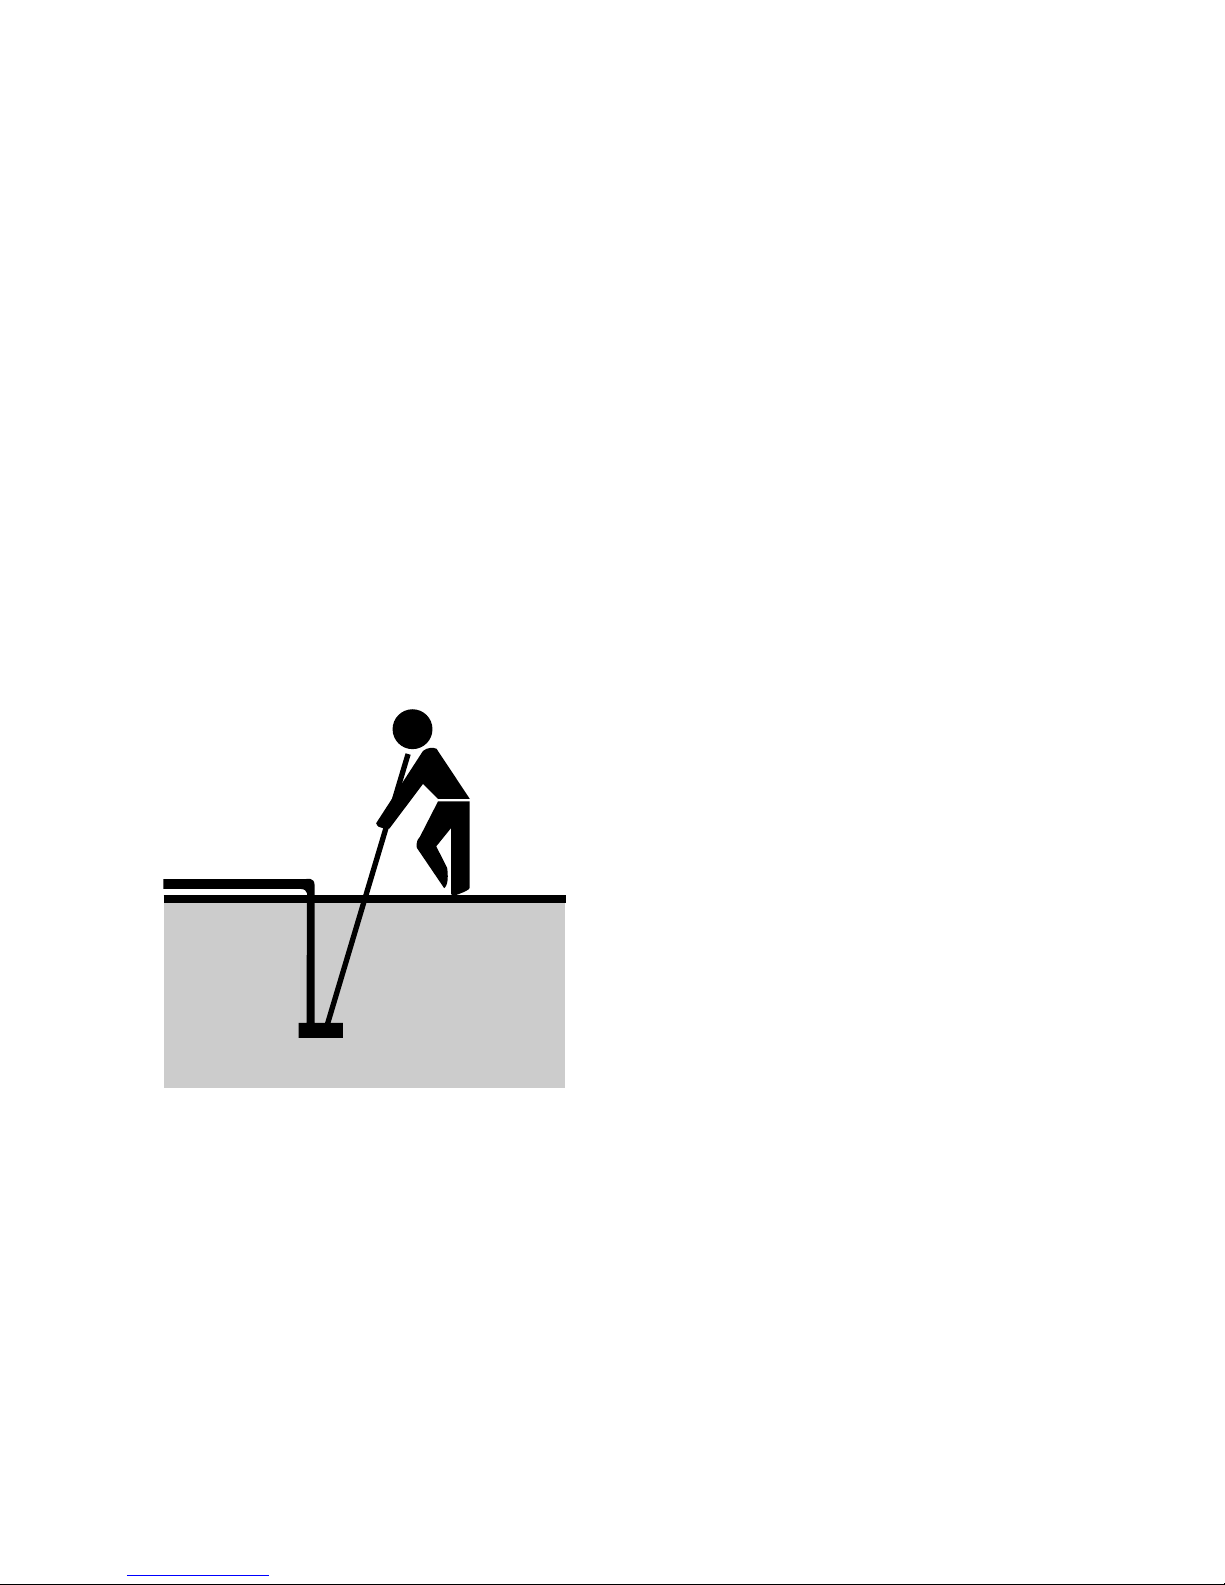
1. Switch pump OFF.
2. Set multifunction valve to FILTER
position.
3. Position vacuum plate in skimmer box
after first checking MAIN DRAIN
CONTROL PLUG is screwed into
bottom main drain port.
4. Expel air from vacuum hose. This can
be done simply by connecting hose to
vacuum head and submersing it in the
pool. Switch pump ON then place
other end of hose on return to pool
inlet thus filling hose with water and at
the same time expelling air. Switch
pump OFF.
5. Fix handle to vacuum head and
connect free end of hose into skimmer
box vacuum plate.
6. Switch pump ON and proceed to
vacuum clean the pool.
A useful hint: when lowering the pool
level with multifunction valve set in WASTE
position only, vacuum cleaning may be
performed at the same time as under this
condition the filter will not collect sludge
and debris as it will be all discharged to
waste.
Important: Under no circumstances must
the vacuum cleaning operation be
performed with the multifunction valve set
in BACKWASH or RECIRCULATE
positions.
Maintenance Procedure
Your Poolrite Diatomaceous Earth Filter
system should be serviced regularly every
6 months as follows to ensure trouble
free efficient operation.
Clean Internal Septums
1. After backwashing and with multifunction
valve still in BACKWASH position
switch pump OFF. If pump is below pool
water level, close valve on pump
suction line.
2. Loosen air relief valve to allow w ater
to drain from tank to waste.
3. Remove the metal clamp band that
joins the filter tank top and bottom.
4. Lift UP internal septum manifold
assembly from its seat on the vertical
white pipe in the tank bottom.
5. Place the top of the manifold on the
ground. The individual septums
(candles) can now be removed by
gripping each septum at the manifold
end and then pulling to one side. The
septum will simply clip out of the
manifold.
6. Septums should be individually hosed
and annually soaked in detergent and
hot water, then scr ubbed with a
bathroom nail brush to remove algae
etc. from pores of cloth.
7. Under some circumstances cloth may
become clogged with calcium. This can
be removed by soaking in 10 parts
water to 1 part hydrochloric acid for
approximately 1 hour. A large plastic
rubbish bin can be used for this purpose.
8. After cleaning, replace septums in
manifold by bumping in with palm of
hand or block of wood and then
reposition in tank.
9. Clean tank flanges and ‘O’ Ring
thoroughly then coat ‘O’ Ring with
petroleum jelly and fit to tank bottom.
10.Replace tank top and refit clamp band
– do not over tighten.
11.Open valve on pump section line if
pump is below water level.
12.Refer to “Starting Up Procedure”.
6
Page 9

Trouble Shooting Pools
Black Spot Algae in Fibreglass Pools Add hydrochloric acid to lower pH to yellow
on test kit. Brush black spot. When algae
has disappeared use soda ash to raise pH
back to 6.8. Black spot algae will always
reappear if pH is allowed to rise too high.
Note: Do not swim in pool whilst pH is low.
Black Spot Algae in Concrete Pools Add algaecide as per manufacturer’s
recommendation, adjust pH, and brush
black spot algae with stainless steel algae
brush. The main cause of this algae is
ineffective chlorine due to high pH.*
Green Algae Check and adjust pH.
Check chlorine level.*
Superchlorinate.
Brown Algae Check pH. Add algaecide.*
Milky Water Check pH and adjust. Chec k filter is operating
correctly. Increase running time.
Filter Pressure Builds Up Rapidly • Clean septums if necessary.
• Check correct filter powder load.
• Acid wash septums if necessary (see
section on Maintenance Procedure).
• Check eyeballs in pool are in open position.
• Check for algae in pool.
Air Bubbles Back to Pool • Check sufficient water in pool.
• Check suction pipe coupling backnut is
hand tight.
• Check pump lid ‘O’ Ring is clean, lubricated
with petroleum jelly and correctly fitted
and lid is tight.
7
Page 10

Water Drains Back to Pool • Check hair and lint pot lid for leaks.
when Filter Switched Off • Check backwash valve for leaks.
• Check air release valve for leaks.
• Check coupling backnuts are hand tight.
Filter Powder Returning to Pool • Check filter septums for holes or damage.
Pump Loses Suction Power • Check strainer baskets to ensure they are
not choked with debris. Don’t forget there
are two strainer baskets which need
emptying regular ly. One is located in the
skimmer box, whilst the other is housed in
a special compartment within the pump
assembly itself. This strainer safeguards
the impeller against debr is which gets
past the skimmer’s basket.
Frequently this basket immediately in front
of the pump gets overlooked, and servicemen are called to investigate malfunctioning
equipment which is put right simply by
emptying debris from strainer baskets.
Get in the habit of checking them regularly,
perhaps at the same time as the backwashing operation is to be carried out.
Remember: Be sure motor is switched off
before opening up the pump’s strainer
basket compartment.
During the compartment opening and
basket emptying process, air will have
entered the filtration system. This should
be released immediately after switching
the motor back on again to re-start
filtering.
• Check filter condition from pressure
gauge and clean if necessary.
* If a Salt Water Chlorinator is fitted • Check and adjust pH and Cyanuric
stabiliser levels, then superchlorinate.
• Check/clean electrodes.
• Check/adjust salt levels .
8
 Loading...