

Page 1
Across Pool
Volleyball/Badminton Game
72776
770 Del Paso Road, Sacramento, CA 95834-0308
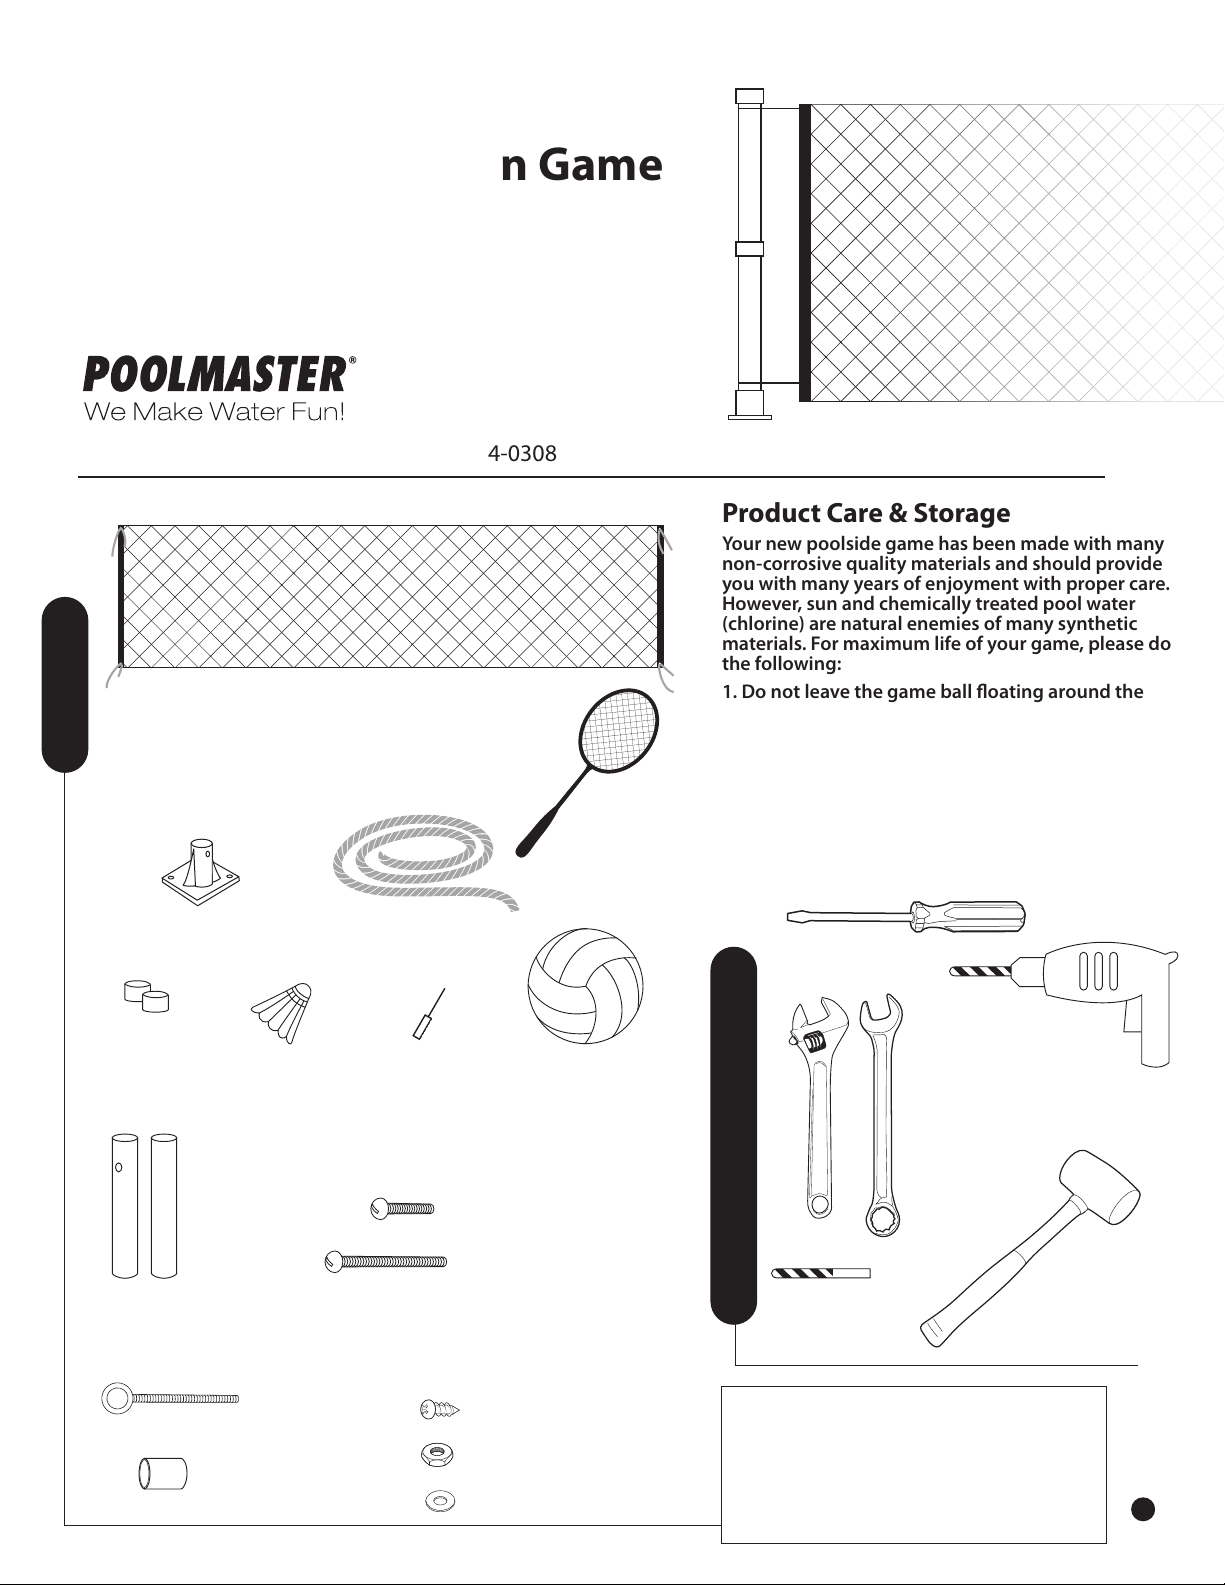
Volleyball Net w/rope ties
on each corner (extends up to 26’)
Contents
Product Care & Storage
Your new poolside game has been made with many
non-corrosive quality materials and should provide
you with many years of enjoyment with proper care.
However, sun and chemically treated pool water
(chlorine) are natural enemies of many synthetic
materials. For maximum life of your game, please do
the following:
1. Do not leave the game ball oating around the
pool when not in use.
2. After use, wash away the chlorine pool water with
plain water using a garden hose.
3. When not in use, store your game in a dry place
away from direct sunlight.
Rail Connectors (2)
Caps for
Upright
Poles (2)
2 pc. Upright
Poles (2)
Eyelets (2)
1” Couplings (2)
8 ft. Ropes (4)
10-24 x 1” Bolts
¼-20 x 1 ¾” Bolts
Badminton
Rackets (4)
VolleyballBall NeedleBirds (4)
Set Screws #8 (4)
Hex Nuts (12)
Washers (2)
Flathead Screwdriver
Electric Drill
⁄” Open or Box Wrench
or Adjustable Wrench
Rubber
Recommended Tools
⁄” Drill Bit
Need Assistance?
Call our Customer Service Line:
Mallet
800.854.1492
Visit our website @ poolmaster.com
eMail us @ [email protected]
11111301776-4
1
Page 2
Cap
6
Assembly Instructions
Upright
Pole
1” Coupling
#8 Set
Screws
Hex Nuts
2
1
7
3
Net
Ties
1” Bolts
1 ¾” Bolt
Rope
Net
Eyelet/Pole Detail
Hex Nut
Washer
4
Eyelet
Connector Detail
Diagram A Diagram B
5
1” Bolts
w/ Hex
Nuts
¾” Bolt
1
w/ Hex Nut
Pool Upright
Support
8
Pool
Top Rail
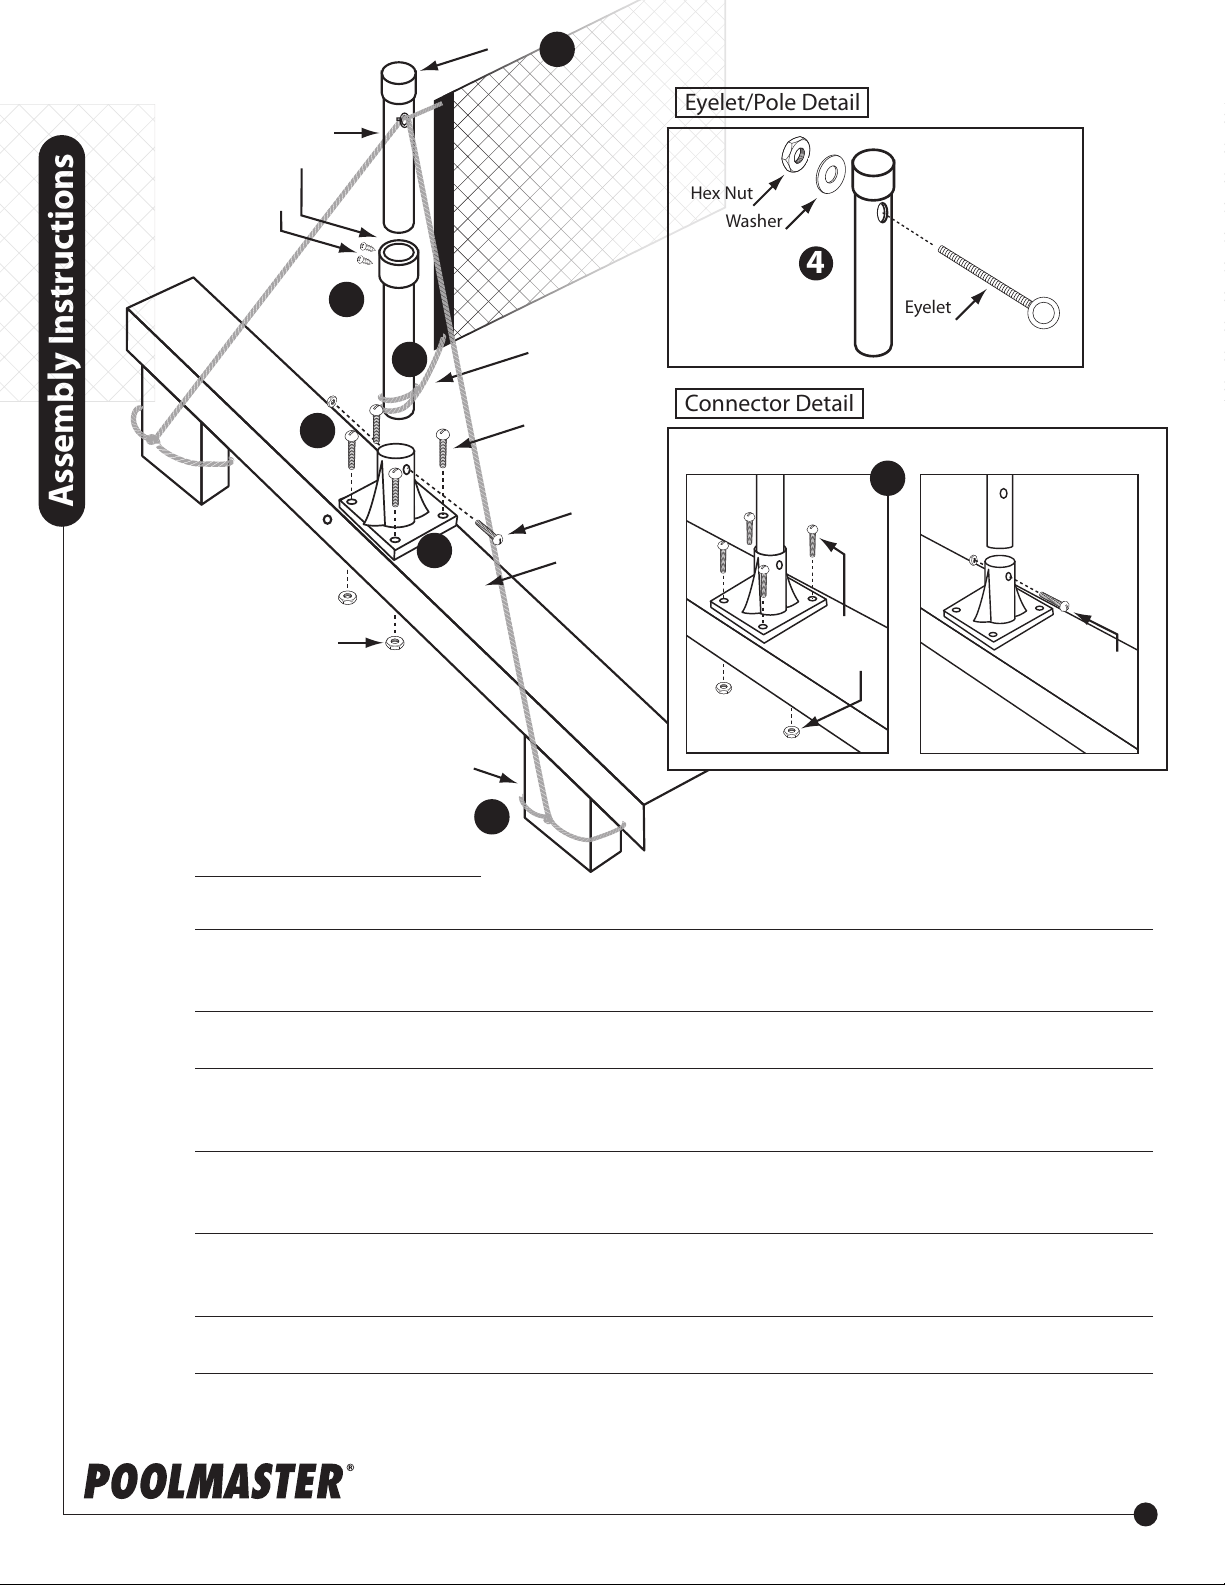
Step 1
•Secure Coupling between two upright poles and secure with 2 Set Screws. Repeat for other set.
Step 2
•Situate the game on the pool top rail at your desired location. Using the holes in the Rail Connector
as a guide, drill eight ⁄" in top rail, four holes per connector.
Step 3
• Attach the connectors to the pool and secure with (8) 10-24 Nuts and Bolts. (Figure 5-A)
Step 4
•Insert Eyelet into the top holes on the Upright Pole Support (see Eyelet/Pole Detail) and fasten with
Washer and Hex Nut (repeat for other side).
Step 5
•Insert the Upright Pole into the Rail Connector, secure wih ¼" x 1 ¾" Bolts (repeat for other side.)
(Figure 5-B)
Step 6
• Extend the Net across the pool, pull tight and tie Net Ropes to the top of each pole through the
Eyelets. Net can be shortened by rolling on pole or lengthened by extending the Rope Ties.
Step 7
•Tie net ropes to the bottom of each pole.
Step 8
• Tie two 8ft. Ropes to the Eyelet at the top of the Upright Pole and extend diagonally and tie to the Pool
Upright Support (repeat for other side).
poolmaster.com
2
 Loading...