

Page 1
Super Combo
Volleyball/Badminton
Game
72708
770 Del Paso Road, Sacramento, CA 95834-0308
Net
Contents
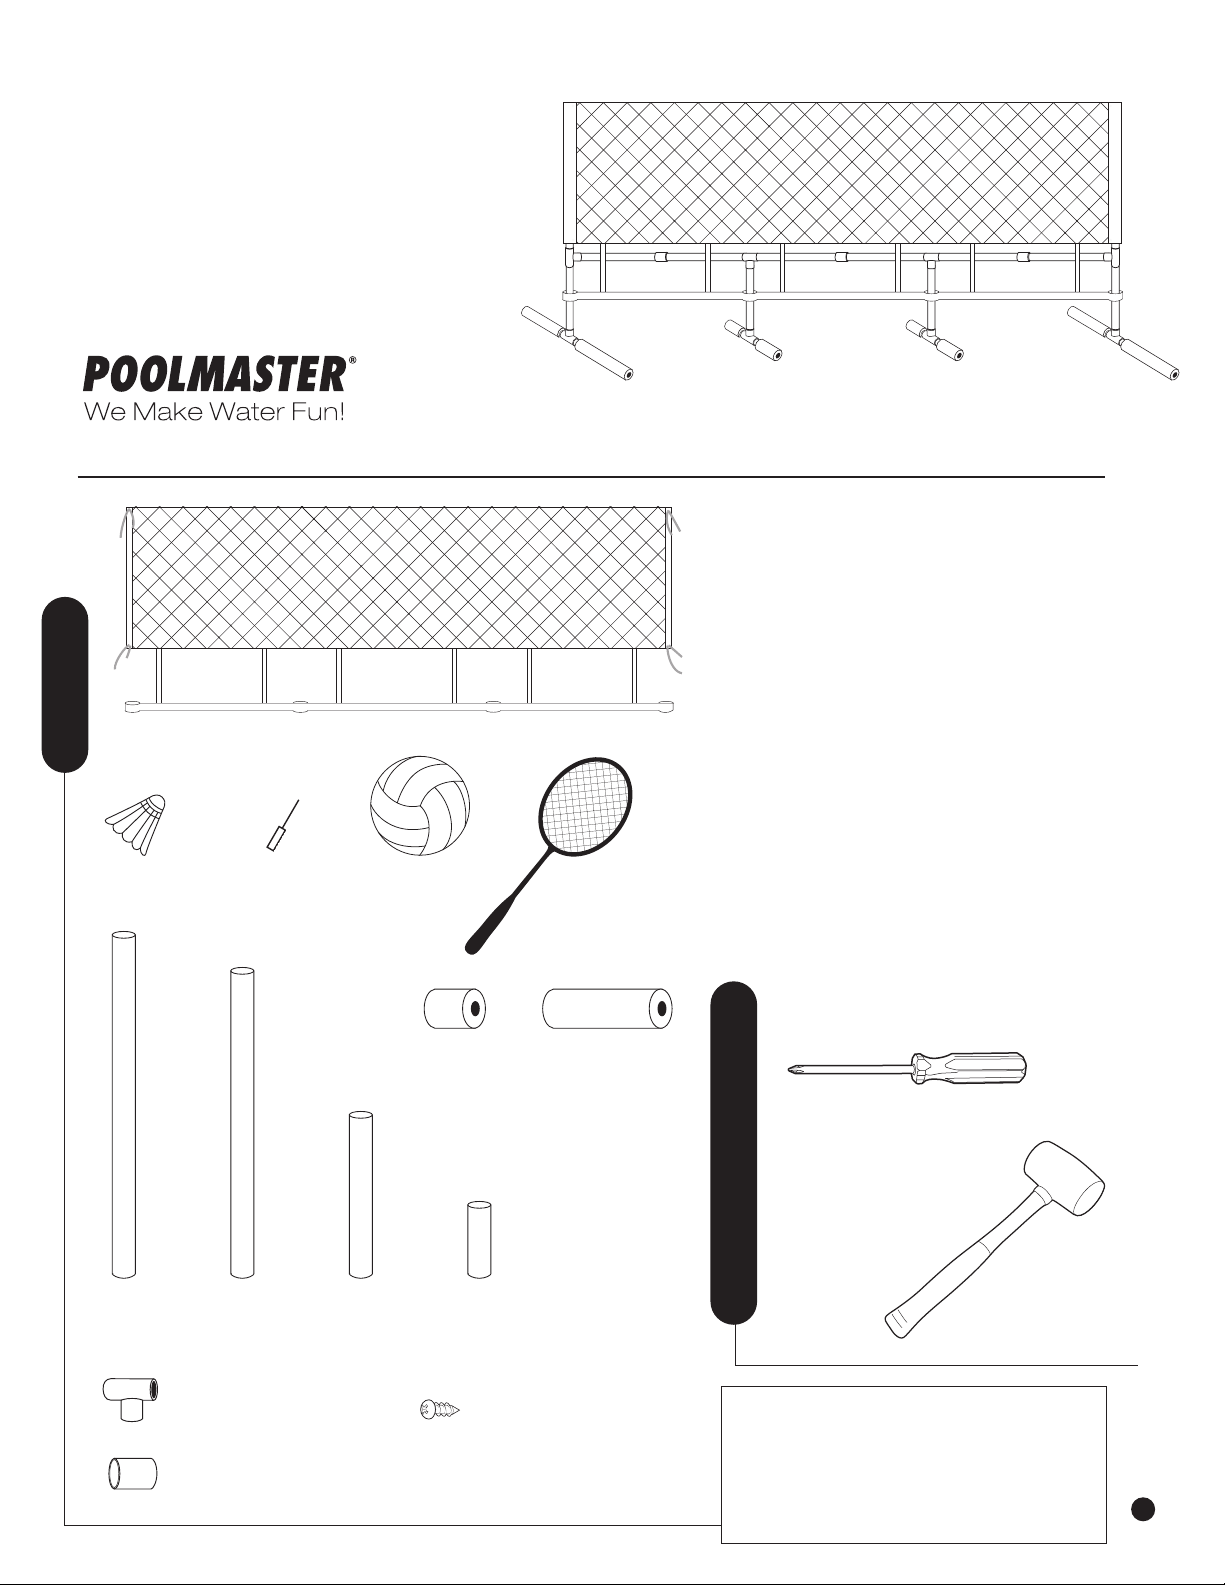
VolleyballBall NeedleBirds (4)
Product Care & Storage
NOTE: The parts of the frame are made of PVC pipe
and PVC glue may be used to secure all connections.
Your new poolside game has been made with many
non-corrosive quality materials and should provide
you with many years of enjoyment with proper care.
However, sun and chemically treated pool water
(chlorine) are natural enemies of many synthetic
materials. For maximum life of your game, please do
the following:
1. Do not leave the game ball oating around the
pool when not in use.
2. After use, wash away the chlorine pool water with
plain water using a garden hose.
3. When not in use, store your game in a dry place
away from direct sunlight.
Badminton
Rackets (4)
15"
Poles (6)
Tee Connectors (8)
½" Couplings (3)
14"
Poles (6)
9 ½"
Poles (4)
8" Foam
Floats (4)
4" Base
Poles (4)
Set Screws (30)
3" Foam
Floats (4)
Phillips Screwdriver
Rubber
Recomended Tools
Need Assistance?
Call our Customer Service Line:
Mallet
800.854.1492
Visit our website @ poolmaster.com
eMail us @ [email protected]
11101301708-3
1
Page 2
Step 1
•Lay out all the materials from the box in a neat fashion, because sizes of PVC poles are
similar it is recommended that a permanent marker is used to write on the PVC poles
differing from 14’’ horizontal poles from the 15’’ upright poles.
• Note: The use of a rubber mallet may be necessary to push the PVC Pipe all the way into
the Couplings and Tee Connectors. This will ensure proper t of the volleyball net on the
frame. Failure to push the PVC pipe all the way into the coupling and tee connectors may
result in the net either being too tight or not tting on the frame.
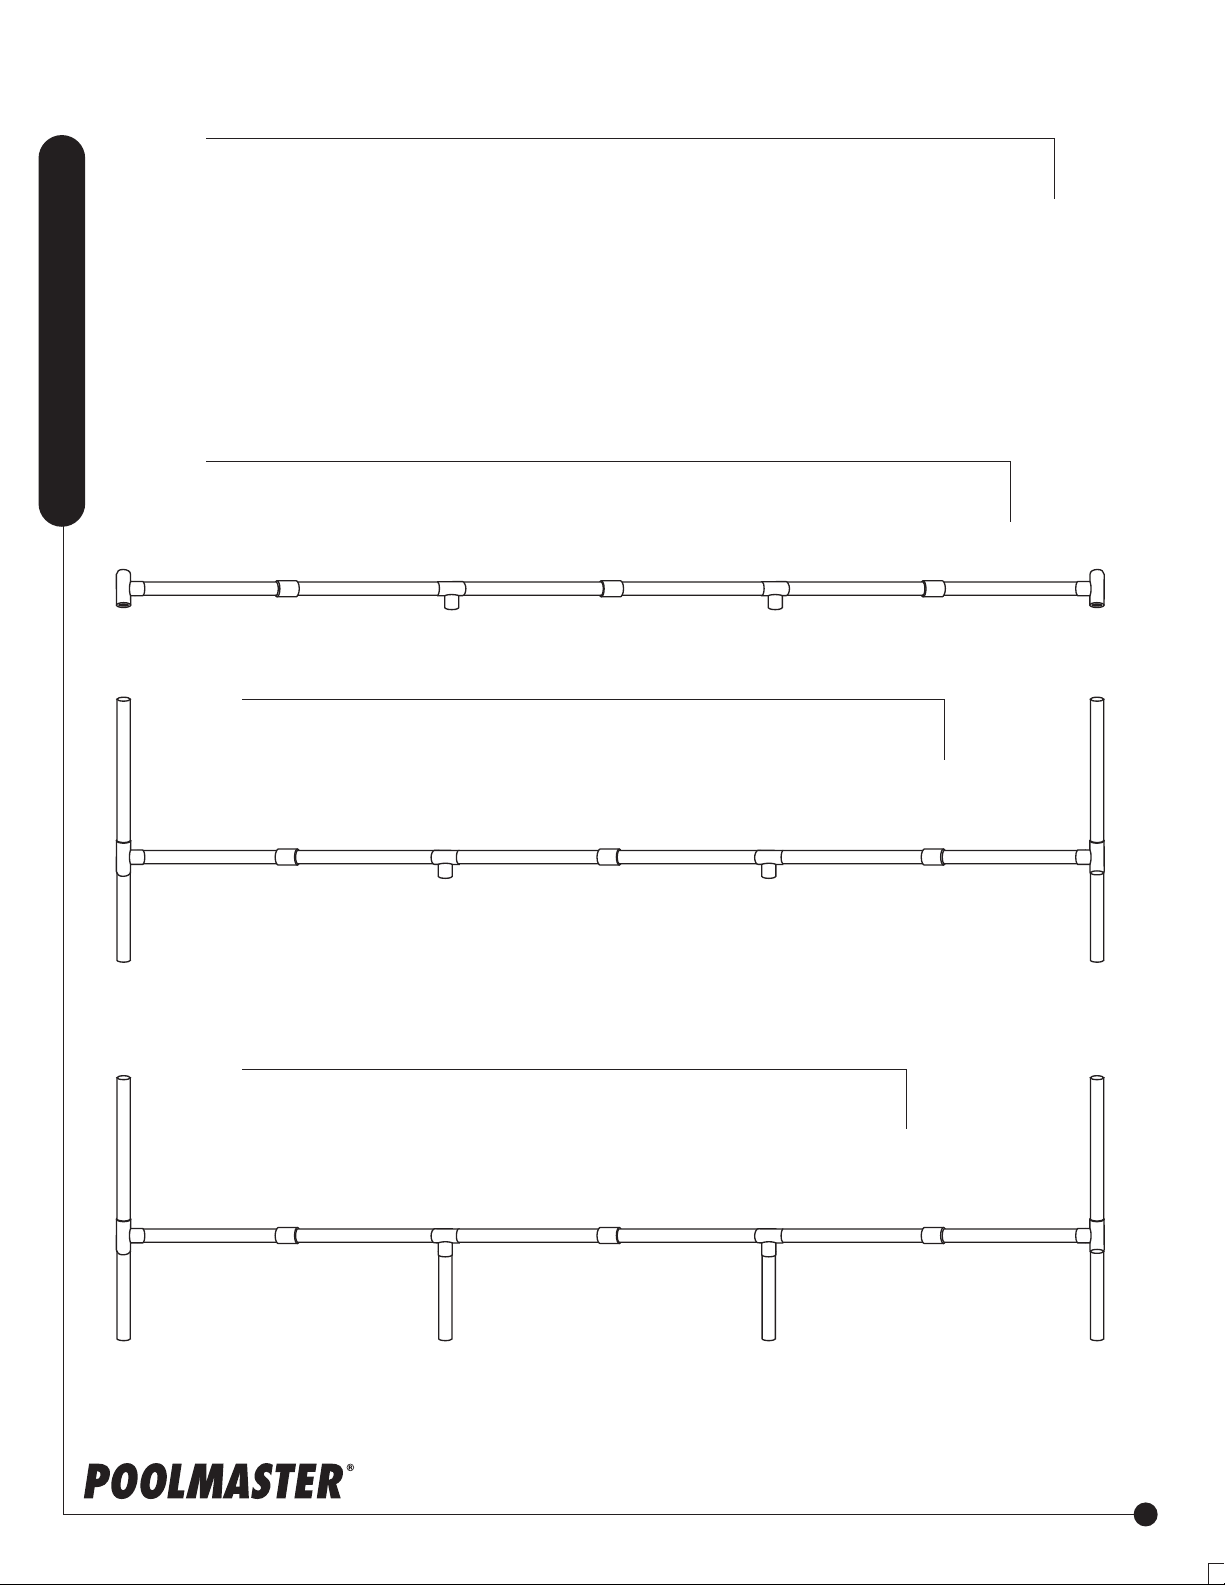
Step 2
•On a at surface, begin the framing of the volleyball game. Connect (6) 14’’ horizontal
Assembly Instructions
poles with (4) tee connectors and (3) ½’’ couplings.
Step 3
•Connect (2) 15’’ upright poles & (2) 9 ½’’ upright poles to connector tees on
both ends. The (2) 9 ½’’ upright poles should be facing towards the ground.
Step 4
•Connect remaining (2) 9 ½’’ upright poles to the middle tee connectors.
poolmaster.com
2
Page 3
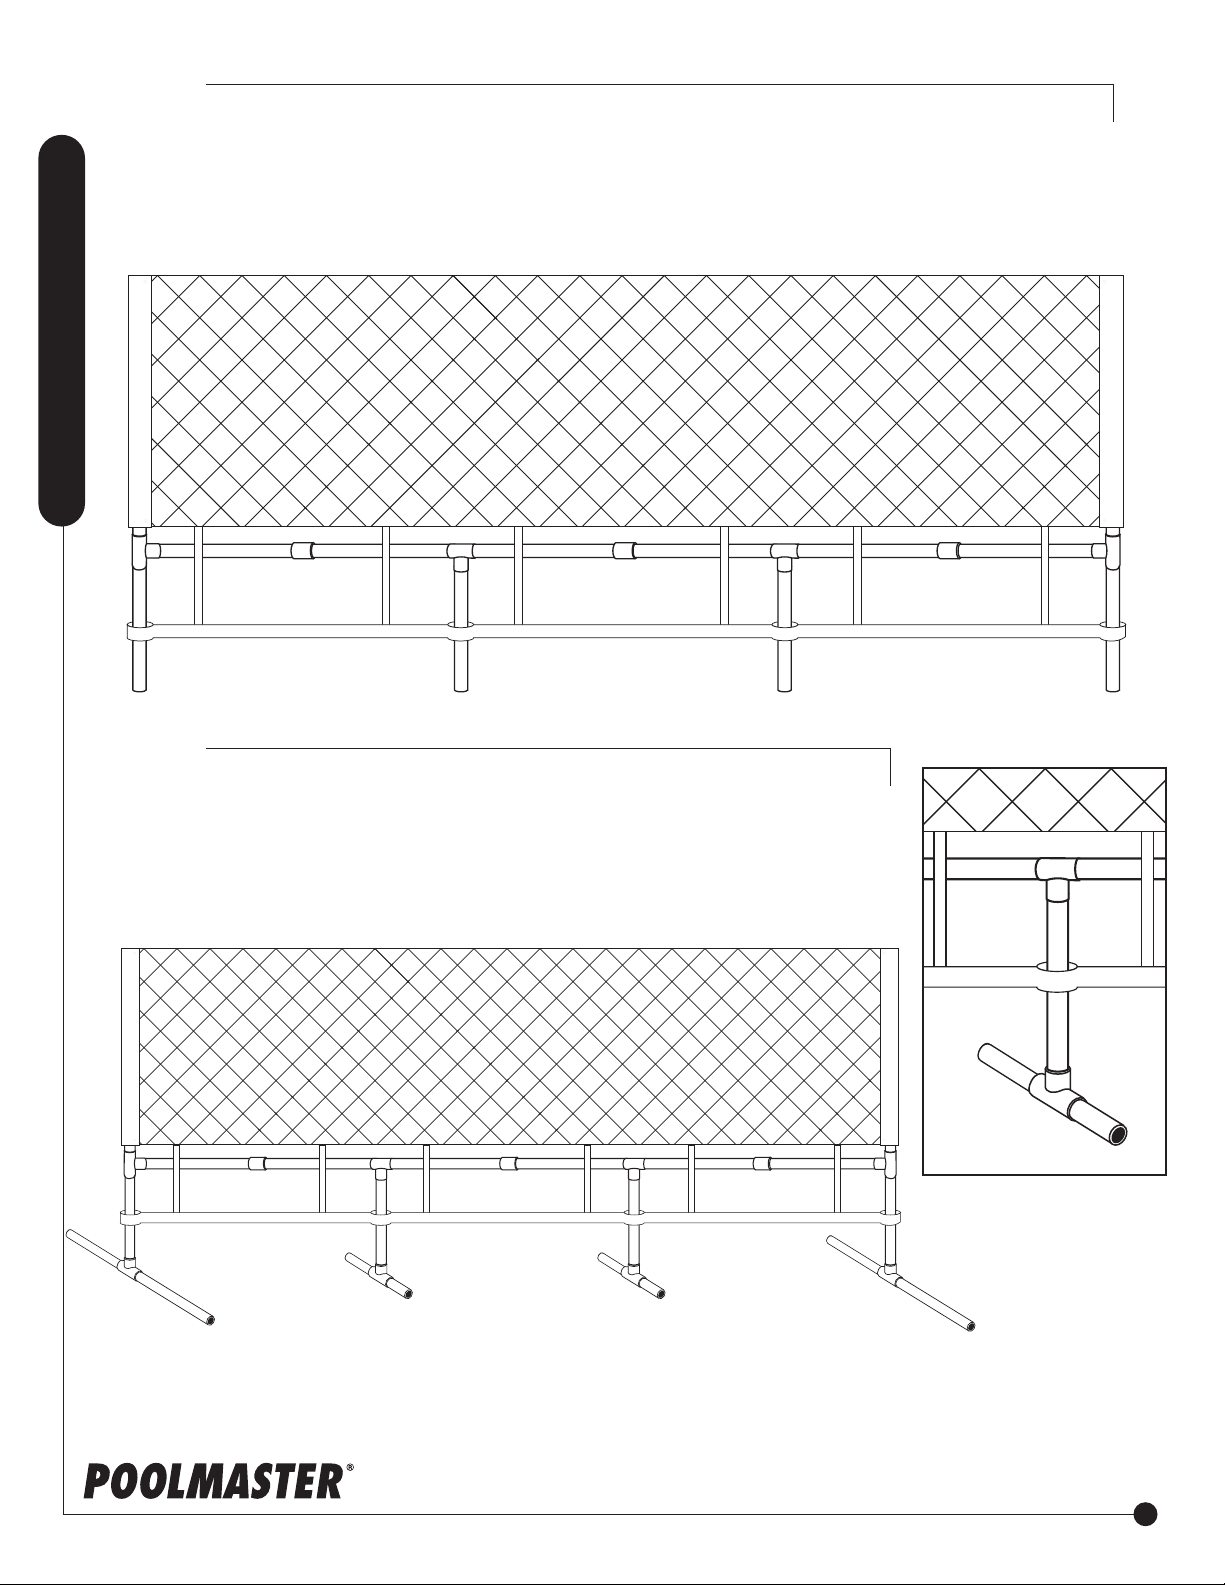
Step 5
Attach Net.
• Lay net over the top of the PVC frame
• Slide the outside sleeve pockets onto each of the (2) 15’’ Upright Poles
• Slide the (4) small loops located at the bottom of the net onto the (4) 9 ½’’ Upright Poles
Assembly Instructions
Step 6
• Insert the center of the (4) tee connectors onto each of the (4) leg poles
• Connect (2) 15’’ PVC poles to each of the outside tee connector openings
• Connect (2) 4’’ PVC poles to each of the inside tee connector openings
poolmaster.com
3
Page 4
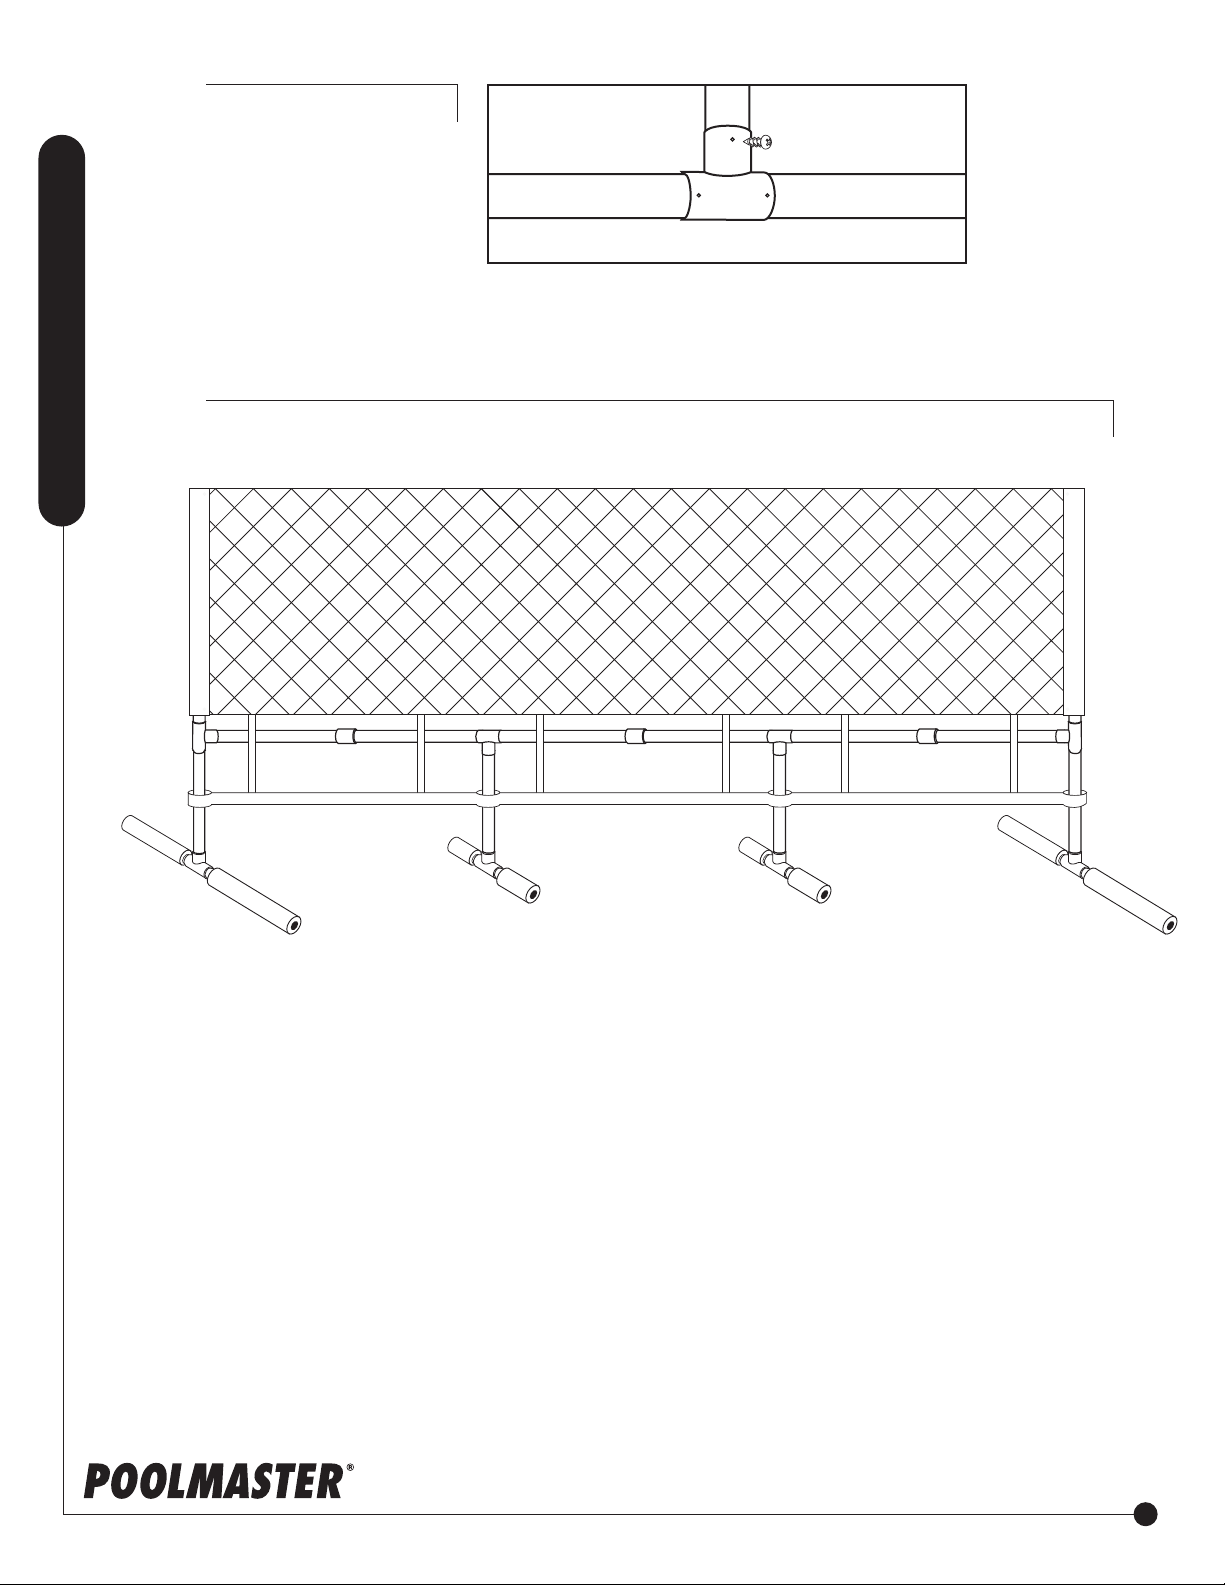
Step 7
•Secure frame with Set Screws.
Step 8
•Attach the 8’’ Foam Floats to 15’’ Base Poles. Attach the 3’’ Foam Floats to the 4’’ inside Base Poles.
Assembly Instructions
poolmaster.com
4
 Loading...